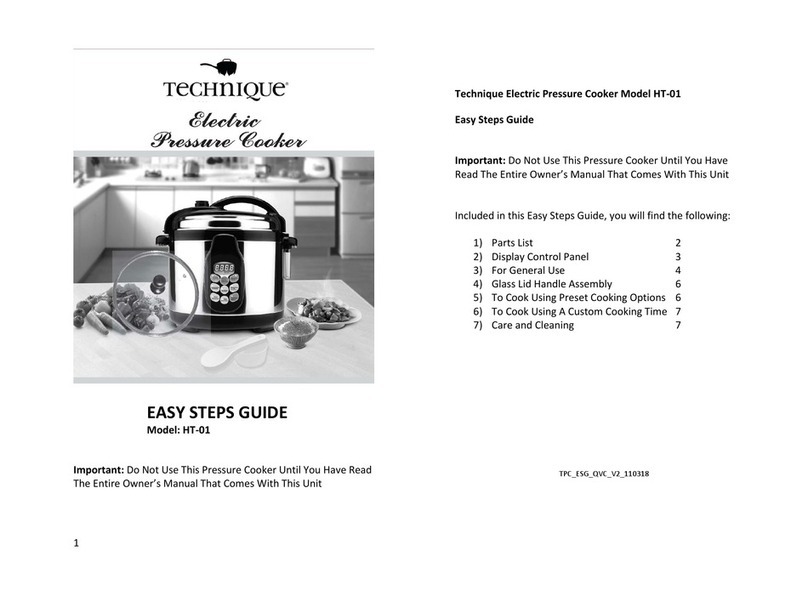
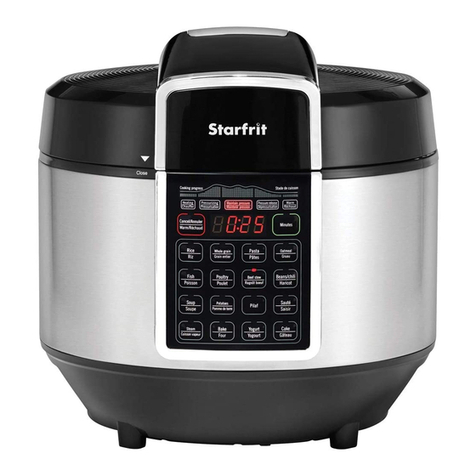
Technique HT-01 Quick guide

For Household Use Only!
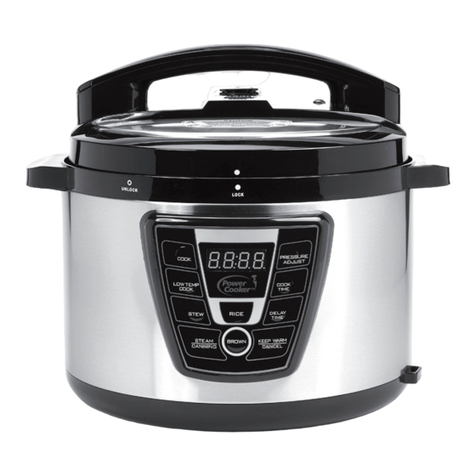
Electric
Pressure Cooker
Instructions & Recipe Guide
MODEL:HT-01


Indicator Code
E1
E2
E3
E4
Cause
Broken circuit of the sensor
Short circuit of the sensor
Overheating
Signal Switch Malfunction
9
13. Large amount of steam discharging from the periphery during operations an
abnormal phenomenon and the relief valve is working for protection. Unplug
the power cable. Get it repaired in the maintenance shop of our company
prior to use.
14. In case of alarming during operation and displaying the following trouble
code, have it repaired in our maintenance shop prior to use.
15. When moving the cooker, hold the ears of cooker instead of the handle.
16. Dismantling or replacement by using accessories other than ours is not
recommended.
2
2. Wiring Diagram
8. Following built-in safety devices:
* The cooker cannot gain pressure when the lid is not well closed and
the lid cannot be opened when the inner pressure is too high.
* Relief function. When temperature and pressure inside the cooker go
beyond the normal value, the pressure discharging valve will discharge the
steam to regulate.
* De-pressure Function: When pressure limit device inside cooker fails and
pressure goes beyond the limit, cooker automatically de-pressure around lid
to avoid an explosion.
* Temperature Limit: power automatically cut off when temperature inside
cooker goes beyond preset temperature.
* Ultrahigh Temperature Safe: power automatically cut off when
temperature inside cooker goes beyond limit value.
7. Non sticking inner tank, easy to clean. Stainless lid and outer tank
ensure long service life.
Ultrahigh Temperature Fuse
Controller
Indicator
Sensor
Heating plate
Timer Keep warm Cooking Congee Soup Tendon Meat
6. Airtight cooking retains nutrition and original taste.
2. You do not need to set the pressure and time but select the menu,
the cooker will do it automatically .
When the bell rings and enters "warm "status , you are ready to serve .
3.
Custom Menu : You can adjust the cooking time from 0~99 minutes
on your demand.
4. Power Failure Memory: Cooker resumes original sequence when power is
supplied again.
5. Time & Power Saving. Power and time saved by over 60% and 40% respectively
than common electric cookers.
120V~
5. The anti-block case should be kept clean by cleaning regularly.
6. Never attempt to uncover the cooker when the floating valve is flopping.
7. Never apply any weight on the pressure discharging valve or replace it with
other materials.
8. Never block the periphery of the clamping position to ensure safety.
9. The surface of the cooker and the heating plate should be clean, never
use the inner tank to cook on other thermal sources or have it replaced
by other cookers.
10. The inner tank is coated with anti-sticking materials. To avoid scratch,
wooden or plastic ladles are recommended.
11. Be sure to keep your hand or face away from the air exit hole of the pressure
limiting air relief valve when you discharge the air; never touch the lid of the
pot to avoid any scald burn when the cooker is turned on.
12.The maximum length for keeping warm is 8 hours. However, the duration
less than 6 hours is recommended to ensure excellent cooking effect.

3
3. Product Structure
Fix and
anti-blocking case
Pull up
Press down
Take off
Fix
Fix and take off
sealant washer
Press down
Fix
Pull up
Take off
Dismantling of
water collector
Floating valve
SpoonMeasuring cup
Accessories
21
Control panel
8

1.Handle 2. Lid 3. Pressure Discharging Valve 4. Floating valve
5. Floats 6.Inner Tank 7.Outer Tank 8.Tank handle 9. Upper Ring
10. Control panel 11. Power Cable 12. Spatula holder 13.lid holder
14. Water Collector 15. Outer shell 16.heating plate 17.base
18. 19.
Sealant Washer 21.Sensor
Sealant washer of the floating valve Anti-blocking case
20.
4
4. Technical Specifications
5. Directions
1. Open the lid: hold firmly the handle, turn the lid clockwise until it loosens.
(See Figure1.2)
2. Take out the inner tank and fill in food and water. Food and water
should be no higher than 4/5 and no lower than1/5 of the height of inner
tank, and for expandable food, no higher than 3/5. (See Figure 3.4.5)
Model Power
Capacity
Diameter
Work
Pressure
Keep Warm
Temperature
Preset
Timer
Limited
Pressure
7.0L 24cm 90kpa 0
60~80 C
2
Press once more time to cancel the "Keep Warm" status and the indicator
goes out.
8. "Keep Warm" indicator flickers to indicate the food is ready. Press "Keep
Warm/Cancel" to cancel and you can take food now.
* Set the pressure limiting air relief valve to“Air Out”and discharge the air
until the float controlled valve drops. (Please refer to the figure 10-a,10-b)
* When fluid food such as congee is cooked, the pressure discharging valve
cannot be taken up immediately after the "Keep Warm" indicator begins to
flash. What until the floating valve is no longer floating or the food may puff
off with the steam.
A wet towel on the lid can speed up the cooling.
* It is recommended that the steam is discharged when the indicator is on
without flashing. The pressure is much lower at this time.
* Unplug the power cable
* Hold and turn the handle clockwise until the lid comes to the clamping
position and take up the lid. (See Figure 1.2)
7
0~70kpa 1~10h
1100W
Voltage
/Frequency
120V~60Hz
HT-01
1
10-a 10-b
Exhaust
Position
Exhaust
Seal
Exhaust

5. Put the pressure discharging in its position, Then set it to "seal" point,
(see the Fig.) Be sure that the Floating valve is in down position.) (see Figure
9-a,9-b)
3. Clean the inner tank and heating plate before put in the inner tank. Be
sure no dirt or smear on the heating place and outer tank. After that, turn
slightly the inner tank to make it well fit to the heating plate. (See Figure 6)
4. Put on the Cover
* Check the sealant washer, make sure it has been put on the inner steel ring.
* Turn the sealant washer to make sure it well fit to the steel ring.
* Cover up the lid and turn it counter-clockwise until it gears with a clamping
sound. (See Figure 7.8)
3
4
53
5
1
5
4 5
5
7
68
9-a 9-b
Exhaust
Seal
Exhaust
Seal
Position
6
b. If you press the "function menu button, the display will show "P000
(00 denotes pressure holding time; for example, if you set 15 minutes,
the display will show 0P15), and the pressure holding time decreases
in 1 minute internal.
When pressurizing is over, it will deliver three rings, the working
indicator will go out and the display shows"0000 , reminding the end
of cooking and start of keep warm process , The "keep warm" indicator
flashes if pressure inside is high; the indicator just remains on if the
pressure inside is low.
Press "keep warm/cannel" button to cancel parameter setting or
current working status.
In case of no time preset, press the menu button or function menu
button, the indicator will light up, denoting the start of cooking.
Pressure holding process begins when pressure inside is high enough:
a. If you press any menu button on the panel, the display will show P000 .
6. Press the menu button (press "rice" for rice cooking, for example)
and the indicator lights up;
7. For function menu, please refer to cooking instructions to set proper
pressure keeping time. Press the "optional pressure holding time
button and the timer increases by 1 min. The maximum time setting
is 99 minutes and after that it begins a new cycle (optional pressure
holding time denotes the time pressure sustained after it gets to
desired working pressure)
After time setting, press "function menu "button, The timing indicator
will flash and the function menu " indicator lights up.
If you have preset the time, the timer will decrease each time by 0.5 hour.
When the countdown ends, the display shows"00", the timing indicator
goes out, and the cooking begins.


1 lb cream cheese
1.2 cup powdered sugar
3 Eggs
6 one oz. squares white chocolate-melted in the microwave till smooth
1 tablespoon vanilla pinch salt
In mixing bowl, cream together sugar and cream cheese with an electric mixer
until smooth.Add eggs one at a time. Add vanilla, salt, and melted chocolate.
Prepare a spring from pan by putting parchment paper (or wax paper) on the
bottom of pan. Wrap the spring around the paper coated bottom. Spray the
interior of the pan with non-stick cooking spray. Pour cake mixture into prepared
spring formed pan. Cover cheese cake with paper towel and wrap entire
spring form pan with aluminum foil. Place the smallest rack in the pressure cooker.
Pour two cups of water into bottom of pressure cooker. Place cake mix into
springform pan in the pressure cooker, on the rack. Put the lid securely on cooker.
Set for high pressure. Set the timer for 30 minutes.
Per Serving (excluding unknown items): 2886 calories; 230g Fat (68.9% calories
from fat);57g Protein; 176g carbohydrate; 9g Dietary Fiber; 1059mg Cholesterol;
1536mg Sodium.
Exchanges: 71.2 Lean Meat; 42 Fat; 11 Other Carbohydrates.
White
Chocolate Cheesecake
2 2/3 cups milk, plus more as needed
1 cup medium grain rice, unrinsed
3/4 cup sugar
zest of 1/2 lemon
1/3 teaspoon salt
pinch of nutmeg
1 1/3 teaspoons vanilla extract
pinch ground cinnamon
blueberries and dried cranberries to garnish
In pressure cooker, mix 2 2/3 cups milk with rice, sugar, lemon zest, and salt.
Lock lid in place, and set to low pressure. Set timer for 11 minutes. Let steam
escape. If rice isn’t tender,place lid on cooker and let stand 8–10 minutes.
Add cinnamon and nutmeg stir in. Transfer to serving dish, if serving warm.
If desired, chill pudding in refrigerator for 2 hours. Top with blueberries and
dried cranberries, or a few tablespoons milk. Makes 4–6 servings.
Rice Pudding
Split Pea Soup
1 large yellow onion, chopped
1 1/2 large carrots, peeled and chopped
2 stalks celery, chopped
1 lb. ham bone
3/4 pound dried green split peas
4 1/2 cups water
_ teaspoon ground clove
1/3 teaspoon ground black pepper
1/8 teaspoon salt croutons, to top
Combine onions, carrots, celery, ham bone, split peas, and water in pressure cooker.
Cover,lock, and bring to high pressure. Cook for 12 minutes. Release steam. Remove
ham bone from cooker and stir in remaining ingredients well. If desired, cut any meat
off bone and put in cooker. Stir in thyme, pepper and salt. Top with croutons. Serves 6.
5 1/4 cups low-sodium chicken broth
2 cups cabbage, chopped coarsely
2 8 oz. can tomatoes, drained and chopped coarsely
6 oz. green beans, cut into 1/2-inch pieces
1 large onion, chopped
2 medium carrots, diced
3 cloves garlic
1/4 teaspoon salt, plus more to taste
1/8 teaspoon dried oregano
1/8 teaspoon dried rosemary
1/4 teaspoon ground black pepper, plus more to taste
1 medium zucchini, cut into 1/2-inch pieces
1/4 cup chopped fresh basil
1/4 cup ditalini pasta, if desired
15 oz. can kidney beans, drained and rinsed
grated parmesan cheese
In cooker, put chicken broth, cabbage, tomatoes, green beans, onion, carrots,
garlic, salt,oregano, rosemary, and pepper. Place lid on cooker and lock. Set to
high pressure for 8 minutes. Release steam. Remove lid and add zucchini, basil,
and pasta. Cook without lid overmedium heat on stovetop until pasta is tender,
about 10 minutes. Add kidney beans and cook about 1 minute to heat through.
Serve hot, sprinkled with parmesan cheese. Serves 6–8.
Minestrone Soup
12 13

1/3 tablespoon olive oil
1 (2 lb.) frying chicken, cut in pieces
1 small white onion, sliced thin
1 small red bell pepper, cut into strips
1 small green bell pepper, cut into strips
1 ounces small Portobello mushrooms, cleaned, stemmed,
and cut into pieces
3 garlic cloves, minced
1/3 cup dry white wine
1 (14 oz.) can diced tomatoes
2/3 tablespoon large capers, drained
1 tablespoon chopped fresh rosemary
2/3 tablespoons chopped fresh oregano
1/3 teaspoon salt
1/3 teaspoon ground black pepper
Preheat pressure cooker over medium heat and slowly add the oil. Brown a few
pieces of chicken at a time on both sides, about 8–10 minutes. Transfer browned
chicken to a plate. Add onion, peppers, mushrooms, and garlic to pressure cooker.
Cook until mushrooms are soft,stirring constantly (about 3 minutes). Add wine and
cook for about a minute while stirring to remove browned bits from bottom of cooker.
Add tomatoes, capers, rosemary, oregano, salt,and black pepper. Lock pressure
cooker cover in place, and set to low pressure. Set timer for 15 minutes. Let steam
escape before opening lid. Serve mixture over chicken. Serves 4.
1/3 pound bacon, chopped
3 large onions, sliced
1/3 cup olive oil
4 garlic cloves, crushed
2 1/3 cups long grain white rice
8 chicken pieces
6 1/2 cups low-sodium chicken broth
1/3 cup plus 2 tablespoons tomato paste
2/3 cup bottled clam juice
4 tablespoons fresh lemon juice
3 tablespoons sherry
1 1/3 tablespoons brown sugar
1/3 cup chopped parsley
In cooker, saute bacon until crisp. Add onions and cook for about 2 minutes.
Add garlic, rice,and chicken. Cook, stirring frequently, about 1 minute. Add broth,
tomato paste, clam juice,lemon juice, sherry, brown sugar, parsley, salt, saffron,
paprika, pepper flakes, oregano, and bay leaves. Stir well and place lid on cooker.
Lock in place. Set at high pressure for 10 minutes.
Release steam. Remove lid. Add bell pepper, scallops, and shrimp to cooker. Stir well.
Replace lid and lock. Cook at pressure for 4 minutes. Release steam. Remove lid
and stir mixture. Add peas and olives and stir. Discard bay leaves. Season to taste
and serve, garnished with lemonslices. Makes 8 servings.
3-lb. chicken
1 teaspoon granulated garlic
1 teaspoon granulated onion
1 tablespoon dried thyme
1 tablespoon dried rosemary
1 tablespoon paprika
juice of 1 lemon
2 tablespoons olive oil
2 cups chicken broth
ground black pepper to taste
cooked egg noodles, buttered and parsleyed
In bowl, combine garlic, onion, thyme, rosemary, and paprika. Rub half of mixture
inside chicken. Rub inside with 1 tbsp. lemon juice. In cooker, heat oil.
Add chicken and brown on all sides. Pour in broth and remaining lemon juice. add
remaining garlic mixture. Place lid on cooker and lock. Set at high pressure for 30
minutes. Release steam. Season with black pepper to taste and serve. Serve
accompanied with buttered egg noodles. Makes 6–8 servings.
Whole Lemon-Garlic Chicken
Chicken Soup
1 1/2 tablespoons olive oil
1 1/2 lbs. boneless chicken thighs, skinned
1 medium onion, chopped
2 small carrots, sliced into 1/2-inch pieces
2 medium celery stalks with leaves, cut into 1/4-inch slices
3 cups water
1 1/2 cups canned chicken broth
1/8 teaspoon poultry seasoning
14 15
Chicken & Pasta
Paella

1 small bay leaf
3/8 teaspoon salt, plus more to taste
1/8 teaspoon ground black pepper, plus more to taste
3/4 cup orzo
1 1/2 tablespoons chopped fresh parsley
In cooker, heat 1 tablespoon of oil over medium heat. Add chicken and brown,
turning once,about 5 minutes. Transfer chicken to plate. Add remaining oil to cooker
and heat. Add onion,carrots, and celery. Cook until vegetables begin to soften,
stirring occasionally. Stir in water,broth, poultry seasoning, bay leaf, salt and pepper.
Scrape off bits that may be stuck to bottom.
Return chicken to cooker. Place lid on cooker and lock. Set to high pressure for 8
minutes.Release steam. Remove lid and transfer chicken to cutting board.
Skim any fat from cooking liquid. At high heat, bring to boil, uncovered. Season to
taste with salt and pepper. Stir in orzo and parsley. Reduce heat to medium and
cook until orzo are al dente. Cut chicken into small pieces. Return to soup and heat
through. Serve hot. Makes 6–10 servings.
Beef Stew
2 1/2 tablespoons olive oil, plus more if needed
2 pounds beef chuck, cubed
1/2 teaspoon salt
1/4 teaspoon ground black pepper
1 medium onion, chopped
2 garlic cloves, minced
1 shallot, minced
1/2 cup beef stock
1 can crushed tomatoes
1/2 teaspoon parsley
5 medium carrots, sliced
5 medium red-skinned potatoes, scrubbed and cubed
1 cup sweet peas
In pressure cooker, heat 1 tablespoon oil over high heat. In batches, add beef to
brown,turning occasionally (about 4 minutes). Add more oil as needed. Transfer
beef to plate and season with salt and pepper. Pour off fat in cooker. Add remaining
oil to cooker and heat overmedium heat. Add onion, shallot and garlic. Cook until
onion begins to soften, stirring
occasionally (about 2 minutes). Stir in beef stock, tomatoes, and parsley. Return the
beef and juices on plate to cooker. Place lid on cooker and lock. Set at high pressure
for 20 minutes.Release steam. Open lid and let stand for 5–7 minutes. Skim off any fat
from liquid. Add carrots, potatoes, and peas. Replace lid and lock in place. Set a high
pressure for 5 minutes.Release steam. Remove lid Serve with toast points or crust rolls
Makes 6–8 servings.
Butternut Squash Soup
2 lbs. butternut squash, quartered and seeded
3 tablespoons olive oil
4 cloves garlic, coarsely chopped
1 large yellow onion, finely chopped
1 carrot, chopped
2 apples, peeled and seeded
1 tablespoon chopped fresh sage
1 teaspoon salt
1/8 cup brown sugar
4 cups chicken stock
1 cup heavy cream
pinch ground nutmeg, to top
Place squash, cut side down, on rack in pressure cooker. Pour in 1 cup chicken stock.
Place lidon cooker and lock. Set for high pressure for 7 minutes. Let sit for 3 minutes
to finish cooking.Release steam. Transfer squash to plate. When cooker is cool enough
to handle, rinse and dry.Heat oil in cooker. Add garlic, onion, apples and sage, cooking
about 6 minutes while stirring occasionally. Scrape squash meat off skin. Chop squash
meat and add to garlic, apples and onion mixture. Add salt and stock. Lock lid in place
and set for high pressure for 10 minutes.Let sit another 10 minutes to finish cooking,
add heavy cream and brown sugar. Serves 4.
Corned Beef and Cabbage
4-lb. corned beef brisket with pickling spice packet
2 2/3 cups water
1/8 cup red wine vinegar
2 medium onions, peeled and chopped
5 medium red-skinned potatoes, scrubbed
5 medium carrots, cut in half lengthwise
1 medium head green cabbage, cut into wedges
Rinse corned beef and do NOT trim excess fat. Tie pickling spices in double thickness of
16 17

cheesecloth. Place rack in pressure cooker. Add water, vinegar, onions, garlic, and
picklingpacket. Place corned beef in pot. Place lid on cooker and lock. Set at high
pressure for 1 hourand 10 minutes. Release steam. Remove lid and transfer meat to
platter. Transfer onions to large bowl. Cover both with aluminum foil. Place potatoes
and carrots in pot with cooking liquid. Place cabbage on top, submerging if possible.
Place lid on cooker and lock. Set at high pressure for 6 minutes. Release steam.
Remove lid and transfer vegetables to bowl with onions.
Slice beef across grain and serve with vegetables. Makes 6–8 servings.
Beef Pot Roast
1 1/3 tablespoons olive oil
4-lb. rump roast, trimmed leaving some fat on
2 cloves garlic minced
1/3 teaspoon salt, plus more to taste
1/3 teaspoon ground black pepper, plus more to taste
1 large onion, chopped
2 bay leaves
1/4 cup red wine
2 2/3 cups canned beef broth
2 2/3 tablespoons unsalted butter, room temperature
2 2/3 tablespoons all-purpose flour
In cooker, heat oil over medium heat. Season meat with salt and pepper. Put meat
in cooker,fattier side down. Cook, tuning occasionally, until fully browned. Transfer
roast to plate. Pour off all but 1 tablespoon of fat from cooker. Add onion, garlic and
cook until softened. Add bay leaves. Pour in stock, red wine and loosen any bits
that may be stuck on bottom of cooker.Return meat to cooker. Place lid on cooker
and lock. Set cooker to high pressure and cook for 1 hour 10 minutes. Release steam.
Remove lid and transfer meat to serving platter. Cover meat loosely with aluminum
foil to keep warm. Remove bay leaves from liquid and let liquid stand
for 5 minutes. Skim fat from liquid. In separate bowl, work butter and flour together until
smooth. Whisk 1 cup of cooking liquid into butter/flour mixture to form thin paste. Bring
skimmed cooking liquid to boil over medium heat. Whisk in thin paste and cook until
thickens into gravy. Season with salt and pepper if desired. Slice meat and pour some
gravy over top of roast. Serve with mashed potatoes and gravy on side. Serves 6.
Delicious Baby Back Ribs
3 slabs lean baby back ribs
2 cups ginger ale
1 tablespoon liquid smoke flavoring
DRYRUB:
1 tablespoon ground cumin
1 tablespoon of ground coriander
1 tablespoon of ground onion powder
1 tablespoon of garlic powder
1 tablespoon of kosher salt
1 tablespoon of ground black pepper
1 jar barbecue sauce
Rub dry barbecue seasoning all over the ribs, front and back. Place the rack inside
of the pressure cooker. Stand the three slabs of ribs on the rack inside of the
pressure cooker. Add the ginger ale and the liquid smoke to the pressure cooker.
If the ribs are too tall, you canremove the rack and stand the ribs on the bottom of
the pot. Secure the lid by turning clockwise as far as it will go. Make sure the float
valve is free (listen for the noise that indicates it is free). Lock the handle.
Set the pressure mode to high. Set the timer for 15 minutes. At the end of the 15
minute cooking time, pour barbecue sauce all over the ribs and make sure the sauce
thoroughly coats the ribs all over. If you so desire, you may add several ears of corn
to the contents of the pressure cooker. It makes an excellent side dish to the ribs!
Place the lid backon the pot. Set the timer for another 5 minutes. After 5 minutes,
the ribs (and corn) are done.If you would rather, you can skip the last 5 minute
cooking cycle and finish cooking the ribson a grill. Baste well with barbecue sauce
and turn frequently. It all depends on how muchtime you have and the results you
want.
One 4-5 lb. chicken, skinned and cut into pieces
3 3/4 tablespoons olive oil
2/3 cup white wine
1 large onion
3 garlic cloves, minced
1 red bell pepper, diced
1 large ripe tomato
1 1/4 cup uncooked long grain white rice
2/3 cup frozen peas
3 3/4 cups low-sodium chicken broth
1 teaspoon salt
salt and pepper to taste
Chicken & Rice
18 19

Season chicken pieces with salt and pepper. Heat 3 tablespoons oil in cooker over
mediumheat. Place chicken in cooker and brown, in batches. Add wine to chicken
in cooker. Cook 2-3 minutes. Remove chicken and juices and set aside. Heat
remaining oil in cooker. Add onion, garlic, red pepper, and tomato. Cook until onion
is softened. Add rice and cook for about 2 minutes. Add peas, broth, salt, chicken
and juices. Stir well. Place lid on cooker and lock. Set at high pressure for 9 minutes.
Release steam. Remove lid. Mix so rice looks fluffy,and serve. Serves 5-6.
1/2 lb. ground beef
1 red bell pepper, diced
1 green bell pepper, diced
1 1/2 tablespoons vegetable oil
2 small onions, chopped
1 small jalapeno pepper, seeded and finely minced
2 ounces chopped green chilies
2 cloves garlic, minced
1/2 bunch fresh parsley leaves, chopped
1 can each pinto, kidney, navy beans, rinsed and drained
1/2 (28 ounce) can crushed tomatoes, coarsely chopped
2 teaspoons salt
1/2 teaspoon ground cumin
1/2 teaspoon dried oregano
1 tablespoon chili powder
1 cup water
1 tablespoon chopped fresh cilantro
shredded cheddar cheese, to top
Heat oil in pressure cooker over medium heat and saute onions until oftened. Brown
ground beef with onions. Add peppers, jalapeno, chilies, garlic, parsley, and beans.
Add tomatoes, salt,cumin, oregano, chili powder, and water. Seal and lock cooker
and set to high pressure. Set timer for 15 minutes. Release steam. After steam is
released, unlock and remove lid and add cilantro. Serve in bowls immediately, topped
with cheddar cheese. Serves 4.
Chili
3/4 tablespoon olive oil
1 green onion, using only white and light green parts, chopped
(about 3 tablespoons)
1 1/2 cups Aborio rice
2 cups butternut squash, peeled, seeded, cubed
3 cups canned chicken broth
3/8 cup dry white wine
3/4 teaspoon ground nutmeg
1 1/2 tablespoons chopped fresh basil
3 tablespoons grated parmesan cheese
salt to taste
ground black pepper to taste
Heat oil in pressure cooker over medium heat. Add green onion and cook until
onion starts to wilt, about 2 minutes. Add rice and cook, stirring constantly, until
thoroughly coated. Stir in squash, chicken broth, wine, and nutmeg. Place lid on
cooker and lock. Set at high pressure for 9 minutes. Release steam. Carefully
remove cover and STIR in basil, cheese, salt and pepper. Allow risotto to sit for
2 minutes before serving. Serves
Butternut Squash Risotto
20 21
Other manuals for HT-01
1
Table of contents
Other Technique Electric Pressure Cooker manuals

