manuals.online logo
Brands
  1. Home
  2. •
  3. Brands
  4. •
  5. Techone
  6. •
  7. Toy
  8. •
  9. Techone 02A-703 Metis User manual

Techone 02A-703 Metis User manual

1
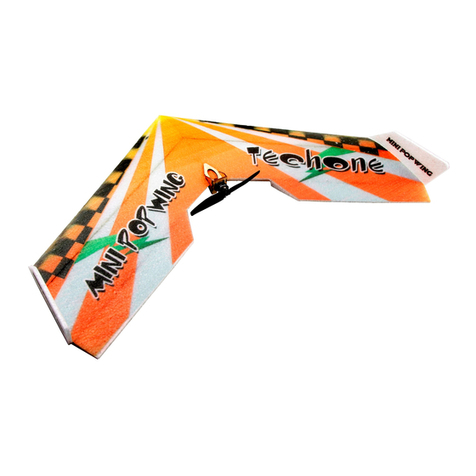
The Metis was designed by Filippo Materazzi, F3P, Aeromusical and
F6A Italian Champion. It is the last version of his famous indoor
freestyle airplane which he flew in World Air Games 2009. It has
been totally updated but maintaining its particular style. Now it has
bigger mobile surfaces, a higher top and bottom fuselage and a
completely new milling, paying attention to maintain the strength of
the airframe. Thanks to all these tricks it flies slowly and smoothly
but it can become very agile, reactive and fast if you need it. This
characteristic is fundamental for an aeromusical flight where you
need to change the flight style according to the music, but also in a
good freestyle, to differentiate the maneuvers and employ the own
imagination. In addition, a beginner can improve his skills gradually,
increasing step by step the movement of mobile surfaces.
The kit is composed by 3 mm and 2 mm depron, carbon rods (precutted!),
super lightweight carbon control horns and all the
necessary to complete the plane.
Before assembly, please spend some time to read our instructions.
Along the way you’ll learn how to properly assemble your new
airplane in the least amount of time possible. Below are some tips
that will help you in the assembly.
Before operating this unit, please read these instructions
completely.
METIS INSTRUCTIONS
2
1. You need to consider the reserved servo position when installing
the elevator and rudder. Also make sure that moving control
surfaces do not interfere with reinforcement parts such as
strings and linkage poles.
2. Before fixing carbon with C/A, paper the part that is going to be
inserted and fixed in the depron. In this way you can have a
stronger glueing.
3. Glue the carbon rods exactly as shown in the pictures. To obtain
a rigid and strong plane is very important that the ends of carbon
rods touch and are glued together.
4. Correct assembly can assure good flying, before using glue or
adhesive, please check the parts position and angle of alignment.
5. Remember to use less glue as possible and to use the lightest
electronic parts you find. Less weight means always better flying
characteristic!
6. If you want for your plane the best flying characteristic I suggest
you to use the high quality electronic parts that I tested and I use
on my planes.
Filippo Materazzi
Product Specifications
Fuselage length: 95 cm (37.4 in.)
Wingspan: 90 cm (35.4 in.)
Flying weight without batter y: 120 - 130 g (4.23 – 4.58 Oz)
Flying weight with batter y: 140 - 150 g (4.93 – 5.29 Oz)
Motor: 15 – 22 g (0.52 – 0.77 Oz) (suggested: Hacker A10-9L)
ESC: 7 - 10 Amp (suggested: Hacker MasterECO 08)
Propeller : about 8 x 4 (suggested: Mejzlik 8x4)
Ser vo: 6g x 4pcs (suggested: 4 x JR DS318 or 3 x JR DS319 HV)
Radio: 5/more channel (suggested: 2 - 5 g receiver)
Batter y: 2S 250-350 mAh LiPo (suggested: 15 – 22 g batter y)
3
Do not fly under the conditions below
Windy conditions
A street with many trees or street lamps
Close to high voltage electrical wires
High Population density areas
Cautions for flying
Metis is made for indoor flight. Of course it is able to fly outdoor in
not much windy condition. Make sure you have permission to fly and
follow safety guidelines set by local authorities.
Note for Storage
Please disconnect the lipo packs when finished flying
Do not press or crush the airplane when storing
CG Position: 23.5-24.5 cm from the nose
Use some C/A to glue the two carbon strip
(73 and 79.2 cm long) on both sides of the
win g as sh ow n in the picture. NOTE:
position the wing on a flat surface.
Fix the elevator with 3M tape.Do the
same with ailerons.
4
Cut a 55º bevel on ailerons. On elevator
and rudder cut a 40° bevel on mobile
and fixed surface.
Fix the horizontal fuselages to the wing
with C/A.
Insert the downside vertical winglets
into the pre-reser ved slots on the do-
w n s i d e o f t h e w i n g a n d a p p l y some
C/A to fix.
Inser t the par ts to reinforce contr ol
surfaces into the pre-reser ved slots
on ailerons and apply some C/A to fix.
Fix with C/A the two 2 mm depron rei-
nforcement parts on both sides of lower
vertical fuselage. A micro hole indicates
the position. In a consecutive step you
will have to insert in it the four 1.5 mm
carbon rods to reinforce the wings.
Fix with C/A the two 2 mm depron rei-
nforcement parts on both sides of lower
vertical fuselage where there is the hole
for the landing gear legs.
5
Use some C/A to fix the lower vertical
fuselage on the hor izo ntal f uselage.
Be ver tical and no distor tion!
Install all the carbon rods as shown in
the pictures. Fir st of all fix wit h C/ A
the four 1.5 mm (29.3 cm long) win g
carbon rods. Then the others 1 mm c-
arbon rods.
Fix with C/A the four 2 mm depron rei-
nforcement parts on the bottom of wing
at the end of each 1.5 mm wing carbon
rod.
6
Fix with C/A the four 2 mm depron rei-
nforcement half-moons on the bottom
of horizontal fuselage as shown in the
picture. The micro holes indicate the
position. They are necessar y to rein-
force the points where the 1 mm car-
bon rods will be fixed.
Install the landing gear. Please inser t
through the pre-reserved holes on the
fuselage and wing the two 2 mm x 24
cm carbon rods, then use C/A to fix.
Fix with C/A the three 1 mm carbon rods
as shown in the pictures.
Fix with C/A the 0.8 mm carbon rods to
reinforce the ailerons.
7
Fix with C/A the two 3 mm round depron
reinforcements on the bottom of hori-
zontal fuselage as shown in the picture.
The micro holes indicate the position.
The y are necessar y to reinforce the
joint of the landing gear legs.
Use so me C/A to fix the rudder servo in
the pre-reserved slot on the upper vert-
ical fuselage as shown in the picture.
Use some C/A to fix the two aileron serv-
os in the pre-reserved slots on the down-
side vertical winglets as shown in the
picture.
Use some C/A to fix the elevator servo
in the pre-reser ved slo t on the lower
vertical fuselage as shown in the picture.
8
Send the lower part of control horns.
Fix with C/A the two ailerons control horns.
Install the 1 mm x 1 6 c m c arbon ro d
paying attention to the elevator def-
lection. ATTENTION: elevator, when
moves down, must not touch this ca-
rbon rod!
Insert the 0.5 mm x 32.5 cm carbon strip
in the elevator control horn. Then glue
them together in the pre-reser ved slot.
ATTENTION: elevator and rudder control
horns are asymmetric. The shorter part
goes on the side of mobile surface where
there is the bevel for movement.
9
Fix with C/A the 1 mm x 14 cm carbon rod.
Then fix the rudder control hor n.
Install the rudder to the fuselage with
some 3M tape.
Use C/A to fix the upper vertical fuse-
lage into the horizontal fuselage. Be
ver tical, no distor tion.
Insert the four 2 mm winglets into the
pre-reser ved slots on the elevator and
apply some C/A to fix.
Connect the elevator and rudder servos
and contr ol h or ns wi th thread. Make
sur e the thread i s ta ut and have the
control surfaces in a horizontal position.
10
10
Install the motor with 3M tape and C/A.
Fix the small depron piece to the wheel
pan ts to rein fo r ce them. Pier ce t he
wheel pants and fix them with C/A in
the landing gear as shown in the picture.
Fix with C/A a small piece of velcro on
each wheel pant.
Use receiver to trim the ser vo arms in
neutral, then fix the servo arms. Install
ailerons linkages using the four clips
and the two 1.3 mm x 5 cm carbon rods
included in the kit.
2
11
Use sm all piece s of velcro to fix the
ESC, receiver and batter y. NOTE: you
can adjust the place of battery acco-
rding to the CG position.
A perfect Metis is done after your car-
eful assembly. While assembly, the fl-
ying weight is really critical to the fli-
ght perfor mance and will be affected
by adding weight, so you should reduce
any unnecessary weight while assembly.
Then you’ll get the best flying perfor-
mance.
Do the same on “tail landing gear” as
shown in the picture.
12
For technical informations about planes,
pls contact with:
filippo.materazzi@gmail.com
www.fmdplanes.com
www.filippo-materazzi.it
www.techonehobby.com
Email:techonesales4@gmail.com

This manual suits for next models

1

Other Techone Toy manuals

Techone Gent EPP User manual

Techone

Techone Gent EPP User manual

Techone EPP-P51D User manual

Techone

Techone EPP-P51D User manual

Techone Yak54 EPP User manual

Techone

Techone Yak54 EPP User manual
Techone MXS-HCF User manual

Techone

Techone MXS-HCF User manual

Techone MANTH User manual

Techone

Techone MANTH User manual

Techone P51 3D-EPP User manual

Techone

Techone P51 3D-EPP User manual

Techone Paiget II User manual

Techone

Techone Paiget II User manual

Techone Extra 300 EPS User manual

Techone

Techone Extra 300 EPS User manual

Techone Malibu III User manual

Techone

Techone Malibu III User manual

Techone SWIFT 3D-EPP User manual

Techone

Techone SWIFT 3D-EPP User manual

Techone P51 3D-EPP User manual

Techone

Techone P51 3D-EPP User manual

Techone Yak55 3D EPP User manual

Techone

Techone Yak55 3D EPP User manual

Techone Arrow 3d User manual

Techone

Techone Arrow 3d User manual

Techone SU-27 User manual

Techone

Techone SU-27 User manual

Techone Sukhoi EPP User manual

Techone

Techone Sukhoi EPP User manual

Techone AEROLUS F3P User manual

Techone

Techone AEROLUS F3P User manual
Techone rainbow-epp User manual

Techone

Techone rainbow-epp User manual

Techone leader 3D EPP User manual

Techone

Techone leader 3D EPP User manual

Techone Malibu III User manual

Techone

Techone Malibu III User manual

Techone Mini Tempo 3D-EPP User manual

Techone

Techone Mini Tempo 3D-EPP User manual

Techone BLUEFOX 2012 3D-HCF User manual
Techone

Techone BLUEFOX 2012 3D-HCF User manual

Techone Malibu2 F3P User manual

Techone

Techone Malibu2 F3P User manual

Techone Yak54 F3P User manual

Techone

Techone Yak54 F3P User manual

Techone Yak54-F3P User manual

Techone

Techone Yak54-F3P User manual

Popular Toy manuals by other brands

Beyblade Dark Wolf BB-29B instructions

Beyblade

Beyblade Dark Wolf BB-29B instructions

Fisher-Price Brilliant BASICS L1832 manual

Fisher-Price

Fisher-Price Brilliant BASICS L1832 manual

Joovy 0008X Series instruction manual

Joovy

Joovy 0008X Series instruction manual
Maison Battat Bplay BX4504 quick start guide

Maison Battat

Maison Battat Bplay BX4504 quick start guide

Fisher-Price Y7363 instructions

Fisher-Price

Fisher-Price Y7363 instructions

Smoby 440821 quick start guide

Smoby

Smoby 440821 quick start guide

Agora Models LONDON TRANSPORT ROUTEMASTER RM 857 Build instructions

Agora Models

Agora Models LONDON TRANSPORT ROUTEMASTER RM 857 Build instructions

marklin 36343 user manual

marklin

marklin 36343 user manual

SIG RISER 100 Building and flying instructions

SIG

SIG RISER 100 Building and flying instructions

Horizon Hobby UMX F-16 instruction manual

Horizon Hobby

Horizon Hobby UMX F-16 instruction manual

REVELL Battleship Bismarck Assembly manual

REVELL

REVELL Battleship Bismarck Assembly manual

marklin 16051 manual

marklin

marklin 16051 manual

Lansay mini delices 17904 instructions

Lansay

Lansay mini delices 17904 instructions

Mega Bloks Halo Wars UNSC Warthog manual

Mega Bloks

Mega Bloks Halo Wars UNSC Warthog manual

Molt models Tyro 150 Building instructions

Molt models

Molt models Tyro 150 Building instructions

ATOMIC MASS GAMES STAR WARS LEGION SWL11 Assembly

ATOMIC MASS GAMES

ATOMIC MASS GAMES STAR WARS LEGION SWL11 Assembly

Hubsan SpyHawk instruction manual

Hubsan

Hubsan SpyHawk instruction manual

Enabling Devices Peek-a-Boo 7508M user guide

Enabling Devices

Enabling Devices Peek-a-Boo 7508M user guide

manuals.online logo
manuals.online logoBrands
  • About & Mission
  • Contact us
  • Privacy Policy
  • Terms and Conditions

Copyright 2025 Manuals.Online. All Rights Reserved.