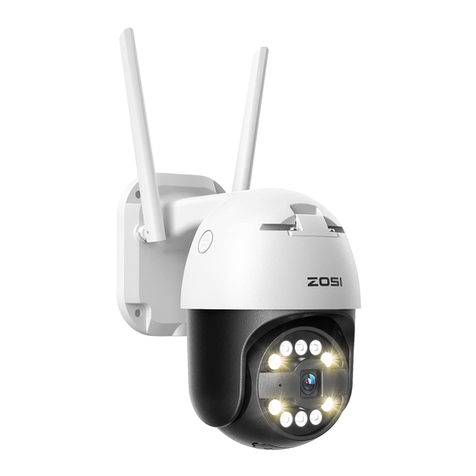
Tecno TC-4015WF User manual

Dear customer, welcome to use this product, before using this product, please read the operation instructions
in detail, and save this manual for future reference.
I
II
I
、
、、
、
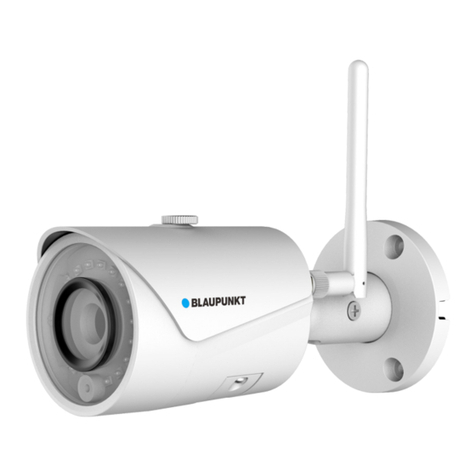
Realize your HD Waterproof IP camera

I
、
、、
、
Interface definition and wiring diagram
①Network interface:suitable for accessing network using network cable.
②WIFIantenna:receive WIFI signal;
③Memory card socket:insert memory card,support 64G:device can stock video/picture;
④
Power supply interface;connect power supply adapter(only support DC12V,2A input)
II
IIII
II、
、、
、Mobile phone software operation
Mobile phone software operationMobile phone software operation
Mobile phone software operation
For
better experience the convenience that brought by this product , please
download mobile phone software before using this product:

1、
、、
、Mobile phone software download:
1) IOS user can download and install Yoosee in Apple official shop
2) Android user can enter website :http://www.yoosee.co ,download and install
Yoosee
3) Also can input http://www.yoosee.co/ in the explorer to download it in PC,
Android version and IOS version can scan the QR code to download the software
directly,PC click
to download directly.
2、
、、
、Mobile phone ID register
Note
NoteNote
Note:
::
:first open the
first open the first open the
first open the “
““
“
Yoosee
”
””
”
software
software software
software ,
,,
,user need register one ID as the following:
user need register one ID as the following:user need register one ID as the following:
user need register one ID as the following:
○,1、choose the underface “register” to enter
○,2、choose“phone ”or“email /user ID”,click “next”
○,3、input email box and password,click “next”( the email register no need
verification code ,register it directly; the mobile phone register,the verification
code will be sent to the phone by message.)

○,4、if register successfully,it will show “register successful”,and the system will
distribute one ID to you automatically at the same time.please remember this
ID,it can be used as the user name ,click “confirm”,input the password you set
just now again,then you can log in normally.
3
33
3、
、、
、Mobile phone network co
Mobile phone network coMobile phone network co
Mobile phone network connection
nnectionnnection
nnection
There are two ways for connecting device to network:
1) Wired connection
Wired connectionWired connection
Wired connection:
::
:after the camera power on,connect one end of the cable
after the camera power on,connect one end of the cable after the camera power on,connect one end of the cable
after the camera power on,connect one end of the cable
to the camera ,the other end to the router LAN port(please be sure the
to the camera ,the other end to the router LAN port(please be sure the to the camera ,the other end to the router LAN port(please be sure the
to the camera ,the other end to the router LAN port(please be sure the
router open the DHCP function) ,the network light w
router open the DHCP function) ,the network light wrouter open the DHCP function) ,the network light w
router open the DHCP function) ,the network light will be normally on
ill be normally on ill be normally on
ill be normally on
after connection successfully.
after connection successfully.after connection successfully.
after connection successfully.
2) WIFI connection
WIFI connectionWIFI connection
WIFI connection:
::
:the users can follow the below ways if they wants to
the users can follow the below ways if they wants to the users can follow the below ways if they wants to
the users can follow the below ways if they wants to
start using WIFI to get connection with the camera when the camera is
start using WIFI to get connection with the camera when the camera is start using WIFI to get connection with the camera when the camera is
start using WIFI to get connection with the camera when the camera is
wired connection
wired connectionwired connection
wired connection:
A、please add the devise to the Yoosee device list:“Add device”,please view the fifth
part for the detail steps.
B、open Yoosee software,1、choose“device”,click device name,choose “settings”;
2、choose “network settings”3、(
((
(please don’t choose “WIFI” directly at the
moment )
))
)the following will search all of the WIFI signal near it
automatically,choose your WIFI ID 4、input WIFI password,open wifi
successfully.

C、set WIFI by “intelligent online”:【details refer to 4、add device
on mobile phone》2)】
4
44
4
、
、、
、
Add device on mobile phone
Add device on mobile phoneAdd device on mobile phone
Add device on mobile phone
How to add the device to device list:
1)、In the device list interface of the“Yoosee”software,when the camera
is in network and the phone is in the same WIFI,both of them are in
one LAN,the software will find all the devices automatically,and only
need choose ,add and set the access password is ok.

2)、intelligent online:open the Yoosee software,click “Device”,choose
the“ +”button ,choose “intelligent online”,click next and then choose the WIFI
and WIFI password you need,click the “next” again ,connect the device.;
3)、Add device manually:in the device interface of the Yoosee software,click the
“+” ,input ID and password is ok.

5
55
5、
、、
、The device monitor of mobile phone
The device monitor of mobile phoneThe device monitor of mobile phone
The device monitor of mobile phone
1)、contact person:click the device icon that has been added in device list to entry the
monitor mode .
6、
、、
、The video settings of mobile phone.
1)、Video:this device supports 64GB TF card in max ,if need record video,please
insert the memory card at first,and then open the Yoosee :click Device ->Device
name ->settings->video settings,user can choose record video manually ,alarm
video, timing video.
2)、playback:this device support playback in mobile phone,open the Yoosee
software:click Device->Device name->playback,user can find the playback files
according to the date, then play it directly .
7
77
7、
、、
、Mobile phone zone settings
Mobile phone zone settingsMobile phone zone settings
Mobile phone zone settings
1
11
1)、
)、)、
)、Alarm learning code.
Alarm learning code.Alarm learning code.
Alarm learning code.
Note:
::
:this function is optional,please be sure your device has this function.
This device with 8pcs remote control ,8*8=64pcs wireless
alarm(433frequency),support 8 groups.
The following is the learning code ways:
A、Please add device to device list in Yoosee software.
B、Click Device->device name->settings->zone settings
Eg:you want to learn one door sensor that installed in the hall,the serial number is
1.Click “Hall”-click number 1,pop-up,

C、Click “OK”,and trigger the alarm you will learn at the same time(take the door
sensor as example,separate the door sensor will trigger the alarm).if match
code successfully,the words will be turn blue from gray,and will
pop-up :learn successfully
D、Back to device list interface ,click the right lock key of the device,
“”means Arming,“ ” means disarming,the alarm will be effective if mach
code successfully after arming 15secs.
E、“remote caontrol”is special designed for alarm remote control ,the
ways of matching code is the same as“A、B、C”,the function is equal to the right
key
of the device list in the Yoosee software,it can be used as
“arming,disarming”,but it need match with the device learning .
2)、
)、)、
)、delete match code :
::
:click the access number that had learned,confirm delete
is ok.
3)、
)、)、
)、alarm settings:
::
:

Arming:there are two ways :one is through the press the infrared remote control
arming key(lock key) that has learned successfully ;two is the arming keys (lock key)
in the back of the APP contact list, after arming ,when there is a case, the device will
send the alert to the APP actively , and send the scene captured images to the alarm
mail at the same time。
Push account,alarm mail:Click on the device name - > settings - > alarm settings:
add receiving alert APP ID in binding account (open Yoosee software,can be found
after clicking on the first"settings" button from right in the lower, can add up to five
account), alarm write the receiving alarm email address.
Motion detecting: alarm as soon as the scene change.
Buzzer: open the buzzer, when have alert the device itself will sirens screaming until
to "disarming"
8
88
8、
、、
、Device upgrading
Device upgradingDevice upgrading
Device upgrading
Click contact names - > Settings - > check device update: click on the new version
number,it will remind the new version number if have the new version ,and the user
can choose whether to upgrade。
I
II
III
IIII
II、
、、
、The software operation in PC
The software operation in PCThe software operation in PC
The software operation in PC
1, Download software to PC
1)、input http://www.yoosee.co/ in the PC explorer ,click the icon to download
directly.
2、log account in PC
A
AA
A、
、、
、
Use the ID( email/phone number/Yoosee account ID) that register in mobile phone

to login directly, no need to register again. The account is:admin password:
00000000.
3,Computer terminal network connection (the same as mobile phone software
operation three ", 3)
4,
4,4,
4,Add device to PC.
How to add device to the device list?In fact, there are many kinds of ways to
achieve,specific methods, please refer to:1)、In the left side of the "CMS" software
interface, click the button ,click ok:
5
55
5、
、、
、Device monitor in PC.
Device monitor in PC.Device monitor in PC.
Device monitor in PC.
Open CMS software,right click device name -》start monitor,as the following picture:
CHICK

6、
、、
、The video setting in PC.
1)、Video: this device can store the video in the computer's hard disk, right click on
the monitor screen ,select "start video" (note: be sure only in the computer
monitoring condition ,the video can be stored in the computer's hard disk)
2)、playback:this device can playback the video from computer, open the CMS

software,click on the replay button ,choose "playback" , user can find the
playback files according to the date, then play it directly .
(note: the video in computer hard disk only can be played in PC ,does not support
playing in mobile)
IV
IVIV
IV.
..
.Restore
RestoreRestore
Restore
the
thethe
the
factory default
factory defaultfactory default
factory default
settings
settingssettings
settings
Reset will erase all user Settings: including WIFI information,access password , alarm
information, arming zones information.
The steps:press 5 seconds on the pigtail reset key,and wait the device restart is ok .
Other Tecno Security Camera manuals
Popular Security Camera manuals by other brands
Allied Vision Technologies
Allied Vision Technologies Prosilica GE1650 Technical manual

Quasar
Quasar Quasar CM-4321 User and installation guide
DW
DW MEGApix DWC-MV95Wi28TW user manual

Sony
Sony HVM-332 operating instructions
Honeywell
Honeywell EQUIP HD4DIP reference guide
Siqura
Siqura XCU Fusion quick start guide


