Tecsun S-8800 User manual

TECSUN
S-8800
FM Stereo/LW/MW/SW SSB PLL Synthesized Receiver
OPERATION MANUAL
TECSUN ELECTRONIC IND. LTD.


CONTENTS
1. LCD SYMBOL DESCRIPTION ..................................................................................... 1
2. LOCATION OF CONTROLS (FRONT OF THE RADIO) ............................................... 2
LOCATION OF CONTROLS (SIDE AND BACK OF THE RADIO) ............................... 3
3. REMOTE CONTROL OPERATION ............................................................................... 4
4. INSTALLING BATTERIES ............................................................................................. 5
5. HOW TO TURN ON/OFF THE RADIO .......................................................................... 6
6. VOLUME & TONE CONTROL ....................................................................................... 7
7. MW TUNING STEP & FM FREQUENCY RANGE SETTING ........................................ 8
8. ANTENNA SELECTION AND CONNECTION ............................................................... 9
Broadcasting knowledge:
How to achieve long-distance FM radio reception (FM-DX)? ...................................... 13
9. FREQUENCY BAND SELECTION
.............................................................................. 13
10. VF (View Frequency) & VM (View Memory) MODE .................................................... 14
11. TUNING INTO STATIONS ........................................................................................... 14
12. AM BW (bandwidth) SELECTION ............................................................................... 15
13. SSB (Single Side Band) SELECTION .......................................................................... 16
Broadcasting knowledge: What is SSB? ..................................................................... 16
14. FM STEREO ................................................................................................................ 17
Broadcasting knowledge:
What kind of signal can interfere with FM broadcasts? ................................................ 17
15. STORING STATIONS INTO MEMORY ........................................................................ 18
Why are more MW stations received at night Broadcasting knowledge:
than during the day? .......................................................... 21
18. AUTO SORTING MEMORY ......................................................................................... 24
19. CLOCK SETTING (24-hour clock) ............................................................................... 24
20. ALARM SETTING (by radio only) ................................................................................ 25
21. SLEEP TIMER SETTING ............................................................................................. 26
22. STEREO LISTENING USING EARPHONES ............................................................... 26
23. AUDIO LINE OUT FUNCTION .................................................................................... 26
24. DISPLAY & BACKLIGHT FEATURES ......................................................................... 27
25. RETURN TO PREVIOUS STATION ............................................................................ 27
26. BUILT-IN CHARGING FUNCTION .............................................................................. 28
Lithium battery safety information (important!) ............................................................. 28
27. TROUBLE SHOOTING ................................................................................................ 29
29. SPECIFICATIONS ....................................................................................................... 30
28. FIRMWARE RESET FUNCTION .................................................................................. 30
How to reduce interference when listening to FM radio? ............................................. 18
16. LISTENING TO STORED STATIONS .......................................................................... 22
17. DELETING STORED STATIONS ................................................................................. 23
Why is the SW broadcasting sound so unstable, Broadcasting knowledge:
continuously changing between large and small sound? ... 24
30. RADIO MAINTENANCE ............................................................................................... 32
............................................................................................................... 33 Memorandum

1
LCD SYMBOL DESCRIPTION
Battery display
Full battery power:
Depleted battery power:
Alarm on indication
VOL: Volume level
Frequency unit indication
F
LW/MW/SW: kHz
M: MHz
Radio ON display:
Frequency, bandwidth, volume and clock time display
Radio OFF display:
Clock time display
Band & Signal indicator
FM stereo:
MW: MW
LW: LW
SW: SW
USB mode (upper sideband): USB
LSB mode (lower sideband): LSB
FM mono: FM
Clock time, Alarm time (AL), SW meter band (mb),
Frequency memory storage location (PRESET), Charging time (Charge) indication
Signal strength indication
Weak signal:
Strong signal:
Tuning speed indicator
Fast tuning:
Slow tuning:
Sleep timer on indication

LOCATION OF CONTROLS ( FRONT OF THE RADIO )
2
2
Time setting
Alarm setting (by radio only)
2
3
LCD
8
Treble control
14
Bass control
15
Power/Sleep:
- Press to turn ON/OFF the radio.
Volume control
16
4Display/Delete
In radio ON mode:
- Press to switch between “Clock time” and “Alarm time” in the top right corner of the LCD; in View Memory
(VM) mode the LCD also displays the “Station memory location”.
- In VM mode, press and hold to delete stored stations.
VF (View Frequency) / VM (View Memory) / FM SET
5
-
- In radio ON mode: Press to switch between VF & VM mode; In VM mode, press and hold to browse
all stored stations in the selected frequency. In VF mode, press and hold to scan
all available stations.
In radio OFF mode:Press and hold to select the FM frequency range.
AM NORM./FM ST.
- USB/LSB
- In FM mode: Press to select Mono or Stereo reception.
In mode:Press to return to AM (LW/MW/SW) radio mode.
USB/LSB / 9/10kHz
7
-
- In radio OFF mode: Press and hold to set the 9kHz/10kHz MW tuning step.
In LW/MW/SW band:Press to enter USB or LSB mode.
9Memory / LW ON/OFF
-
- In radio ON mode: Press to store a station into memory.
In radio OFF mode:Press and hold to activate /deactivate the LW band.
10 ATS (AUTO TUNING STORAGE)
In radio ON mode:Press to automatically search and store all available
in the selected frequency band.
stations
11 Remote control sensor and LED
To reduce power consumption the remote control function automatically turns
when the device is not in use for one hour. Press any key on the radio to resume
remote control function. The LED indicates whether the remote control function
is on or off.
, off
12 TUNING KNOB
-
- In radio OFF mode: Rotate for clock and alarm time setting.
In radio ON mode:Rotate for frequency adjustment and memory browsing.
FINE TUNING / SW METER BAND
13
-
press to enter SW band and switch between meter bands.
- In radio OFF mode: Rotate for clock and alarm time setting.
In radio ON mode:Rotate for frequency adjustment;
AM BW (Bandwidth) selector
18
-
- SSB Mode: Bandwidth 0.5kHz / 1.2kHz / 2.3kHz / 3kHz / 4kHz adjustable
AM Mode: Bandwidth 2.3kHz / 3kHz /4kHz /6kHz adjustable
1
Speaker
17
Band selector
19
LW / MW / SW / FM band selection
- Press and hold, then rotate the tuning knob to adjust 1-120 minutes sleep timer.

3
Ф3.5mm stereo earphones jack
23 Low-impedance
FM / SW antenna socket
High-impedance
AM antenna socket
26
Telescopic antenna (for short wave and FM)
22 Antenna port (Red)
Ground (black)
27
28 Battery compartment
2 pieces 18650 rechargeable lithium battery
DC (5V) USB Charging socket
INT ANT./EXT ANT. switch
- “INT ANT.” position: When using the telescopic antenna.
- “EXT ANT.” position: When using an external antenna.
LOCATION OF CONTROLS ( SIDE AND BACK OF THE RADIO )
( Use for LW / MW / SW )
DX / LOCAL switch
DX position: For long-distance reception,
and when the received signal is weak.
- LOCAL position: For local reception,
and when the received signal is strong.
-
24
20
Line out jack
Connect the radio to
an external audio amplifier using an audio cable.
21
25
2

FINE TUNE
FINE TUNE
FMMW
USB LSB/
AM NO M.R
DISPLAY
SCAN
MEMORY
METER BAND 9/10kHz FM SET
ATS
AM BW
SWSW
23
4
7
5
8
6
0M
9
TUNING
TECSUN
RM-007
VOL
ONEALL
DELETE
VOL
VF
VM
ENTER
FM ST.
1
36 Volume
Increase volume level
signal level
- VOL Decrease volume level / line out
signal level
- VOL : / line out
:
34 ENTER
Press to confirm setting.
33 Multifunctional numeric keys
-
- Memory location input for stored stations
(VM mode)
Frequency input (VF mode)
31
Sleep timer setting
Turn on the radio, press repeatedly
to select your desired auto turn off timer
(1 to 120 minutes).
32 DELETE
band, then press and hold to activate
delete function, press again to confirm.
- ONE: In VM mode, select desired frequency
band, press and hold to activate
delete function, press again to confirm.
- ALL: In VM mode, select desired frequency
38 /FM FM SET
Radio OFF mode: Press and hold to select your
desired FM frequency range.
- Radio ON mode: Press to select FM band, or
press and hold to automatically
tune into stations and store
them into memory (ATS).
-
39 MW / 9/10kHz
-
tuning steps.
- Radio ON mode: Press to select MW band, or press
and hold to automatically tune into
stations and store them into memory
(ATS).
Radio OFF mode: Press to select 9kHz or 10kHz MW
40 Battery compartment (back side)
Requires 2pcs AAA size battery
43 AM NORM. / FM ST.
In SSB mode: Press to return to
LW/MW/SW reception.
- In FM mode: Press to select
FM mono or stereo.
-
Infrared (IR) transmitter (top)
30
46 TUNING
Adjust the frequency or select a
stored station memory location
(in VM mode only).
47 BACK
Set your desired temporary preset
station, then continue tuning into
other stations. At any time, press
[BACK] to return to the temporary
preset station.
48
Press to display the Station Memory
Location, or press to store the station
into memory.
M (MEMORY)
49 DISPLAY
Radio ON mode: Press to display
either the frequency or clock time
on the LCD.
VF/VM
In radio ON mode, press to switch
between the View Frequency (VF)
and View Memory (VM) modes.
45
44 SCAN
In VF mode, press and hold to scan
all available stations in the selected
frequency band. In VM mode, press
and hold to scan all available stored
stations in the selected frequency band.
AM BW bandwidth filter
Select the frequency band (LW/MW/SW), then
press repeatedly to apply the desired
bandwidth filter.
- AM mode: 2.3kHz / 3kHz / 4kHz / 6kHz
- SSB mode: 0.5kHz / 1.2kHz / 2.3kHz / 3kHz
/ 4kHz
37
41 SW- / SW+
Radio ON mode:
- Press to select the SW band, press again to change
SW meter band.
- Press and hold to automatically tune into stations and
store them into memory (ATS).
USB/LSB
While receiving LW/MW/SW signals, press to
select USB or LSB mode.
42
3
4
Power
Press to turn on/off the device.
29
REMOTE CONTROL OPERATION
35 Auto sorting memory ( “0” key)
※ Don’t press!
Water ingression prevention only.

INSTALLING BATTERIES (RADIO)
Note: When the inserted batteries are fully charged, the battery indicator on the
LCD shows full power “ ”. If the battery indicator shows low power “ ” and is
blinking, the battery is about to run out. “ ” indicates that the operating voltage is
insufficient, the radio will turn off automatically and is unable to turn on. See section
26 for information about how to charge the batteries.
5
1. Open the battery compartment located at the back of the unit.
2. Correctly install two 18650 lithium batteries by following the polarity diagram.
3. Close the battery door.
Note:
This device has battery detection circuits, supplied with detection buttons
located at both ends of the battery compartment. After inserting a lithium battery,
press the detection button. When the LED light is on, this indicates that the lithium
battery is suitable for use. If the light is off, the battery is damaged and should be
promptly replaced.
and LEDs
4

5
6
The operating voltage of the remote control is 3V and requires two pieces
AAA (R03) size batteries.
1. Open the battery door. 3. Close the battery door.2. Insert two AAA-size batteries
following the indicated polarity.
1
11
HOW TO TURN ON/OFF THE RADIO
After installing the batteries,
[POWER] button on the radio or
remote control to turn ON/OFF the
radio.
press the
Note:
1. When using the remote control, the IR
transmitter should point towards the
IR sensor on the radio.
2. To reduce power consumption, when
the radio is not used for one hour, the
IR sensor LED indicator light
automatically turns off, meaning that
the remote control function is
deactivated. Press any key on the
radio to reactivate it.
INSTALLING BATTERIES (REMOTE CONTROL)
4

7
Volume control
6VOLUME & TONE CONTROL
Note:
The volume output level is the combined result of adjustments made on the radio
and the remote control. For maximum volume level, turn the volume knob on the
radio to maximum and use the [VOL+] button on the remote control to set the digital
volume level to 30.
Tone (bass, treble) control
Turn on the radio, rotate the [BASS ---
your desired tone level.
TONE ---- TREBLE] knobs / to select
Volume display while using Remote Control
Volume indicator (level 0-30)
Radio:
Rotate the [VOLUME] knob to adjust
to your desired volume level.
Remote control:
Press the [VOL+ / VOL-] button on
the remote control for your desired
volume level.
36

8
To meet the broadcasting conditions in different countries, you can preset the MW
tuning step and FM frequency range following the below steps:
7MW TUNING STEP & FM FREQUENCY RANGE SETTING
MW tuning step (9kHz / 10kHz)
In radio OFF mode, press and hold the
[9/10kHz] button on either the radio or
remote control . The LCD briefly
displays “9 kHz” or “10 kHz” to indicate
the selected tuning step.
9 kHz tuning step: MW frequency
coverage is 522 kHz ~ 1620 kHz.
10 kHz tuning step: MW frequency
coverage is 520 kHz ~ 1710 kHz.
setting
FM frequency coverage settings
In radio OFF mode, press and hold the
[FM SET] button on either the radio or
remote control , then press repeatedly
to select your desired starting point of
the FM frequency range (64, 76, 87 or
88 MHz) and wait until the LCD displays
“108 MHz” to automatically confirm the
setting.
LCD displays “ ”, the frequency
coverage is 64 ~ 108 MHz.
LCD displays “ ”, the frequency
coverage is 76 ~ 108 MHz.
LCD displays “ ”, the frequency
coverage is 87 ~ 108 MHz.
LCD displays “ ”, the frequency
coverage is 88 ~ 108 MHz.

8
25
9
22
ANTENNA SELECTION AND CONNECTION
Safety Alert
1. When you build an outdoor antenna, you must pay attention to personal
safety!
2. An outdoor antenna must be kept away from power lines! It must be
windproof, waterproof, and requires protection from lightning strikes.
3. During a thunderstorm, do not use an outdoor antenna! Disconnect the
outdoor antenna from the radio.
4. Do not use a gas pipeline or AC power outlet for grounding purposes.
1. Long Wave and Medium Wave antenna:
The S-8800 radio uses a built-in magnetic rod (ferrite) antenna to receive long wave
and medium wave signals. Since this ferrite antenna is directional, minimizing
interference and achieving the best reception for long wave and medium wave
signals requires repositioning of the radio. If necessary, you can connect an external
antenna to the “AM ANT.” external antenna socket and a ground wire to the ground
(GND.) socket to improve reception. Push the switch to “EXT ANT.” position.
22

Upon receiving a strong radio signal, push the [DX / LOCAL] switch to “ ”
position; when receiving a weak signal, push the switch to the “DX” position.
LOCAL
“ ” whip antenna to improve reception:
Connect the Tecsun “ ” (can be purchased separately) to the
telescopic antenna of the S-8800. Fix the opposite end at a high location outside the
building, then push the [INT ANT. / EXT ANT.] antenna switch to “INT ANT.” position.
Extended
AN-05 external antenna
Using an external antenna:
In order to improve short wave reception,
an external antenna can be connected to
either the high impedance or low
impedance external antenna socket
on the back of the S-8800. When using
the external antenna, push the [INT ANT.
/ EXT ANT.] switch to “EXT ANT.” position.
22
23
23
22
2. Antenna for Short Wave
For receiving short wave signals, you can either use the telescopic antenna or an
external antenna. When using the telescopic antenna, push the [INT ANT./EXT ANT.]
switch to “INT ANT.” position. When using an antenna connected to the external
antenna socket, push the switch to “EXT ANT.” position.
10
AN-05

11
Warning: Do not use the water pipe as the ground wire for anti-lightning protection!
Connecting a low-impedance short wave antenna
Example: symmetrical horizontal antenna:
Connecting a high-impedance short wave antenna
Example: inverted L-shaped antenna

12
3. Antenna for FM
For receiving FM signals, you can either
use the telescopic antenna or an
external antenna.
When using the telescopic antenna, push
the [INT ANT. / EXT ANT.] switch to
“INT ANT.” position. Changing the length
and angle of the telescopic antenna can
improve the reception.
When using an antenna connected to the
external antenna socket , push the
switch to “EXT ANT.” position.
Both FM external antennas and VHF
(channels 1 to 12) TV antennas can be
used to enhance FM signals.
Note:
Because external VHF TV antennas are directional, a rotatable antenna with remote
control is suggested.
Signal reception in this direction is the best

13
Broadcasting knowledge:
How to achieve long-distance FM radio reception (FM-DX)?
To enhance reception, use an outdoor VHF antenna or suitable FM antenna (low
attenuation coaxial cable), fix it as high as possible (take into account the antenna
usage safety alerts) and point it in the direction of the desired FM broadcast. If the
signal is weak, you may require installing a low-noise antenna amplifier. For FM-DX
purposes, more antenna sections can increase the signal. Adding more antennas to
create an antenna array can further enhance signal gain and directionality.
9FREQUENCY BAND SELECTION
To select your desired frequency band,
rotate the [BAND SELECT] knob on
the radio or press the corresponding
band button ([FM] / [MW] / [SW-] / [SW+])
on the remote control ( , , ); for LW
band selection, press the [MW] button
twice.
Note:
To turn ON/OFF LW band, in radio OFF
mode, press and hold the [LW ON/OFF]
button until “LW ON” or “LW OFF”
appears on the display. Alternatively,
press and hold the [2] key on the remote
control.
To change meter bands when tuning the
SW band, press and then turn the
[FINE TUNING] knob on the radio, or
press the [SW-]/[SW+] buttons on the
remote control.
SW meter band indictor (41mb)

14
Note:
When the memory contains no stored stations, it is not possible to switch
VF and VM mode; the device will automatically be in VF mode.
between
VF (View Frequency) & VM (View Memory) MODE
TUNING INTO STATIONS
Before tuning into FM or short wave stations, push the [INT ANT.] switch to the
proper position following the instructions about antenna usage as described in
section 8.
MANUAL TUNING
In VF (View Frequency) mode, rotate the [TUNING] knob to search for your
desired station. Alternatively, use the tuning options [ ], [ ], [ ], and [ ] on
the remote control.
VF (View Frequency):
Press the [VF/VM] button on the radio
or remote control . When the clock or
alarm time is shown in the upper right
corner of the display, the VF mode is
activated. If it shows the preset station
number, press the [VF/VM] button again. View Frequency display
View Memory display
VM (View Memory):
Press the [VF/VM] button. When the
preset station number “P0XX” is shown
in the upper right corner of the display,
the VM mode is activated. If it shows the
clock or alarm time, press the [VF/VM]
button again.
AUTO SCAN TUNING
In VF mode, press and hold the [VF/VM] button on the radio or [SCAN] button
on the remote control. The scanning indicator “ ” advances from left to right while
the device automatically scans the available stations, staying on each station for
about 5 seconds. To stop the auto scan function, rotate the [TUNING] knob or
press the [SCAN] button on the remote control.
46

15
DIRECT KEYPAD ENTRY
In VF mode, you can press the numeric keys [0-9] on the remote control to
enter a station frequency.
directly
For example, tuning into radio programs on FM 105.2 MHz:
1. Press the [VF/VM] button on the remote control to enter VF mode.
2. Press the [FM] button to enter the FM frequency band.
3. To select the FM 105.2 MHz frequency, press the [1], [0], [5], [2] keys subsequently.
Auto Scan Tuning display
Note:
The frequency scanning direction is
based on the last used tuning direction.
When the last used tuning direction was
up frequency/down frequency, then the
scanning direction is also up frequency/
down frequency.
FMMW
USB LSB/
AM NO M.R
METER BAND 9/10kHz FM SET
ATS
AM BW
SWSW
FM ST.
18
6 7
12 AM BW (bandwidth) SELECTION
When listening to AM frequency bands
(LW, MW, SW and SSB), rotate the
[AM BW] knob , or press the button
on the remote control, to adjust the
bandwidth and enhance the signal.
In LW / MW / SW mode:
Adjust to your desired bandwidth:
2.3 kHz / 3.0 kHz / 4.0 kHz / 6.0 kHz
In SSB mode:
Adjust to your desired bandwidth:
0.5 kHz / 1.2 kHz / 2.3 kHz / 3.0 kHz
/ 4.0 kHz

16
Choosing a wider band
(local stations / strong signals):
It has better audio fidelity when receiving
strong signals or local stations.
Choosing a narrower band (long
distance stations / weak stations):
1. Suitable for receiving weak and long
distance stations. A narrower band is
able to limit interference from adjacent strong signals and reduce background
noise.
2. When using a narrower band for SSB signals, the sound will be slightly distorted,
which is a normal phenomenon.
AM Bandwidth display
13 SSB (Single Side Band) SELECTION
When listening to AM frequency bands (LW, MW, SW), press the [USB/LSB] button
or repeatedly to select your desired side band mode.
USB: Upper Side Band
LSB: Lower Side Band
To exit the SSB mode and resume normal listening, press the [AM NORM.] button
or .
Broadcasting knowledge:
What is SSB (Single Side Band)?
LW, MW and SW broadcasts belong to the AM (Amplitude Modulation) broadcasting
mode, which has a spectrum composed of three parts: (1) carrier wave, (2) lower
sideband (LSB), and (3) upper sideband (USB):

17
The figure shows an AM signal that has two sidebands with information, each
a copy of the other, and the carrier wave. To enhance the efficiency of the signal, the
carrier wave and either one of the sidebands can be eliminated. What remains is a
single side band (SSB).
Besides the capability of receiving AM signals, a radio device requires a specific
demodulator to receive the information from SSB signals. The advantage of SSB
transmissions is the narrow bandwidth (gives better selectivity and less noise),
higher power efficiency and longer transmission distance. The disadvantage is that
the sound is slightly distorted, which makes it primarily suitable for less demanding
audio quality communication.
14 FM STEREO
1. When listening to FM broadcasts
through stereo earphones, press the
[FM ST.] button or to activate the
stereo function. If the FM broadcast is
transmitted in stereo, the FM stereo
indicator “ ” is displayed on
the LCD. When the FM signal is weak, it is advised to turn off the stereo function.
6
2. Since stereo sound does not function via the speaker of the device, it is advised to
turn off the stereo function to improve sound quality while listening via the speaker.
3. If the FM station is not broadcasted in stereo, or the stereo signal is too weak, the
“ ” symbol does not appear and the stereo function will not be activated.
Broadcasting knowledge:
1. What kind of signal can interfere with FM broadcasts?
The reception of a particular FM station can experience interference from powerful
VHF TV signals as well as strong signals from adjacent FM stations. Several
strong FM stations can also interfere with each other.
Table of contents
Other Tecsun Receiver manuals

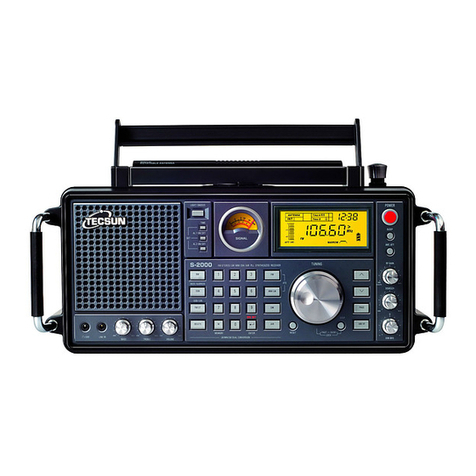
Tecsun
Tecsun S-2000 User manual

Tecsun
Tecsun PL-600 User manual

Tecsun
Tecsun DTR-762 User manual

Tecsun
Tecsun PL-310 Installation manual

Tecsun
Tecsun PL-360 User manual

Tecsun
Tecsun PL-680 User manual

Tecsun
Tecsun PL-310 User manual

Tecsun
Tecsun PL-360 User manual

Tecsun
Tecsun PL-660 User manual

Tecsun
Tecsun PL-880 User manual

Tecsun
Tecsun PL-606 User manual

Tecsun
Tecsun R-108 User manual

Tecsun
Tecsun S-2000 User manual

Tecsun
Tecsun PL-365 User manual

Tecsun
Tecsun PL-310ET User manual

Tecsun
Tecsun PL-660 User manual

Tecsun
Tecsun PL-398MP User manual

Tecsun
Tecsun R-909 User manual

Tecsun
Tecsun PL-330 User manual

Tecsun
Tecsun PL-368 User manual