tedee Nordic Adaptor Assembly instructions

tedee nordic adapter | page 1www.tedee.com
INSTALLATION GUIDE
AND USER MANUAL
tedee nordic adapter
Read installation guide and user manual and learn how
to assemble the adapter in a safe and proper manner.
EN

page 2 | tedee nordic adapter www.tedee.com
table of contents
table of contents
quick start with tedee nordic adapter
set of items – what’s in the box?
what’s NOT in the box (but is needed)?
setup – 3 easy steps
step 1: PREPARE your door
step 2: INSTALL the adapter
step 3: INSTALL tedee lock
additional and technical information
technical information
technical support
Page 2
Page 3
Page 4
Page 5
Page 6
Page 6
Page 12
Page 15
Page 20
Page 20
Page 20

tedee nordic adapter | page 3www.tedee.com
Page 2
Page 3
Page 4
Page 5
Page 6
Page 6
Page 12
Page 15
Page 20
Page 20
Page 20
quick start with tedee nordic adapter
tedee nordic adapter setup - go to page 6
3 easy steps
Tedee nordic adapter can be tted to any
door equipped with a lock that works with
Scandinavian prole cylinders.
It’s a part of tedee set. It’s customized for tedee
lock to make your door smart.
This booklet will give you an overview of the
basic features of tedee nordic adapter and
will help you walk through the setup in 3 easy
steps.
PREPARE
your door
INSTALL
the adapter
INSTALL
tedee lock
1 2 3

page 4 | tedee nordic adapter www.tedee.com
set of items – what’s in the box?
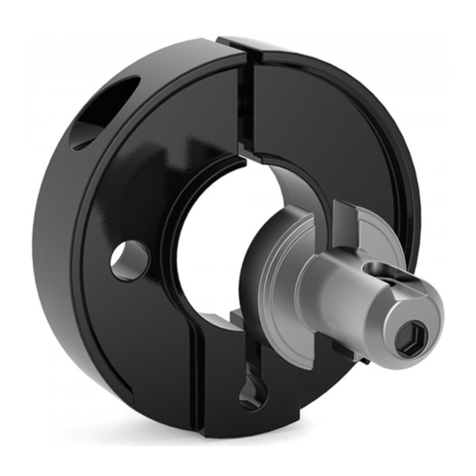
tedee nordic adapter
tailpiece with cam other items
1. Lock stabilizer
2. Mounting holes
3. Adapter shaft
4. Groove and hole
5. Cam
6. Tailpiece
7. Plate
8. Plate mounting
screws (2x)
41
2
3
8765

tedee nordic adapter | page 5www.tedee.com
what’s NOT in the box (but is needed)?
necessary to prepare
step 1 and step 2
step 3
RULER PHILLIPS
SCREWDRIVER
2x PLIERSTIME (15-30 MIN)
TEDEE LOCK ALLEN KEY

page 6 | tedee nordic adapter www.tedee.com
setup - 3 easy steps
step 1: PREPARE your door
1Remove the mounting screws that keep your old knob escutcheon in the door lock.
rotate
counter-clockwise

tedee nordic adapter | page 7www.tedee.com
setup - 3 easy steps
2Remove the old knob escutcheon from the door lock.
remove
Note: the lock escutcheon on the other side of the door is xed with the screws you
just removed. Make sure to prevent it from falling off either with a tape, or just hold it
with your hand.
OLD ESCUTCHEON
MOUNTING
SCREWS (2x)

page 8 | tedee nordic adapter www.tedee.com
setup - 3 easy steps
1Please, check if the tailpiece sticks out from the door leaf. Measure it with a ruler.
If it’s between 3mm and 12mm, proceed directly to step 2.
If it’s less than 3mm you should remove the tailpiece and replace it with a new one provid-
ed in the tedee nordic adapter box. Check the next pages to learn how to do it.
If it’s more than 12mm you should shorten the tailpiece using pliers. Check the next pages
to learn how to do it.
OLD TAILPIECE
RULER
measure
3 mm - 12 mm

tedee nordic adapter | page 9www.tedee.com
setup - 3 easy steps
1
2
Remove mounting screws that hold the plate.
Remove plate that
holds the tailpiece
and remove the old
tailpiece.
OLD
TAILPIECE
PLATE OLD PLATE
MOUNTING
SCREWS (2x)
PLATE
MOUNTING
SCREWS (2X)
remove
remove
[OPTION A] If tailpiece sticks out less than 3mm
rotate
counter-clockwise
<3 mm

page 10 | tedee nordic adapter www.tedee.com
setup - 3 easy steps
3Replace the old tailpiece with a new one from the tedee nordic adapter box.
Then place back the plate (old or a new one) and secure it with the mounting screws.
Note: please measure the tailpiece once again and make sure that your it sticks out from
the door leaf more than 3mm but less than 12 mm.
If it does, proceed to step 2.
PLATE
SCREWS
insert
NEW
TAILPIECE

tedee nordic adapter | page 11www.tedee.com
setup - 3 easy steps
[OPTION B] If tailpiece sticks out more than 12mm
Note 1: If you accidentally damage the tailpiece or shorten it too much, you can use the
extra tailpiece provided in the tedee nordic adapter box.
Note 2: please measure the tailpiece once again and make sure that it sticks out from the
door leaf more than 3mm but less than 12mm.
If it does, proceed to step 2.
PLIERS
TAILPIECE
PLIERS
shorten
2
1
Use two sets of pliers
to adjust the length of
your tailpiece.
Remove mounting screws that hold the plate, then remove the plate
and the old tailpiece (follow the steps shown on the previous pages).
> 12 mm

page 12 | tedee nordic adapter www.tedee.com
setup - 3 easy steps
step 2: INSTALL the adapter
Insert your tedee nordic adapter.
OK
1
insert
NORDIC
ADAPTER

tedee nordic adapter | page 13www.tedee.com
setup - 3 easy steps
OK
turn
clockwise
2Mount the adapter with two screws using a Philips screwdriver.
2X MOUNTING
SCREWS

page 14 | tedee nordic adapter www.tedee.com
setup - 3 easy steps
Congratulations, your nordic adapter is now ready to host tedee lock.
Note: before proceeding to step 3 described on the next pages, please read tedee lock in-
stallation guide and user manual and learn how to use your device in a safe and proper manner.
When you’re ready, proceed to step 3.

tedee nordic adapter | page 15www.tedee.com
setup - 3 easy steps
step 3: INSTALL tedee lock
1Align tedee lock with the shaft of the adapter and push it forward.
IMPORTANT: the mounting screw that extends from the lock mounting
hole must t into the groove on the adapter shaft.
push forward
NORDIC
ADAPTER
TEDEE LOCK

page 16 | tedee nordic adapter www.tedee.com
setup - 3 easy steps
OK
Note: double check if tedee lock rear wheel is fully adjusted and ts the adapter’s lock
stabilizer. The lock is mounted correctly if the wheel remains in a xed position when you
rotate the lock manually.

tedee nordic adapter | page 17www.tedee.com
setup - 3 easy steps
2Fix tedee lock tightly on the adapter using the Allen key provided in tedee lock box.
OK
rotate
clockwise
ALLEN
KEY
Note 1: Fix tedee lock tightly on the adapter. Keep rotating the key until it stops (at least
two full turns).

page 18 | tedee nordic adapter www.tedee.com
setup - 3 easy steps
4Check light signal (LED).
OK
RED - BLUE - GREEN - WHITE
Note: after the RED-BLUE-GREEN-WHITE sequential light signal your tedee lock is
ready to be added and calibrated in the app.
Note: before turning on tedee lock make sure you read tedee lock installation guide and
user manual and learn how to use your device in a safe and proper manner.
3Turn on the lock. Hold the button
pressed for two
seconds

tedee nordic adapter | page 19www.tedee.com
setup - 3 easy steps
5
6
Download tedee app, create new account, and log in as described in step 2 of tedee lock
installation guide and user manual.
Use tedee app to activate and calibrate your tedee lock as described in step 3 of tedee lock
installation guide and user manual.
Note: follow instructions in tedee lock installation guide and user manual (step 2 and
step 3).
Note: tedee lock which is not added to any account may turn off after a few minutes.
If it does so, please turn it on again before starting the calibration.

page 20 | tedee nordic adapter www.tedee.com
additional and technical information
technical information
tedee nordic adapter
Models Nordic-type door lock adapter
Variants tailpiece with cam
Manufacturer GERDA Sp. z o.o. ul. Sokołowska 49, 05-806 Komorów, POLAND
+48 (22) 329 10 30, www.gerda.pl
Tedee Sp. z o.o. | ul. Altowa 2, 02-386 Warszawa, POLAND
technical support
[email protected] www.tedee.com/support
For technical support please contact our support team
(+48) 884 088 011
Mon-Fri 8am – 4pm (CET)
Table of contents
Other tedee Adapter manuals
Popular Adapter manuals by other brands
Keysight
Keysight 86205A Operating and service manual
Wistron NeWeb
Wistron NeWeb DNUA-93C2 user manual
D-Link
D-Link DGE-560T - Gigabit PCI-Express SNMP VLAN Flow Control Network... Ethernet adapter
Accell
Accell UltraAV DisplayPort Setup instructions
B.E.G.
B.E.G. LUXOMAT 93067 quick start guide
Fein
Fein AUSB manual
