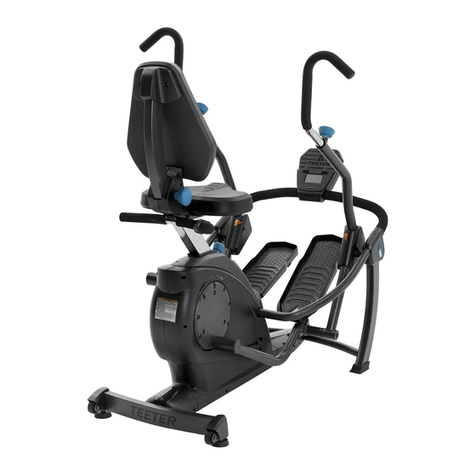
Teeter FreeStep User manual

Repacking Guide
For the FreeStep™Elliptical Recumbent Cross Trainer
Specifications subject to change without notice.
© COPYRIGHT 2020 Teeter; International law prohibits any copying. SE1060 0920-2
EN
Removing the Handle Support Tubes
Start by removing the Pedal Arm Joint Cover Sets by
unscrewing the 2 × Phillips Head Screws on each set with
the screwdriver (Figure B).
Remove the Upper Front Leg Cover Sets by unscrewing the
3 × Phillips Head Screws on each set with the screwdriver
(Figure C).
Adjust the Handles so they are in the lowest position, and lock
them into place with the Handle Adjustment Knob (Figure D).
Remove the Handle Support Tubes by unscrewing the
4 × Bolts with the Allen Wrench and removing the
4 × Curved Washers on each Support Tube (Figure E).
Pull the Handle Support Tubes away from the Base,
(Figure F) and leave the Handles in the lowest position
inside the Handle Support Tubes.
Please be sure to include all components of the FreeStep™in your returned order, otherwise you may not be eligible for a complete refund.
Begin by using the repackaging boxes provided by Teeter. If you do not have the repackaging boxes, contact Teeter Customer Service
at 800-847-0143. Product returned in an unauthorized packing container may not be eligible for a complete refund.
1
2
3
4
5
11
6
8
7
9
8
9
10
10
2
2
33
45
4
5
7
6
Base
Rear Stabilizer
Rear Stabilizer Cover Set
Pedals
Seat Assembly
DO NOT disassemble the product into more components than
the parts listed below (Figure A).
FIGURE A
Console Front Support Bar
Handle Support Tubes with Handles
Pedal Arm Joint Cover Sets
Upper Front Leg Cover Sets
Tools Provided
FIGURE D
FIGURE B FIGURE C
FIGURE E
FIGURE F
FIGURE HFIGURE G
Removing the Console Front Support Bar
Unplug the Speed Sensor Wire by carefully pushing in the
locking tab on the terminal and pulling the terminal ends
away from each other (Figure G).
Remove the Console Support Bar by unscrewing the
4 × Bolts with the Allen Wrench and removing the 4 ×
Curved Washers (Figure H).
Pull the Console Support Bar away from the Base (Figure ).
6
7
8
FIGURE

REVISIONS
ENGR
DATE
REV
SHT
ZONE
DESCRIPTION
NMS
10/18/2017
A
1
8D
A1: RELEASE FOR PATENT
PARTS LIST
ITEM
QTY
NET DIMENSIONS/DESCRIPTION
NOTE
MATERIAL
SHT
REVISION STATUS
SHT
1
REV
A
8
A
1234567
D
C
B
C
A
D
B
5 3 16 248 7
Teeter_STRIDER ASSEMBLY 201703
SHEET 1 OF 1
REV
FILE NAME
TITLE:
NICK SOLLER
ENGR
UNLESS OTHERWISE NOTED
SURFACE ROUGHNESS PER ANSI B46.1
DIMENSIONING PER ASME Y14.5-2009
WELD SYMBOLS PER AWS A2.4
DRAWN
FINISH
AS PROCURED
UNLESS NOTED
.X
.XX
.XXX
ANGLE
EXPECTATIONS PROPRIETARY
THE INFORMATION CONTAINED HEREIN
IS PROPRIETARY TO EXPECTATIONS AND
SHALL NOT BE REPRODUCED IN WHOLE
OR IN PART OR USED FOR ANY PURPOSE
EXCEPT WHEN SUCH USER POSSESSES
DIRECT WRITTEN AUTHORIZATION
FROM EXPECTATIONS LLC
SCALE: FULL
SIZE:
D
A
EXPECTATIONS LLC
PUYALLUP, WA 98391
TOLERANCES
UNLESS NOTED
=
.1
=
.03
=
.005
=
1
NICK SOLLER
FILLET RADII: .005-.010
CORNER BREAK: .005-.010
ALL DIMENSIONS IN INCHES
Sealing the Box & Attaching the Label
Seal the large box securely with packing tape, affix the
return label to the top of the box and mark your Return
Authorization Number (RA #) on the outside of the box.
IMPORTANT: Teeter products cannot be
returned without a Return Authorization Number.
Please contact Teeter Customer Service at (800) 847-014
or email info@teeter.com for assistance.
Repackaging the FreeStep™
WARNING: Always lift the Base with the help of a
partner, and ensure the box is securely taped to
withstand shipping heavy weight.
Open the provided repackaging box and securely tape
the bottom. Leave the top of the box open and, with the
help of a partner, lift the Base and place it into the box.
A large, medium, and small parts bag is provided with
the repackaging box. Place all parts as designated
below and then pack the large, medium, and small bags
respectively into the box.
Large Bag Contents:
Pedals, Rear Stabilizer, Seat Assembly, Console Front
Support Bar, Handle Support Tubes with Handles
Medium Bag Contents:
Pedal Arm Joint Cover Sets, Upper Front Leg Cover
Sets, Rear Stabilizer Cover Set
Small Bag Contents:
Tools, Hardware Kits, Assembly Instructions
If you have any trouble disassembling the equipment, or questions
about its use, please contact customer service.
USA: 800-847-0143 or info@teeter.com
International: info@teeterintl.com
USA: Teeter
9713 233rd Avenue East
Bonney Lake, WA 98391
Toll Free: 800-847-0143
Fax: 800-847-0188
teeter.com | info@teeter.com
International: Teeter International, Ltd.
Gor-Ray House
758 Great Cambridge Rd
Enfield
Middlesex EN1 3GN
United Kingdom
teeterintl.com | info@teeterintl.com
FIGURE J FIGURE K
FIGURE L
FIGURE M
FIGURE P
FIGURE Q
FIGURE R
FIGURE N
Removing the Seat Assembly
Remove the Seat Assembly by unscrewing the
4 × Bolts with the Allen Wrench and removing the
4 × Spring Washers and 4 × Washers (Figure J).
Set the Seat Post in the highest position, and lock it into
place with the Height Adjustment Knob (Figure K).
Removing the Pedals
Position the FreeStep™to rest on its back side by lifting up
on the Front Crossbar and rotating on the Rear Stabilizer
until the Seat Post is resting on the ground (Figure L & M).
Remove the Pedals by unscrewing the 6 × Large Bolts and
6 × Bolts with the Allen and Box-Ended wrenches, and then
remove all the corresponding washers (Figure N).
Pull the pedals away from the Base.
Set the Seat Post in the lowest position, and lock it into
place with the Height Adjustment Knob (Figure O).
Removing the Rear Stabilizer
Remove the Rear Stabilizer Cover Set by unscrewing the
2 ×Machine Screws with the screwdriver and pulling the
right and left pieces apart (Figure P).
Remove the Rear Stabilizer by unscrewing the 6 ×
Bolts with the Allen Wrench, and then remove all the
corresponding washers (Figure Q).
Lift up slightly on the Base so that you can pull the Rear
Stabilizer away from the Base (Figure R).
9
11
14
10
12
15
13
16
17
18
19
FIGURE O
Lift and Flip
Lift
Pull
Other manuals for FreeStep
2
Other Teeter Elliptical Trainer manuals
Popular Elliptical Trainer manuals by other brands

Sole Fitness
Sole Fitness E95 Elliptical owner's manual
NordicTrack
NordicTrack Cxt 950 Elliptical Manuale d'istruzioni
Reebok
Reebok Elliptical Exerciser/rel2i Manual Del Usuario
NordicTrack
NordicTrack Smart Terrain 12.0 Elliptical manual
Horizon Fitness
Horizon Fitness 3.1E user guide
Skandika
Skandika ELSKLING E 520 Assembly instructions and user guide
