TEKAMON YBW60-100F User manual

Thank you for purchasing the TEKAMON Multi-function
pressure cooker .Please read the User Manual carefully before
use and keep it in a convenient place for future reference .
User Manual
Model: YBW60-100F
TROUBLE SHOOTING
19

Important safeguards
Precautions
Features
Specifications
Product Structure
Guide to operation
Pressure cooker control panel
The LCD panel
Introduction of functions
Function operation
Cleaning and care
Trouble shooting
CONTENTS IMPORTANT SAFEGUARDS
1. Please read all instructions.
2. Do not touch hot surfaces.Use handles or knobs.
3. Close supervision is necessary when the pressure cooker is used near
children.
4. Do not place the pressure cooker in a heated oven.
5. Extreme caution must be used when moving an appliance containing hot
oil or other hot liquids, Do not touch hot surfaces, Use handles or knobs.
6. Do not use pressure cooker for other than intended use.
7. This appliance cooks under pressure .improper use may result in scalding
injury. Make certain unit is properly closed before operating. Please see”
Food Preparation Instructions.”
8. Do not fill the unit over 2/3 full. When cooking foods that expand during
cooking such as rice or dried vegetables,do not fill the unit over 1/2 full.
Over filling may cause a risk of clogging the vent pipe and developing
excess pressure .Please see “Food Preparation Instructions.”
9. Be aware that certain foods, such as applesauce, cranberries, pearl
barley ,oatmeal or other cereals, split peas, noodles, macaroni, rhubarb,
or spaghetti can foam, froth ,and sputter, and clog the pressure release
device(the steam release handle).These foods should not be cooked in a
pressure cooker.
10. Always check the pressure release devices (the steam release handle )
for clogging before use .
11. Do not open the pressure cooker until the unit has cooled and all internal
pressure has been released .if the handles are difficult to push apart, this
indicates that the cooker is still pressurized-do not force it open. Any
pressure in the cooker can be hazardous. Please see “Cooking Preparation.”
12. Never deep fry or pressure fry in the unit with oil. It is dangerous and
may cause a fire or serious damage.
13. To protect against electrical shock,do not immerse cord, plugs, or
appliance in water or other liquid.
14. Unplug from outlet when not in use and before cleaning.Allow to cool
before putting on or taking off parts, and before cleaning .
15. Do not operate any appliance with a damaged cord or plug or after the
appliance malfunctions or has been damaged in any manner . Return
appliance to the service center for examination repair or adjustment .See
Warranty section .
1 2
2-4
4
5
6
7
8-9
10
11-12
13
14-17
18
19

16. The use of accessory attachments not recommended by the appliance
manufacturer may cause injuries.
17. This product is for household use only .Do not use outdoors.
18. Do not let cord hang over edge of table or counter, or touch hot surfaces.
19. Do not place the unit on or near a hot gas or electric burner, or in a heated
oven.
20. Caution: to reduce the risk of electric shock, cook only in the provided
removable container (cooking pot).
21. Do not use incompatible removable container ( cooking pot )or sealing
ring (gasket) to avoid pressure leakage.
22. To disconnect ,turn any control to “off” ,then remove plug from wall outlet.
23. Do not place the unit on an unstable location it is strictly prohibited to use
it on a newspaper ,foam or other object that may easily block the vent holes
at the bottom.
24. Do not use it in a place which is near splash water or fire. Do not use it in
a place exposed to directly to sunshine or oil splash. Put it in a place out of
the reach of children.
25. Before use each time ,be sure to check the anti-block shield ,float valve
and exhaust valve(steam release handle) for obstruction ,wipe the surface
of the inner pot and the heating plate to confirm they are free of any foreign
object; make sure the steam release handle is in sealing position .
26. Do not move this product or force to remove the lid when the unit is in
operation .
27. Do not place your hands or face over the exhaust valve (steam release
handle ) or float valve to avoid scald when the unit is in operation .
28. To reduce the risk of fire or electric shock, only authorized personnel
should do repairs.
29. Do not cover the pressure valves.
30. This appliance is not intended for use by persons(including children)
with reduced physical,sensory or mental capabilities, or lack of experience
and knowledge,unless they are accompanied by a person responsible for
their safety .
31. Do not use this product on any electrical system other than voltage:
120V~/60HZ.
32. A short power-supply cord is used to reduce the risk resulting from it
being grabbed by children ,becoming entangled in ,or tripping over a linger
cord.
33. Intended for countertop use only.
34. WARNING: Spilled food can cause serious burns, keep appliance and
cord away from children ,Never drape cord over edge of counter ,never use
outlet. below counter ,and never use with an extension cord.
3 4
Before each use ,Please make sure to inspect the following:
1.The anti-block shield ,float valve and exhaust valve are not blocked
by food debris.
2.The bottom surface of the inner pot and the heating plate are free of
any foreign objects.
3. The steam release handle is in the “sealing” position for all pressure
cooking.After cooking ,wait until the cooker cools down for a while and
release the pressure using the steam release handle. Use extreme caution
when opening the lid .Scald and serious burns can be caused by the steam
inside the unit .If all LCD lights are lashing on the control panel, unplug the
power cord immediately and consult the “Troubleshooting “ section.
Care must be taken with the sealing ring to avoid deformation .Failure to do
so may prevent the product from working properly .
PRECAUTIONS
High safety standard: 10 safety mechanisms and ETL safety certification .
Multi-function :Braising ,pressure cooking ,stewing ,steaming ,simmering ,
slow cooking ,saute/browning ,fermenting, making yogurt and keeping warm.
14 convenient cooking programs controlled by a microprocessor : Simply
press one of the function keys to start cooking. The microprocessor controls
the time ,cooking pressure and temperature eliminating the need to watch
over the cooker in the kitchen.
4.Clean and pleasant:TEKAMON produces very little noise and leaks almost
no steam. This keeps the aromas and flavor of ingredients in the food and
avoids messy spills ,splashes or spatters to clean up.
5.D ual pressure settings for fast and flexible cooking: Cooking with the high
pressure reduces cooking time by up to 70% and low pressure avoids
overcooking delicate food.
6.U p to 24-hour delayed cooking: Long 24 hour timer. Perfect for meal
planning .
7.A uto keep warm: After cooking ,the keep-warm function starts
automatically for 24 hours .
8.D ishwasher safe stainless steel inner pot and steam rack .
FEATURES SPECIFICATIONS
5 6
✸ Working pressure : 40-70kPa
✸ Steam release pressure limit: (90kPa)
✸ Warm temperature :65℃~80℃
Model Power
supply
Rated
power
Capacity
Weight Dimension
Diameter
YBW60-100F
120V~60HZ
1000W
6L 22cm
8.66in
5.1kg
33.4x30.5x33cm
13.1x12x13in
Accessories
Rice paddle,soup spoon , Measuring cup, Steam rack ,
Silicone mini mitts, User manual and recipe booklet .

1.Open the lid. Hold the handle, turning in clockwise direction to the limited
side, and than open it. (Illustration 1&2&3)
2.Take out eh inner pot and Put the food and water in the inner pot. The food
and water should not be more than 4/5 of the total, the easy-expanding food
not more than 3/5, while, the food and water should not be less than 1/5.
(Illustration 4,5&6)
3. Put the inner pot into the Middle pot . Wipe the bottom of the inner pot
and surface of the heating plate clean before putting them in .No sundries
should be placed on the surface of the Middle pot and heating plate; After
placing ,gently rotate the inner pot left and right to keep good contact
between the inner pot and the heating plate (Illustration 7)(Illustration 8 is
an error placement).
GUIDE TO OPERATION
3
8
PRODUCTSTRUCTURE
18
20
21
1. Lid handle
2. Lid
3. Cover Lid
4. Steam release valve
5. Exhaust pipe
6. Float valve
7. Float
8. Inner pot
9. Middle pot
10. Middle ring
11. Control panel
12. Heater
13. Collector box
14. Cooker handle
15. Cooker housing
16. Power line+plug
17. Base
18. Seal ring of float valve
19. Seal ring
20. Anti-block nut
21. Panel sticker
7
12
4 5 6
7 8

9
4. Close the lid .
✸ Check that the sealing ring is in the lid.
✸ Turn the seal ring from left to right with your hand so that it is free and
evenly placed inside the lid
✸ Hold the lid handle and put it in the limited area, Then turn the lid
counterclockwise to the limit position to lock up the lid.
(Illustration 9. Illustration10)
10
PRESSURE COOKER CONTROL PANEL
Pressu re
Mode
Low
Less
High
Normal More
Cake Dessert Pasta
Pizza Canning Pie
Pretesting Co oking K eep War m
Preset
pressure
Cooking
programs
Preset
pressure
Cooking
programs
Reduce or add
time for Delay
Start
Adjust pressure level
(Low or High)
Toggle to automatically
Keep Warm at end
of cooking cycle
Preset yogurt
Program
Manual
Pressure
cooking
Set amount of time
until cooking program
starts
Cancel the current
operation LCD screen
will display 00:00 standby
Preset Bake
Program
(no pressure)
Manual slow
cooking
(No-Pressure)
Heats inner
pot for sauteing
(no pressure)
9 10
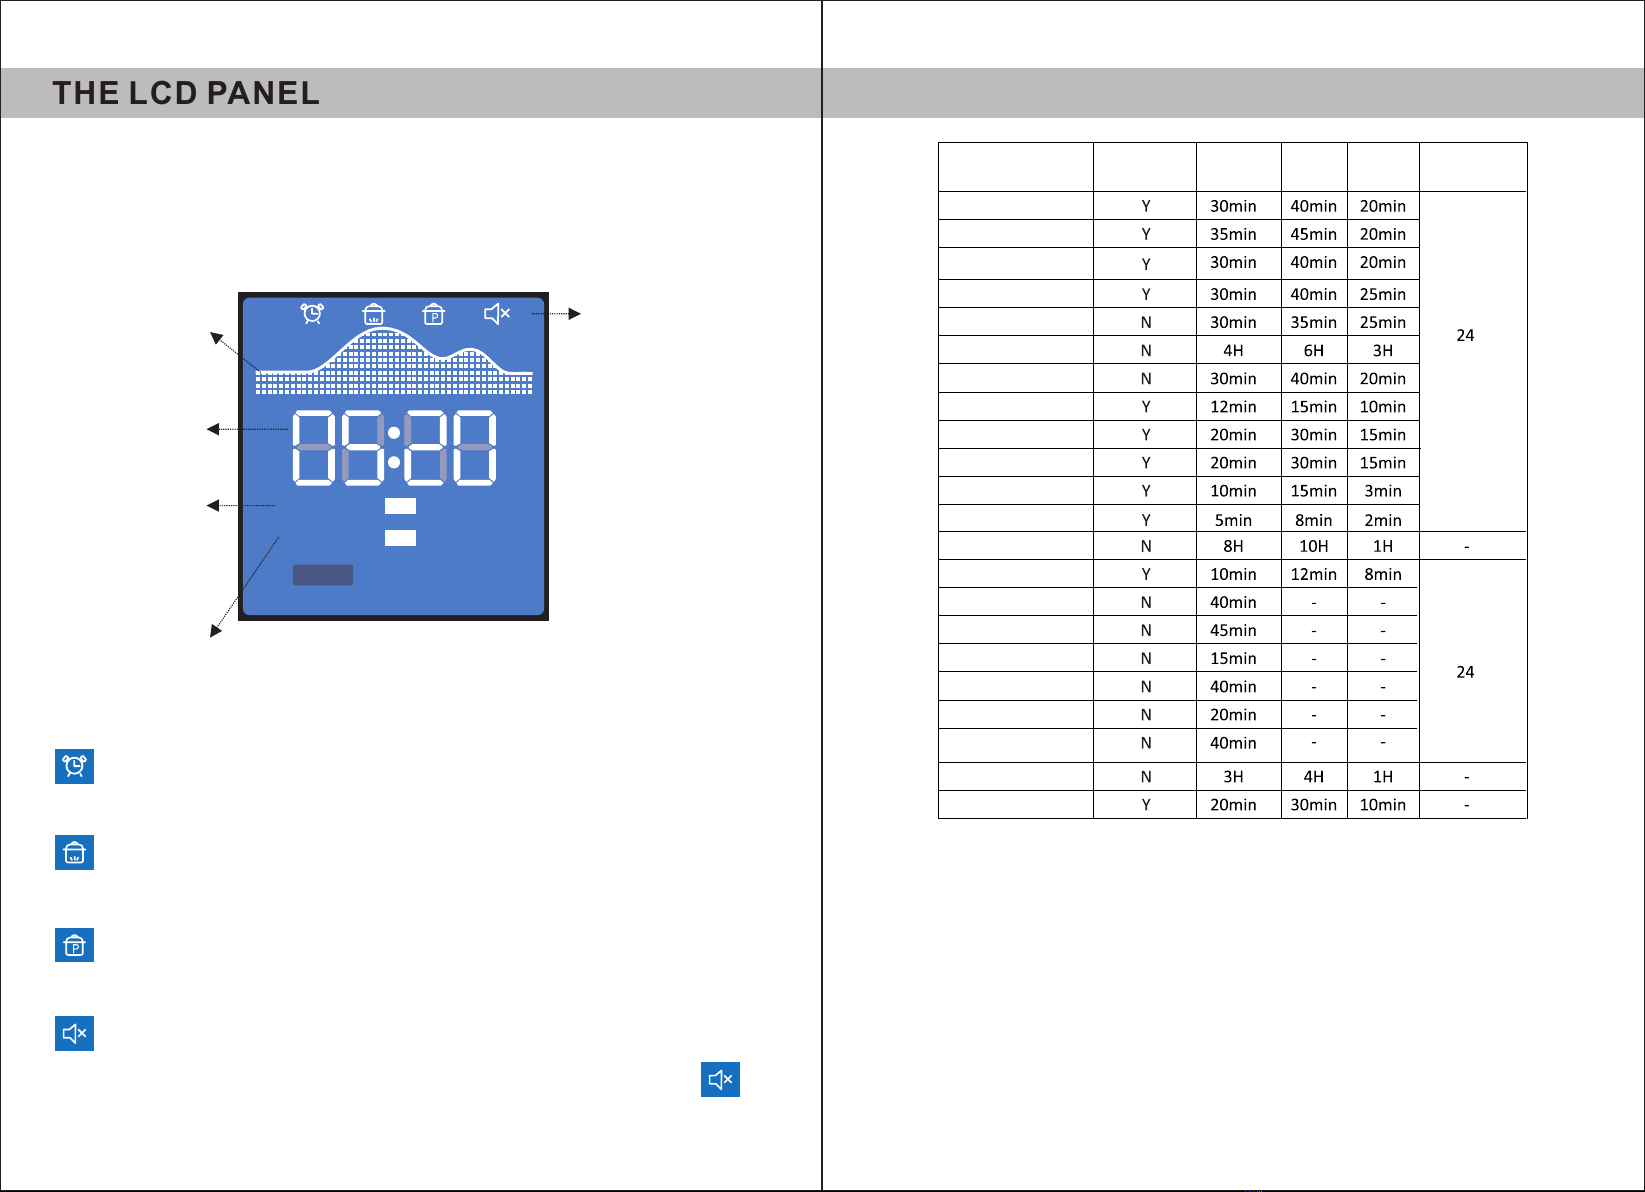
The Large LCD display users symbols, words and numbers to convey
time ,pressure levels,mode, cooking progress and messages.
Pressure
Mode
Low
Less
High
Normal More
Cake Dessert Pasta
Pizza Canning Pie
Pretesting Cooking Keep Warm
THE LCD PANEL
The icon lights up when ‘Delay Start’ is selected, and the icon
disappears when no use of delay start function.
The icon lights up when in Pre-heating stage, and light off when no
heating.
The icon lights up when there’s pressure, and lights off when no
pressure.
In the standby state, press and hold the cancel button for 10 seconds
to cancel the buzzer sound. When the sound is off, the icon will be .
When the sound is on, the icon will not be displayed.
11 12
Sound Indicator
Displays whether
Sound is ON or OFF
Safety alerts never
turn off
To turn sound off
Press CANCEL to
Stop all programs
The LCD Screen will
display 00:00
Time
Mode Indicator
(Less,Normal or More)
Pressure Level
Indicator
(Low or High)
Time Display
(indicates cook
time)
Status indicator
(Displays current
stage:Preheating
cooking or
keep warm)
Functions Pressure Normal More
Soup/Broth
Meat/Stew
Bean/Chili
Poultry
Bake
Slow Cook
Saute
Rice
Multigrain
Porridge
Steam
Egg
Yogurt
Pressure Cook
Cake
Dessert
Pasta
Pizza
Canning
Pie
Sous Vide
Sterilize
Less Keepess
Warm (h)
1. Power on status
When plug into the socket, all the indicator lights and LCD lit on for 1
second then to standby mode.return
2. Standby status
4 digital displays”00:00” here”:” in the middle of “00:00” doesn’t flicker.
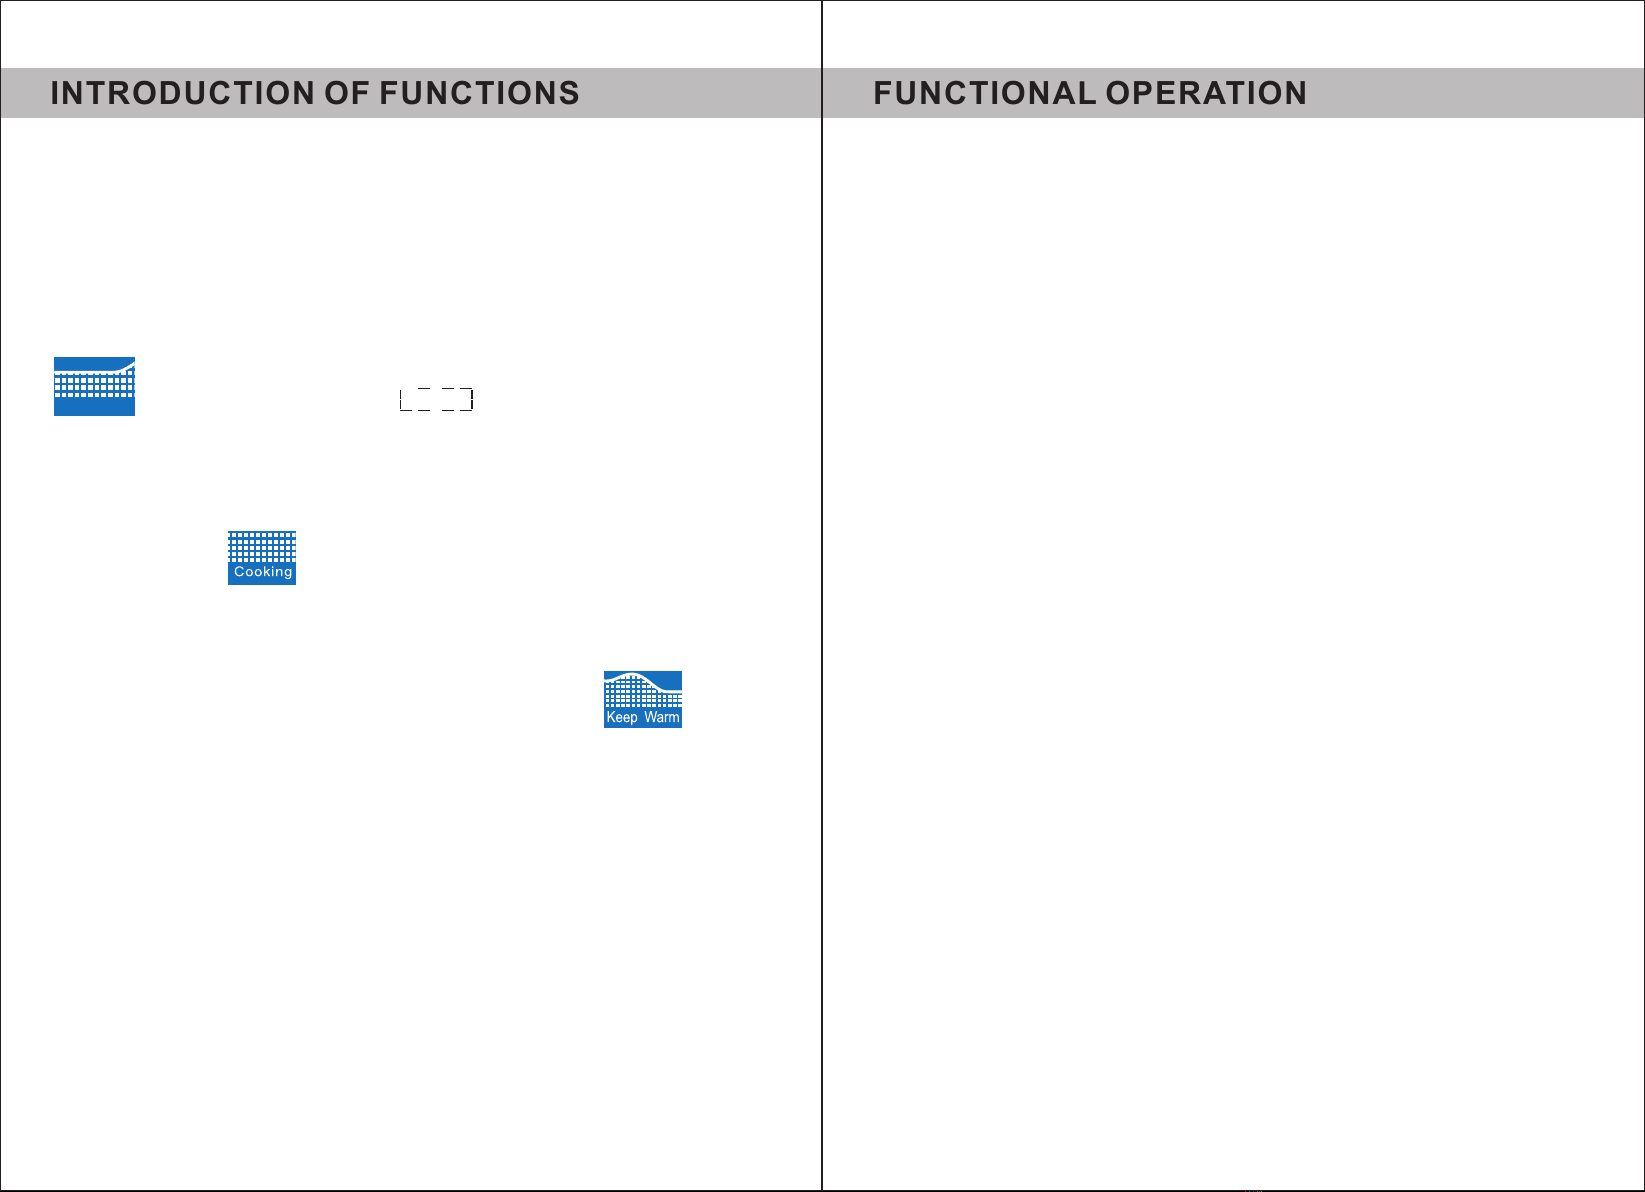
3. Preheat status
When select a cooking function, the indicator light on ,choose a suitable
pressure level and mode,when enter into preheat stage, Pre-heating will lit
and 4 digital tube shows “ ” moving.
INTRODUCTION OF FUNCTIONS
Pretesting
4.Timing status
When the pressure in the pot is to achieve the set pressure or temperature
automatically after the state of the timer ,digital display system is set ,the
function of the holding time ,and with the countdown display, cooking
progress bar light , after the pressure maintaining process ,buzzer
sing channel 5,enter a state of 24 hours heat preservation,heat
preservation lights ,digital tube display total heat preservation time ,cook
a complete.
5. Warming status
When enter into warming stage,keep warm will light up , and
keep warm button light on and timer shows keep warm time, from 0-24h,
when finished ,1 beep sounds.
1. Keep Warm
In standby mode, press” keep warm” button, warm indicator light on ,the
digital tube displays count up time ,pressure cooker enter into warming
stage, after 24 hours return to standby status.
2. Cancel
Press “cancel” to return to standby (except the alarm state).
3. “+” “-” Buttons
When select “Delay start” ,press +\- to adjust the time ,00:10~24:00;
FUNCTIONAL OPERATION
4. Mode Setting
When a cooking function is selected,the default mode is Normal,re-press
the function can select from less to more; Special cook cannot adjust Mode;
5. Pressure Level:
When a cooking function with pressure is selected ,press “ Pressure
Level” to select low or high pressure.
6. Delay Start:
Press “delay start”, display screen shows default time“00:10”, repress
“Delay Start’ can select from minutes to hour, when preset the time, select a
function in 5s, when the function is selected, the indicator light on, after 5s,
the indicator light off and it starts the function.
If no action after the time is settled, it returns into standby state.
7. Rice、Multigrain、Porridge、Steam、Egg、Sous Vide、Sterilize、
Soup/Broth、Meat/Stew、Bean/Chili、Poultry 、Pressure Cook :
✸You can also manually input your own settings by using the Pressure Cook
function. Complete the following steps to run a pressure cooking program.
✸Place the steel pot inside the base and plug in your the Pressure Cooker.
The LCD screen will display 00:00.
1413

✸When you are finished using Bake, press CANCEL. The LCD screen will
display 00:00.
10.Slow cook
✸Place the steel pot inside the base and plug in your Pressure cooker.The
LCD screen will display 00:00.
✸Add prepared ingredients into the stainless steel pot.
✸Lock the lid in place and turn the steam release valve handle to RELEASE.
✸Select SLOW COOK,Press SLOW COOK again to adjust cooking time .
( Options are LESS, NORMAL (default), MORE).
✸After 6 seconds the program will begin. Your Pressure cooker will beep one
time and the LCD screen will display to indicate that the Pressure
cooker is preheating .When preheating is complete the LCD screen will
display the remaining cook time .
✸When cooking is complete ,the Pressure cooker beeps one time and
automatically switches to KEEP WARM. The LCD screen will now display the
elapsed time after cooking is complete. After 24 hours, the pressure cooker
will automatically switch to 00:00.
11.Yogurt
✸Making yogurt is simple with your Pressure cooker . All you need is some
milk and a bit of active culture
1.Stir active culture into warm milk according to your recipe. Return steel
pot to Multi-Use Pressure cooker base.
2.Lock the lid in place . The steam release valve handle can be turn to
Release position .
3.Select Yogurt: Press Yogurt again until Normal displays with 8 hours
timer on the LCD screen,Press Yogurt again to adjust cooking time .
4.After 6 seconds the Pressure cooker will beep 1 times and the LCD screen
will display timer when cooking begins. ( the yogurt timer will start as the
time selected counts down .)and
5.When cooking is complete ,the LCD screen will turn off .Transfer yogurt
to containers and refrigerate as directed by your recipe.
16
✸Place your prepared ingredients in the pot ,ensuring that there is at least
1cup of liquid in the recipe.
✸Lock the lid in Place ,Turn the steam release valve handle to SEALING
and select your preset program or pressure cook Adjust time and pressure
according to your needs and recipe.
✸After 6 seconds,the Pressure Cooker will beep 1 times and your program
will start automatically .The LCD screen will display the time ,pressure level ,
mode and preheating status .Depending on the amount of ingredients and
temperature ,it may take anywhere between 2-40 minutes to preheat and
build pressure .As the cooker heats and pressure builds. The float will rise,
When pressure is reached ,the status indicator will finally display COOKING
and the timer will begin.
✸When cooking is complete ,the Pressure Cooker will beep one times and
switch to KEEP WARM. The LCD screen then displays the elapsed time ,
After 24 hours, the Pressure Cooker automatically switches 00:00.
8. Sauté
✸ Select Sauté. Press Sauté to enterin to default mode “NORMAL” and then
is “MORE”, “LESS”.
✸After 6 seconds the program will begin.Your Pressure cooker will beep1times
and the LCD screen will display to indicate that the Pressure Cooker
is preheating .The LCD screen will display 00:30 and begin Counting down.
✸Add ingredients to the stainless steel pot and cook according to your recipe.
✸When you are finished using Sauté, press CANCEL. The LCD screen will dis-
play 00:00. CAUTION: “ Sauté” function works without the pressure cooker Lid.
9. Bake
✸Select Bake. Press Bake to enterin to default mode ROMAL,MORE, LESS.
✸After 6 seconds the program will begin .Your Pressure cooker will beep 1
times and the LCD screen will display to indicate that the Pressure
Cooker is preheating .The LCD screen will display 00:30 and begin Counting
down.
✸Add ingredients to the stainless steel pot and cook according to your recipe.
15
Caution: Please make sure the appliance has cooled down and is
unplugged before cleaning.
1.Clean the product after each use . Wipe the black inner housing rim and slot
dry with cloth to prevent rusting on the exterior pot rim .
2.Remove the lid and take out the inner pot ,wash them with detergent ,rinse
with clear water and then wipe dry with a soft cloth. The stainless steel inner
pot is also dishwasher safe.
3.Use water to clean the lid ,including the sealing ring(which can be removed ),
Release valve, anti-block net ,and wipe them clean with dry soft cloth. Do not
take apart the steam release pipe assembly.
4.Clean the cooker body with clean damp cloth .Do not immerse the cooker in
to water. Do not use wet cloth to clean the pot while the power cord is plugged
into the power outlet .
5.Check the pressure limited valve and exhaust pipe regularly to ensure that
they are not blocked.
CLEANING AND CARE
18
12.Special Cook (Cake/ Dessert/ Pasta/ Pizza/ Canning/ Pie)
✸You can also manually input your own settings by using the Pressure Cook
function. Complete the following steps to run a pressure cooking program.
✸Place the steel pot inside the base and plug in your the Pressure Cooker.
The LCD screen will display 00:00.
✸Place your prepared ingredients in the pot ,ensuring that there is at least
1cup of liquid in the recipe.
✸Lock the lid in Place ,Turn the steam release valve handle to “SEAL” and
select your preset program or pressure cook Adjust time and pressure
according to your needs and recipe.
✸After 6 seconds,the Pressure Cooker will beep 1 times enter to fault
“Cake” program and then will start automatically .The LCD screen will
display preheating status and the time. Press “Special cook” again ,
the LCD screen displays “Dessert” program,repeat in this way ,the LCD
screen displays “pasta”,” pizza” “Canning” “ Pie”.
Depending on the amount of ingredients and temperature ,it may take
anywhere between 2-40 minutes to preheat and build pressure .As the
cooker heats and pressure builds. The float will rise,When pressure is
reached ,the status indicator will finally display COOKING and the timer
will begin.
✸When cooking is complete ,the Pressure Cooker will beep times and
switch to KEEP WARM. The LCD screen then displays the elapsed time ,
After 24 hours, the Pressure Cooker automatically switches 00:00.
17
Table of contents


