4
DUOS inCO2 WIRELESS TRANSMITTER INSTALLATION GUIDE
01
step
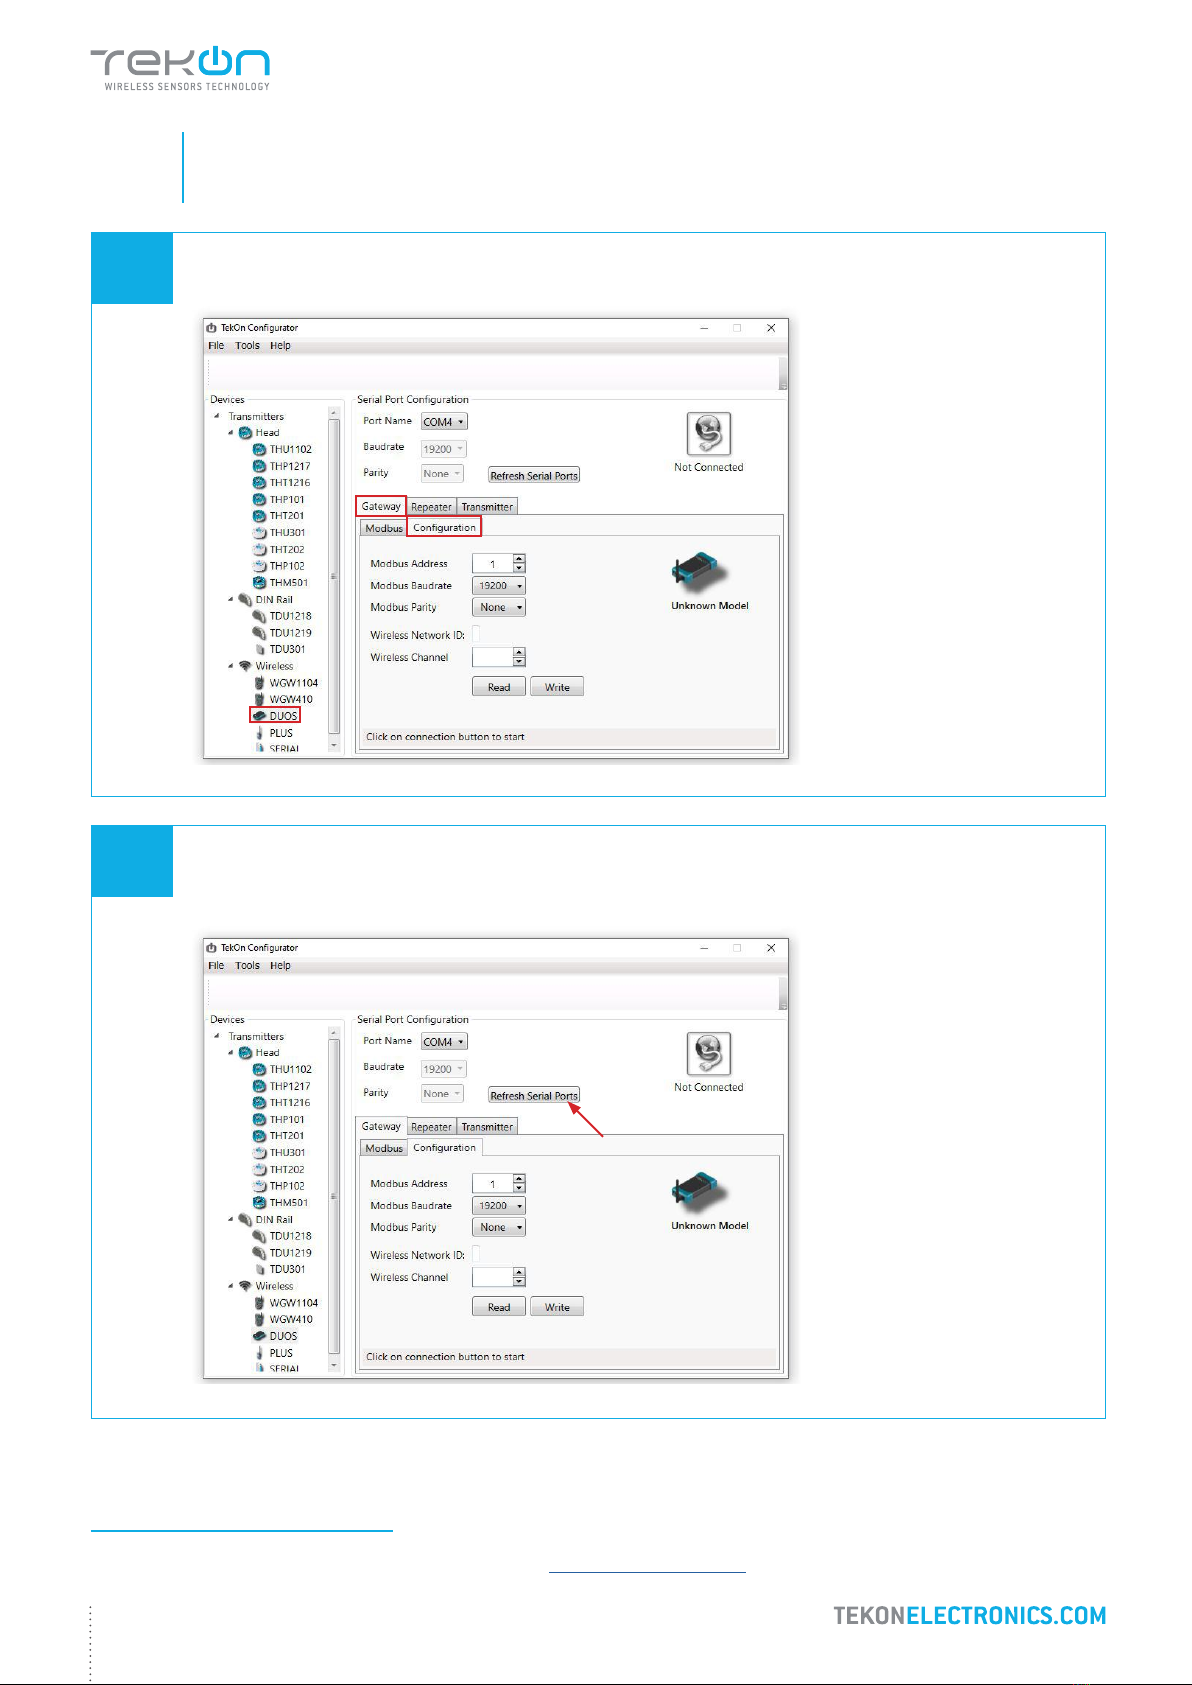
CONNECT AND CONFIGURE DUOS WIRELESS GATEWAY
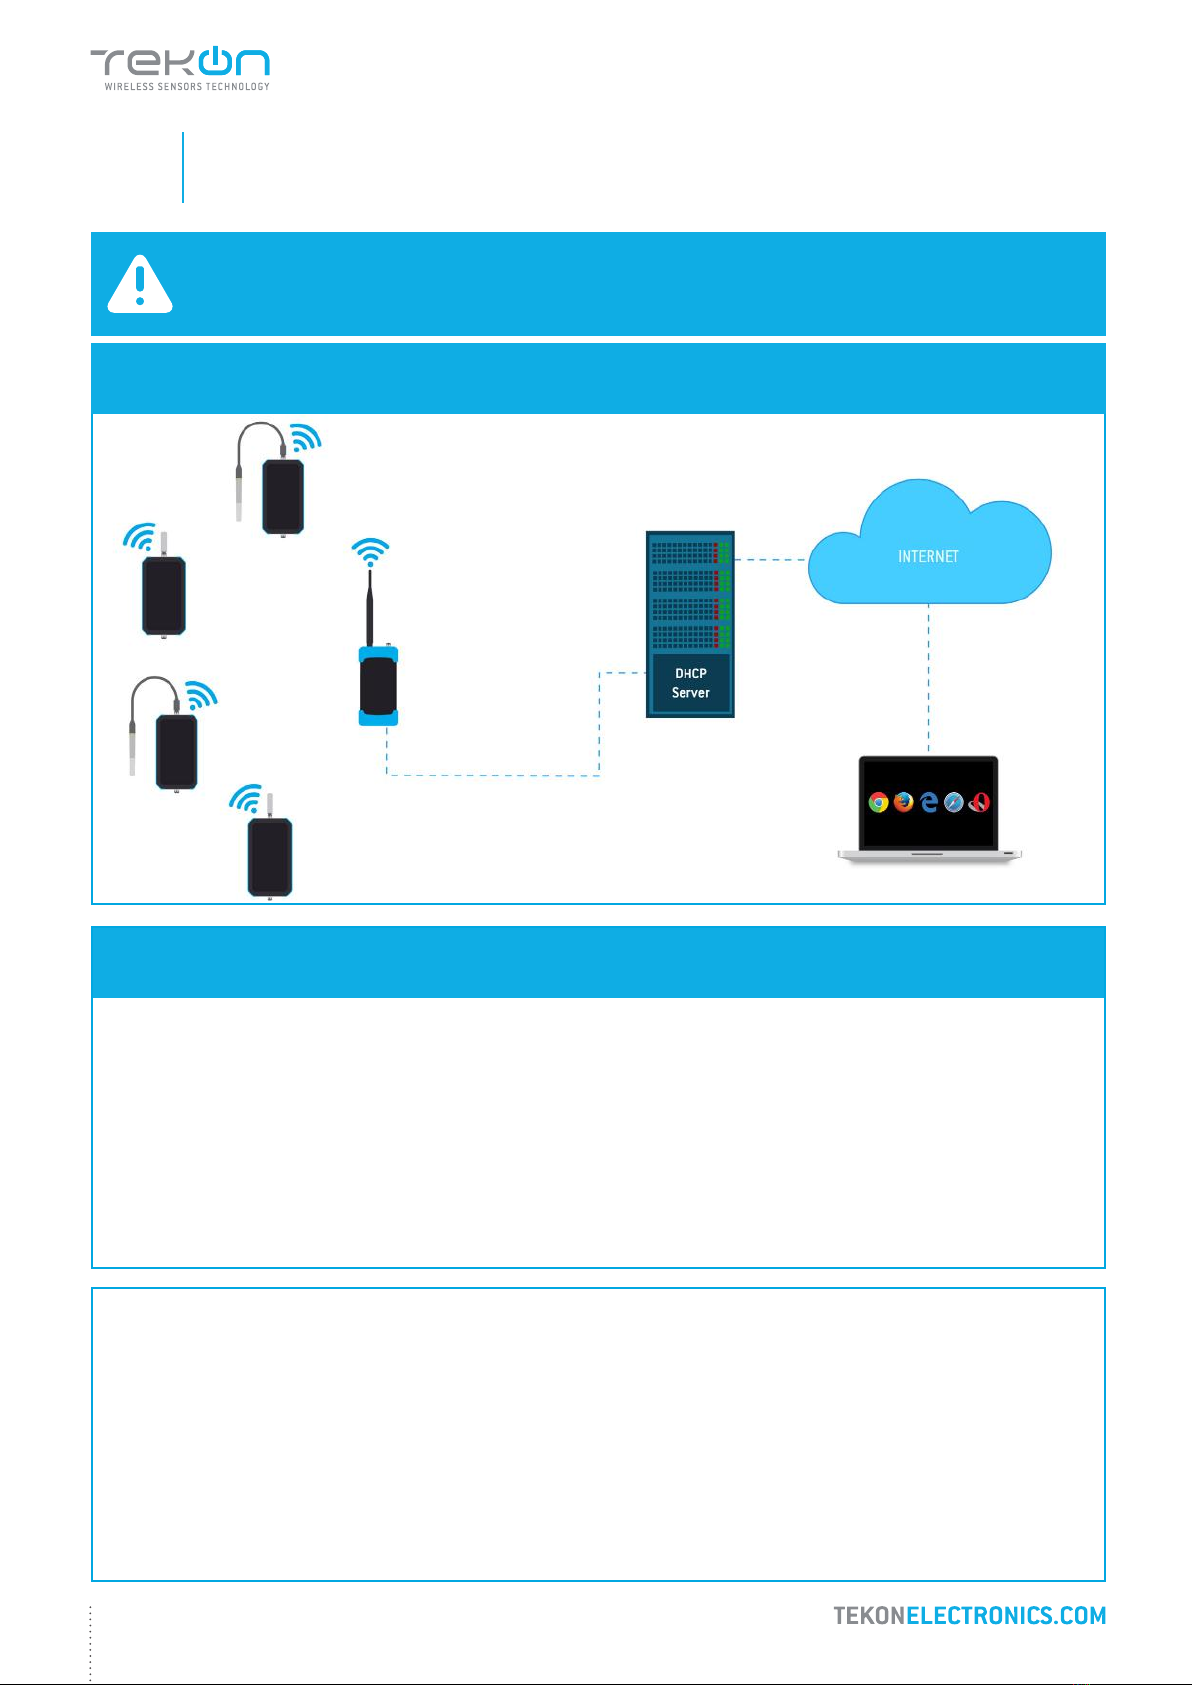
SYSTEM ARCHITECTURE
MINIMUM REQUIREMENTS
The right application of DUOS IoT GATEWAY only occurs if all minimum requirements are met by the customer side. The
architectural minimum requirements needed to successfully use this device are:
- Ethernet cable (included with your DUOS IoT GATEWAY);
- DHCP server;
- Web browser with the latest version;
You must have a DHCP server in your network. The main purpose of this kind of server is to automatically provide and
assign IP addresses and other network parameters to connected devices.
NOTE:
If your device is a DUOS IoT GATEWAY, please consider the information on this page. If your device is a DUOS
GATEWAY, please go to the next page to start the equipment setup.
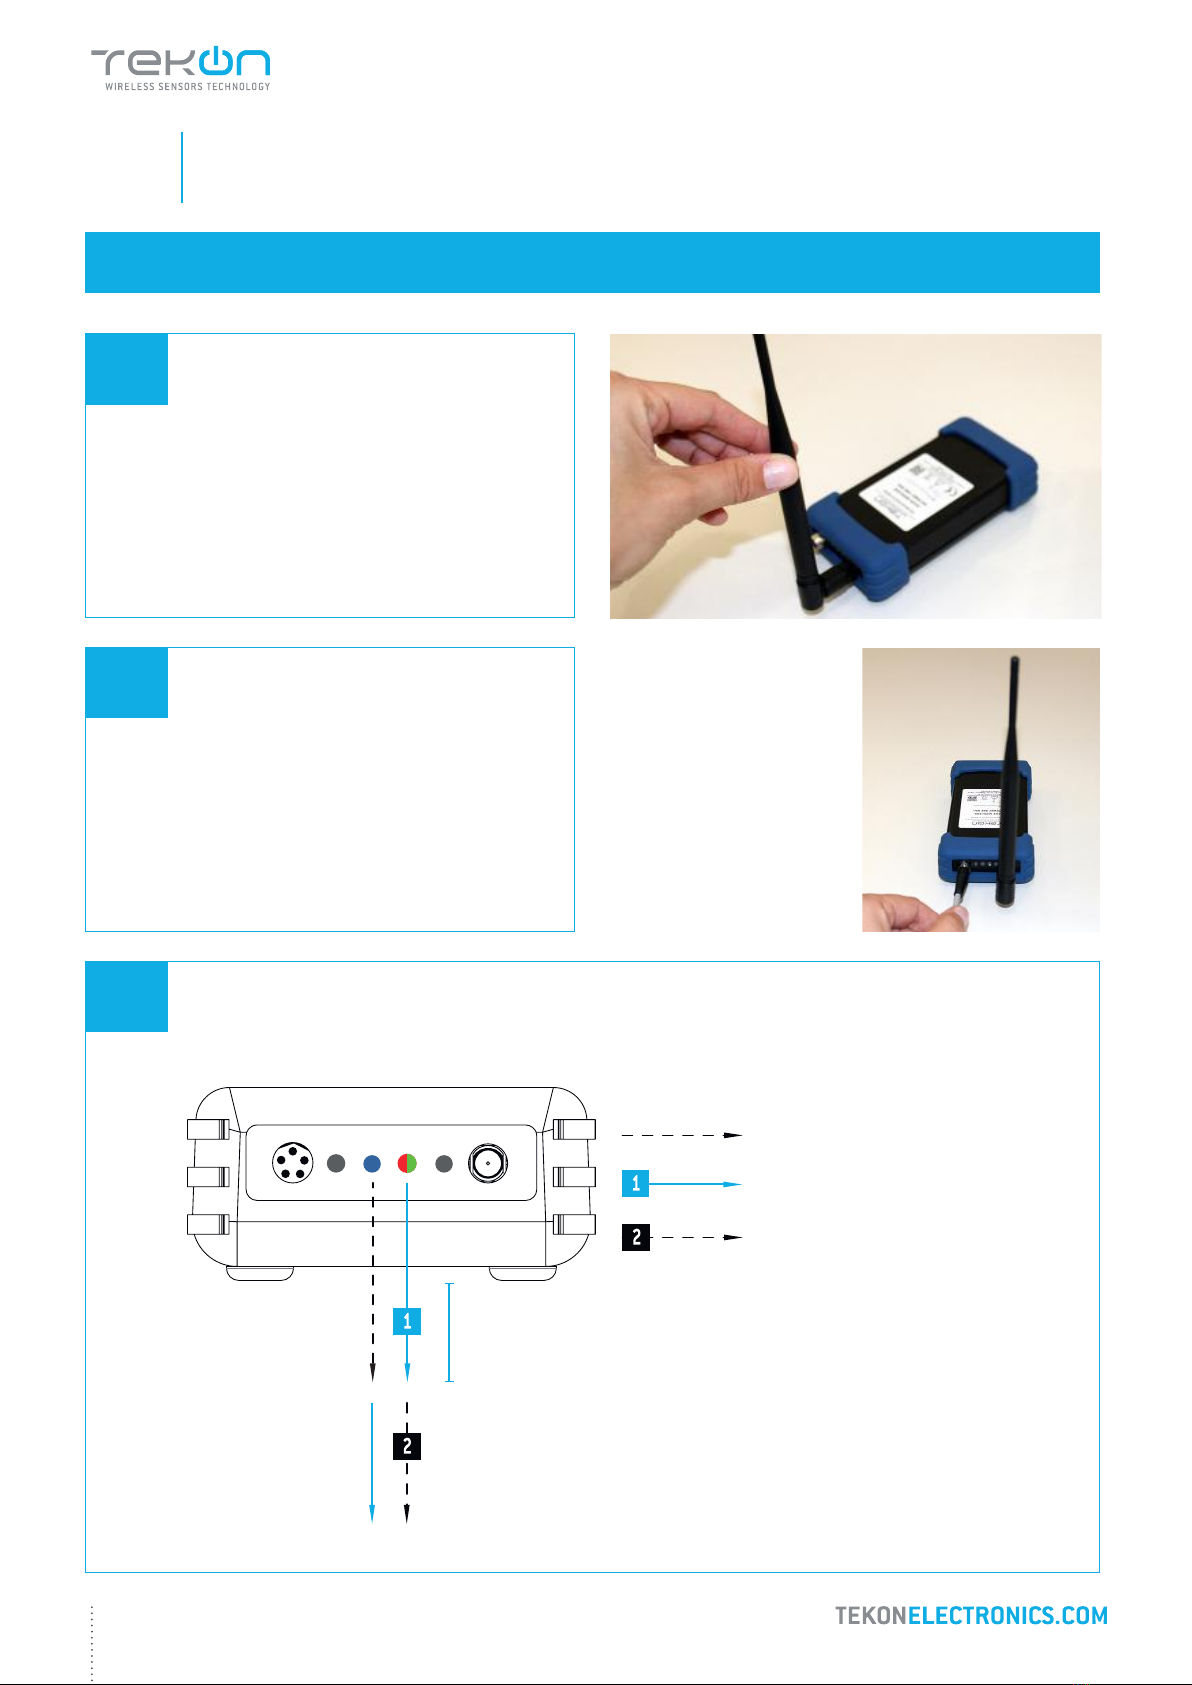
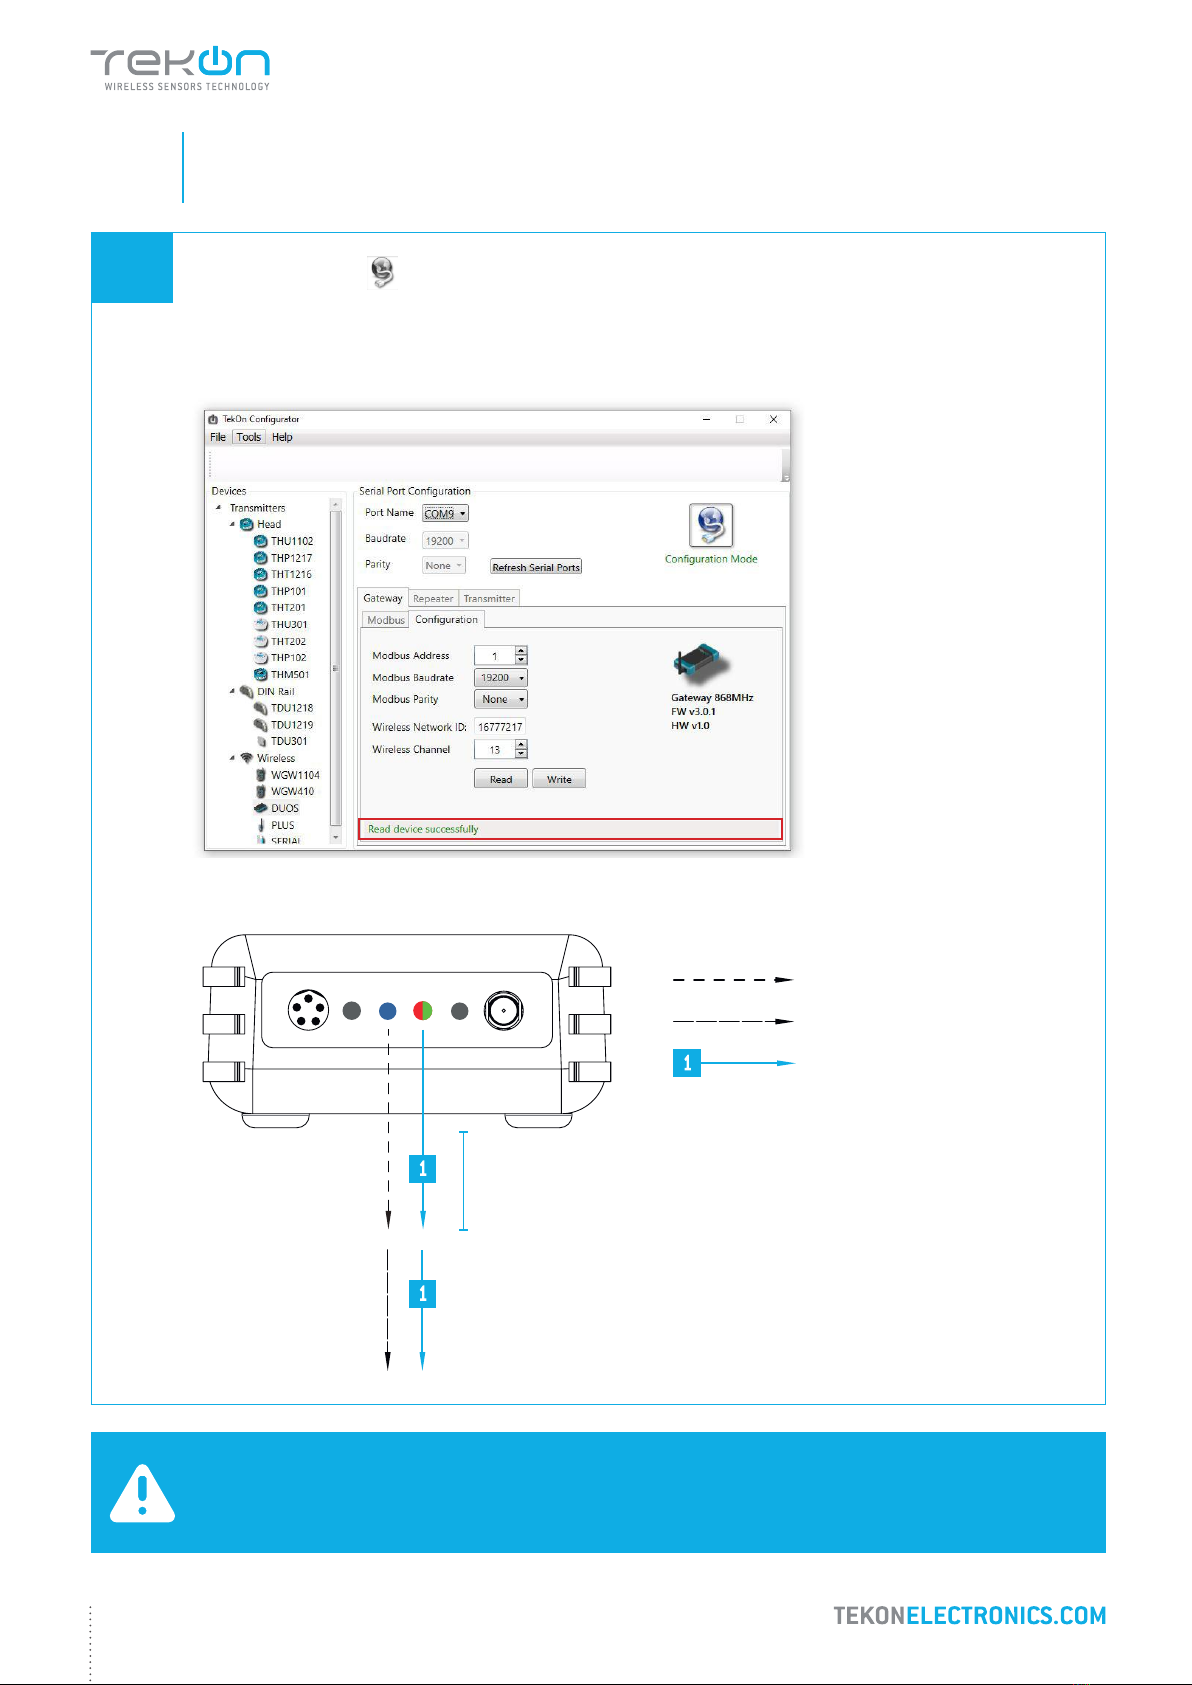
To begin the configuration of DUOS IoT GATEWAY, the pin of
button mode, must be in the Config Mode side.
After completing the setup procedures, go to step 5 to
begin the connection to the platform.