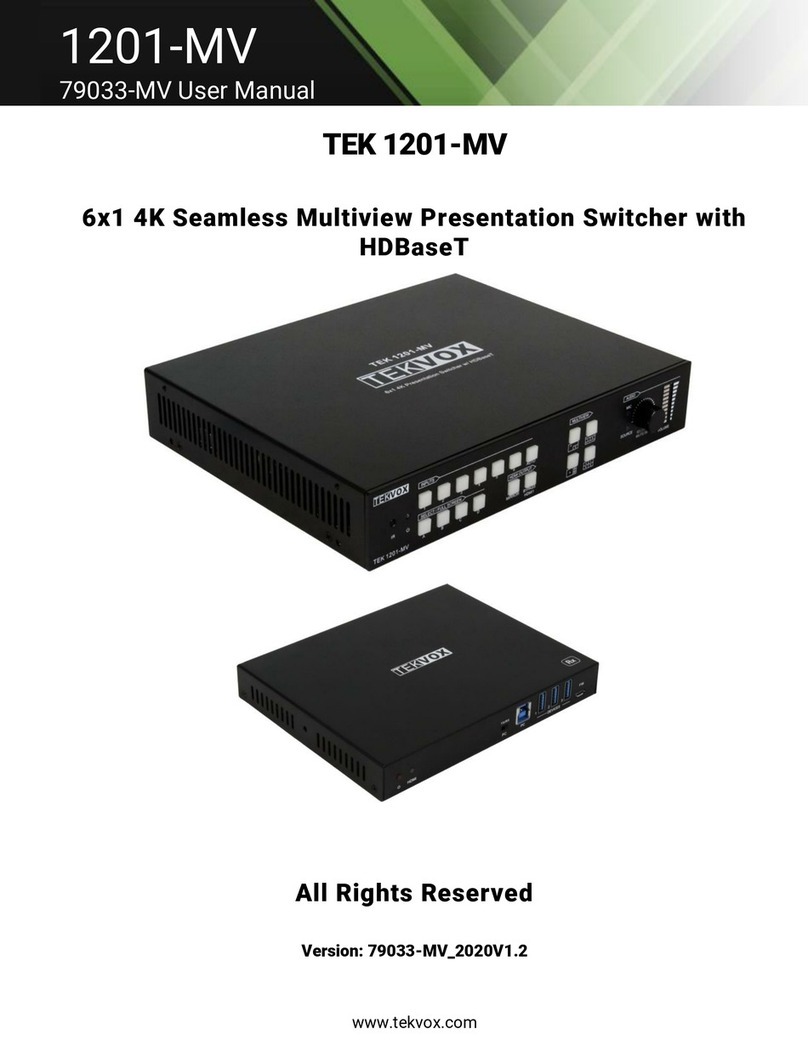
Tekvox TEK 1201-HD User manual

TEK 1201-HD Presentation Switcher
User’s Manual
March 10, 2015
Please read this manual carefully before using the system.


Attention:
This manual only includes operational instructions and specifications,
and is not intended to be used for service. Specifications are subject to
change without notice. Please ask your local dealer for detailed
information.
© Copyright 2011 - TEKVOX, Inc. No part of the contents of this book
may be transmitted or reproduced in any form or by any means without
the written permission of TEKVOX, Inc. All rights reserved.
Please check website or contact local supplier for updates.
www.tekvox.com

Operation Notice
In order to ensure the proper use of the product and the user’s safety, please
comply with the following items during installation and maintenance:
The system must be properly connected to earth ground. Do not use ungrounded
or two bladed plugs and ensure the alternating power supply ranged from 100v to
240v and from 50Hz to 60Hz.
Do not operate the device in locations above 100° F and below 30°F.
To avoid any damage by over heat, please provide adequate ventilation to
radiate the heat when operating the device.
The device should be turned off when in wet or humid areas.
The AC power supply line should be disconnected from main power during the
following operations:
•Remove or reinstall any component on the device.
•Disconnect or re-connect any connector on the device.
Please do not attempt to remove the cover on the device. There are no
serviceable components and high-voltage is present inside with risk of the
electric shock.
Do not splash any chemical product or liquid on or near the equipment.

Contents
1.#DESCRIPTION#...................................................................................................................................................#1!
2.#FEATURES#........................................................................................................................................................#1!
3.#FRONT#AND#REAR#PANEL#DESCRIPTION#............................................................................................................#2!
4.#TPHD402R#........................................................................................................................................................#2!
5.#IR#REMOTE#.......................................................................................................................................................#3!
6.#CONNECTION#DIAGRAM#...................................................................................................................................#4!
7.#VIDEO/AUDIO#DESCRIPTION#............................................................................................................................#5!
7.1!VIDEO!AND!S-VIDEO!INPUT!.........................................................................................................................................!5!
7.2!YPBPR!INPUT!...........................................................................................................................................................!5!
7.3!VGA!INPUT!.............................................................................................................................................................!5!
7.4!HDMI!INPUT!...........................................................................................................................................................!6!
7.5!AUDIO!INPUT/OUTPUT!...............................................................................................................................................!6!
8.#OSD#OPERATION#(ON-SCREEN-DISPLAY)#...........................................................................................................#6!
8.1!PICTURE!SETTINGS!....................................................................................................................................................!6!
8.2!AUDIO!SETTING!........................................................................................................................................................!7!
8.3!SYSTEM!SETTING!......................................................................................................................................................!7!
9.#RS-232#CONTROL#..............................................................................................................................................#7!
9.1!PROTOCOL!..............................................................................................................................................................!7!
9.2!RS-232!COMMANDS:!...............................................................................................................................................!8!
10.#TCP/IP#CONTROLLING#...................................................................................................................................#11!
10.1!IP!CONFIGURATION!...............................................................................................................................................!11!
10.2!CONNECTION!AND!CONTROL!...................................................................................................................................!12!
11.#FIRMWARE#UPDATING#.................................................................................................................................#12!
12.#TECHNICAL#SPECIFICATION#...........................................................................................................................#13!
SERIAL!CONTROL!INTERFACE!...........................................................................................................................................!13!
OUTPUT!.....................................................................................................................................................................!13!
GENERAL!....................................................................................................................................................................!13!
13.#PROBLEMS#SOLVING#&#MAINTENANCE#........................................................................................................#14!
14.#WARRANTY#..................................................................................................................................................#14!


TEK 1201-HD Presentation Switcher
TEKVOX, Inc. 1 www.tekvox.com
512.808.0845
1. Description
The TEK 1201-HD presentation switcher scaler designed with enough inputs to fit most needs for
classrooms and conference rooms. For easy installations the TEK 1201-HD not only has mirrored
VGA and HDMI outputs, it also includes an HDBaseT Cat 5 output with a receiver. Other features
include a microphone input, a stereo line input for mixing (iPod and VTC) and an integrated 20 watt
amplifier. The most impressive feature is the TEK 1201-HD can be controlled from both the main unit
and the RS-232 connection on the receiver or even control our TEK 2. This allows for the TEK 1201-
HD to be controlled from a remote control system without having to run an additional RS-232 cable.
Other options of the TEK 1201-HD are available by request such as lower cost version without the
HDBaseT connection and a full version with a TCP/IP connection.
2. Features
•4 HDMI 1.3 inputs with HDCP
•4 VGA inputs
•1 YPbPr input
•2 Video inputs
•S-Video input
•Mirrored HDMI and VGA outputs
•Mirrored HDBaseT output
•HDBaseT receiver with RS-232
•Output Resolution: XGA, WXGA, 720P, HD 1360x768 and 1080P
•IR Remote Control with OSD
•RS-232 control from main unit or receiver
•1 Microphone input
•1 Stereo Line Level Mix input
•Speakers 10/20 Watts 8/4 Ohms
•Separate Volume Controls for both Sources and Microphone/Line Mix inputs

3. Front and Rear Panel Description
1. Power indicator and IR input
2. Input type selection – HDMI, VGA, VIDEO
3. Selects one of the four Channels of the selected type
4. Resolution selection – Please wait 5 seconds between selecting Resolution
5. Mic Volume Control – Controls the level of the Mic inputs
6. Line Volume Control – Controls the level of the Line/Video inputs
7. VGA and Audio outputs – All outputs are mirrored
8. HDBaseT output – Includes audio and control
9. HDMI Output – Includes audio
10. Four VGA inputs
11. Video input 1 Composite with audio
12. Video input 2 Component (YPbPr) – Shares audio with Video input 4
13. RS-232 control
14. TCP/IP - Optional
15. Line Power Connector
16. Four HDMI inputs – There are no separate audio inputs for HDMI
17. Four 3.5mm Stereo Audio input for the VGA inputs
18. S-Video input – Shares audio with the Video 1 input
19. Video input 4 Composite with audio
20. USB Input for firmware upgrading only
21. Mic and Line level stereo inputs
22. Stereo 10 Watts 8 ohm Amplifier per channel
4. TPHD402R
HDBaseT Receiver (200 feet)
1. HDBaseT input – Includes audio and control
2. HDMI Output – Includes audio
3. Not used
4. RS-232 control for TEK 902-HD
5. 5 Volt power

TEK 1201-HD Presentation Switcher
TEKVOX, Inc. 3 www.tekvox.com
512.808.0845
5. IR Remote
Remote Operation
Menu/
Volume
control
area,
MUTE for
Lline and
MIC
audio.
MIC volume control area,
can work when not in
MENU mode.
Direction and OK buttons
area, these buttons are
available only in MENU
mode.
Line volume control area,
can work when not in
MENU mode.
Source select area, 12
channels for inputs,
including:
4 HDMI
4 VGA
2 C-VIDEO
1 S-Video
1 YPbPr
Output resolution select
area, five different
resolutions can be
selected, including:
720P: 1280x720
1080P: 1920x1080
XGA: 1024x768
WXGA: 1280x800
HD: 1360x768

6. Connection Diagram

TEK 1201-HD Presentation Switcher
TEKVOX, Inc. 5 www.tekvox.com
512.808.0845
7. Video/Audio Description
Below are the detailed descriptions of inputs and outputs.
7.1 Video and S-Video input
Supports PAL/SECAM/NTSC formats
Allows for changeable aspect ratios. (Full-screen, wide screen, 4:3)
Color RGB adjustable
7.2 YPbPr input
Input
Resolution
Display Parameter
Frame
frequency
Frame
frequency
Frame
frequency
720x480I
2:1
525
15.75
60
4:3
720x480P
1:1
525
31.5
60
4:3
720x576I
2:1
625
15.625
50
4:3
720x576P
1:1
625
31.25
50
4:3
1280x720P
1;1
750
45
60
16:9
1280x720P
1:1
750
37.50
50
16:9
1920x1080I
2:1
1125
28.125
50
16:9
1920x1080I
2:1
1125
33.75
60
16:9
1920x1080I
2:1
1250
31.25
50
16:9
1920x1080P
1:1
1250
62.5
50
16:9
1920x1080P
1:1
1250
67.5
50
16:9
The bandwidth is up to 170MHz.
Changeable aspect ratios. (Full-screen, wide screen, 4:3, auto-adjust)
Supporting HDTV input
7.3 VGA input
The VGA resolution is VESA standard, supporting:
No.
Resolution
No.
Resolution
1
720×400@70 Hz
8
1024×768@70 Hz
2
640×480@60 Hz
9
1024×768@75 Hz
3
640×480@72 Hz
10
1280×768
4
800×600@60 Hz
11
1280×1024@75 Hz
5
800×600@72 Hz
12
1360×768@60Hz
6
800×600@75 Hz
13
1920×1080
7
1024×768@60 Hz
The bandwidth is up to 375MHz.
Changeable aspect ratios. (Full-screen, 4:3)

7.4 HDMI input
HDMI resolution support:
No.
Resolution
No.
Resolution
1
640×480@60 Hz
9
1024×768@70 Hz
2
640×480@72 Hz
10
1024×768@75 Hz
3
640×480@75 Hz
11
1280×1024@75 Hz
4
800×600@56 Hz
12
1280×720P
5
800×600@60 Hz
13
1360×768
6
800×600@72 Hz
14
1920×540
7
800×600@75 Hz
15
1920×1080I
8
1024×768@60 Hz
16
1920×1080P
Digital embedded audio decoding.
Changeable aspect ratios. (Full-screen, wide screen, 4:3, auto-adjust)
Support HDCP 1.3, compatible with DVI signal
7.5 Audio input/output
2 pairs of L/R analog audio input, 4 VGA audio and 2 MIC audio inputs
2x10W@8Ωamplifier output. L/R stereo audio output and HDMI embedded audio.
Volume/Bass/Treble adjustable
Audio status presets, changeable scene mode (Wall-mounted, Desk)
8. OSD Operation (On-Screen-Display)
The TEK 1201-HD provides On Screen Display (OSD) menu, with various functions and language.
The operation includes:
8.1 Picture Settings
The first icon from left of OSD menu is to set the
picture parameters. It includes the pictures mode
preset, color temperature, contrast, brightness,
hue, saturation, sharpness, scale, VGA setting
and Advance picture adjustments. Some
parameters are available depending on the input
type. For example: VGA setting can be set only
when a VGA input is displayed.
The Advance Picture Adjust can set the Digital
Noise Reduction, dynamic color, skin tone and
Adaptive Luma adjustments. DNR is suggested to
be on, it can make the output image clear and
smooth.

TEK 1201-HD Presentation Switcher
TEKVOX, Inc. 7 www.tekvox.com
512.808.0845
8.2 Audio Setting
The Second icon from left of OSD menu is
used to set the audio/sound parameters. It
includes the sound effect preset, bass,
treble, balance, scene mode, surround and
smart volume setting. Some parameters
are available depending on different type of
input.
8.3 System Setting
The Third icon from left of OSD
menu is the system setting. It
includes the OSD language
setting, audio listen only, and
freeze output picture etc.
Please check the picture below:
9. RS-232 Control
Send data without carriage return or line feed. Data cannot be typed in using a terminal program. You
must use a program that can send the complete command.
9.1 Protocol
Protocol: Baud: 9600bps 8, n, 1 format: ASCII without carriage return
Connector: 3.5mm EURO type connector, Left to Right: TX, GND, RX
Any change in status is automatically transmitted to the controller followed by a CR LF.

9.2 RS-232 Commands:
Command
(ASCII)
Function Description
Feedback
(example)
(ASCII)
0600%
MUTE Line
LINE Mute On
0601%
Un-Mute Line
LINE Mute Off
0602%
Line Audio Up
LINE Volume: XX
0603%
Line Audio Down
LINE Volume: XX
0604%
Lock the front panel button
Panel Locked
0605%
Unlock the front panel button
Panel Un-Locked
01XX%
Set Volume Level. XX = 00 to 99
Volume: XX
02XX%
Set brightness. XX = 00 to 99
Brightness: XX
03XX%
Set Contrast. XX = 00 to 99
Contrast: XX
04XX%
Set Saturation. XX = 00 to 99
Saturation: XX
05XX%
Set Sharpness. XX = 00 to 99
Sharpness: XX
0606%
Auto-adjust the input parameter(VGA only)
Adjustment
0607%
Auto-adjust the color temperature
Color Temp: XX
0608%
ZOOM the image, set the aspect ratio
Aspect Ratio: XX
0609%
OSD OK
OK
0610%
OSD Left
Left
0611%
OSD Right
Right
0612%
OSD Up
Up
0613%
OSD Down
Down
0614%
Set the picture mode
Picture Mode : XX
0615%
SM Mode
Sound Mode: XX
0616%
OSD MENU
MENU
0617%
Command to reset to factory defaults
Factory reset
0618%
Set Resolution to 1360X768 HD
Resolution: HD
1360X768
0626%
Set Resolution to 1024X768 XGA
Resolution: XGA
1024X768
0627%
Set Resolution to 1280X720 720P
Resolution: 720P
1280X720
0628%
Set Resolution to 1280X800 WXGA
Resolution:
WXGA 1280X800
0629%
Set Resolution to 1920X1080 1080P
Resolution: 1080P
1920X1080

TEK 1201-HD Presentation Switcher
TEKVOX, Inc. 9 www.tekvox.com
512.808.0845
Command
(ASCII)
Function Description
Feedback
(example)
(ASCII)
0630%
Get the volume level
LINE Volume:
XX/MIC Volume:
XX
0631%
Get the input source
Source: XXXXXX
0632%
Get the output resolution
Resolution:
XXXXXXXX
0633%
Get the image mode
Picture Mode : XX
0634%
Get the audio mode
Sound Mode: XX
0635%
Get the image aspect ratio
Aspect Ratio: XX
0636%
Get the brightness
Brightness: XX
0637%
Get the contrast
Contrast: XX
0638%
Get the saturation
Saturation: XX
0639%
Get the sharpness
Sharpness: XX
0640%
Get the color temperature
Color Temp: XX
0644%
Display OSD CHANNEL
OSD Source:
Display
0645%
Disable OSD CHANNEL
OSD Channel
(Source): No
Display
0646%
Display Volume Bar
Volume Bar:
Display
0647%
Disable Volume Bar
Volume Bar: No
Display
0648%
Enable Digital audio (HDMI and SPDIF) output
Digital Sound
Ouput: Enable
0649%
Disable Digital audio (HDMI and SPDIF) output
Digital Sound
Ouput: Disable
0650%
Get OSD CHANNEL display status
OSD Source:
Display
0651%
Get Volume Bar display status
Volume Bar:
Display
0652%
Get Digital audio output status
Digital Sound
Ouput: Enable
0655%
Freeze output image
Freeze: Enable
0656%
Cancel the freezing of output image
Freeze: Disable
0698%
Firmware update

Command
(ASCII)
Function Description
Feedback
(example)
(ASCII)
0701%
Select HDMI1 input
Source: HDMI 1
0702%
Select HDMI2 input
Source: HDMI 2
0703%
Select HDMI3 input
Source: HDMI 3
0704%
Select HDMI4 input
Source: HDMI 4
0705%
Select VGA1 input
Source: VGA1
0706%
Select VGA2 input
Source: VGA2
0707%
Select VGA3 input
Source: VGA3
0708%
Select VGA4 input
Source: VGA4
0709%
Select Composite Video AV1 input
Source:
CVIDEO1
0710%
Select YPbPr input
Source: YPbPr
0711%
Select S-Video input
Source: SVIDEO
0712%
Select Composite Video AV2 input
Source:
CVIDEO2
0720%
Mute Line and MIC
LINE Mute
On/MIC Mute On
0721%
Un-Mute Line and MIC
LINE Mute
Off/MIC Mute Off
0722%
Mute MIC
MIC Mute On
0723%
Un-Mute MIC
MIC Mute Off
0724%
MIC Volume Up
MIC Volume: XX
0725%
MIC Volume Down
MIC Volume: XX
08XX%
Set MIC Volume Level.XX = 00 to 60
MIC Volume: XX
99XX%
Send Macro Command To Version 2 TekMonitor
XX = 10 to 19 = Macro 10-19
CMD: XX

TEK 1201-HD Presentation Switcher
TEKVOX, Inc. 11 www.tekvox.com
512.808.0845
10. TCP/IP Controlling
The optional network port of TEK 1201-HD is used for sending commands using TCP/IP control.
These commands are sent the same as when using RS-232 control. There is no Web based control
for the unit. The Web interface is used for network configuration only.
10.1 IP Configuration
To connect a computer to the network port you must use a crossover network cable or network
switch. Set its IP address of the PC to the same IP VLAN as the default IP is address or the unit
(192.168.0.178).
Enter the IP address 192.168.0.178 into Internet Explorer, you will see the LOGIN page as below:
Same IP section but
cannot be 192.168.0.178

Enter the password “88888”, and then you can enter the configuration page to configure the IP
port, including the IP reset, PW reset etc.
Notice: Serial configuration cannot be changed.
After configuration, reset device, then you can use the new IP address for controlling.
10.2 Connection and Control
To send IP commands to the TEK 1201-HD connect using TCP/IP port 4001 and the set IP
address of the unit. Use the standard serial commands from a control system or program that can
send a complete command line. You cannot type the command using a Telnet program.
11. Firmware Updating
The TEK 1201-HD supports firmware field-updating, by USB flash disk.
1: Copy the file “MT23ATV.bin” to a USB flash disk.
2: Plug the USB flash disk to the USB port on the unit.
3: Pressing the button “HDMI” on the front panel for 6 seconds or sending RS232 command 0698%
for updating, then press the button “OK” on the remote or send RS232 command 0609% to
confirm update. The unit will capture the new firmware from USB flash disk.
4: After updating is completed, reboot and send the command “0617%” to reset to factory settings.
This command must be sent using a command line program set to 115200.
5: After reset, reboot again.
Notice: The name of the update file must be MT23ATV.bin.

TEK 1201-HD Presentation Switcher
TEKVOX, Inc. 13 www.tekvox.com
512.808.0845
12. Technical Specification
Inputs
4 - HDMI 1.3 HDCP Compliant.
4 - VGA with 1/8” stereo audio
1 - YPbPr with RCA stereo audio
2 - Video with audio shard with S-Video
1 - S-Video
Video and S-Video support PAL/SECAM/NTSC
Note: There are no audio inserts for DVI type signals unless you use the Mix input with separate volume
control.
Serial control interface
COM..................................................................... One - RS-232 serial (TX and RX only)
Protocol ............................................................... 9600, 8-bit, 1 stop bit, no parity
Output
HDMI ..................................................................... HDMI 1.3 Supports HDCP
RJ45...................................................................... HDBaseT (200 feet using Cat 6. Best to use shielded cable)
Digital (DO 1-2) VGA....................................................................... DB-15HD Female
Resolution ............................................................. XGA, WXGA, 720P, HD 1360x768 and 1080P
Speakers ............................................................... 10/20 watts per channel into 8/4 ohms respectively
General
Power Supply ....................................................... 100-240VAC, 50/60 Hz, 65 watts
Temperature/humidity ........................................... Storage -40° to +158°F (-40° to +70°C) /10% to 90%
Non-Condensing Operation .................................. +32° to +122°F (0° to +50°C) /10% to 90%
Enclosure type ...................................................... Aluminum
Enclosure d Enclosure dimensions ........................................... 1.75" H x 19.1" W x 9.25" D / 44 mm H x 483 mm W x 235 mm
(Depth excludes connectors.)
Product weight ...................................................... 7.1 lbs (3.2 kg)
Shipping weight..................................................... 9 lbs (1 kg)
Compliances ......................................................... CE
MTBF .................................................................... 30,000 hours
Warranty................................................................ 3 years parts and labor
Specifications are subject to change without notice.

13. Problems solving & Maintenance
1) If displayed images have reflections or ghosting check the projector’s settings or try a higher
quality VGA cable.
2) If output signal is not preset or there is a loss of color, please check the input and output
connections on VGA and video cables. Also check for correct source selection.
3) If the IR remote controller does not work:
Check or replace the battery.
Check for objects blocking the IR receiver.
The controller may be broken, please return it for repair.
4) If the unit cannot be controlled through its COM port, please check the COM port number in the
software and make sure the COM port, Baud rate and cable connections are correct.
5) If a source is selected and audio is not heard, please check for cables corrected to the correct
audio input.
6) If microphone is not heard, check that the microphone does not require phantom power.
7) If the output image is noisy, please make sure the system is properly grounded.
8) If the switcher cannot be controlled by its front buttons, RS232 port or remote controller, the
switchers may be bad. Please send it to the dealer for repair.
14. Warranty
TEKVOX, Inc. warrants this product against defects in workmanship and materials for a period of
Three Years from the date of purchase. During the warranty period, if failure is caused from faulty
workmanship and/or materials, TEKVOX, Inc. will, at its option, repair or replace said products or
components, to whatever extent it shall deem necessary to restore said product to proper operating
condition, provided that it is returned within the warranty period, with proof of purchase and
description of malfunction.
This Limited Warranty does not apply if fault is caused by misuse, improper handling, electrical or
mechanical abuse, abnormal operating conditions or non-TEKVOX authorized modifications to said
product.
If it has been determined product is defective, please call TEKVOX and ask for an Applications
Engineer at (210) 348-6565 (USA) to receive an RMA # (Return Material Authorization Number) to
begin the repair process as quickly as possible.
Units must be returned with prepaid shipping charges. Please insure package. If not insured you
assume the risk of loss or damage during shipment. Returned units must include the serial number
and a description of the problem, as well as the contact person in case there are any questions.
TEKVOX, Inc. makes no further warranties either expressed or implied with respect to said product,
or its quality, performance, or operation for any particular use. In no event will TEKVOX, Inc. be liable
for direct, indirect, or consequential damages resulting from any defect in this product even if
TEKVOX, Inc. has been advised of such damage. Please note that laws vary from state to state and
country to country, and that some provisions of this warranty may not apply to you.
Table of contents
Other Tekvox Switch manuals

Tekvox
Tekvox MV71-4K User manual

Tekvox
Tekvox TEK MV71-4K 79065 User manual

Tekvox
Tekvox SCU21T-KVM User manual

Tekvox
Tekvox MV41 Plus User manual

Tekvox
Tekvox TEKMV41-HD User manual

Tekvox
Tekvox TEK 1201-MV User manual

Tekvox
Tekvox 71028-DI User manual

Tekvox
Tekvox TEK 1201-N User manual

Tekvox
Tekvox TEK 1201-MV User manual

Tekvox
Tekvox MODULAR1616 User manual