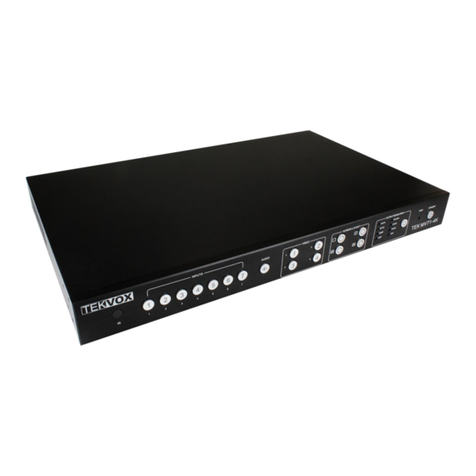
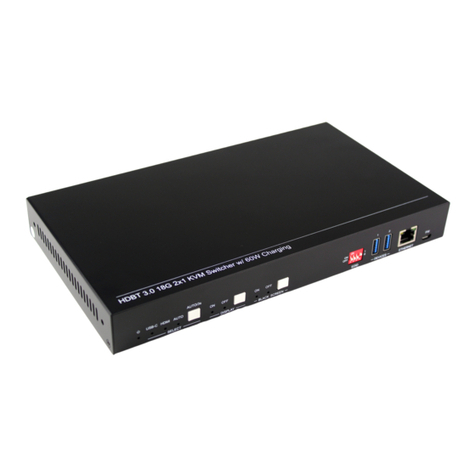
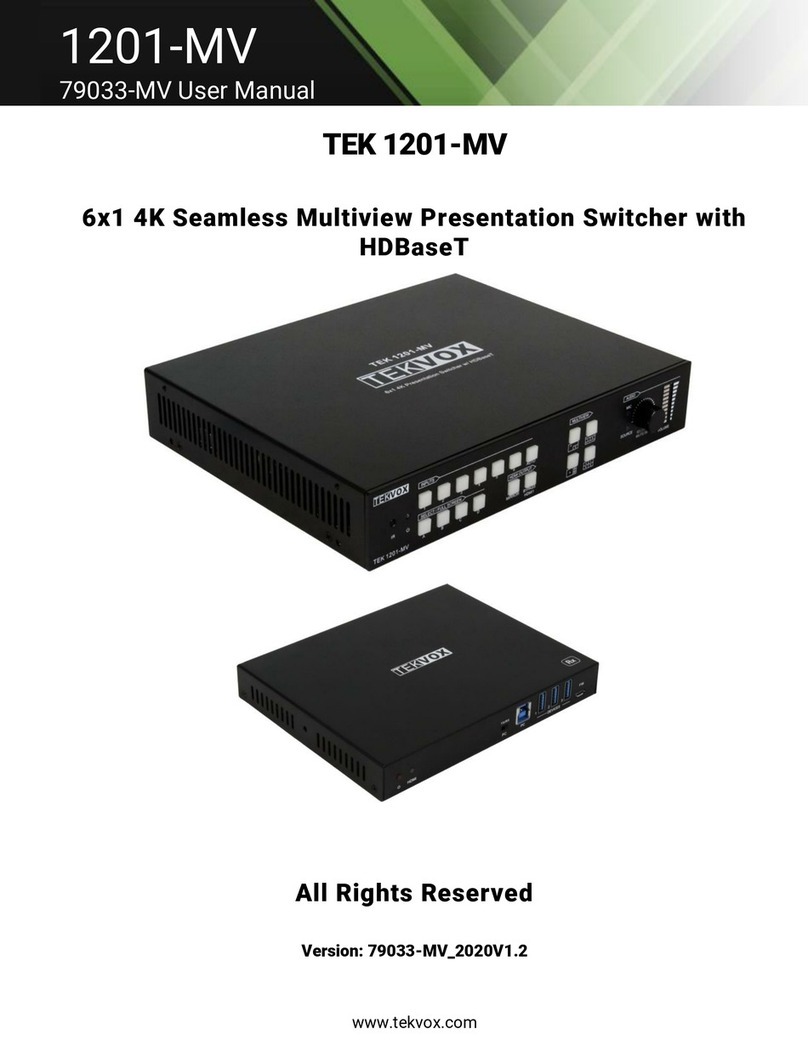
Tekvox TEK 1201-MV User manual

www.tekvox.com
1201-MV
79033-MV User Manual
TEK 1201-MV
6x1 4K Universal Switcher
All Rights Reserved
Version: 79033-MV_2021V1.5.3

www.tekvox.com
1201-MV
79033-MV User Manual
Preface
Read this user manual carefully before using the product. Pictures shown in this manual are for
reference only. Different product model specifications may vary.
This manual is only for operation instruction, please contact the local distributor for maintenance
assistance. The functions described in this version were updated February 2021. In order to continue
improving the product, we reserve the right to make function or parameter changes without notice or
obligation. Please refer to the dealers for the latest details.
Trademarks
Product model and logo are trademarks. Any other trademarks mentioned in this manual are
acknowledged as the properties of the trademark owner. No part of this publication may be copied
or reproduced without the prior written consent.
FCC Statement
This equipment generates, uses and can radiate radio frequency energy and, if not installed and used
in accordance with the instructions, may cause harmful interference to radio communications. It has
been tested and found to comply with the limits for a Class A digital device, pursuant to part 15 of
the FCC Rules. These limits are designed to provide reasonable protection against harmful
interference in a commercial installation.
Operation of this equipment in a residential area is likely to cause interference, in which case the
user at their own expense will be required to take whatever measures may be necessary to correct
the interference.
Any changes or modifications not expressly approved by the manufacture would void the user’s
authority to operate the equipment.

www.tekvox.com
1201-MV
79033-MV User Manual
Safety Precautions
To ensure the best performance from the product, please read all instructions carefully before using
the device. Save this manual for further reference.
•Unpack the equipment carefully, and save the original box and packing material for possible
future shipment
•Follow basic safety precautions to reduce the risk of fire, electrical shock, and injury to persons
•Do not dismantle the housing or modify the module (electrical shock or burn hazard)
•Using supplies or parts not meeting the products’ specifications may cause damage,
deterioration, or malfunction
•Refer all servicing to qualified service personnel
•To prevent fire or shock hazard, do not expose the unit to rain, moisture or install this product
near water
•Do not put any heavy items on the product’s power cable
•Do not remove the housing of the device as opening or removing housing may expose you to
dangerous voltage or other hazards
•Install the device in a place with sufficient ventilation to avoid damage caused by overheating
•Keep the module away from liquids
•Spillage into the housing may result in fire, electrical shock, or equipment damage. If an object
or liquid falls or spills on to the housing, unplug the module immediately.
•Do not twist or pull by force ends of the optical cable. It can cause malfunction.
•Do not use liquid or aerosol cleaners to clean this unit. Always unplug the power to the device
before cleaning.
•Unplug the power cord when left unused for a long period of time
•Information on disposal for scrapped devices: do not burn or mix with general household
waste, please treat them as normal electrical wastes

www.tekvox.com
1201-MV
79033-MV User Manual
Table of Contents
1. Product Introduction ....................................................................................................................6
1.1 Features...............................................................................................................................................6
1.2 Package List........................................................................................................................................7
1.2.1 TEK 1201-MV Switcher..............................................................................................................7
1.2.2 TEK 1201-MV-RX Receiver ........................................................................................................7
2. Specifications ..............................................................................................................................8
2.1 Universal Switcher ..............................................................................................................................8
2.2 Receiver .............................................................................................................................................10
3. Panel Description.......................................................................................................................11
3.1 Universal Switcher Front Panel........................................................................................................11
3.2 Universal Switcher Rear Panel .........................................................................................................12
3.3 Hub Receiver Front Panel.................................................................................................................13
3.4 Hub Receiver Rear Panel ..................................................................................................................13
3.5 System Connection...........................................................................................................................14
4. Front Panel Control ....................................................................................................................14
4.1 Multiview Mode Selection ................................................................................................................14
4.2 Fullscreen Setting .............................................................................................................................15
4.3 HDMI Output Settings.......................................................................................................................15
4.4 Audio Control.....................................................................................................................................15
4.5 Video Signal Switching.....................................................................................................................16
4.6 Switching Status ...............................................................................................................................16
5. GUI Control ................................................................................................................................17
5.1 Control Tab........................................................................................................................................18
5.1.1 Video Control............................................................................................................................18
5.1.2 Display Control .........................................................................................................................19
5.1.3 Audio Control............................................................................................................................20
5.2 Multiview Tab ....................................................................................................................................21
5.2.1 Pre-Defined Multiview Mode...................................................................................................21

www.tekvox.com
1201-MV
79033-MV User Manual
5.2.2 User-Defined Multiview Mode .................................................................................................23
5.2.3 Multiview Source Selection.....................................................................................................24
5.3 Display Setting Tab...........................................................................................................................25
5.4 Resolution Tab ..................................................................................................................................26
5.5 CEC Tab .............................................................................................................................................27
5.5.1 Source Control..........................................................................................................................27
5.5.2 Display Control .........................................................................................................................27
5.5.3 User-Defined CEC Command ..................................................................................................28
5.6 EDID Tab ............................................................................................................................................29
5.6.1 EDID Setting..............................................................................................................................29
5.6.2 EDID Upload..............................................................................................................................29
5.7 Network Tab ......................................................................................................................................30
5.8 Tags Tab............................................................................................................................................30
5.9 Security Tab.......................................................................................................................................31
5.10 Additional Tab.................................................................................................................................31
5.11 GUI Upgrade ....................................................................................................................................32
6. IR Remote Control ......................................................................................................................33
7. RS232 Control............................................................................................................................34
7.1 System Commands ..........................................................................................................................35
7.2 Signal Switching Commands...........................................................................................................36
7.3 Audio Setting Commands ................................................................................................................38
7.4 Function Setting Commands ...........................................................................................................40
7.5 CEC Commands................................................................................................................................47
7.6 Special Commands...........................................................................................................................49
8. Firmware Upgrade......................................................................................................................54
8.1 Switcher .............................................................................................................................................54
8.2 Receiver .............................................................................................................................................54

www.tekvox.com
1201-MV
79033-MV User Manual
1. Product Introduction
The 1201-MV is a universal switcher that supports 4Kx2K@60Hz 4:4:4, flexible multiview modes, and
six video inputs: five HDMI, and one powered USB-C. The 1201-MV includes simultaneous HDMI &
HDBaseT outputs, LAN bridge extension, and a simulated USB 3.0 hub extender with bridging to the
USB-C input. The HDMI output can be configured to mirror the HDBaseT output or preview the HDMI
1 input. The HDBaseT output can travel up to 328 feet (100m) without any additional amplification,
and supports PoC for remotely powering the receiver.
The 1201-MV also features automatic source detection & switching, can power displays on and off
using CEC or RS232, and offers versatile multiview for showing up to four sources on-screen
simultaneously. The universal switcher can extend USB signals—such as cameras and
microphones—from the far-end hub, making them available to the system PC or a connected laptop.
The 1201-MV is available with or without its hub/receiver.
1.1 Features
Video
•5 HDMI inputs & 1 USB-C input with 60W charging
•EDID settings for all inputs –Default is 1080P/60
•Supports an Auto-Switching mode with automatic display power
•Supports HDMI output resolutions up to 4Kx2K @ 60Hz 4:4:4
•Supports HDBaseT output resolutions up to 4Kx2K @ 60Hz 4:2:0
•Default output resolution is 1080P/60
•12 flexible multiview configurations for showing up to 4 sources at once
•Breakaway HDMI output can preview the HDMI 1 input or mirror the HDBaseT output
•328 ft HDBaseT transmission with controllable PoC power
•Hub receiver supports PoC power with 12 ~ 48V range
Audio
•Independent audio input selection during Multiview operation
•Supports both source and mic levels
•Mic with phantom power selection
•Line input for mic mixing
Control
•Controllable via RS232, IR remote, front panel buttons, or TCP/IP commands
•RS232 and TCP/IP use a unique, easy-to-use ASCII protocol
•Two RS232 control modes:
•Control of the switcher from both the switcher and hub/receiver (Default)
•Sending RS232 display commands with baud rate setting to the hub/receiver
•Supports sending TEVOX Macro commands for TekMonitor control
•CEC control of displays and receivers
•User-defined CEC commands

www.tekvox.com
1201-MV
79033-MV User Manual
•RS232 Command entry for display power
•Bridged LAN network allows for single network connection to switcher and 3rd party devices
at hub/receiver
•Selectable power on and off of the POC control for the hub/receiver
•Shipped fully functional, pre-programmed, and rigorously tested
USB
•Supports bidirectional USB 3.0 simulated hub extension at switcher and hub/receiver
•Automatic bridging of USB hub to USB-C input
•Provides PC or connected laptop access to far-end USB devices (cameras, microphones, etc)
1.2 Package List
1.2.1 TEK 1201-MV Switcher
⚫1x 6x1 4K Universal Switcher
⚫2x Mounting Ears with 4 Screws
⚫4x Plastic Cushions
⚫2x 3-pin Terminal Blocks
⚫1x 4-pin Terminal Block
⚫1x 5-pin Terminal Block
⚫1x IR Remote
⚫1x IR Receiver
⚫1x Power Adapter (DC 24V, 5A)
⚫1x Power Cord
⚫1x User Manual
1.2.2 TEK 1201-MV-RX Receiver
⚫1x HDBaseT Receiver
⚫2x Mounting Ears with 2 Screws
⚫4x Plastic Cushions
⚫1x RS232 Cable (3-pin to DB9)
Note: Please contact your distributor immediately if any damage or defect in the components is found.

www.tekvox.com
1201-MV
79033-MV User Manual
2. Specifications
2.1 Universal Switcher
Video Input
Video Input
(5) HDMI (Type-A, Female)
(1) USB-C (USB Type-C, Female, Powered)
Input Resolution
HDMI (1~4): Up to 4K@60Hz 4:4:4
HDMI (5): Up to 4K@30Hz 4:4:4
USB-C: Up to 4K@30Hz 4:4:4
Video Output
Video Output
(1) HDMI (Type-A, Female)
(1) HDBaseT (RJ45)
Output Resolution
HDMI: Up to 4K@60Hz 4:4:4
HDBaseT: Up to 4K@60Hz 4:2:0
HDMI Standard
Up to 2.0
HDCP Version
Up to 2.2
Audio Input
Audio Input
(1) AUDIO IN (3.5mm mini jack)
(1) LINE (3-pin terminal block)
(1) MIC (3-pin terminal block)
Frequency Response
20Hz to 20kHz, ±3dB
Max Input Level
2.0Vrms ± 0.1
L-R Level Deviation
< 0.3dB, 1kHz sine at 0dBFS level (or max level before clipping)
Input Impedance
> 10KΩ
AUDIO/LINE/MIC Audio Format
PCM 2.0
HDMI Audio Format
PCM 2.0 48K
L+R Audio Output
Audio Output
(1) L+R Balanced Stereo (5-pin terminal block)
Audio Format
PCM 2.0
Frequency Response
20Hz to 20kHz, ±1dB
Max Output Level
2.0 ± 0.1Vrms
Total Harmonic Distortion +
Noise (THD+N)
< 0.05%, 20Hz to 20kHz bandwidth, 1kHz sine at 0dBFS level (or
max level)
Signal-to-Noise Ratio (SNR)
> 90dB, 20Hz to 20kHz bandwidth
Crosstalk Isolation
< -70dB, 10kHz sine at 0dBFS level
L-R Level Deviation
< 0.3dB, 1kHz sine at 0dBFS level (or max level before clipping)

www.tekvox.com
1201-MV
79033-MV User Manual
Output Load Capability
1kΩ and higher (Supports 10x paralleled 10kΩ loads)
Noise Level
- 80dB
SPDIF Audio Output
SPDIF Out
(1) SPDIF (Toslink)
Audio Format
PCM 2.0
Max Output level
±0.3dBFS
Frequency Response
20Hz to 20kHz, ±1dB
Total Harmonic Distortion +
Noise (THD+N)
< 0.05%, 20Hz to 20kHz bandwidth, 1kHz sine at 0dBFS level (or
max level)
Signal-to-Noise Ratio (SNR)
> 90dB, 20Hz to 20kHz bandwidth
Crosstalk Isolation
< -70dB, 10kHz sine at 0dBFS level (or max level before
clipping)
Noise Level
- 90dB
Control
Control Ports
(1) PC (Type-B USB 3.0)
(2) DEVICES (Type-A USB 3.0)
(1) IR IN (3.5mm mini jack)
(1) IR OUT (3.5mm mini jack)
(1) IR EYE (3.5mm mini jack)
(1) FIRMWARE (Type-A USB 2.0)
(1) RS232 (4-pin terminal block)
(1) TCP/IP (RJ45)
General
Transmission Distance
328 feet (100 meters)
Bandwidth
18Gbps
Operation Temperature
23° ~ 131°F (-5°C - 55°C)
Storage Temperature
-13° ~ 158°F (-25°C ~ 70°C)
Relative Humidity
10 ~ 90%, Non-condensing
External Power Supply
Input: 100 ~ 240VAC, 50/60Hz
Output: DC 24V, 5A
Power Consumption
90W (Max)
USB-C Power Charging
60W (Max)
Product Dimensions
9.84”(250mm) x 1.73” (44mm) x 7.87” (200mm)
Product Weight
3.53lbs (1.6kg)

www.tekvox.com
1201-MV
79033-MV User Manual
2.2 Receiver
Video
Video Input
(1) HDBT (RJ45)
Video Output
(1) HDMI (Type-A, Female)
HDBT Input Resolution
Up to 4K@60Hz 4:2:0
HDMI Output Resolution
Up to 4K@60Hz 4:2:0
HDMI Standard
Up to 2.0
HDCP Version
Up to 2.2
Audio
Audio Output
(1) SPDIF OUT (Toslink)
Audio Format
PCM 2.0
Max Output Level
±0.3dBFS
Frequency Response
20Hz to 20kHz, ±1dB
Total Harmonic Distortion +
Noise (THD+N)
< 0.05%, 20Hz to 20kHz bandwidth, 1kHz sine at 0dBFS level (or
max level)
Signal-to-Noise Ratio (SNR)
> 90dB, 20Hz to 20kHz bandwidth
Crosstalk Isolation
< -70dB, 10kHz sine at 0dBFS level (or max level before clipping)
Noise Level
- 90dB
Control
Control Ports
(1) PC (Type-B USB 3.0)
(3) DEVICES (Type-A USB 3.0)
(1) FW (Micro-USB)
(1) ETHERNET (RJ45)
(1) IR IN (3.5mm mini jack)
(1) IR OUT (3.5mm mini jack)
(1) RS232 (3-pin terminal block)
General
Transmission Distance
328 feet (100 meters)
Bandwidth
18Gbps
Operation Temperature
23° ~131°F (-5 ~55°C)
Storage Temperature
-13° ~158°F (-25 ~ 70°C)
Relative Humidity
10 ~ 90%, Non-condensing
External Power Supply
Power over Cable (PoC); no external power supply
Power Consumption
PoC with 12 ~ 48V range, 10W (Max)
Product Dimensions
6.61” (168mm) x 0.91” (23mm) x 5.31” (135mm)
Product Weight
1.1lbs (500g)

www.tekvox.com
1201-MV
79033-MV User Manual
3. Panel Description
3.1 Universal Switcher Front Panel
1. IR LED: Built-in IR sensor; receives IR signals sent from IR remote
2. POWER LED: Lights up red when switcher is in Standby Mode, or green when device is powered on
3. INPUT BUTTONS:
⚫1~6: Input source selectors
⚫AUTO: Enables or disables auto-switching when in Fullscreen Mode
4. MULTIVIEW: Selects the four most commonly used built-in Multiview modes
5. SELECT/FULLSCREENS (A~D): Window A ~ D buttons are for output selection and Fullscreen
settings
6. MIRROR: Sets the local HDMI output as HDBT loop out. (e.g. HDMI and HDBT ports
simultaneously output the same signal source)
7. BYPASS HDMI 1: Sets the local HDMI output port to output the HDMI input 1 source signal
8. AUDIO CONTROL:
⚫Press the volume knob to select MIC or SOURCE audio to be controlled. With MIC audio
selected, the MIX and MIC mixing audio inputs are controlled simultaneously.
⚫Rotate the knob to increase or decrease the volume of the selected audio
⚫Press and hold the knob for at least 3 seconds to mute the selected audio; rotate the knob to
unmute.
Note: Please refer to 4. Front Panel Control for more details about button usages.
3
125678
4

www.tekvox.com
1201-MV
79033-MV User Manual
3.2 Universal Switcher Rear Panel
1. INPUTS:
⚫Five HDMI inputs and one USB-C input
⚫One external audio input for HDMI input 1
2. OUTPUTS: One HDMI and one HDBaseT output. The HDBaseT output supports PoC
3. AUDIO IN:
⚫MIX: Mix audio input for audio mixing
⚫MIC: Microphone input for audio mixing. Set 48V phantom power mode switch as needed (ON
for Condenser microphone; OFF for Dynamic microphone)
4. AUDIO OUT:
⚫L+R: Balanced stereo analog audio output for audio de-embedding
⚫SPDIF: SPDIF audio output for audio de-embedding
5. CONTROL:
⚫PC: Type-B USB port for Host PC connection. The Host PC is connected to the USB devices
(e.g. mouse, keyboard, camera, mic, etc.) which are connected to the USB Type-A ports
(DEVICES) on both the universal switcher and the hub receiver.
⚫DEVICES (1~2): Two type-A USB ports for USB devices connection (e.g. mouse, keyboard,
etc.). These USB devices are accessible from the Host PC
⚫IR IN: Connects to IR receiver for IR pass-through
⚫IR OUT: Connects to IR emitter for IR pass-through
⚫IR EYE: Connects to IR receiver for switcher control
⚫FIRMWARE: Type-A USB for firmware upgrade
⚫RS232: Connects to a control device (e.g. PC) or a third-party device for RS232 control
⚫TCP/IP: Connects to a control device (e.g. PC) to control the switcher by GUI
6. DC 24V: DC connector for power adapter connection
INPUTS
1. HDMI 2. HDMI 3. HDMI 4. HDMI 5. HDMI
AUDIO IN
L R
MIX ON
Phantom 48V)
(
OFF
MIC
AUDIO OUT
L RPC
SPDIF
AUDIO IN
DC 24V
HDBT
HDMI
OUTPUTS
6. USB-C
IR EYEIR IN IR OUT TCP/IPRS232
CONTROL
FIRMWARE
Tx Rx24V
DEVICES
21
1
345
26

www.tekvox.com
1201-MV
79033-MV User Manual
3.3 Hub Receiver Front Panel
1. POWER LED: Lights up red when device is powered on
2. HDMI LED: Lights up green when there is an HDMI signal output
3. PC SWITCH: Select whether the Host PC is connected to the switcher or receiver
4. PC: Type-B USB port for Host PC connection. The Host PC is connected to the USB devices (e.g.
mouse, keyboard, camera, mic, etc.) which are connected to the USB Type-A ports (DEVICES) on
both the universal switcher and the hub receiver.
5. DEVICES (1~3): Three type-A USB ports for USB device connection (e.g. camera, microphone,
etc.). These USB devices are accessible from the selected Host PC.
6. FW: Micro-USB for firmware upgrade
3.4 Hub Receiver Rear Panel
1. HDMI OUT: Connects to display device
2. HDBT IN: Connects to the HDBaseT output port of the universal switcher via a CAT cable. The
orange LED lights up when there is a valid HDBaseT link between the switcher and the receiver.
The green LED lights up when the video contains HDCP content.
3. ETHERNET: RJ45 port for network signal extension. When the TCP/IP port of the switcher is
connected to the network, the port will gain network signal via HDBaseT bridged LAN extension.
4. SPDIF OUT: Connects to speaker or amplifier for audio de-embedding
5. IR IN: Connects to IR receiver for IR pass-through
6. IR OUT: Connects to IR emitter for IR pass-through
7. RS232: Connects to a control device (e.g. PC) or a third-party device for RS232 pass-through
control
HDMI
FW
PC DEVICES321
PC
TX/RX
123456
HDBT IN
HDMI OUT RS232
Tx Rx
SPDIF
OUT IR OUTIR IN
ETHERNET
1234567

www.tekvox.com
1201-MV
79033-MV User Manual
3.5 System Connection
4. Front Panel Control
4.1 Multiview Mode Selection
There are four built-in Multiview modes which can be selected via the
front panel buttons.
Input 1 -> Window A
Input 2 -> Window B
Input 3 -> Window C
Input 4 -> Window D.
The view buttons’LEDs (A~D) turn blue
When switching to two-window (A&B) mode, the corresponding
mode’s LED will turn blue, and the window A and B LEDs will turn
blue. The factory default correspondence between the two input
sources and the two output windows is:
Input 1 -> Window A
Input 2 -> Window B

www.tekvox.com
1201-MV
79033-MV User Manual
4.2 Fullscreen Setting
The default mode is fullscreen, and the default routing is:
Input 1 -> Window A.
In Multiview mode, press the Window A~D buttons to display the
corresponding window in full-screen mode. The corresponding
input source button LED and window button A LED will illuminate
blue, and other window buttons and previous Multiview mode
button LED will go out.
4.3 HDMI Output Settings
MIRROR: Press to set the local HDMI output as an HDBaseT loop
output, meaning that the HDMI and HDBaseT ports will
simultaneously output the same signal source.
BYPASS HDMI 1: Press to set the HDMI output port to output the
source signal of HDMI input 1.
4.4 Audio Control
By default, the HDMI and HDBT output audio follows the video
source in Fullscreen Mode. In the Multiview modes, the output
audio will come from the HDMI 1 input. The audio source can be
changed via GUI or RS232 command.
Press the volume knob to select MIC or SOURCE audio. If MIC
audio is selected, then the MIX and MIC mixing audio inputs are
controlled simultaneously.
Rotate the knob to increase or decrease the volume of the
selected audio. Press and hold the knob for at least 3 seconds to
mute the selected audio; rotate the knob to unmute.

www.tekvox.com
1201-MV
79033-MV User Manual
4.5 Video Signal Switching
In Multiview modes
Operation: Input # + Window #
Example: Switch Input 1 to Window B:
Press “Input 1”(The input 1 LED will turn blue, and the A~D LEDs will flash.) Press “Window B”
(The A, C, and D LEDs will go out, and then the input 1 and Window B LEDs will flash three times. The
input 1 LED will then go out, and the A~D LEDs will turn blue.)
In Fullscreen Mode
1. Manual Switching
Operation: Directly press Input #
If Input 2 is currently set to fullscreen Window A, press “Input 3”to switch HDMI Input 3 to Window
A. The Input 3 and Window A LEDs will then turn blue.
2. Auto Switching
Press the “AUTO”button to enable or disable auto-switching mode. Note that auto-switching mode
only works while in Fullscreen Mode. When in auto mode, the switcher will switch according to the
following rules:
⚫The switcher will switch to the available active inputs with the following priority: Input 1 > Input
2 > Input 3 > Input 4 > Input 5 > Input 6 (USB-C). When the input source and output window are
connected, the corresponding LEDs will turn blue.
⚫New input: The switcher will automatically select a new input once it has been detected.
⚫Reboot: If power is restored to the switcher, it will automatically reconnect to the input that
was active when the switcher powered off.
⚫In auto-switching mode, the input source can be switched manually, but doing so will exit auto-
switching mode
⚫When changing from Fullscreen Mode to Multiview mode, auto-switching mode will not exit.
4.6 Switching Status
In Multiview mode, the LEDs for Windows A, B, C, and D will turn blue
Operation: Press and hold Window # button for at least 3 seconds.
Example: To determine which source is being sent to Window B, press and hold the Window B button
for at least 3 seconds. Windows A, C, and D’s LEDs will turn off, and the LED of the input being sent
to Window B will light up (e.g. if Window B is currently set to Input 2, the Input 2 LED will light up).
After 3 seconds, the Window A, B, C, and D LEDs will turn back on, and the Input 2 LED will turn off.

www.tekvox.com
1201-MV
79033-MV User Manual
5. GUI Control
The switcher can be controlled via TCP/IP. The default IP settings are:
IP Address: 192.168.0.178
Subnet Mask: 255.255.255.0
Type 192.168.0.178 into a web browser, and it will open the login page, as shown below:
Username: admin
Password: admin
Type the username and password, then click “Login”to enter the section for video switching.

www.tekvox.com
1201-MV
79033-MV User Manual
5.1 Control Tab
5.1.1 Video Control
⚫Source: Select a Window A ~ D, and then click one of the Input buttons (1 ~ 6) to select the
corresponding input source. While in Fullscreen Mode, click “Auto”to enable or disable auto-
switching mode.
⚫Select/Fullscreen: Window A ~ D buttons for selecting an output, and for using Fullscreen
Mode.
⚫HDMI Output: Press the “Mirror”button to set the local HDMI output as an HDBaseT loop
output, meaning that the HDMI and HDBaseT ports will simultaneously output the same signal.
Press the “Bypass HDMI 1”button to set the HDMI output port to output the HDMI input 1
source signal.
⚫Press “Power Off”to put the system into Standby Mode
Note: The source selection, Auto, Window A~D, Mirror, and Bypass HDMI 1 buttons are the same as
the front panel buttons of the same names. See 4.5 Video Signal Switching for more details.

www.tekvox.com
1201-MV
79033-MV User Manual
5.1.2 Display Control
⚫Display: Click “On”or “Off”to send RS232 and CEC commands simultaneously to power the
display on or off, respectively.
⚫Command: To send a command to a 3rd-party device, type the command into this box, then
click “Send”.
⚫Audio: Click the Volume Down, Volume Up, or Volume Mute buttons to control the volume of
the display via CEC commands.
⚫Power: Press “Power Off” to put the system into Standby Mode

www.tekvox.com
1201-MV
79033-MV User Manual
5.1.3 Audio Control
Audio Out & HDMI Out:
⚫Audio In: Enable or disable external audio embedding for HDMI input 1
⚫Source: Select a source as the audio output
⚫Source Volume: Use the Volume Bar, Volume Up, Volume Down, and Mute buttons to control
the source audio
⚫For Analog Audio Out: Set a delay time for the balanced analog audio output
Mix:
⚫Mix In: Enable or disable the mixing audio input
⚫MIC In: Enable or disable the microphone audio input
⚫MIC Volume: Use the Volume Bar, Volume Up, Volume Down, and Mute buttons to control the
Mix and Microphone (MIC) audio
Power: Press “Power Off” to put the system into Standby Mode
Other manuals for TEK 1201-MV
1
Table of contents
Other Tekvox Switch manuals
Tekvox
Tekvox TekFlex-85T Pro User manual

Tekvox
Tekvox MODULAR1616 User manual

Tekvox
Tekvox MV71-4K User manual

Tekvox
Tekvox TEK MV71-4K 79065 User manual

Tekvox
Tekvox 71028-DI User manual

Tekvox
Tekvox TEK 1 User manual

Tekvox
Tekvox MV41 Plus User manual

Tekvox
Tekvox TEKMV41-HD User manual
Tekvox
Tekvox MV41 User manual

Tekvox
Tekvox TEK 1201-N User manual