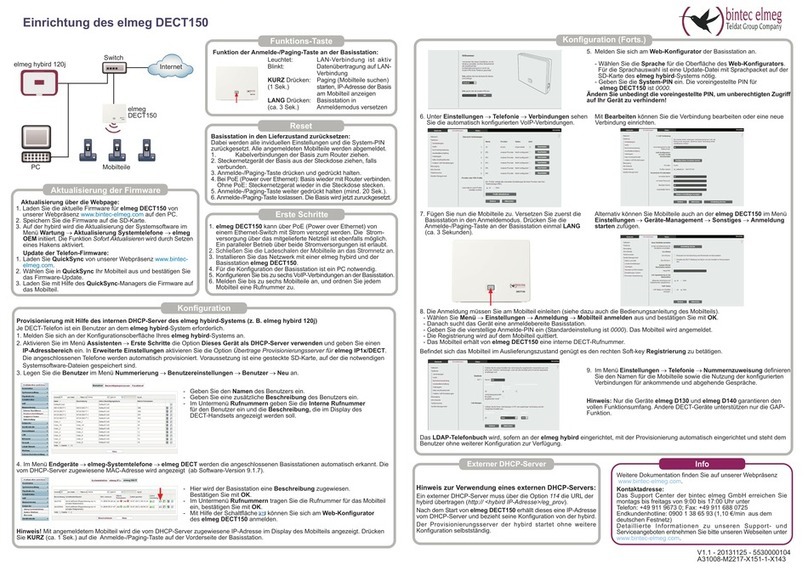
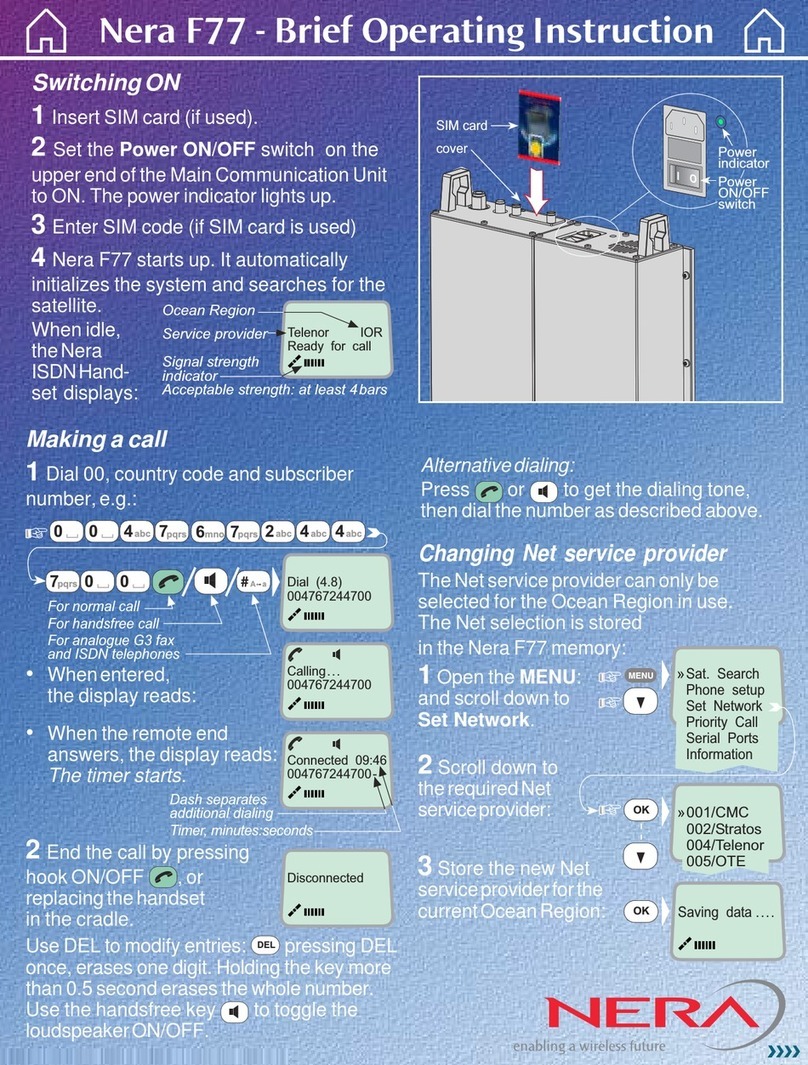
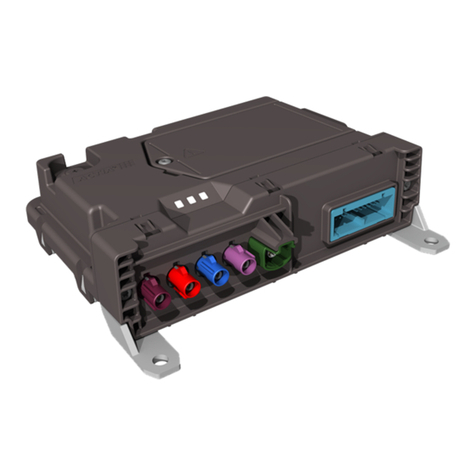
Teldat Bintec Elmeg DECT200M Manual

Aktualisierung über die Webpage:
1. Laden Sie die aktuelle Firmware für elmeg DECT200M von
unserer Webpräsenz www.bintec-elme .com auf den PC.
2. Speichern Sie die Firmware auf die SD-Karte der elmeg hybird.
3. Auf der hybird wird die Aktualisierun der Systemsoftware im
Menü Wartung ® Aktualisierung Systemtele one ® elmeg
OEM initiiert und beim nächsten Aktualisierun sdurch an
automatisch aus eführt.
Update der Tele on-Firmware:
1. Laden Sie QuickSync von unserer Webpräsenz www.bintec-
elme .com.
2. Wählen Sie in QuickSync Ihr Mobilteil aus und bestäti en Sie
das Firmware-Update.
3. Laden Sie mit Hilfe des QuickSync-Mana ers die Firmware auf
das Mobilteil.
Aktualisierung der Firmware
Erste Schritte
1. Der DECT-Mana er und die Basisstationen können über PoE
(Power over Ethernet) von einen Ethernet-Switch mit Strom versor t
werden. Die Stromversor un über ein optionales Netzteil ist
ebenfalls mö lich. Ein paralleler Betrieb über beide Stromversor un en
ist erlaubt.
2. Schließen Sie die Ladeschalen der Mobilteile an das Stromnetz an.
3. Installieren Sie das Netzwerk mit einer elme hybird, mit dem DECT-
Mana er und mit midestens einer Basistation.
4. Für die Konfi uration des DECT-Mana ers ist ein PC notwendi .
5. Bis zu 20 DECT-Basisstationen können konfi uriert werden.
6. Das elmeg DECT MultiCell unterstützt bis zu 100 Mobilteile.
Die Anzahl der SIP-Accounts hän t von der Anzahl der vorhanden
Lizenzen ab. Ordnen Sie jedem Mobilteil eine Rufnummer zu.
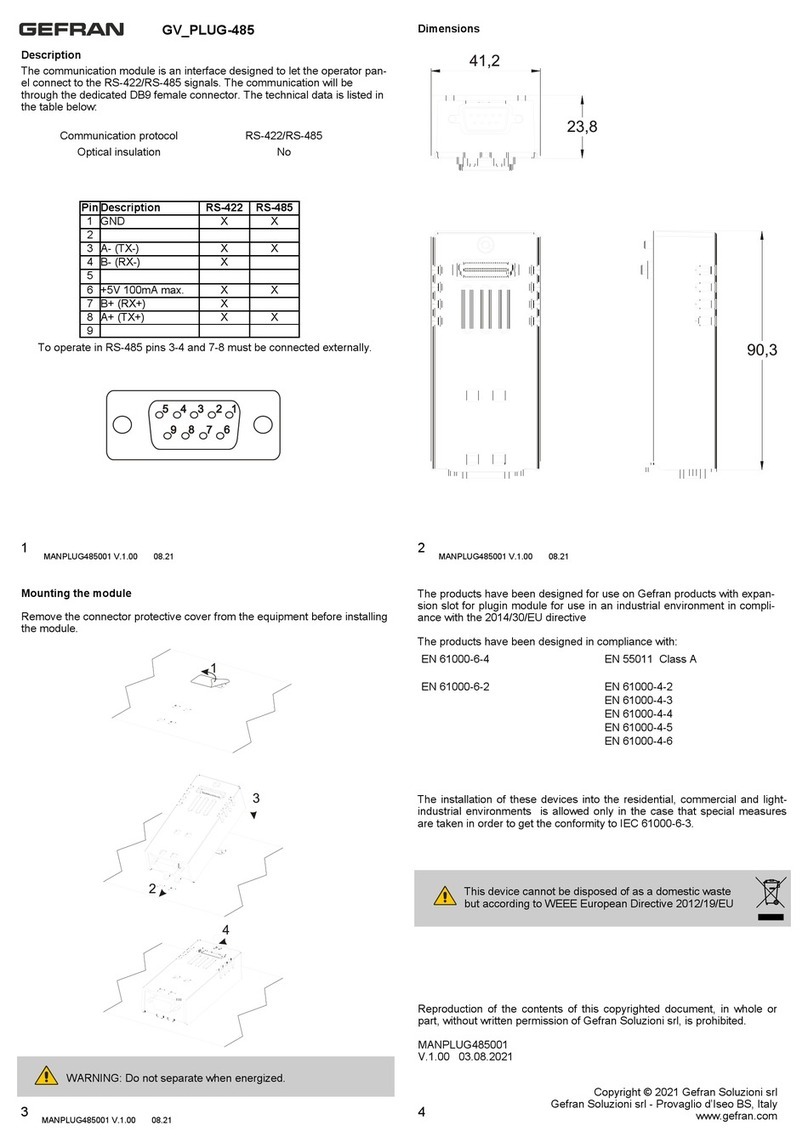
Gerät au Werkseinstellung zurücksetzen
Diese Aktion steht am DECT-Mana er und an den Basisstationen
zur Verfü un .
1. Unterbrechen Sie die Stromversor un .
2. Drücken Sie die Reset-Taste und halten Sie sie edruckt.
3. Verbinden Sie das Gerät bei edrückter Reset-Taste wieder mit
dem Stromnetz.
4. Lassen Sie die Reset-Taste wieder los, wenn die zweite LED
von oben (Power/LAN) zu flackern be innt.
Reset
Training: Für die Konfi uration und Inbetriebnahme der elmeg DECT MultiCell-Lösung wird eine Schulun empfohlen!
DECT
Power/LAN
VoIP
CALL
RESET
DECT Power/LAN VoIP CALL Beschreibung
Aus Aus Aus Aus Keine Stromversor un /KeineVersor un sspannun
Aus Blinkt Aus Aus Keine LAN-Verbindun oder Warten auf Adressver-
alle 2 Sek. abe durch DHCP-Server
Aus An Aus Aus IP-Adressver abe über DHCP erhalten, VoIP -Dienst
(noch) nicht verfü bar
Aus An Blinkt Aus Mindestens ein VoIP-Dienst aktiviert, Warten auf SIP-
alle 4 Sek. Re istrierun
Aus An An Aus Alle aktivierten VoIP-Dienste erfol reich re istriert
Blinkt An An Aus Mindestens eine Basisstation verbunden
alle 4 Sek.
An An An Aus Alle re istrierten Basisstationen verbunden
An An An An Mindestens ein aktiver Anruf
Aus Blinkt Blinkt Aus Firmware wird aktualisiert
alle 2 Sek. alle 2 Sek.
Leuchtanzei en am DECT-Mana er
Zustand der Verbindun en zu den Basisstationen
Zustand der Stromversor un
Ist die Stromversor un in Ordnun , zei t die LED den Zustand der
LAN-Verbindun an.
Zustand der VoIP-Verbindun en (Aktivierun und Re istrierun )
Anzei e von aktiven Anrufen
Reset-Taste
Kon iguration (Forts.)
Provisionierung mit Hil e des internen DHCP-Server des elmeg hybird-Systems (z. B. elmeg hybird 120j)
Je DECT-Telefon ist ein Benutzer an dem elmeg hybird-System erforderlich.
1. Melden Sie sich an der Konfi urationsoberfläche Ihres elmeg hybird-Systems an.
2. Aktivieren Sie im Menü Assistenten ® Erste Schritte die Option Dieses Gerät als DHCP-Server verwenden und eben Sie einen
IP-Adressbereich ein. In Erweiterte Einstellungen aktivieren Sie die Option Übertrage Provisionierungsserver für elmeg IP1x/DECT.
Die an eschlossenen Telefone werden automatisch provisioniert. Voraussetzun ist eine esteckte SD-Karte, auf der die notwendi en
Systemsoftware-Dateien espeichert sind.
3. Le en Sie die Benutzer im Menü Nummerierung ® Benutzereinstellungen ® Benutzer ® Neu an.
- Geben Sie den Namen des Benutzers ein.
- Geben Sie eine zusätzliche Beschreibung des Benutzers ein.
- Im Untermenü Ru nummern eben Sie die Interne Ru nummer
für den Benutzer ein und die Beschreibung, die im Display der
DECT-Handsets an ezei t werden soll.
Kon iguration
Externer DHCP-Server
Hinweis zur Verwendung eines externen DHCP-Servers:
Ein externer DHCP-Server muss über die Option 114 die URL der
hybird übertra en (http:// <hybird IP-Adresse>/eg prov).
Nach dem Start von elmeg DECT200M erhällt dieses eine IP-Adresse
vom DHCP-Server und bezieht seine Konfi uration von der hybird.
Der Provisionierun sserver der hybird startet ohne weitere
Konfi uration selbstständi .
4. Im Menü Endgeräte ® elmeg-Systemtele one ® elmeg DECT werden
die an eschlossenen Basisstationen automatisch erkannt. Die vom DHCP-
Server zu ewiesene MAC-Adresse wird an ezei t (ab SW-Version 9.1.7).
- Hier wird dem DECT-Mana er eine Beschreibung zu ewiesen.
- Im Untermenü Ru nummern tra en Sie die Rufnummer für das Mobilteil
ein, bestäti en Sie mit OK.
- Mit Hilfe der Schaltfläche können Sie sich am Web-Kon igurator
des elmeg DECT200M anmelden.
5. Melden Sie sich am Web-Kon igurator des DECT-Mana er an.
- Wählen Sie die Sprache für die Oberfläche des Web-Kon igurators.
Für die Sprachauswahl ist eine Update-Datei mit Sprachpacket auf der
SD-Karte nöti .
- Geben Sie das Passwort ein. Das vorein estellte Passwort für
elmeg DECT200M ist admin.
6. Unter Einstellungen ® Netzwerk und Anschlüsse ®7. Im Menü Einstellungen ® VoIP-Provider werden die VoIP-Provider
IP-Kon iguration sehen Sie die von dem DHCP-Server konfi uriert.
erhaltenen Adressdaten.
8. Anschließend werden die Basistationen im Menü Einstellungen ® Netzwerk und Anschlüsse ® Neue Basisstationen anmelden
hinzu efü t. Siehe dazu die Bedienun sanleitun des DECT-Mana er. Beachten Sie auch die Komplexität der DECT MultiCell-Lösun .
Weiterführende Kenntnisse über Versor un und Messun der Funkabdeckun sind nöti . Wir empfehlen daher, an einem Installations-
Trainin teilzunehmen.
9.Im Menü Einstellungen ® Mobilteile können Sie die Einstellun en
für bereits re istrierte Mobilteile bearbeiten, abmelden oder löschen.
Mit Hinzu ügen fü en Sie ein neues Mobilteil mit ei enen Daten hinzu.
Geben Sie die Persönlichen Providerdaten für das Mobilteil ein.
- Klicken Sie auf Anmeldung Starten.
- Der DECT-Mana er ist anmeldebereit. Die PIN ür die Anmeldung
des Mobilteils und die Restzeit zur Registrierung wird an ezei t.
Hinweis: Nur die Geräte elmeg D130 und elmeg D140 arantieren den
vollen Funktionsumfan . Andere DECT-Geräte unterstützen nur die GAP-
Funktion.
Die Re istrierun müssen Sie am Mobilteil einleiten (siehe dazu auch die Bedienun sanleitun des Mobilteils).
- Wählen Sie Menü ® Einstellungen ® Anmeldung ® Mobilteil anmelden aus und bestäti en Sie mit OK.
- Danach sucht das Gerät eine anmeldebereite Basisstation.
- Geben Sie die vierstelli e Anmelde-PIN ein, die am DECT-Mana er erzeu t wurde. Das Mobilteil wird an emeldet.
- Bestäti en Sie am DECT-Mana er die Meldun Registrierung er olgreich mit OK.
- Das Mobilteil erhält von elmeg DECT200M eine interne DECT-Rufnummer.
Befindet sich das Mobilteil im Auslieferun szustand enü t es den rechten Soft-key Registrierung zu betäti en.
Das LDAP-Tele onbuch wird, sofern an der elme hybird ein erichtet, mit der Provisionierun automatisch ein erichtet und steht dem
Benutzer ohne weiterer Konfi uration zur Verfü un .
DECT 1
Power/LAN
Power/LAN
DECT 2
RESET
Power/LAN 1/2 DECT 1/2 Beschreibung
Aus Aus Keine Stromversor un /KeineVersor un sspannun
Blinkt Aus
Die Basisstation sucht nach dem DECT-Mana er
1x pro Sek.
An Aus
Verbindun mit DECT-Mana er her estellt,
Service der Basisstation
noch nicht bereit
Blinkt Aus
Firmware wird aktualisiert, Service der Basisstation nicht aktiv
alle 2 Sek.
An An
DECT-Modul der Basisstation bereit, DECT synchronisiert
An Blinkt
DECT-Modul der Basisstation bereit, DECT nicht synchronisiert
alle 4 Sek.
Blinkt An
DECT-Modul der Basisstation uberlastet, DECT synchronisiert
alle 4 Sek.
Blinkt Blinkt
DECT-Modul der Basisstation uberlastet, DECT nicht synchronisiert
alle 4 Sek. alle 4 Sek.
Die elmeg DECT200 Basisstationen enthalten zwei DECT-Module, deren Zustand
etrennt an ezei t wird.
Zustand von DECT-Modul 1
Zustand der Stromversor un
Ist die Stromversor un in Ordnun , zei t die LED den Zustand der
LAN-Verbindun an.
Zustand von DECT-Modul 2
Reset-Taste
V1.3 - 20140603 - 5530000105
A31008-M2315-X151-1-X143
Leuchtdioden Manager Leuchtdioden Basis
elme hybird 120j
Basisstationen
elme DECT200
Mobilteile
PC
Switch DECT-Mana er
elme DECT200M
Einrichtung des elmeg DECT200M
In o
DECT200
DECT200M
DECT200
Weitere Dokumentation finden Sie auf unserer Webpräsenz
www.bintec-elme .com.
Kontaktadresse:
Das Support Center der bintec elme GmbH erreichen Sie
monta s bis freita s von 9:00 bis 17:00 Uhr unter
Telefon: +49 911 9673 0; Fax: +49 911 688 0725
Endkundenhotline: 0900 1 38 65 93 (1,10 /min aus dem
deutschen Festnetz)
Detaillierte Informationen zu unseren Support- und
Servicean eboten entnehmen Sie bitte unseren Webseiten unter
www.bintec-elme .com.

Updating via webpage:
1. Download the latest firmware for elmeg DECT200M onto the
PC from our website, www.bintec-elmeg.com.
2. Save the firmware onto the elmeg hybird SD card.
3. he updating of system software on the hybird is initiated via
the Maintenance ® System Telephone Update ® elmeg
EM menu. It is automatically carried out during the next update
cycle.
Telephone firmware update:
1. Download QuickSync from our website, www.bintec-
elmeg.com.
2. Select your handset in the QuickSync menu and confirm the
firmware update.
3. Using the QuickSync Manager, download the firmware to your
handset.
Updating of firmware
Initial Steps
1. he DEC Manager and the access points can be supplied by an
Ethernet switch with power via PoE (Power over Ethernet). Power
can also be supplied via an optional mains unit. Parallel operation
via both power supplies is permitted.
2. Connect the handset charging cradle to the mains.
3. Install the network with an elmeg hybird, the DEC Manager and
at least one access point.
4. A PC is required in order to configure the DEC Manager.
5. Up to 20 DEC access points can be configured.
6. he elmeg DECT MultiCell supports up to 100 handsets.
he number of SIP accounts depends on the number of available
licences. Assign a number to each handset.
Reset device to ex works settings
his action is available on the DEC Manager as well as at the
access points.
1. Switch off the power supply.
2. Press and hold the Reset button.
3. Connect the device to the mains again when continuing to hold
the Reset button.
4. Release the Reset button once the second LED starts flickering
from above (Power/LAN).
Reset
Training: raining is recommended for the configuration and installation of the elmeg DECT MultiCell Solution.
DEC
Power/LAN
VoIP
CALL
RESE
DECT Power/LAN VoIP CALL Description
Off Off Off Off No power supply/No supply voltage
Off flashes Off Off No LAN connection, or waiting for address assignment
ev. 2 sec. by DHCP server
Off On Off Off IP address assignment received from DHCP, VoIP
service (still) not available
Off On flashes Off At least one VoIP service enabled, waiting for SIP
ev. 4 sec. registration
Off On On Off All enabled VoIP services successfully registered
flashes On On Off At least one access point connected
ev. 4 sec.
On On On Off All registered access points connected
On On On On At least one active call
Off flashes flashes Off Firmware updated
ev. 2 sec. ev. 2 sec.
LEDs on DEC Manager
Status of connections to access points
Status of power supply
If the power supply is OK, then the LED
displays the status of the LAN connection.
Status of VoIP connections (activation and registration)
Displays active calls
Reset button
Configuration (cont.)
Provisioning using the internal DHCP server of the elmeg hybird system (e.g. elmeg hybird 120j)
Each DEC telephone requires a user on the elmeg hybird system.
1. Log in to the configuration interface of your elmeg hybird system.
2. Activate the Use this device as a DHCP server option in the Wizards ® Initial Steps menu and enter an IP address range.
When in Advanced Settings, enable the option Transfer provisioning server for elmeg IP1x/DECT. he connected telephones are
automatically provisioned. his requires an inserted SD card on which the required system software files are stored.
3. Create the users in the Numbering ® User Settings ® User ® New menu.
- Enter the name of the user.
- Enter an additional description of the user.
- Enter the Internal Number for the user in the Numbers submenu
and the description to be shown in the DEC handset display.
Configuration
External DHCP server
Information regarding the use of an external DHCP server:
An external DHCP server may only transfer the URL of the hybird
(http:// <hybird IP address>/eg_prov) via the option 114.
After starting the elmeg DECT200M, it then receives an IP address
from the DHCP server and obtains its configuration from the hybird.
he hybird provisioning server then starts independently without any
further configuration.
4. he connected access points are automatically detected in the Terminals
® elmeg System Telephones ® elmeg DECT menu. he MAC address
assigned by the DHCP server is displayed (as of software version 9.1.7).
-A description is assigned to the access point here.
- Enter the number for the handset in the Numbers submenu, then
confirm with K.
- You can log in to the elmeg DECT200M web configurator using
the button.
5. Log in to the DEC Manager web configurator.
- Select the language for the web configurator interface.
An update file with a language pack is required on the SD card for
language selection purposes.
- Enter the password. he preset password for elmeg DECT200M
is admin.
6. You will see the address data received from the DHCP 7. he VoIP providers are configured in the
server under Settings ® Network and Connections Settings ® VoIP Provider menu.
® IP Configuration.
8. hen the access points are added in the Settings ® Network and Connections ® Login New Access Points menu. For more
information please see the DEC Manager User's Guide. Please also note the complexity of the DEC MultiCell solution.
Advanced knowledge regarding the supply and measurement of radio coverage is necessary. We therefore recommend that you take
part in an installation training session.
9. You can edit, disable or delete the settings for handsets that are already
registered in the Settings ® Handsets menu.
You can add a new handset with its own data by using Add.
Enter the personal provider data for the handset.
- Click on Start Login.
- he DEC Manager is ready for login. he PIN for logging in the
handset and the remaining time left for registration are both
displayed.
Note: Only elmeg D130 and elmeg D140 devices guarantee the full range
of functions. Other DEC devices only support the GAP function.
You must commence the login on the handset (see also the User's Guide for the handset).
- Select Menu ® Settings ® Login ® Log in handset and confirm with K.
- he device then searches for an access point that is ready for login.
- Enter the four-digit login PIN that was created on the DEC Manager. he handset is logged in.
- Confirm the message Registration successful on the DEC Manager with K.
- he handset is given an internal DEC number by the elmeg DECT200M.
If the handset is in an ex works state, then it shall suffice to press the right Registration softkey.
Provided it is set up on the elmeg hybird, the LDAP phone book is automatically set up with the provisioning and is available to the user
without any further configuration.
DEC 1
Power/LAN
Power/LAN
DEC 2
RESE
Power/LAN 1/2 DECT 1/2 Description
Off Off No power supply/No supply voltage
flashes Off
he access point searches for the DEC Manager
1x per sec.
On Off Connection with DEC Manager established,
access point service not yet ready
flashes Off
Firmware updated, access point service not active
ev.2 sec.
On On
Access point DEC module ready, DEC synchronised
On flashes
Access point DEC module ready, DEC not synchronised
ev. 4 sec.
flashes On
Access point DEC module overloaded, DEC synchronised
ev. 4 sec.
flashes flashes
Access point DEC module overloaded, DEC not synchronised
ev. 4 sec. ev. 4 sec.
he elmeg DEC 200M access points contain two DEC modules whose
statuses are displayed separately.
Status of DEC module 1
Status of power supply
If the power supply is OK, then the LED displays
the status of the LAN connection.
Status of DEC module 2
Reset button
V1.3 - 20140603 - 5530000105
A31008-M2315-X151-1-X143
LED Manager LED Base
Set up of elmeg DECT200M
Info
elmeg DEC 200
access points
elmeg DEC 200M
DEC Manager
Handsets
elmeg hybird 120j
PC
Switch
DEC 200
DEC 200M
DEC 200
Further information is also available on our website at
www.bintec-elmeg.com.
Contact address:
he bintec elmeg GmbH Support Centre can be reached Monday
to Friday between the hours of 9 am and 5 pm, at
elephone: +49 911 9673 0;
Fax: +49 911 688 0725
For detailed information about our support and service
offers please visit our website at www.bintec-elmeg.com.
Table of contents
Languages:
Other Teldat Conference System manuals
