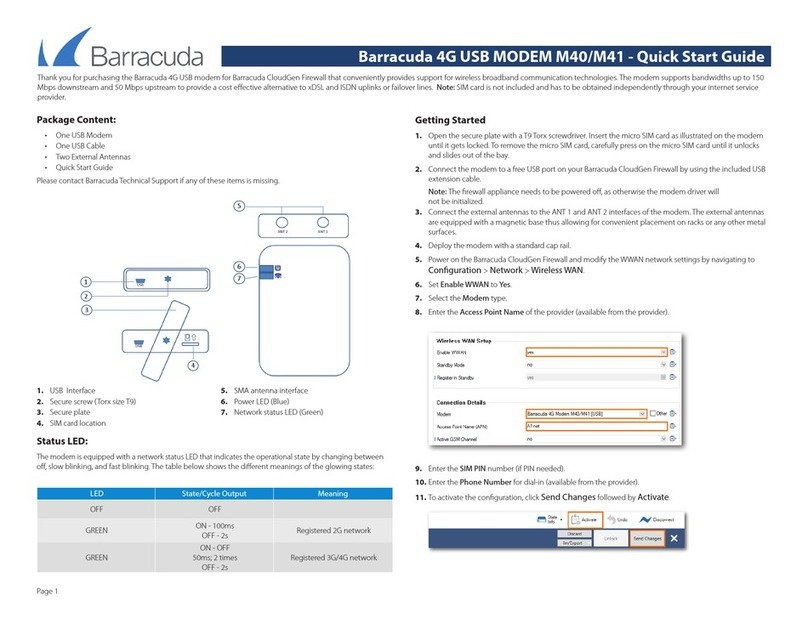
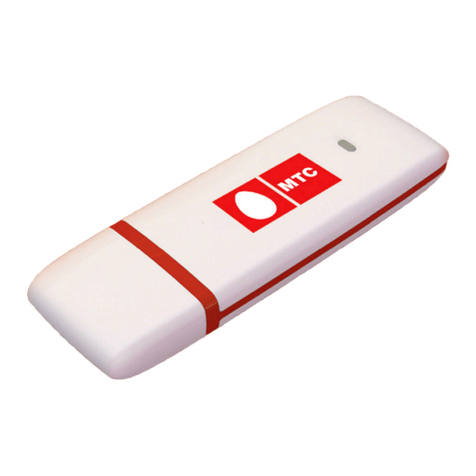
Telecom MF180 User manual

Page 1
Telecom MF180 USB Modem User Guide
INDEX
Connection Manager Software Guide ......................................2
Using your USB Modem .............................................................4
Internet connection records ......................................................5
Task bar information ..................................................................6
Using the SMS Interface.............................................................7
Using the Phonebook.................................................................9
Settings..................................................................................... 11
Insert a MicroSDTM card for USB Mass Storage...................... 14
Troubleshooting Guide ........................................................... 15
System requirements .............................................................. 19
SIM card insertion.................................................................... 20
Step by Step Installation......................................................... 22
Software Removal ................................................................... 25
Radiation from Electronic Devices – SAR............................... 25
Precautions and Safety Information...................................... 26
Technical Specifications.......................................................... 28

Page 2
Connection Manager Software Guide
After installation the Telecom Connection Manager will launch
automatically. The modem takes a few minutes to initialise. You’ll be
ready to go as soon as the Connect button is available.

Page 3
LED indicator Modem Status
Red Offline. Not registered on any networks
Green solid Registered on 2G or 3G networks
Green
blinking Active data connection on 2G or 3G networks
Installation Notes
The installation will create a new icon on your desktop and a
new program listing under Start-Programs
If you have problems with the installation please contact your
supplier or see our website, www.zte.co.nz for more assistance
and FAQ’s
If you can’t connect to the internet check your SIM card is
inserted correctly.
Advanced users should check device manager to see if the
drivers are fully installed. See our website for details
www.zte.co.nz
See the Troubleshooting section in this User Guide for further
assistance.

Page 4
Using your USB Modem
Press Connect to start a data connection using your USB
modem
Launch your intended application, eg web browser, email etc.
When you have finished your internet or email connection
remember to return to the software interface and press
Disconnect to end your session
When the software is minimized double click the icon on the
task bar to re-open the Connection Manager.
You can set the modem to automatically Connect to the internet.
Click the Settings icon, select System and select ‘Auto connect’.
Auto start is enabled by default. Click the Settings icon, select
System and uncheck ‘Auto start’ to disable this feature if
required.
TIP
After the computer wakes from hibernation or standby mode you
may need to remove and re-insert the modem.

Page 5
Internet connection records
To view your connection records click on Data records:
The graph shows the upload and download speeds updated in
real time.
Click on the Data record tab to view upload and download
history.
Data usage is approximate. Please contact your service provider
for actual usage.
Press the ‘X’ button to close the window and return to the main
screen when finished.

Page 6
Task bar information
When you minimise the software the window will minimise to an
icon on the system tray. The program is active in the background
but disappears to free your normal Windows space. Double click the
task bar icon to restore the Telecom Connection Manager.
Right Click the task bar icon to access the following menu:
Log Displays the system log file (for support purposes)
Diagnostics Open Diagnostics (serial no., software version etc)
Help Open the help file
Exit Close the software and switch off the modem
Safe Removal of Hardware
To remove your USB modem from the computer first close the
Connection Manager then use the safe removal of hardware process
for Windows or Eject for MAC OS.
Safely remove the modem, eg. Windows Systems:
Left click the icon on the Windows taskbar
Click on Safely Remove Hardware
Remove the USB modem

Page 7
Using the SMS Interface
Click the SMS button to use the SMS Interface:
The message content is displayed here…
Read Incoming Messages
The inbox is displayed by default. Select a message from the Inbox.
The message content and details are displayed in the window
below the inbox summary list.
Click on the column headers to sort by Name/Number, Content or
Time

Page 8
Create a new message
Select New and enter the recipient’s number
Use ‘;’ to separate multiple recipients if required
Press To for the Phonebook interface
Click into the text field to enter text
Click Send when finished or Save to store in Drafts
Enter the recipients
’
number here
After the message is sent it is saved in the Outbox.
If the message fails to send the icon is marked with a red cross

Page 9
Using the Phonebook
Click the Phonebook button to select the phonebook interface.
Select from PC or USIM:
To create a new contact click New →New Contact, enter the
details and select OK to finish.
You can choose the Save location as the PC or the USIM card.
The default location is on the PC.

Page 10
Phonebook Notes:
If your storage location is PC then you can also save to a Group
Use the Search box to find contacts by name or number
Select the following functions using the buttons at the bottom of
the screen:
View View the selected contact’s information
New Create a new contact
Delete Delete contacts or groups
Move Move the contact between the SIM and the PC
Edit Edit the contact information
Tip
To avoid corrupting the phonebook file wait for the connection
manager to close before removing the modem.

Page 11
Settings
Click the Settings button to select the settings interface.
Connection Settings:
The setting TelecomData is pre-configured for your network.
If you have a private VPN you may need to create a new
connection configuration. This feature is designed for IT
Administrators in a corporate environment and is generally not
required to be changed by end users.

Page 12
Settings > Network Selection (Default = Automatic)
These settings are pre-configured for your network. There is no
need to change any of these settings. Manual mode will perform a
scan of available networks.
Settings > Network Preferences (Default = Automatic)
These settings are pre-configured for your network. There is no
n
eed to change any of these settings. Selecting UMTS/HSPA will
lock the modem to 3G services only. Selecting GSM/EDGE will lock
the modem to 2G services only.
Settings > SMS Settings
These settings are pre-configured for your network. There is no
need to change any of these settings. If you go overseas or use a
foreign SIM card you may need to change the local SMS Centre
number. Consult your service provider for more details.
Settings > Sounds
The default system sounds can be personalised if required. Browse
to your chosen sound to change the alert tones specified.
Settings > Security
You can enable a PIN number that is requested when the
Connection Manager is launched. This can protect you against
unwanted use. The PIN number is stored on the SIM card.

Page 13
Settings > System
Set the Start up and Auto connect Modes
Startup Set the Connection Manager to start
automatically when the modem is inserted.
Auto connect Set the modem to establish a connection
automatically.

Page 14
Insert a MicroSDTM card for USB Mass Storage
You can insert a MicroSDTM memory card up to 32GB to use the
modem as a mass storage device.
Safely remove your modem from your computer
Open the modem back cover to access the MicroSDTM slot
There is a diagram showing the correct orientation of the
MicroSDTM card printed on the top of the MicroSDTM slot
Check the correct orientation and carefully insert the MicroSD
card
Replace the modem cover and insert your device into your
computer
The MicroSDTM card will appear as an external drive on your
computer system
Always handle memory cards with care and avoid static discharge
MicroSDTM cards supported to 2GB are FAT 16 format.
MicroSDTM HC cards supported to 32GB are FAT 32 format.
If you want to remove the modem please use the Safe Removal of
Hardware to stop the removable disk first. For more details see the
Safe Removal of Hardware process.

Page 15
Troubleshooting Guide
If you have any problems with your modem please check this
section. If the problem still exists test on an alternate PC and contact
your service provider. Check for more details and FAQ’s at
www.zte.co.nz
Problem Possible Causes Suggested Solution
The user
interface doesn’t
start or stays
‘Initialising’ after
the modem is
plugged in.
PC configuration is
not correct.
(No Autorun)
Start the program
manually by going
Start > Program Files
or use the shortcut on
the desktop. Check
the drivers, try Safe
Mode.
The antenna is at the
wrong angle or
position.
Use the extension
cable and adjust the
angle and position of
the USB modem.
The modem has
no signal.
You have no
network coverage.
Try moving location
until you get good
reception. Try the
extension cable.

Page 16
Problem Possible Causes Suggested Solution
Is your SIM card
active and inserted
correctly.
Check your SIM
insertion, account and
PIN number if applied.
Message sent
failed.
The SMS centre
number isn’t correct.
Contact your Service
Provider. Enter the
correct number in the
Message settings.
You have no
network coverage.
Try moving location
until you get good
reception. Try the
extender cable
The APN
configuration is
wrong
Check with your
service provider and
set the APN in the
configuration settings.
The manual network
selection is wrong.
Select the correct
network for your
service provider.
Restore Automatic
mode.
Data connection
failed.
You are using the
wrong APN.
Consult your service
provider.

Page 17
Problem Possible Causes Suggested Solution
The modem
cannot connect
to the internet
abroad
(Roaming)
You don’t have
roaming enabled on
your plan.
Contact your service
provider to enable
roaming.
No warning tone.
The PC soundcard is
disabled or on low
volume.
Check the audio card
and adjust the
volume.
The MicroSDTM
card cannot be
read or is not
found.
Re-insert the
MicroSDTM card. The
maximum capacity is
32GB. The card is not
formatted correctly.
Try another MicroSDTM
card and make sure
the capacity and
format is correct.
2GB is FAT16 format
32GB is FAT32 format

Page 18
Troubleshooting Tips
1. Install and test the modem in another computer
2. Check your SIM is working in another device – eg mobile phone
3. Insert a known working SIM card into your modem
4. Confirm your account is active – contact your service provider
5. Uninstall the modem and re-install using ‘Safe Mode’. Consult a
PC
technician if required. Check the drivers in Device Manager
6. If the software installation does not start or has failed try
downloading the current version from our website www.zte.co.nz

Page 19
System requirements
1. USB port x 1 (USB 1.0 or 2.0*)
2. System Requirements:
a. PC – Windows 7, Vista, XP
b. Mac - OSX 10.4.11 and above
CPU 1GHz Pentium or above
Hard Disk 20GB or above
RAM 512M or above
Display 800 x 600 minimum
3. You need to have Administrator rights to install and run
the software
4. We suggest you switch off your anti-virus software before
installing the USB modem. In some cases protection
software can prevent automatic installation. It is possible to
start the installation process manually by clicking the
Autorun icon when it appears.
Tips
*USB 2.0 ports are preferred because they are much faster
Identify the type of port on your PC and use version 2 ports
Use the USB extender cable to obtain optimum reception

Page 20
SIM card insertion
1. Open the modem back cover to access the SIM and MicroSDTM
slot
2. Insert the SIM card as shown with the gold contacts facing down
and the bevelled corner on the outside edge of the modem.
3. Push the SIM card in as far as it will go and replace the modem
cover.
Tip: There is a diagram showing the correct orientation of SIM
card printed on top of the SIM slot.
Table of contents
Other Telecom Modem manuals
