manuals.online logo
Brands
  1. Home
  2. •
  3. Brands
  4. •
  5. Telex
  6. •
  7. Intercom System
  8. •
  9. Telex Legacy XO-1 User manual

Telex Legacy XO-1 User manual

Pre Game
Pre Game
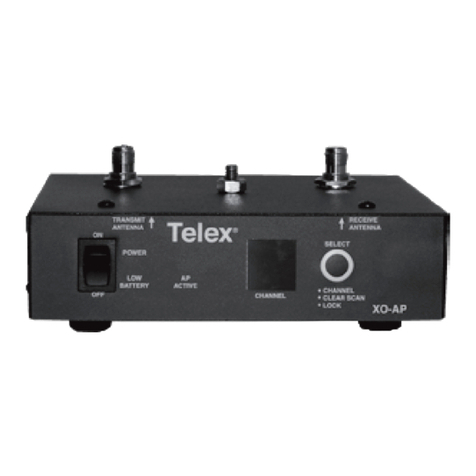
1. Place the XO-AP Base Station (XO-AP) in the press
box.
2. Attach the two antenna cables from the antenna to the
XO-AP. The cable marked, “Receive” connects to the
receive jack on the XO-AP. The cable marked,
“Transmit” connects to the transmit jack on the XO-AP.
3. Aim the directional panel antenna at the 50 yard line
and the sideline where your coaches will be located.
See Figure 2 for details.
NOTE: Make sure the antenna's path to the area of
coverage has clear line-of-sight.
4. Plug the XO-AP’s external power supply into an AC
outlet if available. If external power is not available,
then the XO-AP can run off internal battery (if already
charged).
5. Turn on the XO-AP by pressing the power switch into
the ON position. The power light on the front of the
XO-AP will activate. This will indicate the unit has
power, either from external AC power or internal DC
battery power.
6. After 20 seconds, the channel indicator will illuminate
and scroll through numbers 1-11. The XO-AP will
automatically set to the clearest channel available. You
can scan for another channel or manually select a
channel by using one of the following procedures:
a. Clear Scan – Hold the select button until the
decimal point starts to blink (about 3 seconds) then
release. The XO-AP will scan all available
channels and then set itself to the clearest channel
available for use.
b. Manual Set – Press the button to select the XO-AP
channel desired. Each press of the button will
increment the channel by one. Once the desired
channel is displayed the XO-AP will set to that
channel.
NOTE: You may also Lock your channel by pressing and
holding the select button for 10 seconds, until the decimal
point is illuminated solid, then release the select button. To
de-activate the Lock feature, repeat the procedure until the
decimal point is not illuminated.
7. With the XO-AP running, turn on the XO-1 beltpacks
one at a time. The beltpack’s battery light will activate
immediately, but the unit will require up to 20 seconds
to complete start-up. After 20 seconds, one or both of
the beltpack’s audio channel lights will activate and
communications will start.
8. Wear the beltpacks on the hip. Place them in a position
that allows for greatest visibility to the XO-AP antenna
in the press box.
Figure 1
XO-AP and Panel Antenna
Figure 2
XO-AP with Antenna Pointing Toward Near Sideline
XO-AP and XO-1 Wireless
Intercom User Instructions
NOTE: Prior to use, the XO-1 Beltpacks and XO-AP
Base Station need to have their battery packs fully
charged. Refer to battery charge instructions on reverse
side of this sheet.
Point antenna toward
your sideline.
XO-AP in the
Coach's Box
Legacy
TM
Telex
Figure 3
XO-1 Beltpack
Halftime
1. Leave the XO-AP Base Station “On”.
2. The XO-1 beltpacks may be turned off for halftime to
conserve battery life, or left on.
3. If the XO-1 beltpacks are turned off at halftime, turn the
beltpacks on, one at a time. Again, the beltpack’s
battery light will indicate immediately, but the unit will
require up to 20 seconds to complete start-up. After 20
seconds, one or both of the beltpack’s audio channel
lights will activate and communications will start.
Before Next Game
(Battery Charging Instructions)
1. Ensure the XO-1 beltpacks are in the “OFF” position.
2. Ensure the XO-AP base station is in the “OFF”
position.
3. XO-1 Beltpack: Plug the XO-1 beltpack charger into
the charge jack on the bottom of the beltpack. The LED
on the bottom of the unit indicates the charge status.
•RED =Charging
•GREEN =Charging Done
After a game the XO-1 beltpacks will need to
charge for at least 6-8 hours.
The beltpacks may be left on charge indefinitely.
Figure 4
XO-AP Base Station
On a full charge, the XO-1 Beltpack will operate for up
to 8 hours.
4. XO-AP Base Station: Plug the XO-AP battery charger
into the battery charge jack on the rear of the unit. Then
plug the charger into an AC outlet. The LED on the rear
of the unit will indicate the following:
•RED =Charging
•GREEN = Charging Done
After a game the XO-AP will need to charged
for 10-14 hours.
The XO-AP may be left on charge indefinitely.
On a full charge, the XO-AP base station will operate
for up to 10 hours.
Telex Communications, Inc.
8601 East Cornhusker Highway, Lincoln, NE 68510
PN 804189-TX Rev C
Top View
Bottom View
Front View
Rear View
R

Other manuals for Legacy XO-1

2

This manual suits for next models

2

Other Telex Intercom System manuals

Telex Audiocom BP-2002 User manual

Telex

Telex Audiocom BP-2002 User manual

Telex 4012 Guide

Telex

Telex 4012 Guide

Telex RadioCom BTR-800 User manual

Telex

Telex RadioCom BTR-800 User manual

Telex RadioCom BTR-800 User manual

Telex

Telex RadioCom BTR-800 User manual

Telex Audiocom SPS-2000 User manual

Telex

Telex Audiocom SPS-2000 User manual

Telex RadioCom BTR-300 Administrator guide

Telex

Telex RadioCom BTR-300 Administrator guide

Telex Legacy XO-1 User manual

Telex

Telex Legacy XO-1 User manual

Telex RadioCom TR-300 User manual

Telex

Telex RadioCom TR-300 User manual

Telex Audiocom ES4000A User manual

Telex

Telex Audiocom ES4000A User manual

Telex 4012 Quick start guide

Telex

Telex 4012 Quick start guide

Telex RadioCom TR-825 Technical manual

Telex

Telex RadioCom TR-825 Technical manual

Telex Audiocom BP-2002 User manual

Telex

Telex Audiocom BP-2002 User manual

Telex IC-1 User manual

Telex

Telex IC-1 User manual

Telex BP-2000 User manual

Telex

Telex BP-2000 User manual

Telex IFB-1000 User manual

Telex

Telex IFB-1000 User manual

Telex CIA-1000 User manual

Telex

Telex CIA-1000 User manual

Telex RADIOCOM BTR-1 User manual

Telex

Telex RADIOCOM BTR-1 User manual

Telex PROCOM2 User manual

Telex

Telex PROCOM2 User manual

Telex EKP-832 User manual

Telex

Telex EKP-832 User manual

Telex KP-812 User manual

Telex

Telex KP-812 User manual

Telex Vega IP-1616 User manual

Telex

Telex Vega IP-1616 User manual

Telex RadioCom BTR-800 User manual

Telex

Telex RadioCom BTR-800 User manual

Telex Audiocom WM1000 User manual

Telex

Telex Audiocom WM1000 User manual

Telex ICW-6 User manual

Telex

Telex ICW-6 User manual

Popular Intercom System manuals by other brands

Telikou MDS-400 instruction manual

Telikou

Telikou MDS-400 instruction manual

Commax CMV-70MX user manual

Commax

Commax CMV-70MX user manual

ACT ACTPRO 3200 datasheet

ACT

ACT ACTPRO 3200 datasheet

Aiphone IXG-2C7 installation manual

Aiphone

Aiphone IXG-2C7 installation manual

Telex Communications IC-6SX Installation & operation instructions

Telex Communications

Telex Communications IC-6SX Installation & operation instructions

Optimus OPTIMUS KIT installation guide

Optimus

Optimus OPTIMUS KIT installation guide

Bpt Agata C 200 installation manual

Bpt

Bpt Agata C 200 installation manual

Aiphone KB-3HRD installation manual

Aiphone

Aiphone KB-3HRD installation manual

Chamberlain NDIS user manual

Chamberlain

Chamberlain NDIS user manual

Samsung CCTV SDV-410Y Quick start instructions

Samsung

Samsung CCTV SDV-410Y Quick start instructions

Swann SR244-BVD Easy setup guide

Swann

Swann SR244-BVD Easy setup guide

Aiphone MK-1GD Installation & operation manual

Aiphone

Aiphone MK-1GD Installation & operation manual

Aiphone IS SERIES installation manual

Aiphone

Aiphone IS SERIES installation manual

TMEZON MZ-IP-V103W operation instruction

TMEZON

TMEZON MZ-IP-V103W operation instruction

Carus CAI 1100 Assembly instruction

Carus

Carus CAI 1100 Assembly instruction

Vimar ELVOX PIXEL UP 40414.S user manual

Vimar

Vimar ELVOX PIXEL UP 40414.S user manual

Engineering Incorporated PM501 Operator and installation manual

Engineering Incorporated

Engineering Incorporated PM501 Operator and installation manual

Commend C-EM6CA Mounting instructions

Commend

Commend C-EM6CA Mounting instructions

manuals.online logo
manuals.online logoBrands
  • About & Mission
  • Contact us
  • Privacy Policy
  • Terms and Conditions

Copyright 2025 Manuals.Online. All Rights Reserved.