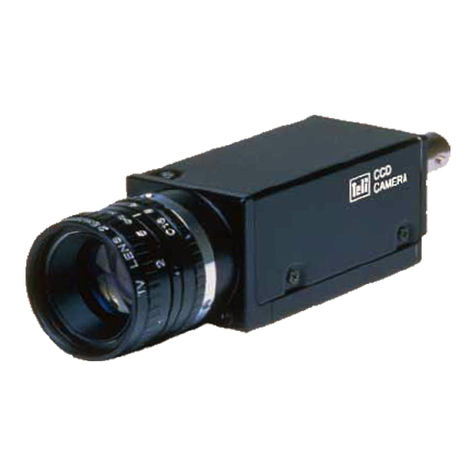
Teli CS6900 User manual

CCD Color Camera
Model CS6900 / CS6900P
Instruction Manual
TOKYO ELECTRONIC INDUSTRY 00. LTD.
2000-04-18

Thank you for purchasing our CS6900 / CS6900P color CCD camera.
This operation manual contains some important information such as how to use
this equipment correctly and safely. Please read through this manual carefully.
After reading, keep this manual by the side of your equipment for your future
reference.
CONTENTS
GENERAL SAFETY INSTRUCTIONS
1. PRODUCT DESCRIPTION --------------------------------------- 1
2. FEATURES ---------------------------------------------------------- 1
3. CONFIGURATION ------------------------------------------------- 1
4. OPTIONAL ACCESSORIES -------------------------------------- 1
5. DESIGNATIONS AND WORKINGS OF EACH PART ------ 2
6. HOW TO MOUNT THE CAMERA ------------------------------- 3
7. CONNECTION ------------------------------------------------------- 4
8. SETTING -------------------------------------------------------------- 5
9. SPECIFICATIONS --------------------------------------------------- 7
10. TIMING CHART ---------------------------------------------------- 9
11. EXERNAL-VIEW DRAWING ------------------------------------ 12

QHandling precautions
BEFORE USING THE CAMERA - GENERAL SAFETY INSTRUCTIONS
This instruction manual contains important information for the operator (user) and/or people
around him/her to avoid personal injuries, or property damages against him/her or people
around him/her Ñ=by using this product correctly. Prior to use, read this operation manual
carefully to fully understand its instructions for correct use.
[Definition of markings]
The meaning of each :mark used in this instruction manual is given below.
DANGERThis mark warns the user that improper use, indicated with this mark, may
cause death or severe personal injuries against the user or people around
him/her.
CAUTIONThis mark warns the user that improper use, indicated with this mark, may
cause personal injuries (*1) or material damages (*2) against the user or
people around him/her.
Notes *
1 : Personal injuries mean wounds, burns, electric shocks, and others for which the person
injured need not to be hospitalized nor to be cared for the long term.
*2 : Material damages mean any direct or consequential damages related to property or material
loss.
This mark indicates what the user SHOULD NOT DO. The details of things which the user
[should not do are described next to this mark.
This mark indicates what the user MUST DO. The details of things which the user must do
Qare described next to this mark.
This mark indicates that the user must be alert against a possible DANGER. The details of
the DANGER which the user must be aware of are described next to this mark.
This mark indicates that the user are given a CAUTION against possible hazards. The
Ìdetails of the CAUTION which the user must be aware of are described next to this mark.
DANGER
QIf any overheating sign is observed, discontinue the use immediately.
In the event that smoke, smell, or any other overheating sign is observed, turn the power
switch of the system OFF immediately, and remove the camera cable from the camera
connector. Do NOT try to continue to use the camera. To do so in spite of clear signs of
malfunction invites fire, an electric shock hazard, or a serious damage to the camera. In
such case, contact us or our dealer/distributor from which you purchased the camera for
repair service.
QIf any malfunctioning sign is observed, discontinue the use immediately.
Do NOT try to use the camera when malfunctioning. (Ex. No images on the
monitor) In the event of malfunction, turn the power switch of the system OFF
immediately, and remove the camera cable from the camera connector. In such case,
contact us or our dealer/distributor from which you purchased the camera for repair
service.

QIf any foreign objects gets into the camera, discontinue the use immediately.
In the event that liquids, small particles, or any other foreign objects get into the camera,
do NOT try to continue to use the camera.. To do so invites a fire or an electric shock
hazard. In that case, turn the power switch of the camera OFF immediately, and remove
the camera cable from the camera connector. After that, contact us or our
dealer/distributor from which you purchased the camera for repair service/technical
advice.
QIf any outer strong impact is given to the camera discontinue the use immediately.
In the event that the camera is dropped onto the ground, or the cabinet of the camera is .,
damaged, turn the power switch of the system OFF immediately, and remove the camera
cable from the camera connector. Do NOT try to continue to use the camera. To do so
invites a fire or an electric shock hazard. In such case, contact us or our
dealer/distributor from which you purchased the camera for repair service.
[Do NOT disassemble the camera.
Do NOT attempt to pull apart, repair, or modify the camera on your own. To do so might
lead to an irreparable breakdown / malfunction, or might invite an unexpected accident.
Contact us or the dealer/distributor from which you purchased the camera for
repair/modification.
[Do NOT supply any power other than specified.
The camera is designed to work only under specified voltage. Do NOT attempt to drive
the camera with power other than the specified. Operating the camera under any out-
of-tolerance power invites a fire or a electric shock hazard.
[Do NOT place the camera unstably.
Do NOT place the system on an unstable table, sloped ground, etc.. Make sure that the
camera do not fall to prevent an accident.
[Do NOT place any potentially-hazardous things on the camera.
Do NOT place any things on the camera which may, if it gets into the inside of the body,
damage the inner parts of the camera (such as a flower pot, glass, cosmetics, a container
filled with liquids or chemicals, as well as small metal parts, etc.). If tumbled, the liquids
inside the bottle; etc. may get into the system, causing a fire or an electric shock
accident.
[Do NOT short-circuit signal outputs.
Avoid short-circuit of signal outputs. Otherwise it may cause damage to the camera. For
inspection of inner parts/circuits, adjustment, or maintenance, contact us or the
dealer/distributor from which you purchased the camera.
[Do NOT use the camera in a high-humidity environment.
Do NOT place the camera near a humidifier, or in other high-humidity environment.
To do so may cause a fire or an electric shock accident.
[Do NOT expose the camera to direct sunlight , nor intensive heat.
Do not place the camera where it is exposed to direct sunlight, or in a higher temperature
than guaranteed (Over 40 degrees Celsius). To do so may cause the inner temperature of
the camera to go up, resulting in burning-down of inner parts, circuits or a fire accident.
[Do NOT expose the camera to greasy fumes.
Do NOT place the camera at the location where it is exposed to greasy fumes or steams,
or heavy dusts. To do so may cause the inner temperature of the camera to go up,
resulting in burning-down of inner parts/circuits or a fire accident.

CAUTION
[Do NOT connect/disconnect connectors with power ON.
Before connecting/disconnecting connectors, make sure to check if the system is
powered OFF. Doing so with power ON may cause a damage or an electric shock
accident.
[Do NOT give a strong shock/impact against the camera-head.
Avoid giving a strong shock against the camera head. The camera-head might be
damaged.
[Do NOT pull/swing the cable forcefully.
Do not pull strongly the camera cable/camera-head nor swing it. The stress from pulling
or swinging may cause damage in the coating of the cable, or breaks in the inside wires.
In carrying the camera around, be sure to disconnect connection cables/lines beforehand.
Otherwise, the connection cable(s)/line(s) might be damaged, causing a fire or an
electric shock accident.
If the camera is operated in the electromagnetic field, there may be cases where beat
noises (vertical, horizontal, or oblique stripes) may appear in the video output. In that
case, take preventive measures on the electromagnetic-wave generating source so that
the camera do not receive the interference by the electromagnetic-wave. Take extra
precautions against electromagnetic-wave-interference if the camera is used with a
servomotor, inverter, or other electromagnetic-wave-generating equipment.
When the camera is not in use, put a lens or a lens-cap onto the camera head so that the
image pickup plane of CCD is protected from dust, foreign object, or other flaw-causing
object. If the glass plane (image pickup plane) gets dirty, clean it with a cotton swab.
When it needs to be cleaned with a cleaner, be sure NOT to use any organic solvent other
than ethyl alcohol. As a countermeasure against condensation, when the camera is
moved from a warm place to a cold place, take appropriate precautions to prevent
condensation from forming on the camera.
Avoid placing the camera where it is splashed with water or any other fluids. Operating
the camera with its inner parts/circuits in wet condition may cause a damage or an
electric shock accident.

RESTRICTION FOR USE
Do not attempt irregular signal interface other than specified. Under signal interface
other than recommended/specified in this instruction manual, the camera might fail to
exert the maximum performance. In much worse case, if you continue to use the camera
under incorrect signal interface, part(s) of circuits might burn down.
In case malfunction of this equipment (e.g. video output cut-off) can be expected to lead
to significant accident, avoid using this equipment for such system build-in use.
CASES FOR IMDEMINITY (LIMITED WARRANTY)
We shall be exempted from taking responsibility and held harmless for damages or
losses incurred by user in the following cases.
1. In case damages or losses are caused by fire, earthquake, or other acts of Gods, the
act by third party, misuse by the user deliberately or erroneously, use under extreme
operating conditions.
2. In case indirect, additional, consequential damages (loss of expected interest,
suspension of business activities) are incurred as results of malfunction or non-
function of the equipment, we shall be exempted from assuming responsibility for
such damage.
In case damages or losses are caused by incorrect use which is not in line with the
instructions in this instruction manual.
4. In case damages or losses are caused by malfunction resulting from bad connection
with other equipment.
s. In case damages or losses are caused by repair or modification done by the user.
3.

1. Product Description
Model CS6900 is an integrated (one-body) type color CCD camera employing a
1/2"size all-pixel-data-readout CCD. Thanks to its built-in RGB primary-color mosaic filter,
this model realizes high resolution and high color reproduction.
2. Features
(1) 1/2" size primary-color mosaic CCD
A high color reproduction is ensured.
(2) Random trigger shutter function
With its built-in RTS (Random Trigger Shutter), CS6900's CCD starts light-exposure
in synchronization with external trigger signals. This function enables the camera to
capture fast-moving subjects at constant position for precise image processing.
(3) External sync.
The camera is switched over to external synchronization operation automatically when
external HD/VD signals are input.
(4) Suitable for image processing
Its simple ROB-dedicated (=only) output line is suitable for signal processing.
3. Configuration
(1) Camera body
(2) Accessory
Operation Manual
4. O
p
tional Accessories
(1) DC SYNC IN cable (CPRC3700) 1
(2) RGB conversion cable (= From HR10A-10R-12SB into DSUB 9PIN) 1
(3) Camera adapter (CA170) 1
(4) Camera mounting hardware (CPT3910) 1
1
1
1

5. Designations and workings of each parts
Rear
-
v
iew: CS6900 / CS6900P
(1) GAIN Control
①MG ------------------- Manual GAIN potentiometer (RGB simultaneously variable)
②WB-R ---------------- White-balance R potentiometer (R variable)
③WB-B ---------------- White-balance B potentiometer (B variable)
(2) DC IN/SYNC
DC+12V Power IN, Ex-sync HD/VD IN, and TRIG/WEN CLK Terminal
This connector is for connection with a power supply, image processing equipment, etc.
(3) RGB OUT
RGB VIDEO OUT and HD/VD VIDEO OUT TERMINAL
For connection with image processing equipment, etc.
2

6. How to mount the camera
(1)Option 1: Using a camera tripod fixing kit [Tripod screws (1/4-20UNC)]
Use an optional tripod fixing kit to fix the camera onto the tripod.
(See the diagrammatic sketch shown below)
3
(2)Option 2 : Using the mounting holes (Bottom side)
Put M3 screws through these holes to fix the camera. Be sure to use screws which are
shorter than specified length. Longer screws may damage the inner circuit board.
①To fix your camera by using mounting holes (a) above (= 2 places), be sure to use
3mm or shorter screws.
②To fix your camera by using mounting holes (b) above (= 4 places), be sure to use
5mm or shorter screws.
③To fix your camera by using mounting holes (c) above (= 2 places), be sure to use
3mm or shorter screws.

7. Connection
(1)IN/OUT connector
DC/SYNC connector (12P)-Manufactured by HIROSE DENKI
Camera-side: HR 10A-10R-12PB, Cable-side: HrlOA-10P-12S
RGB OUT connector (12P)Manufactured by HIROSE DENKI
Camera-side: HR10A-10R-12SB, Cable-side: HR10A-10P-12P
PIN DC IN/SYNC PIN RGB OUT
1 GND 1 R OUT
2 +12 V IN 2 R GND
3 GND 3 G OUT
4 NC 4 G GND
5 HD/VD.GND 5 B OUT
6 HD.IN 6 B GND
7 VD.IN 7 VD OUT*
8 GND 8 VD GNU
9 NC 9 HD OUT
10 WEN OUT 10 HD GNU
11 TRIG IN 11 NC
12 CLK OUT 12 NC
*SYNC output available via REG Board SW. Please refer to Section 8-(6) VD/SYNC
selection switch (REG Board)
4

00
-
01
-
04
18:23
t9L
-
0001498142488101
8. Setting
Setting of each mode can be done with the rear-panel DIP switch. To select modes, slide
DIP switches numbered 1 through 8. The status is OFF when SW is in left position, ON
when in right position.
Rear Panel SW (Left: OFF -- Right: ON)
OFF ON
(1)Setting: G on SYNC [DIP SW1] (Initial Factory Setting: ON = G on SYNC)
OFF: No G on SYNC
ON: G on SYNC (=SYNC signal superposed on G-channel)
(2)Setting: MG (Master GAIN) [DIP SW2] (Initial Factory Setting: OFF = MANU)
OFF: MANU = GAIN adjustable via rear-panel MG potentiometer
ON: FIX = Fixed MAIN (Rear-panel MG potentiometer disabled)
(3)Setting: Shutter Mode [DIP SW3] (Initial Factory Setting: OFF = Normal Shutter)
OFF: NOR = Normal shutter
ON: RDM = Random trigger shutter
(4)Setting: HV Reset Mode [DIP SWS] (Initial Factory Setting: OFF = Non-reset)
OFF: NON-RESET = HD, VD Non-reset mode (Internal- / External-sync operation)
ON: RESET = HD, VD Reset mode (Internal sync operation only) *2
*2 HD, VD Reset mode disabled under external sync operation.
5
P
.
12/19
U
908
G on SYNC selection
MG MANU / FIX selection
Shutter-mode selection
N.C
HV reset mode selection
Shutter-speed selection
Shutter-speed selection
Shutter-speed selection
Rear SW

CCD Side
(5)Setting: Shutter-speed [DIP SW6, 7, and 8]
(Initial Factory Setting: OFF= 1/60s (CS6900), 1/50s (CS6900P)
SW6 SW7 SW8 Normal E shutter (s) RTS (s)
CS6900 CS6900P CS6900 CS6900P
H H H 1/60
(OFF)
1/50
(OFF)
1/500 1/500
L L L 1/125 1/125 1/1,000 1/1,000
H H H 1/250 1/250 1/2,000 1/2,000
L L L 1/500 1/500 1/3,000 1/3,000
H H H 1/1,000 1/1,000 1/5,000 1/5,000
L L L 1/2000 1/2,000 1/7,000 1/7,00(1
H H H 1/4,000 1/4,000 1/10,000 1/10 000
L L L 1/10,000 1/10,000 1/12,000 1/11,000
(6)Setting: VD / SYNC Selection Switch (Camera Inside: REG Board)
VD / SYNC output is selectable via DIP SW on REG board (The bottom board inside).
(
Initial Factor
y
Settin
g
: VD out
p
ut
)
No HD
,
VD out
p
ut under SYNC out
p
ut mode.
Connector Side
S
YN
C
out VD out
VD SYNC Selection SW (REG Board)
CS6900 / CS6900P Side-view: Without Protection Cove
r
IMPORTANT
Before removing / putting back the cover for DIP SW mode selection, make sure to turn
p
ower SW OFF.
6

9. S
p
ecifications
The part of specifications of CS6900P PAL version, which is not the same with CS6900
NTSC version, are shown in brackets [ ] in the table below.
Model CS6900 [CS6900P]
TV system EIA format [CCIR format]
Image sensor All-pixel-data-readout color interline CCD
Optical size 1/2 inch equivalent
Active pixel 659(H)*494(V) [782(H)*582(V)]
(Square-array) (Square-array)
Unit cell size 9.9(H)*9.9(V) micrometer [8.3(H)*8.3(V) micrometer]
Scanning area 6.4(H)*4. mm (=1/2"equivalent)
Scanning lines 525 lines [625 lines]
Scanning system 2:1 Interlace
Sync system Internal / External sync automatic switchover
Scanning frequency 15.734kHz(H), 59.94 [16.625kHz(H), 50.OOHz(V)]
Aspect ratio 4:3
Subject illumination Standard 2800 lx (F4)
Minimum 87.5 lx (F1.4 MG max.)
GAIN MG: Manual GAIN (Plus-minus 6dB)
WB-R: White-balance R variable
WB-B: White-balance B variable
White-balance From 2600K through 9000K
Video output
RGB output
Video RGB: 0.7V(p-p)/75-ohm
SYNC Gch only., 0.3V(p-p)/75-ohm
Resolution R 210, G 420, B 210 lines(H) [R 250, G 500, B 250 lines(H)]
350TV line" [420TV lines(V)]
S/N 48dB (Normal GAIN)
Gamma correction Gamma =1(Fixed)
Input signal
1. Ex-sync signal: HD, VD input
HD input level: LOW; From 0 through 1V / 10k-ohm
HIGH; From 4 through 5V / 10k-ohm
HD frequency deviation:
15.734kHz plus-minus 2% [15.625kHz plus-minus 2%]
HD pulse width: 6.4 plus-minus 3 micro s (Negative)
VD input level: LOW; From 0 through 1V / 10k-ohm
HIGH; From 4 through 5V / 10k-ohm.
VD pulse width: From 250 through 800 micro s (Negative)
2. TRIG signal: Trigger input signal
TRIG input level: LOW; From 0 through 1V/ 10k-ohm
HIGH; From 4 through 5V / 10k-ohm
7

Output signal
TRIG pulse width: Longer than 5 micro s (Negative)
TRIG pulse interval: Longer than 2 FLD (Reset mode)
Longer than 3 FLD (Non-reset mode)
1. WEN signal: CCD readout timing pulse under RTS
Polarity: Negative
Pulse width: 1H (1 FLD under RTS)
Output level: From 3.5 through 4.5V(p-p) / 10k-ohm terminal
2. CLK signal: Clock
Frequency: 12.27MHz [14.75MHz]
Output level: 1V(p-p) plus-minus 0.2V (sine wave) / 75-ohm T
3.HD signal
Polarity: Negative
Pulse width: 6.36 pus-minus 0.5 micro s
[6.41plus-minus0.5micros]
Output level: From 3.5V through 4.5V(p-p) / 10k-ohm terminal
4. VD signal
Polarity: Negative
Pulse width: 572 plus-minus 5 micro s
[480 plus-minus 5 micro s]
Output level: From 3.5V through 4.5V(p-p) / 10k-ohm terminal
5. SYNC signal
Polarity: Negative
Pulse width: 4.89 plus-minus 0.5 micro s
[4.93plus-minus0.5micros]
Output level: From 3.5V through 4.5V(p-p) / 10k-ohm terminal
Electronic terminal
Power adapter
Normal electronic shutter
1/10000s, 1/4000s, 1/2000s, 1/1000s, 1/500s, 1/250s, 1/125s,
1/60s [1/50s]
Random trigger shutter
1/12000s [1/11000s],1/1000s,1/7000s, 1/5000s, 1/3000s,
1/2000s,1/1000s,1/500s
Recommended power adapter: Model CA170
Power rating: DC12V plus-minus 10%
Current rating: 0.9A and over
Ripple voltage: Less than 50mV(p-p)
Compatible connector: DC IN / SYNC (HR10A-10P-12S)
(Manufactured by HIROSE DENKI)
Power consumption Approx.3.8W
Ambient condition
Performance guaranteed:
8

Temperature: From 0 through 40 degree Celsius
Humidity: From 30 through 70% (No condensing)
Operation guaranteed:
Temperature: From Minus 5 through 45 degree Celsius
Humidit
y
:From25throu
g
h 75%
(
No condensin
g
T
-
505 P
.
16l19 U
-
908
Lens mount Lens C mount
External dimension 49(W) * 35(H) * 98(D)mm
Weight Approx. 170g
10. Timing chart
(1) Normal shutter 1/60 [CS6900P 1/50s] interlace mode
In this mode, each RGB signal is output through RGB OUT connector in the interlace
mode [CS6900 -1/6Os, CS6900P =1/5Os].
(2) RTS 1/60s [1/50s] interlace mode (=Non-reset mode)
In this shutter mode, without resetting horizontal/vertical sync, images started to be
captured at ex-trigger input timing are output in the second field after exposure-field.
This mode is suitable for external sync operation system.
9
V
D OUT
HD OUT
R OUT
G OUT
B OUT
WEN
(1H Length Pulse)

(3) RTS 1/60s [1/50s] interlace mode (= Reset mode)
In this mode, images started to be captured at ex-trigger input timing are output in the
first field (=next FLD) after exposure-field by resetting horizontal/vertical sync.
All specification as of the date of issue of this document is provisional.
Specification is subject to change without notice.
10
Important
TRIG IN
VD OUT
HD OUT
CCD
Exporse-time
R OUT
G OUT
B OUT
WEN
TRIG IN
VD OUT
HD OUT
CCD
Exporse-
time
R OUT
G OUT
B OUT
WEN

CS6900 H-rate Timing
CS6900 H-rate Timing
1CLK=1/14.75000MHz
1CLK=1/12.27275MHz
HD OUT
VIDEO
WEN OUT
HD OUT
VIDEO
WEN OUT
11

11. External-view Drawing
12
This manual suits for next models
1
Table of contents
Other Teli Security Camera manuals
Teli
Teli CS3720 User manual
Teli
Teli CS8300 Series User manual
Teli
Teli CS6940CL User manual
Teli
Teli CSCS20BC2 User manual
Teli
Teli CS9001 Series User manual
Teli
Teli CS400B series User manual
Teli
Teli CS8620i (EIA) User manual

Teli
Teli CS8550Di User manual
Teli
Teli CS5260D User manual
Teli
Teli CS9001 Series User manual
