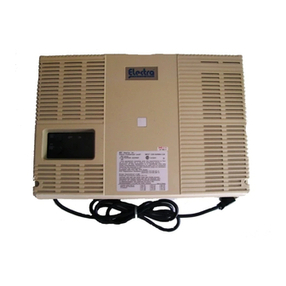
Teltone ILS-1000 User manual

40-400-00001, Rev. A 47
User Manual 40-400-00001, Rev. A
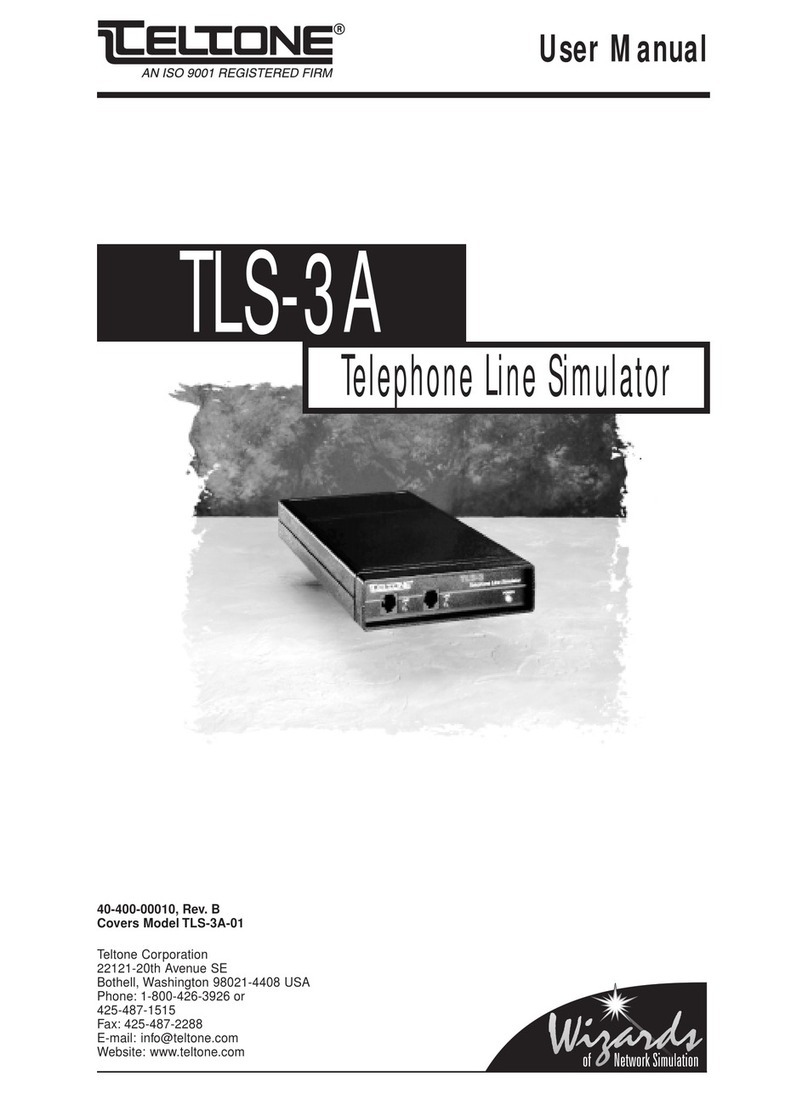
ISDN Line Simulator
ILS-1000

40-400-00001, Rev. A 1
Contents
IMPORTANT SAFETY INSTRUCTIONS ........................................................................................... 2
Regulatory Compliance ..................................................................................................................... 3
Introduction ....................................................................................................................................... 4
Unpacking ....................................................................................................................................... 5
Optional Accessories..................................................................................................... 5
Chapter 1: Quick Start..................................................................................................................... 6
ILS-1000 Operation....................................................................................................... 9
What To Read Next ..................................................................................................... 10
Chapter 2: ISDN-BRI......................................................................................................................11
Technology Overview ...................................................................................................11
Layer 1 - Physical Operation .......................................................................................11
Layer 2 - Data Link Operation..................................................................................... 12
Layer 3 - Network Operation....................................................................................... 13
Chapter 3: Provisioning and Operation ........................................................................................ 15
Configuration Software Installation............................................................................. 15
Figure 1 ILS-1000 Configuration Software Opening Screen..................................... 16
General Operation ...................................................................................................... 16
Defaults ....................................................................................................................... 17
Switch Type ................................................................................................................. 17
D Channel X.25.......................................................................................................... 17
B Channel Provisioning............................................................................................... 19
Caller ID ...................................................................................................................... 19
Terminal Display Text .................................................................................................. 20
Electronic Key Telephone Service (EKTS) ................................................................. 20
Multi-Point ................................................................................................................... 21
Call Appearances ........................................................................................................ 21
Key Hold...................................................................................................................... 22
Additional Call Offering (ACO) .................................................................................... 23
Chapter 4: Simulator Operation .................................................................................................... 24
Simulator Operation .................................................................................................... 24
Restart.........................................................................................................................25
Chapter 5: Reference.................................................................................................................... 26
Status Indications........................................................................................................ 26
Figure 2 U Interface operation ................................................................................... 26
Figure 3 S/T Interface operation ................................................................................ 26
Figure 4 ILS-100 Dimensions and View ................................................................... 27
230VAC Operation ...................................................................................................... 27
Supported Call Control Messages .............................................................................. 28
Typical Call Control Sequence.................................................................................... 29
Figure 5 Call Control Message Exchange example .................................................. 30
Troubleshooting .......................................................................................................... 31
Reference Documents ................................................................................................ 34
Warranty and Service ...................................................................................................................... 35
Specifications................................................................................................................................... 37
Glossary ..................................................................................................................................... 39

240-400-00001, Rev. A
IMPORTANT SAFETY INSTRUCTIONS
When using your telephone equipment, basic safety precautions should always be followed to reduce the risk
of fire, electric shock, and injury to persons, including the following:
1. Read and understand all instructions.
2. Follow all warnings and instructions marked on the product.
3. Unplug this product from the wall outlet before cleaning. Do not use liquid cleaners or aerosol cleaners. Use
a damp cloth for cleaning.
4. Do not use this product near water, for example, near a bath tub, wash bowl, kitchen sink, or laundry tub, in
a wet basement, or near a swimming pool.
5. Do not place this product on an unstable cart, stand, or table. The product may fall, causing serious damage
to the product.
6. Slots and openings in the cabinet and the back or bottom are provided for ventilation. To protect it from
overheating, these openings must not be blocked or covered. The openings should never be blocked by
placing the product on a bed, sofa, rug, or other similar surface. This product should never be placed near or
over a radiator or heat register. This product should not be placed in a built-in installation unless proper
ventilation is provided.
7. This product should be operated only from the type of power source indicated on the marking label. If you
are not sure of the type of power supply to your home, consult your dealer or local power company.
8. Do not allow anything to rest on the power cord. Do not locate this product where the cord will be abused by
persons walking on it.
9. Do not overload wall outlets and extension cords as this can result in fire or electric shock.
10. Never push objects of any kind into this product through cabinet slots as they may touch dangerous voltage
points or short out parts that could result in fire or electric shock. Never spill liquid of any kind on the product.
11. To reduce the risk of electric shock, do not disassemble this product, but take it to a qualified serviceman
when some service or repair work is required. Opening or removing covers may expose you to dangerous
voltages or other risks. Incorrect reassembly can cause electric shock when the appliance is subsequently
used.
12. Unplug this product from the wall outlet and refer servicing to qualified service personnel under the follow-
ing conditions:
A. When the power supply cord or plug is damaged or frayed.
B. If liquid has been spilled into the product.
C. If the product has been exposed to rain or water.
D. If the product does not operate normally by following the operating instructions. Adjust only those
controls that are covered by the operating instructions, because improper adjustment of other controls
may result in damage and will often require extensive work by a qualified technician to restore the product
to normal operation.
E. If the product has been dropped or the cabinet has been damaged.
F. If the product exhibits a distinct change in performance.
13. Avoid using a telephone (other than a cordless type) during an electrical storm. There may be a remote risk
of electric shock from lightning.
14. Do not use the telephone to report a gas leak in the vicinity of the leak.
SAVE THESE INSTRUCTIONS

40-400-00001, Rev. A 3
Regulatory Compliance
This equipment has been tested and found to comply with the limits for a Class A
digital device, pursuant to Part 15 of the FCC Rules.These limits are designed to
provide reasonable protection against harmful interference when the equipment is
operated in a commercial environment.This equipment generates, uses and can
radiate radio frequency energy and, if not installed and used in accordance with the
instruction manual, may cause harmful interference in which case the user will be
required to correct the interference at his own expense.
COPYRIGHT. The enclosed Software is owned by Teltone Corporation and is protected by copyright law. You
must treat the Software like any other copyrighted material (e.g., a book or musical recording) provided that
you may either (a) make one copy of the Software for backup or archival purposes, or (b) transfer the Software
to a single hard disk provided you keep the original solely for backup or archival purposes.
US GOVERNMENT RESTRICTED RIGHTS. This Product is provided with RESTRICTED RIGHTS. Use,
duplication, or disclosure by the Government is subject to restrictions as set forth in subparagraph (c)(1)(ii) of
The Rights inTechnical Data and Computer Software clause at DFARS 252.227-7013 or subparagraphs (c)(1)
and (2) ofThe Commercial Computer Software - Restricted Rights at 48 CFR 52.227-19, as applicable. Manu-
facturer is Teltone Corporation, 22121 - 20th Avenue SE, Bothell, Washington, 98021-4408.
Copyright © 1995Teltone Corporation.Teltone is a registered trademark ofTeltone Corporation.
TeltoneCorporation
22116-23rd Drive SE
Bothell,WA98021-4413
Phone:425-487-1515
Fax:425-487-2288

440-400-00001, Rev. A
Introduction
ISDN (Integrated Systems Digital Network) is a system which combines telephone
and computer networking in a digital medium.The ISDN BRI (Basic Rate Interface)
is the interface for individual users to connect to the public telephone network. An
ISDN BRI is composed of three separate channels of information called 2B+D, that
is, two full duplex Bearer channels and one full duplex Delta channel combined onto
a single pair of wire.
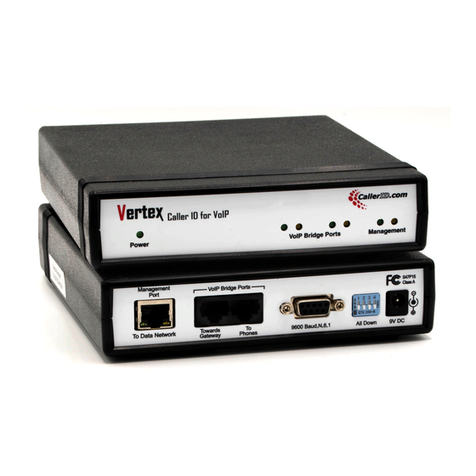
The Teltone ILS-1000 (ISDN Line Simulator) is two ISDN BRI connections in a
portable housing. The user interface is either a “U” or an “S/T” connection using an
RJ45 modular plug. The “U” connection is similar to the interface that is provided by
a local telephone service provider (LEC), such as one of the Bell Operating Compa-
nies, or an independent telephone company. The “S/T” connection uses a built in
NT-1 (Network Termination 1) to connect to Terminal Equipment that includes TE1s,
TAs, and TE2s. Using these connections, the user is able to place calls, either
voice or data, or both, using the National ISDN-1 signalling standard. AT&T 5ESS
Custom provisioning is available as a separate option (ILSATT-01).
ISDN is based upon an OSI (Open System Interconnection) model. The ILS-1000
supports layer 1 (physical operation), layer 2 (data link operation), and Layer 3
(network operation.) Layers 4-7 are considered application layers that use the first 3
layers as a base.
The ILS-1000 ISDN Line Simulator has been developed to make the transition from
traditional telephony to ISDN networking easier. Software developers, manufactur-
ers, integrators, and sales representatives now have an ISDN-BRI
server in a box
.
The ILS-1000 supports ISDN-BRI end-to-end operation, multiple Call Control
protocols, telephony switch services, and simple functional operation on the desktop
or lab bench.

40-400-00001, Rev. A 5
Unpacking
Carefully unpack the items in the shipping container and verify that you have
received the following:
1. ILS-1000 ISDN Line Simulator
2. 115 VAC Power Cord
3. This User Manual
4. System Configuration Diskette
5. Warranty Registration Card
6. DB9F-DB25M 6-ft RS-232 cable (p/n 742-00022-01)
7. DB9M-DB25F adapter (p/n 742-00020-01)
Optional Accessories:
1. AT&T custom configuration software (diskette) (p/n ILSATT-01)

640-400-00001, Rev. A
Chapter 1: Quick Start
The ILS-1000 Line Simulator is easier to operate than most communications devices
designed for ISDN-BRI applications. It functions in the background, providing two
lines of end-to-end ISDN-BRI service.
Because the Simulator was designed primarily for people who demonstrate, func-
tionally test, or configure ISDN-BRI devices, you do not need to understand ISDN
protocols or read the entire User’s Manual to use it. Simply follow the instructions
outlined below to successfully simulate most ISDN-BRI communications devices
and computer applications.
Step 1 Place the Simulator on a flat surface near the ISDN equipment to be
connected.
Step 2 Insert the power cord into the three-pronged outlet located at the rear
of the Simulator. Plug the other end into a standard 115 VAC, 60 Hz
wall outlet. NOTE: 230 VAC Power may be used, see Chapter 5 for
details.
Step 3 Apply power to the Simulator by pressing the power switch - located
at the rear of the Simulator - to the PWR ON position. An internal self-
test, lasting about 30 seconds, is performed. The STATUS LED
located on the front panel will switch between Red and Green during
this self-test. The STATUS LED changes to a continuous solid green
if the self-test is completed satisfactorily.
Step 4 The Simulator is configured at the factory for National ISDN-1 proto-
col.The Simulator is provisioned for default service, as normally
practiced for the selected switch type. Most communications devices
operate correctly with this provisioning. However, if your communica-
tions device does not operate correctly, you may need to change the
Simulator’s provisioning.These settings are fully described in Chapter
3. A list of recommended settings for different terminal types (AT&T
CUSTOM) is available in the ILS-1000 configuration software.
NOTE: The instructions for many ISDN-BRI communications
devices may specify Switch Provisioning required of the tele-
phone company. Provisioning is a means of configuring the
ISDN switch so it knows what kind and how many calls your
communications devices can handle, up to the limits imposed
by ISDN-BRI technology. Provisioning also specifies which
types of Supplementary Services your equipment may request,
such as call appearances, display support, etc.
Step 5 A 3.5" diskette is provided with the ILS-1000 to change the configura-
tion of the ILS-1000. To install this windows based software, place the
diskette in the appropriate drive and from Windows Program Manager,
select FILE, RUN, A:Setup.

40-400-00001, Rev. A 7
Step 6 After the Simulator’s provisioning is established, press RESTART. The
settings are retained in non-volatile memory until you change them.
You now have two ISDN-BRI telephone lines ready to provide Circuit
Mode Voice (Speech, 3.1 kHz Audio, 7 kHz Audio), and/or Circuit
Mode Data (56 Kbs Restricted, 64 Kbs Clear) services on two B
Channels.
Step 7 Refer to the instructions supplied by the manufacturer for installing
your communications device or computer application on an ISDN-BRI
telephone line. For most devices, you will use a procedure similar to
the following:
NOTE: The instructions may specify that your communications device re-
quires power from a secondary source, such as a wall adapter. It may not be
necessary to connect a power source when using the Simulator. See Specifi-
cations for more details.
Step 8 Determine which ISDN-BRI interface is compatible with your device.
The interface may be either S/T or U. The S/T Interface is commonly
called the “Phone” outlet from an NT-1 and is used for most end-user
communications devices. However, some adapters and communica-
tions devices connect to the U Interface, also called the “Line” outlet.
Use 8-Pin Modular (RJ-45) telephone cord for all connections.
IMPORTANT: Either or both Simulator ports may be used during simulation,
but only one interface (S/T or U) may be selected at each port. The Simulator
auto-detects the active interface. If both interfaces at one port are connected,
the Simulator defaults to the S/T interface.
If your communications device is compatible with the S/T Interface, connect to the
Simulator’s S/T Interface at either port. Some instructions may require that the
device be connected to the “Phone” outlet of an Network Termination-1 (NT-1)
device. If you do not have an NT-1 available, use the Simulator’s S/T Interface.
Step 9 If you have an NT-1 and want to install it between your device and the
Simulator, connect the NT-1 “Line” outlet to the Simulator’s U Inter-
face at either port. Allow several seconds (5-30) for the port’s U-SYNC
light to turn green, then connect your communications device to a
“Phone” outlet on the NT-1. Most NT-1’s provide two “Phone” outlets,
providing a convenient method for connecting two devices at each
Simulator port.
NOTE: The Simulator’s U-SYNC light shows synchronization only for the U
Interface. The U-SYNC light is not an indicator for the S/T Interface, which
synchronizes in less than a second.
Step 10 Next, you may be instructed to program one or more identification
numbers into your communications device or computer application.
The numbers may be a Service Profile ID (SPID) and sometimes a
telephone number (Directory Number or DN).The Simulator, like an
ISDN switch, expects specific SPID’s and DN’s to be assigned to any
particular port. When programming these numbers into your commu-
nications device, you must assign the number(s) listed in the following
table:

840-400-00001, Rev. A
First device at Port 1: SPID 0835866101
DN 835-8661 (1-800-835-8661)
Second device at Port 1: SPID 0835866301
DN 835-8663 (1-800-835-8663)
First device at Port 2: SPID 0835866201
DN 835-8662 (1-800-835-8662)
Second device at Port 2: SPID 0835866401
DN 835-8664 (1-800-835-8664)
NOTE: Not all communications devices are programmed with a SPID or DN.
Some devices need an additional number called a Terminal Endpoint Identi-
fier (TEI). If you must assign a TEI, use a different number (between 1 and 63)
for each device you connect to the Simulator. If automatic TEI assignment is
a selectable option, choose it. In short, follow the instructions for your
device, using the numbers listed above, when applicable.
Step 11 After any identification numbers are programmed into your device, it
notifies the Simulator using an initialization procedure. If the proce-
dure is successful, and your device is connected to the U interface,
the U-SYNC LED will light after synchronization is complete.
NOTE: If the U-SYNC LED does not turn on, the device may need to be
rebooted or momentarily disconnected (powered down) and reconnected to
make it initialize. If the device did not require SPID programming, the U-SYNC
LED may not turn on until you place your first call.
Step 12 Repeat the above steps for additional devices.The Simulator provides
power for up to four communications devices and two NT-1’s. Each
communications device must be programmed with a different SPID
and/or DN.
Step 13 If you later need to rearrange the connections between the Simulator
and your devices, disconnect the devices from the Simulator, press
RESTART on the Simulator’s power switch, wait for the STATUS LED
to turn to a solid green, then reconnect your devices. If you move a
device from one port to another, its SPID and DN must be repro-
grammed using available numbers from Table 1.You do not need to
restart simulation if you change a device’s SPID or DN when it re-
mains at the same port.
IMPORTANT: Some devices let you change the ISDN protocol to support the
type of ISDN switch the telephone company has installed. If you change your
device’s protocol, you must change the Simulator’s Switch Type configura-
tion to match. If you change any one device’s ISDN protocol, then all devices
connected to the Simulator must be configured for that protocol.
Step 14 Now you can operate your devices as recommended by the manufac-
turer.

40-400-00001, Rev. A 9
ILS-1000 Operation
When the STATUS LED is a solid green, you can use your communications devices
or computer applications as if connected to the telephone company’s ISDN-BRI
service.
In general, your ISDN-BRI device will operate the same as conventional telephone
equipment, with the obvious exceptions that call processing occurs more rapidly and
that voice, high-speed data, and packet mode data may be sent and received
simultaneously.
To call from one device to another, you must connect at least two devices to the
Simulator.To place a call from device 1 to device 2, dial either the local DN or long
distance DN associated with device 2. For example, to call from device 1 (DN= 835-
8661) to device 2 dial the local Directory Number 835-8662 or the long distance
number 1-800-835-8662.
If you dial one of the valid Directory Numbers, but no device was assigned to that
number, you will hear a ringing tone. If you dial a number assigned to a device that
is unable to accept the call, you will hear busy tone and be disconnected after
approximately 45 seconds. If you dial a number that is invalid, you will hear a
reorder tone (fast busy signal), which means the Directory Number is not in service.
If you dial the number correctly and the device is able to accept the call, the called
device begins alerting (rings). When the call is answered, a connection is estab-
lished between the devices.You may then talk, transfer files, share computer
applications, video conference, exchange e-mail, or perform any other service or
feature your ISDN-BRI devices or computer applications support.
If your device supports putting a call on hold or placing multiple calls, you can make
additional calls to other devices. You can also make calls in either direction.When
you have completed the demonstration, hang up all calls to release their resources.
ISDN-BRI supports up to two connected voice and/or data calls on one line using
the B Channels. More than two calls may be present, but any call exceeding the
limit of two
connected
calls must be placed on hold. Some devices, particularly
those that support video conferencing or LAN adaptation, need both B Channels for
a single call.
If your communications device requests any of these services, the Simulator pro-
vides the necessary processing and resources. A special case, which uses the D
Channel and X.25 packet data transmission is also supported and may occur while
both B Channels are connected.To enable this service, see Chapter 3 section on D
Channel X.25 Packet Handling Function.
Some limitations apply to all ISDN-BRI communications, however. For example, if
two devices are connected to a single line and you establish a call between them,
both B Channels at that line are allocated to connect the call. In other words, both B
Channels are “busy” during one connected call. Consequently, any device that uses
two B Channels for a single call, such as a video conferencing application, cannot
connect to another device on the same line.

10 40-400-00001, Rev. A
Another limitation occurs when attempting to place a call to a device that does not
support the requested call type. For example, a call placed from an ISDN data
terminal to an ISDN voice telephone will be rejected by the telephone.
In some cases, the call type and number of channels are satisfied and the called
device answers the call, but the calling application is not compatible with the called
application. For example, not all video conferencing applications use the same data
encoding. Or, a Terminal Adaptor that converts ISDN to RS-232 may answer a data
call that is carrying FAX information. A well-designed application determines that it
cannot process the data and releases the call. Otherwise the user must hang up.
What To Read Next
For a technical review of ISDN-BRI operation, including physical layer indications,
data link packet protocol, and call control signaling, read Chapter 2.
For a comprehensive review of Simulator provisioning, read Chapter 3.
For more details about Simulator operation , read Chapter 4.
For troubleshooting guidelines, technical references, read Chapter 5.

40-400-00001, Rev. A 11
Chapter 2: ISDN-BRI
Technology Overview
The Integrated Services Digital Network - Basic Rate Interface (ISDN-BRI) is a
technology that gives individuals affordable access to the world’s largest digital
network using the copper wire currently entering their home or office.With ISDN-
BRI, users may connect almost any form of personal communications device to a
single phone line and establish multiple, simultaneous voice and data connections at
speeds up to 128 thousand bits per second.
ISDN is an extremely robust networking technology based on the Open Systems
Interconnection (OSI) model set forth in the International Standards Organization
specification, ISO84.
The OSI model specifies a layered design architecture. Layer 1, or the physical
layer, consists of two new interfaces, referred to as the
U and S/T Interfaces
. Layer
2, or the data link layer, is a packet transport protocol known as
Link Access Proto-
col - D Channel
(LAP-D), which was adapted from ITU-T Recommendation X.25.
Layer 3, or the network layer, is a flexible switching and signaling language referred
to as
ISDN Call Control
.
The ILS-1000 is configured to support the first three layers of the OSI model.
ISDN services are referred to as
Call Types
. Common call types are Circuit Mode
Voice (CMV), Circuit Mode Data (CMD), and Packet Mode Data (PMD). Circuit
mode call types support high-speed data and digitized voice, while packet mode
calls may be used for computer networking.
All ISDN-BRI user traffic travels over two 64Kbs
B Channels
and one 16Kbs
D
Channel
.The B Channels are always used for circuit mode calls and the D Channel
is always used for transporting Call Control signaling packets between the ISDN
switch in the central office and the end-user communications device.The B and D
Channels may optionally transport user Packet Mode Data.
Layer 1 - Physical Operation
Typical ISDN-BRI terminations and interfaces are shown in Chapter 5. Each inter-
face, which the telephone company terms a
reference point
, is designed for a
specific task.
U Reference Point
This interface connects the central office to the customer’s premises. It is a 160Kbs,
two-wire, bidirectional transmission path that employs 2B1Q encoding to endure
long distances. It is designed to provide as much bandwidth as possible over
existing copper wire pairs.The U interface signal carries two B channels, one D
channel, overhead bits for framing and echo cancellation, and an
Embedded Opera-
tions Channel
(EOC) for testing and monitoring.

12 40-400-00001, Rev. A
Network Termination-1 (NT-1)
The U Interface terminates at a device called a
Network Termination-1
, or NT-1.
This device converts the U Interface to an S/T Interface. It also permits loop back
and testing by the telephone company and a means of routing local power to
devices previously designed to receive power from the line, such as a telephone.
S/T Reference Point
This interface is a 192 Kbs, four-wire path; two wires are used for transmission, two
for reception.The encoding scheme is ASI bipolar. Unlike the U Interface, it syn-
chronizes quickly. All ISDN-compatible user devices, or
Type 1 Terminating Equip-
ment
(TE-1), are connected directly to the S/T interface.
Terminal Adapters
To accommodate a variety of communications equipment, the S/T interface may be
connected to a
Terminal Adapter
(TA). This device provides any necessary conver-
sion from an older or proprietary interface, such as RS-232 or a Local Area Network
(LAN) protocol, to an ISDN-BRI S/T Interface. Devices that connect to a TA are
called
Type 2 Terminating Equipment
(TE-2).
Layer 2 - Data Link Operation
Layer 2 of the OSI model establishes a method of transporting binary information via
data links.The ISDN data link layer is a variant of X.25 packet exchange called
LAP-D
. All signaling and switching information (Layer 3), and optionally X.25 LAP-B
user data, are transported on the D Channel using this protocol. LAP-D packets are
of variable length, and are bounded by a flag pattern and terminated with a cyclic
redundancy checksum.
There are three categories of packet. Unnumbered Information (UI) packets carry
LAP-D protocol commands.These commands establish addresses, initiate se-
quenced packet exchanges, or negotiate various protocol parameters. Numbered
Information (I) packets carry Layer 3 Call Control messages or X.25 LAP-B user
data.These packets are given sequence numbers, referred to as Next Send (NS)
and Next Receive (NR), which ensure delivery in correct order. Supervisory (S)
packets acknowledge or reject sequenced I packets.
Packet Addressing
Each packet is given an address consisting of two numbers. The first number,
called a
Service Access Point Identifier
or SAPI, addresses one of three
logical links
or destinations within a device. SAPI 0 addresses Call Control functions, and SAPI
16 addresses the
Packet Handling Function
(PHF) associated with X.25 LAP-B user
data.
SAPI 63 addresses the
Signaling Access Controller
(SAC), which negotiates and
assigns the second packet address number, called a
Terminal Endpoint Identifier
or
TEI.The TEI is a unique number for each Terminating Equipment on a particular
line. For example, if a packet addressed to SAPI 0 and TEI 3 is sent to four ISDN
devices connected to a single line, only the Call Control function (SAPI 0) of the
device assigned TEI 3 will acknowledge and process the packet.

40-400-00001, Rev. A 13
TEI Assignment
Most ISDN Terminating Equipment support a feature called automatic TEI assign-
ment. After a device is connected and synchronized, packets are exchanged with
the switch to establish the TEI. The switch knows which TEI’s are assigned to that
line and can query each device if in doubt. A unique TEI between 64 and 126 is then
formulated and returned to the requesting device.TEI 127, the default broadcast
TEI, is used for this operation. Some switches or devices do not support automatic
assignment, however. The user is then responsible for configuring the device with a
unique
fixed TEI
between 1 and 63.
Layer 3 - Network Operation
Once packet exchange is established, the Network Layers of the switch and Termi-
nating Equipment can begin the Call Control dialog that replaces conventional
telephony signaling. The dialog is based on a set of commands that operate on one
or more parameters, similar to a computer Operating System language. Commands
are called
Messages
and parameters are called
Information Elements
(IE).There
are over 45 Messages and 65 Information Elements currently used by North Ameri-
can ISDN telephone networks. Information elements may contain between one and
over 100 bytes of constant or variable data.
For example, the SETUP Message initiates an incoming or outgoing call on de-
mand. Several Information Elements are contained in a SETUP Message, and each
are expected to be a particular value or variable type.The SETUP Message usually
contains the
Channel ID
,
Bearer Capability
, and
Calling Party Number
Information
Elements, among others.The Channel ID determines which B or D Channel is used
for the connection.The Bearer Capability describes the call as voice, high-speed
data, or packet mode data and sets the data rate and other parameters.The Calling
Party Number is the caller’s Directory Number in ASCII code.
Other Messages and Information Elements enable tones, transport keypad num-
bers, alert the called party, connect the call across the network, and disconnect the
call and release its resources when either party hangs up. Standardized Message
types and Information Elements are listed in Chapter 5. Call Control is extensible,
however, and the number of Messages and Information Elements continues to
increase.
Multiple versions of ISDN Call Control currently exist. Two common ISDN switches
use proprietary Call Control: Northern Telecom’s DMS-100 series and AT&T’s 5E
series.The Call Control standard to which these switches are being upgraded and
to which current switches are designed is called
National ISDN-1
.The European
Economic Community, (ECC) is currently consolidating various national versions to
comply with the European Telecommunications Standards Institute (ETSI) protocol.
Consequently, Messages and Information Elements may differ in function and
coding, depending on the switch and the vintage. A special Message, NETwork
ESCape, is implemented to alert the switch when a proprietary Message coding is
used. Information Element codings that are not yet adopted by the ITU-T are
preceded by a
Locking Shift
Information Element.
Unfortunately, these practices do not ensure that all switches recognize all devices.
Any Message that is not recognized by the switch is ignored. For this reason, not all
ISDN equipment is compatible at all locations.

14 40-400-00001, Rev. A
Service Profile ID (SPID) Assignment
Normally, each telephone line is assigned a single Directory Number.When a
customer orders services or features, they are programmed into a
Service Profile
stored at the switch. Any call associated with that line can be assumed to apply only
to that customer’s Directory Number and Service Profile.When a single ISDN
device is connected and serviced this way, the configuration is said to be
point-to-
point
.
However, ISDN also supports
point-to-multipoint
configurations, with multiple but
dissimilar devices connected to a single line. In many cases, is not desirable to
share the same Directory Number and Service Profile. Consequently, ISDN relies on
an initialization procedure for associating Service Profiles with individual Terminating
Equipment, rather than lines.
Terminating Equipment that support this procedure are said to be
Auto-Initializing.
The phone company gives an ISDN customer a Service Profile ID (SPID) up to
twenty digits long. The customer programs the number into the Terminating Equip-
ment, which sends it to the switch.The switch associates the SPID with a specific
Service Profile and Directory Number, and returns a corresponding
Endpoint ID
to
the Terminating Equipment. When the switch sends SETUP Messages to a line
configured point-to-multipoint, it includes the Endpoint ID, and only matching Termi-
nating Equipment respond.
NOTE: NI-1 Switch Types are always configured for multi-point operation.

40-400-00001, Rev. A 15
Chapter 3: Provisioning and Operation
The instructions for many ISDN-BRI communications devices may specify
Provi-
sioning
required of the telephone company. Provisioning is a means of configuring
the ISDN switch so it knows what kind and how many calls communications devices
can support, up to the limits imposed by ISDN-BRI technology. Provisioning also
specifies various Supplementary Services, such as call appearances, display
support, etc.
The Simulator provides the most common services supplied for the selected Switch
Type. Most communications devices should operate correctly with default provision-
ing, which is retained in a Terminal Service Profile (TSP).The Simulator TSP has a
fixed and a variable part. The following fixed provisioning is established for all
Switch Types:
B Channels: 2
B1 Call Types: CMV, CMD (All Bearer Services)
B2 Call Types: CMV, CMD (All Bearer Services)
The variable part of the TSP may be changed using the Windows based software
supplied with the ILS-1000. Not all variable settings are applicable for all Switch
Types. The settings are,
D Channel X.25 PHF: None,Permanent(PVC),Dial-up(SVC)
B Channel: NONE, Permanent B1, Permanent B2, Permanent Both,
Loopback
Caller IDentification: ON/OFF
Terminal Display Text: ON/OFF
Multi-Point: ON/OFF
EKTS: ON/OFF
Call Appearances: 1-15, 0 = OFF
KEY HOLD: OFF,ON:AUTO-DROP,ON:AUTO-HOLD
ACO: ON,OFF
These settings are fully described in the following sections.
Configuration Software Installation
The ILS-1000 configuration software is supplied on a 3.5" diskette. This diskette
has a program that is installed and run under Windows®3.1, 3.11 Windows for
Workgroups, or Windows 95. To install this software, place the diskette into a 3.5'
disk drive and from Program Manager, select File / Run / x:setup.exe, where x is the
name of your 3.5" disk drive. During installation, a message may appear saying that
a certain file could not be installed because it is already installed and in use. Con-
tinue with the installation until complete. A Program Window will be created that is
labelled ILS-1000 Configuration and includes an icon labelled ILS-1000 Configura-
tion. Double click on this icon to start the software and provision the ILS-1000.

16 40-400-00001, Rev. A
The ILS-1000 Configuration software will attempt to query the ILS-1000 via COM1,
the default communications port. If a serial cable is connected to COM1 and the
ILS-1000, the loaded configuration will appear on the screen. If an error message
appears, follow the instructions as required. i.e. If the communications port is other
than the default of COM1, select another port as necessary. When a valid query
has been completed, the Configuration Name will appear as QUERY, with Switch
and Line Provisioning settings shown. No attempt to compare against a stored
value is done. Two message boxes at the bottom of the screen will aid the user in
provisioning of the ILS-1000. The lower left hand message box will display status
messages at different times, such as QUERY, DOWNLOAD, National ISDN-1
defaults, and other messages. The lower right hand message box provides short
messages about the feature under the cursor, such as, Save User configuration,
when the cursor is over the Save button. It also displays a time bar when down-
loading or querying.
General Operation
Provisioning of features using the ILS-1000 configuration software allow the user to
select from several stored configurations, as well as allow the user to store other
configurations as needed. If a stored configuration is selected, and any feature is
changed, the Configuration Name changes to (Untitled). If you attempt to exit the
program without saving the configuration, you will be prompted to do so.
Figure 1 ILS-1000 Configuration Software Opening Screen

40-400-00001, Rev. A 17
Defaults
To configure default provisioning, based on the selected Switch Type:
QUICK METHOD - During initial power on, move the power switch to the RE-
START and hold for 1 second.
OR,
STEP 1 Run the Windows based configuration software.
STEP 2 Select the SWITCH TYPE
STEP 3 Select DEFAULTS .
STEP 4 Remove all communications devices from the Simulator and press the
DOWNLOAD button. An automatic RESTART is issued as part of the
DOWNLOAD.
Important: When the Simulator configuration is changed using the Windows
based configuration software, always reinitialize any connected devices.
Switch Type
The Simulator is configured at the factory for National ISDN-1 protocol.To simulate
the AT&T 5ESS Custom configuration or other future protocols, you must change
the Simulator’s Switch Type.
Switch Type SettingSwitch Simulation
Various NI-1 National ISDN-1
5ESS Custom AT&T AT&T Custom
STEP 1 Run the Windows based configuration software.
STEP 2 Select the Switch Type.
STEP 3 Select DEFAULTS (if you want the default settings for the selected switch)
STEP 3 Remove all communications devices from the Simulator and select the
DOWNLOAD button. An automatic RESTART is issued as part of the
DOWNLOAD.
STEP 4 Reconnect all communications devices.
Important: When the Simulator configuration is changed, always reinitialize
any connected devices. All devices must be compatible with the selected
switch protocol.
D Channel X.25
Packet Handling Function (PHF)
ISDN-BRI permits the use of the 16Kbs D Channel, usually reserved for ISDN
signaling, to exchange X.25 LAP-B user data with a host system. While few appli-
cations for personal communications devices exploit this service, it is available on
some terminal adapters and integrated into some telephone sets.

18 40-400-00001, Rev. A
X.25 packet data is offered as an ISDN-BRI service, because the telephone com-
pany configured their network with it before any protocol had become popular. It
seems unlikely that X.25 will become more popular now that it is available via ISDN-
BRI. In fact, most Terminal Adapters that transport packet data across ISDN-BRI
lines do so by sending their preferred packet protocol over a 64Kbs B Channel
during a Circuit Mode Data call.
One severe limitation of using X.25 LAP-B protocol on the D Channel is that it must
share the bandwidth, or available throughput rate, with Call Control signaling pack-
ets and other X.25 traffic on a multi-point line. For this reason, the telephone com-
pany does not assure X.25 LAP-B data throughput exceeding 9600 baud.
There are three methods for establishing a D Channel X.25 Packet Mode Data
(PMD) call.The first, but least used, is to negotiate the call using ISDN-BRI Call
Control signaling. The other two methods employ X.25 Virtual Circuit channel
negotiation with the telephone company’s Packet Handling Function (PHF), or host
computer.
The second method, referred to as Semi-permanent Virtual Circuit or SVC, employs
a precursor to ISDN Call Control. Specific X.25 packet formats are used to initiate
calls, confirm “connections”, and clear calls when completed.This method allows
dial up for outgoing calls and notification of incoming calls based on a Directory
Number.
The third method of X.25 call is Permanent Virtual Circuit or PVC.This method does
not employ any form of call control, but simply establishes a constant virtual circuit
between two fixed nodes whenever both nodes are active.
The ILS-1000 Line Simulator supports a single channel for a Semi-Permanent or
Permanent Virtual Circuit connection between Port 1 and Port 2. To demonstrate
these services,
STEP 1 Run the Windows based configuration software.
STEP 2 Select the D Channel X.25 setting.
STEP 3 Change the setting to SVC (for dial-up services) or PVC (for a perma-
nent connection). Select OFF if X.25 functions are not required.
STEP 4 Remove all communications devices from the Simulator and press the
DOWNLOAD button. An automatic RESTART is issued as part of the
DOWNLOAD.
STEP 5 Connect a terminal that supports X.25 data on the D Channel to Port
1 and another to Port 2. When using PVC, the terminals should
automatically negotiate an open X.25 channel with the ILS-1000’s
PHF simulator. When using the SVC setting, dial the Directory Num-
ber assigned to the X.25 terminal at the other port to establish the
connection.
Note: Some terminals require that you send an X.25 RESET command manu-
ally before the terminal will establish a PVC connection.

40-400-00001, Rev. A 19
B Channel Provisioning
Some ISDN-BRI communications devices, usually LAN gateways and other Termi-
nal Adapters, do not use ISDN Call Control to establish calls or allocate B Channels.
These devices assume that one or more B Channels are permanently connected or
“nailed up” to a fixed destination. When using real ISDN-BRI lines, one or more
permanently provisioned B Channels are assigned by the telephone company.To
establish one or more permanent channels between the Simulator’s Port 1 and Port
2, or a LOOPBACK configuration,
STEP 1 Run the Windows based configuration software.
STEP 2 Select the B CHANNEL setting.
STEP 3 Change the setting from NONE, Permanent B1, Permanent B2,
Permanent BOTH, or LOOPBACK.
STEP 4 Remove all communications devices from the Simulator and press the
DOWNLOAD button. An automatic RESTART is issued as part of the
DOWNLOAD.
When B Channels are permanently allocated in this way, they are not available to
any devices that use ISDN Call Control to negotiate channel assignment.You can
exploit this fact to test how a device behaves when a line is provisioned for less than
two B Channels.
Caller ID
This service, also referred to as Automatic Number Identification (ANI) or Calling
Line Identification (CLID), allows Terminating Equipment with display support or call
screening features to identify the calling party before accepting the call.
The ISDN switch knows each user’s identity because a SPID or Directory Number is
always associated with a specific line and user name. When a user places a call,
the switch accesses its database to retrieve the calling number and includes it in the
SETUP message sent to the called party. If the called party supports a display, the
calling party’s name and number may be formatted into ASCII text and sent as well.
When the Simulator’s Caller ID setting is set to ON, any calling device, even when it
doesn’t include a Calling Party Number Information Element in its outgoing SETUP
message, is identified by the Simulator and presented to the called party.
To change this setting and test the Caller ID features of a particular device,
STEP 1 Run the Windows based configuration software.
STEP 2 Select Caller Identification.
STEP 3 Change the setting.
STEP 4 Select SAVE to save the setting.
STEP 5 Remove all communications devices from the Simulator and press the
DOWNLOAD button. An automatic RESTART is issued as part of the
DOWNLOAD.
Note:When CALLER ID is set to OFF, the Calling Party Number is not in-
cluded in incoming SETUP messages.
Table of contents
Other Teltone Telephone System manuals
Popular Telephone System manuals by other brands
Bell System
Bell System 2960A01M Installation, operation and maintenance instructions
AT&T
AT&T Network Adapter 25 user guide

Samsung
Samsung OFFICESERV 100 Series General description
Avaya
Avaya ArgentOffice Hardware reference manual
Tone Commander
Tone Commander 2260d Attendant's guide
Bell System Practices
Bell System Practices 2563HB Service
AVM
AVM FRITZ!Box Fon WLAN 7340 Installation, configuration and operation
TECOM
TECOM IG7600 Quick installation guide
Alcatel
Alcatel OmniPCX 4400 quick guide
NEC
NEC Univerge SV8100 Quick reference guide
AudioCodes
AudioCodes Huddle Room Solution Quick setup guide
Lucent Technologies
Lucent Technologies MERLIN LEGEND Release 6.0 System planning
