Telular PHONECELL SX5D User manual
01/30/02 Part Number5602xxxx
P
HONECELL
®
SX5D GSM
D
ESKTOP
P
HONE
900/1800 MH
Z
GSM (D
UAL
B
AND
)
1900 MH
Z
GSM
V
OICE
C
OMMUNICATION AND
C
OMPUTER
F
AX
/D
ATA
T
ECHNICAL
M
ANUAL

STANDARD CONNECTIONS
DESKPHONE MODEL ONLY
Phonecell®SX5D 2Technical Manual

FAX PHONE MODEL ONLY
PERSONAL LEAST COST ROUTING MODEL ONLY
Phonecell®SX5D 3Technical Manual

Phonecell®SX5D 4Technical Manual
Before installing your Phonecell®SX5D, carefully remove the contents from the shipping carton
and check for evidence of shipping damage. If damage is found, contact your Authorized
Telular Distributor or shipping agent immediately.
SAFE OPERATION INSTRUCTIONS
IMPORTANT! Before installing or operating this product, read the SAFETY AND GENERAL
INFORMATION section of this manual.
• Install unit indoors.
• Install unit on hard, flat surface for proper ventilation.
• Do not expose unit to rain or moisture.
•Do not place unit on or close to sources of heat
IMPORTANT NOTICES
TERMS AND CONDITIONS FOR USE OF PHONECELL®PRODUCTS ("Product")
These Terms and Conditions are a legal contract between you and Telular Corporation for the title to and use of the Product.
BY RETAINING AND USING THE PRODUCT AFTER RECEIPT OF IT, YOU AGREE TO THE TERMS AND CONDITIONS
INCLUDING WARRANTY DISCLAIMERS, LIMITATIONS OF LIABILITY AND INDEMNIFICATION PROVISIONS BELOW. IF
YOU DO NOT AGREE TO THE TERMS AND CONDITIONS, DO NOT USE THE PRODUCT AND IMMEDIATELY RETURN
THEUNUSED PRODUCTFOR ACOMPLETE REFUND.You agreeto acceptsole responsibilityfor anymisuse ofthe Product
by you; and, in addition, any negligent or illegal act or omission of your or your agents, contractors, servants, employees, or
other users of the Product so long as the Product was obtained from you, in the use and operation of the Product. Changes or
modifications not expressly approved by Telular Corporation will void your authority to operate the equipment per FCC part 15
paragraph15.21.
INDEMNIFICATION OF TELULAR CORPORATION ("TELULAR")
YOU SHALL INDEMNIFY, DEFEND AND HOLD HARMLESS TELULAR FOR ANY OF THE COST, INCLUDING REA-
SONABLE ATTORNEYS' FEES, AND FROM CLAIMS ARISING OUT OF YOU, YOUR CLIENTS' OR OTHER THIRD
PARTIES' USE OR OPERATION OF THE PRODUCT: (i) FOR MISUSE OR IN A MANNER NOT CONTEMPLATED BY
YOU AND TELULAR OR INCONSISTENT WITH THE PROVISIONS OF THIS MANUAL; (ii) IN AN ILLEGAL MANNER
OR AGAINST PUBLIC POLICY; (iii) IN A MANNER SPECIFICALLY UNAUTHORIZED IN THIS MANUAL; (iv) IN A MAN-
NER HARMFUL OR DANGEROUS TO THIRD PARTIES; (v) FROM CLAIMS BY ANYONE RESPECTING PROBLEMS,
ERRORS OR MISTAKES OF THE PRODUCT; OR (vi) COMBINATION OF THE PRODUCT WITH MATERIAL, MODIFI-
CATION OF THE PRODUCT OR USE OF THE PRODUCT IN AN ENVIRONMENT NOT PROVIDED, OR PERMITTED, BY
TELULAR IN WRITING. THE PARTIES SHALL GIVE EACH OTHER PROMPT NOTICE OF ANY SUCH COST OR
CLAIMS AND COOPERATE, EACH WITH THE OTHER, TO EFFECTUATE THIS INDEMNIFICATION, DEFENSE AND
HOLDHARMLESS.
CONTENTS
TELULAR CORPORATION
Corporate Headquarters
647 North Lakeview Parkway
Vernon Hills, Illinois 60061, USA
Technical Support
Tel: 847-247-9400 · Fax: 847-247-0021
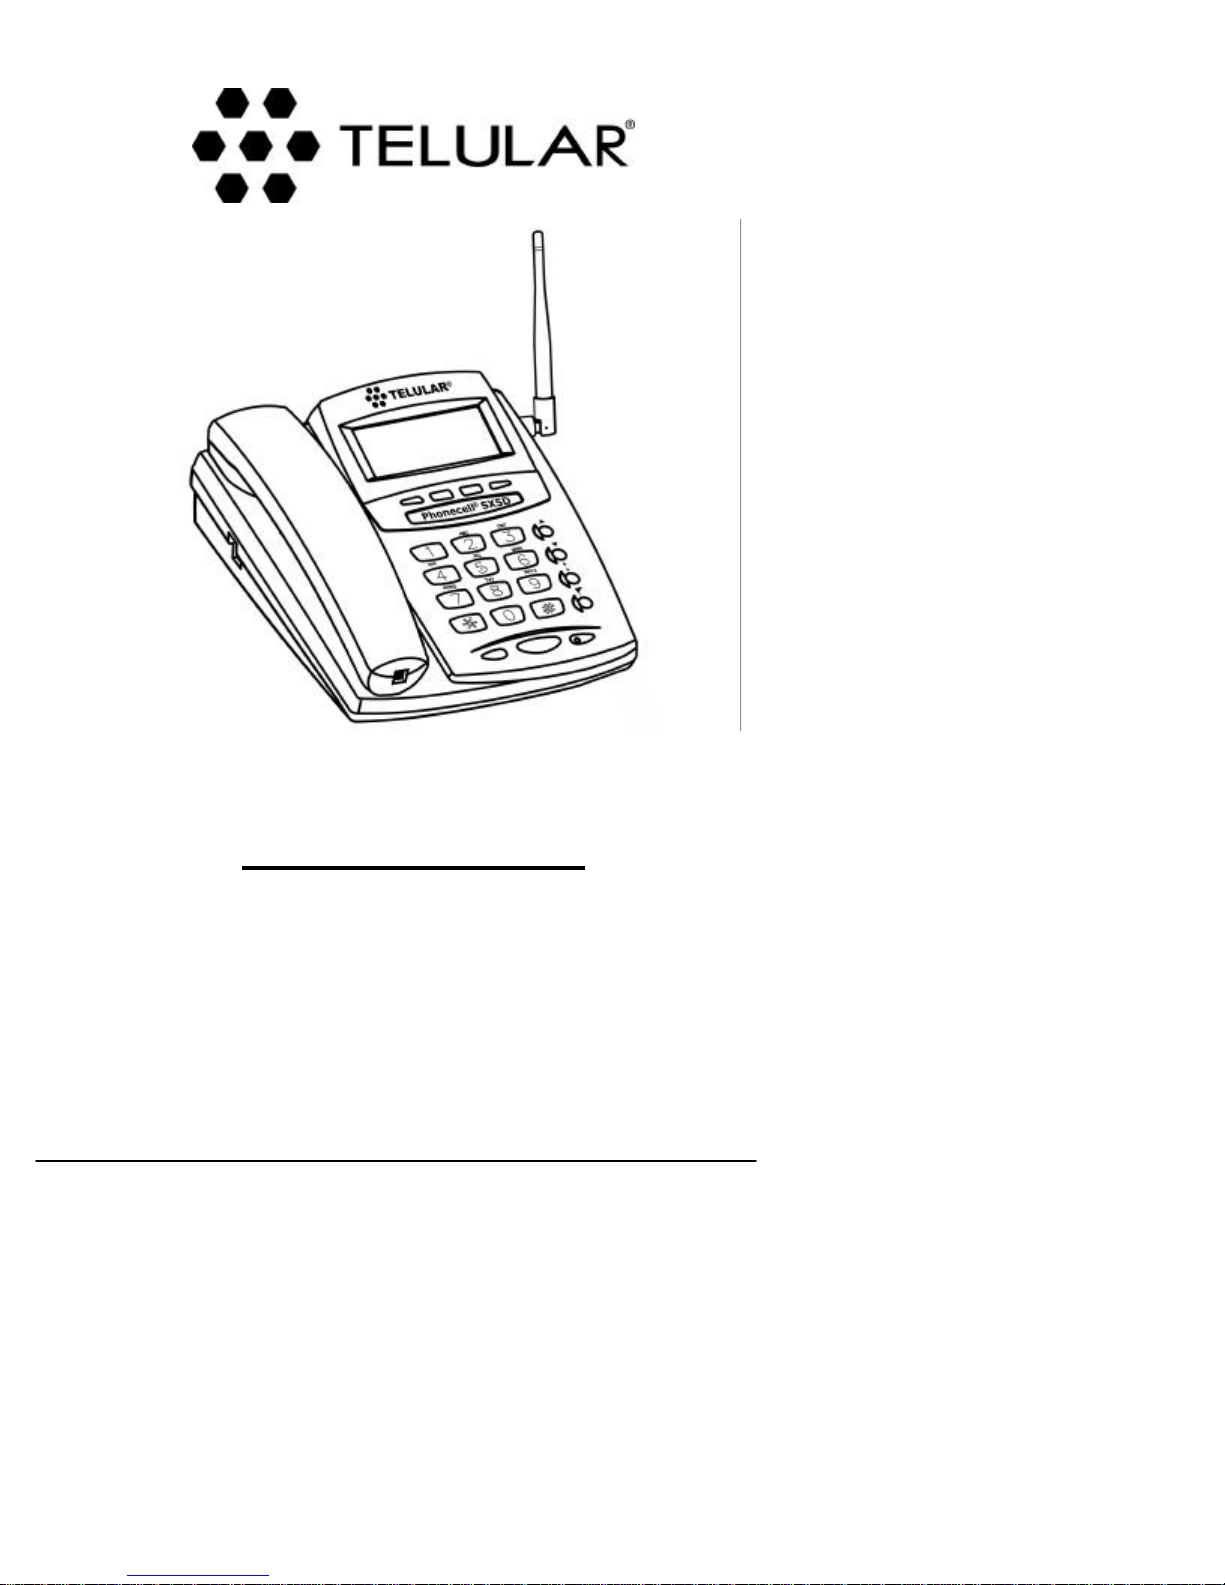
Power SupplyPhonecell®SX5D GSM Desktop Phone Spike Antenna
PLEASE SEE THE IMPORTANT NOTICES SECTION OF THIS MANUAL FOR
IMPORTANT INFORMATION ON USE, WARRANTY AND INDEMNIFICATION

TABLE OF CONTENTS
IMPORTANT NOTICES..................................................................................................2
Technical Support.......................................................................................................2
INSTALLATION..............................................................................................................5
Location and Setup ....................................................................................................5
Connect the Handset...................................................................................................
Optional Wedge ...........................................................................................................
Wall Mounting...............................................................................................................
Connect Your Phonecell®SX5D to AC Power..............................................................
Battery Backup.............................................................................................................
External Connectors.....................................................................................................
OPERATION.....................................................................................................................
Function Keys ..............................................................................................................
LCD Display.................................................................................................................
SIM Card Installation....................................................................................................
SIM PIN Setup .............................................................................................................
Service Indication.........................................................................................................
Network Registration....................................................................................................
Call Functions ..............................................................................................................
Volume .........................................................................................................................
Alert Tones ...................................................................................................................
Speakerphone..............................................................................................................
Internal Phone Book ....................................................................................................
Speed Dial....................................................................................................................
FEATURES.......................................................................................................................
Call Log........................................................................................................................
Keypad Tones ..............................................................................................................
Warning Tones .............................................................................................................
Date and Time..............................................................................................................
Alarm............................................................................................................................
Display Phone Number................................................................................................
Greeting Message........................................................................................................
Screen Contrast...........................................................................................................
Reset System Defaults.................................................................................................
Restrict Phone Use......................................................................................................
SUPPLEMENTARY FEATURES (NETWORK DEPENDENT)........................................
Call Forwarding............................................................................................................
Call Waiting ..................................................................................................................
Three-Way Calling........................................................................................................
Voicemaill .....................................................................................................................
Short Message Service (SMS).....................................................................................
Info Messages..............................................................................................................
In-Call Options .............................................................................................................
Phonecell®SX5D 5Technical Manual

TABLE OF CONTENTS (CONTINUED)
DIGITAL DATA SERVICE ................................................................................................
Standard Modem Setting .............................................................................................
Sending and Receiving Digital Fax..............................................................................
TECHNICIAN COMMANDS.............................................................................................
SAFETY INFORMATION .................................................................................................
WARRANTY.....................................................................................................................
Appendix A: How to Setup PC Serial Ports for Phonecell®
Computer Digital Fax/Data.............................................................................................
Phonecell®SX5D 6Technical Manual

Phonecell®SX5D 7Technical Manual
INSTALLATION
SX5D Location and Setup
The SX5D comes with a standard spike antenna (TNC).
1) Choose location that is above ground and as close to windows (or exterior walls) as possible
to get the best signal- see Figure
2) Finger-tighten the antenna; do not over-tighten.
Connect the Handset
Before you can use your Phonecell®SX5, you must connect the handset cable to the SX5D.
Insert the cable into the phone jack - see Figure
Figure – For optimal call clarity, the antenna should be pointed
up and the SX5D located close to an exterior wall or window.
Figure –
SX5D handset connection.
Handset cable
Phone jack

SIM Card Installation
The SX5D requires a Subscriber Identification Module (SIM) for normal operation. The service
provider supplies the SIM card, which carries the account information needed to operate the
SX5D. The SIM compartment is on the back of the Phonecell®SX5.
NOTE: If you don’t have a SIM card, contact your network service provider.
1) Remove the power supply if you have already connected it. You must remove the power
supply whenever you install or remove a SIM Card.
2) Remove the SIM compartment cover by removing the screw. See Figure.
3) Open the SIM compartment holder.
4) Line up the SIM card with the arrow on the SIM card holder. See Figure.
5) Gently insert the SIM card in the slot of the SIM card holder.
6) Close the SIM card holder.
NOTE: If you insert the SIM card improperly, the holder will not close. Do not force the holder
shut. Make sure the SIM card is aligned properly with the directional arrow on the holder.
7) Reattach the SIM compartment cover with the screw.
8) Attach the power supply.
Phonecell®SX5D 8Technical Manual
SIM
Compartment
Cover
SIM Card
Holder
SIMCard
SIM
Compartment
Cover
Figure - Figure -
Cover Screw
Phonecell®SX5D 9Technical Manual
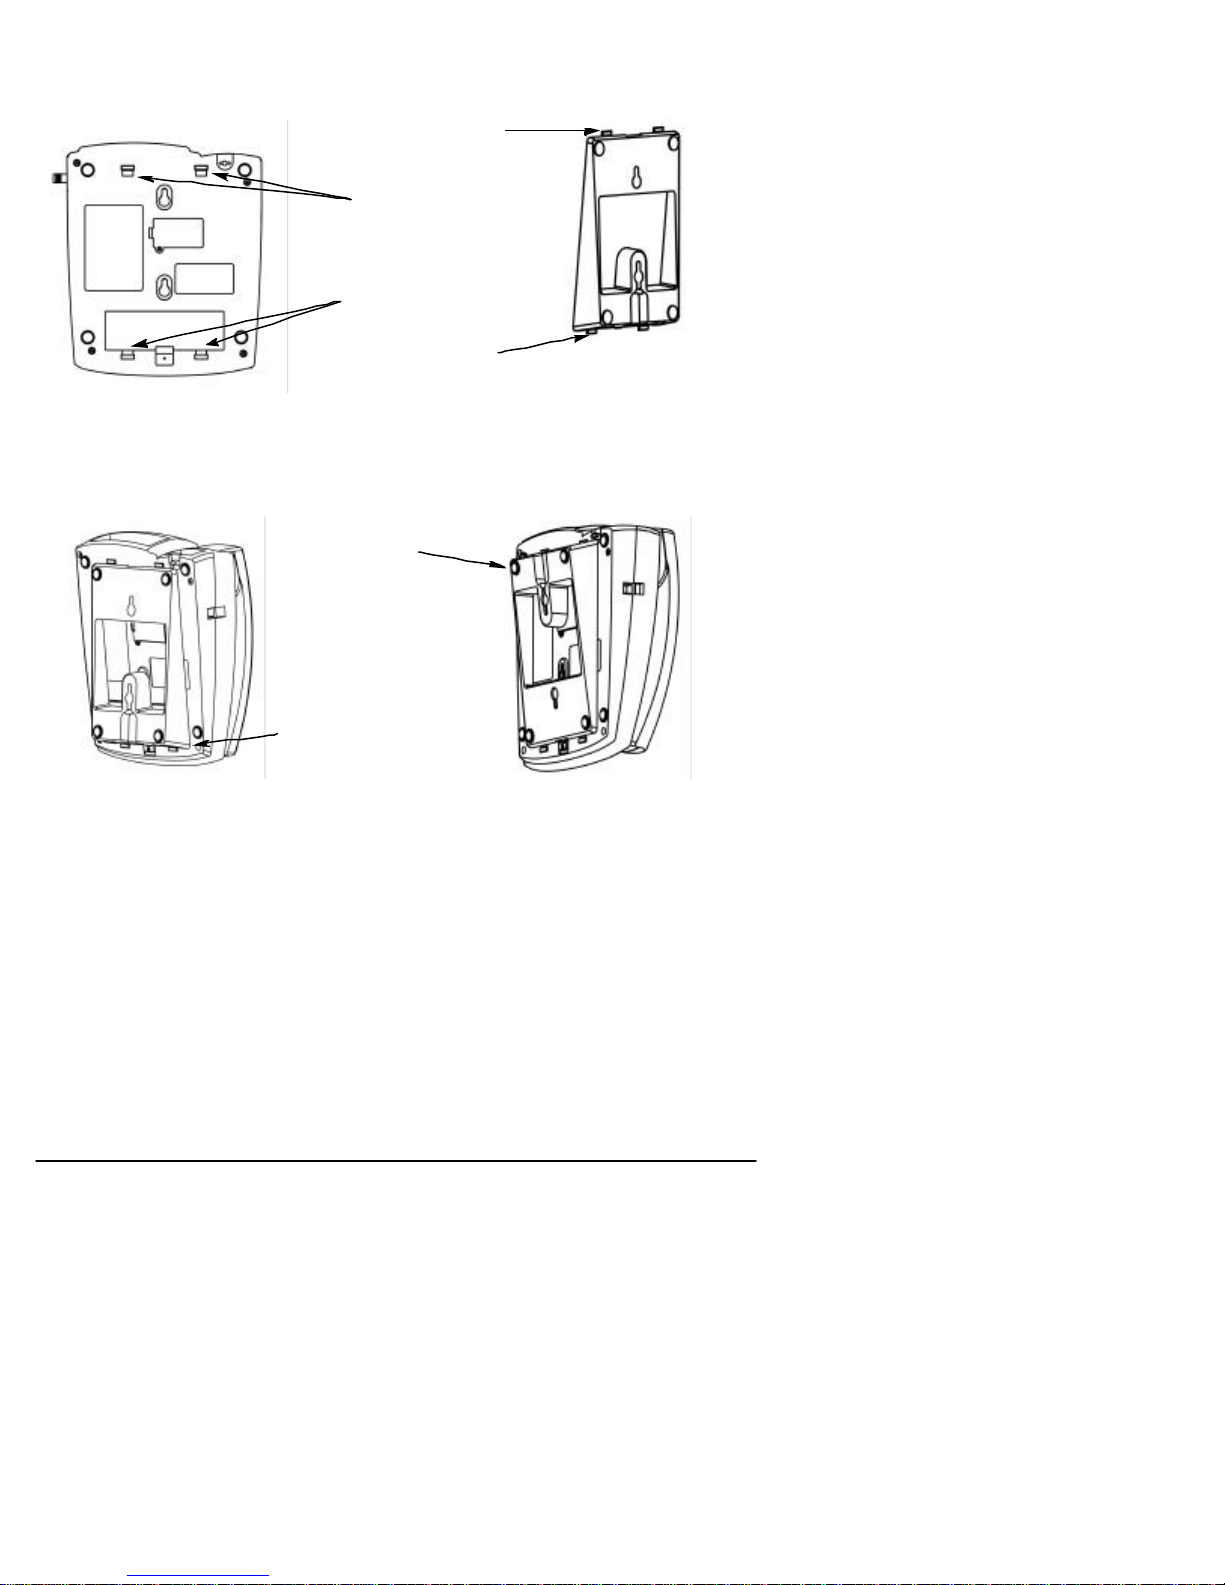
Attach the Optional Wedge
1) Slide the wedge tabs on one end of the wedge into the top wedge tab slots.
2) Snap the wedge tabs on the other end of the wedge into the bottom wedge tab slots.
Using the Optional Wedge
The wedge is used to put the SX5D on an angle that makes it easier to see the display screen if
you are sitting at a desk. If you mount it on a wall, the wedge offsets the natural angel of the
SX5D so that the keypad is parallel to the wall rather than angled down into the wall.
Attach for Wall Mounting Attach for Desk Mounting
Top wedge tab
slots
Bottom wedge
tabslots
Wedgetabs
Wedgetabs
Attachthick end of
wedgeat bottom of
theSX5D.
Attachthickendof
wedgeat topof the
SX5D.
Figure - Figure -
Figure - Figure -
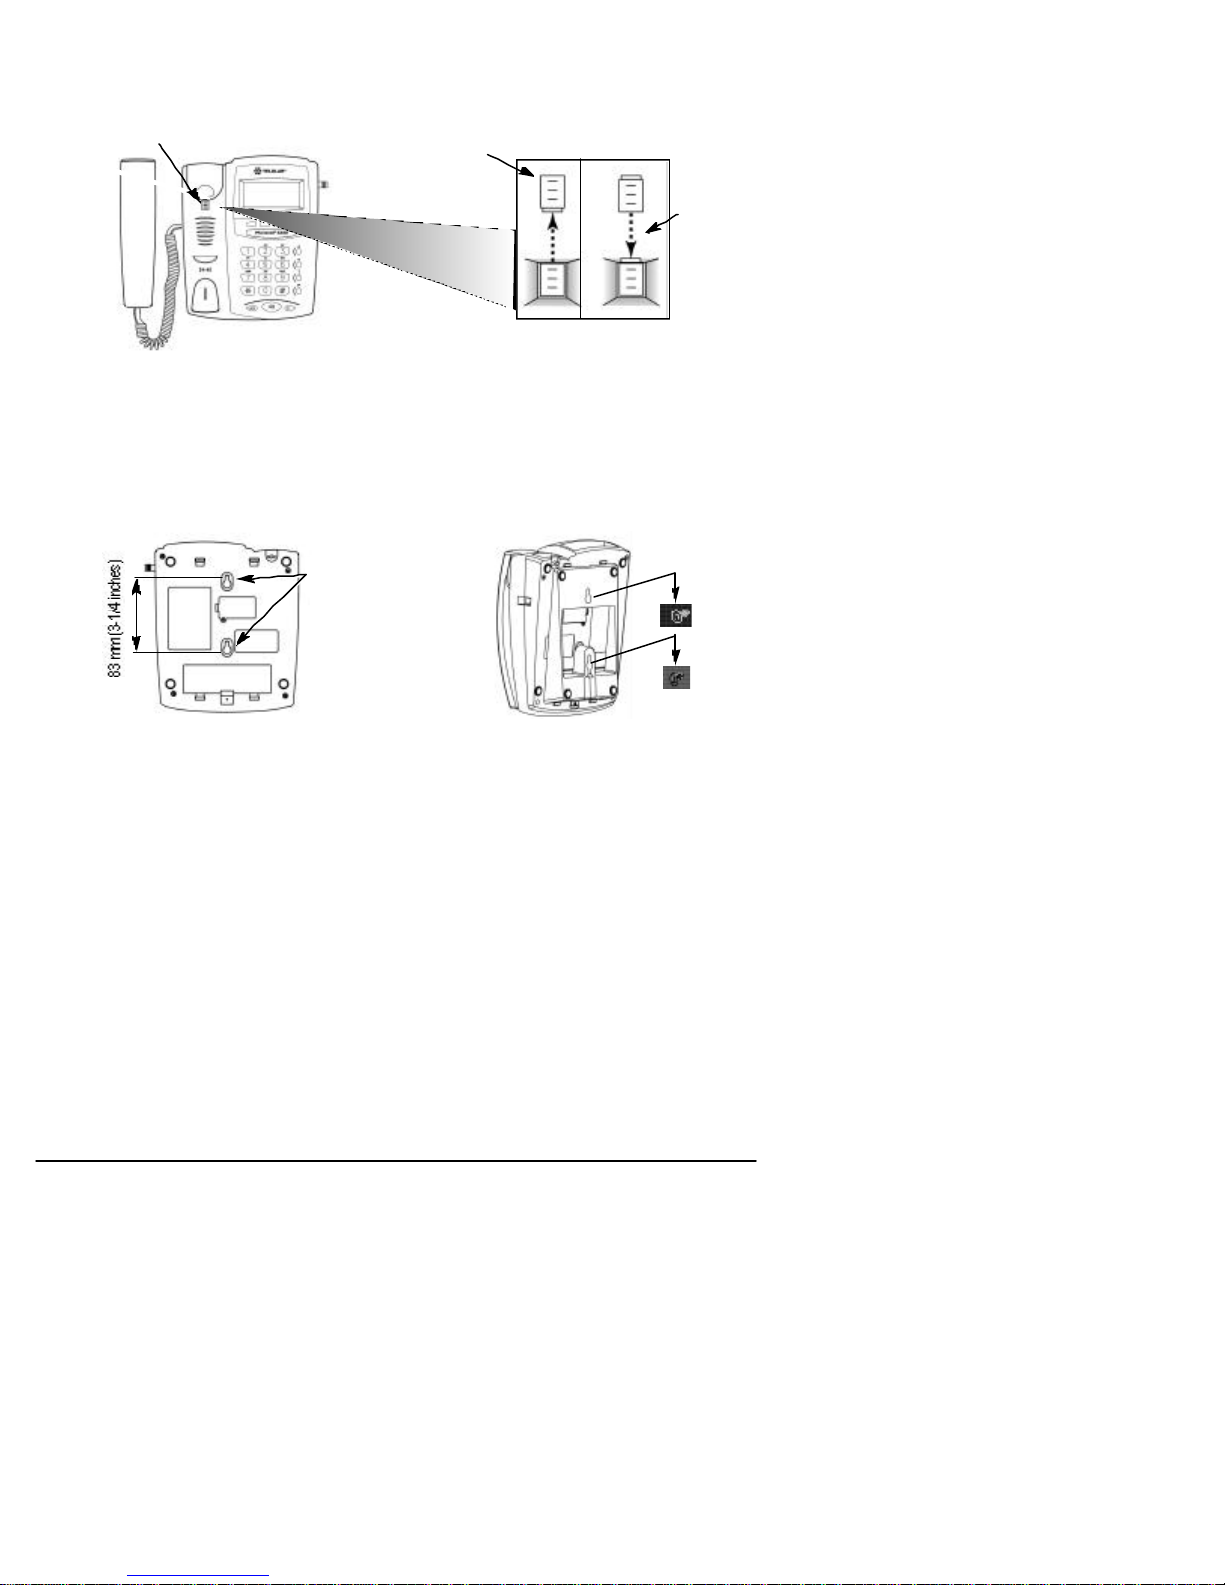
Wall-Mounting
1) Remove the mounting clip from the cradle and re-insert it with the tab pointing up - see
Figures and .
2) Mark two hole locations 83 mm (3-1/4 inches) vertically apart and drill two holes into the wall.
3) Install the screws (not supplied) into the wall, leaving a gap of approximately 3 mm
(1/8 inches) between the screw head and the wall.
4) Align the mounting holes with the screws and mount the SX5D onto the screws - see
Figures and.
Phonecell®SX5D 10 Technical Manual
Figure – Mount the SX5D onto the screws.
Figure – SX5D mounting hooks.
Mounting
Holes
Insert
Mounting
Clip into
the Cradle
(tab up)
Mounting Clip in
Cradle (tab up)
Figure –
Handset mounting clip assembly for
wall-mount applications.
Remove
MountingClip
from the Cradle
(tabdown)
Figure –
Handset
mounting clip assembly.

Phonecell®SX5D 11 Technical Manual
Battery Backup
How to Install Battery
1) Remove the battery access door screw located on the bottom of the unit.
2) Press the battery access door tabs and remove the battery access door.
3) Install 4 AA batteries
4) Reinstall the battery access door using the screw
5) Turn the AC/Battery switch to battery operation
**The SX5D does not support rechargeable batteries
Battery Operation
The unit will automatically switch from AC to battery upon loss of AC power. A fully charged bat-
tery will provide up to two hours of talk time and 72 hours of standby. Total charging time is 15
hours.
Connect Your Phonecell®SX5 to AC Power
1) Connect the barrel connector of the power supply to the AC power input on the rear panel of
the SX5D - see Figure .
2) Plug the power supply into the AC wall socket. The unit will power-up automatically.
3) Check the cellular signal strength and move the unit (or external antenna) until you achieve
the best signal possible - see the Received Signal Strength section of this manual.
Figure –
BatteryAccessDoor.
BatteryAccess
Door Screw
BatteryAccess
Door Tabs
BatteryAccess
Door
4 AA Batteries
AC Power Input
AC wall socket
Power
Supply
BarrelConnector
AC/Battery switch
Figure –
SX5DACpowerinput.
Figure -Battery Installation

Back View
----UPDATE: THESE WILL CHANGE DEPENDING ON THE MODULE-----
Side View
Phonecell®SX5D 12 Technical Manual
Keyboard Port
(DIN)
SerialPort
(DB-9) Phone
(RJ-11)
AC/BatterySwitch
FAXorPSTN
(RJ-11)
AC Power Input
Antenna
(TNC)
Microphone
Phonecell®SX5D 13 Technical Manual
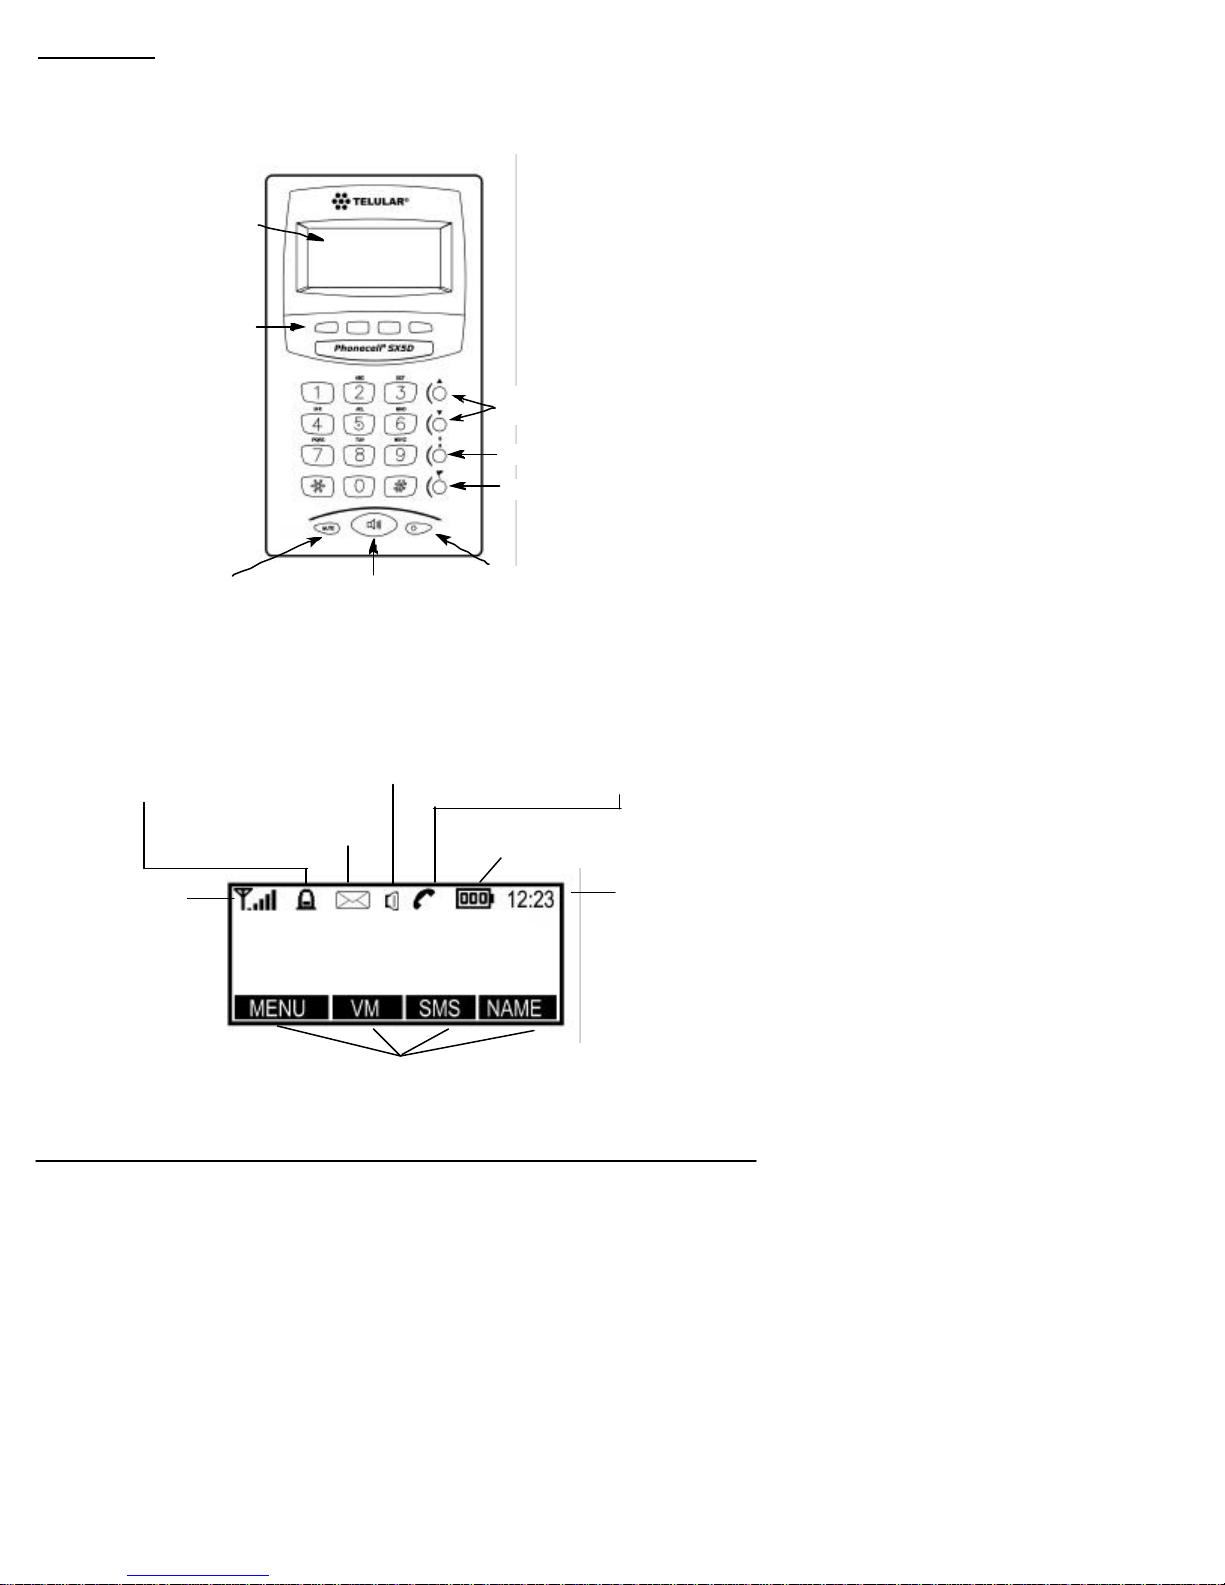
OPERATION
Function Keys
Operation of the Phonecell®SX5 is accomplished though the function keys on the keypad of the
unit - see Figure .
LCD Display Icons
Icons displayed on the LCD display indicate the features in use, the status of the phone, signal
strength and battery status - see Figure .
Figure –
SX5D LCDdisplayicons.
Figure –
SX5D Keypad and Function Keys.
Received Signal
Strength
- Indicates the
strengthof the current
signal. The more bars,
thestronger the signal.
Message
- Displays when
you have a new text or
voicemail message.
Speake
r--indicates speaker phone is
off-hook.
Call-
-indicatesthatthehandset
is off-hook
Battery
-Indicates thelevelof battery
power. The more bars, the more power.
Clock
Soft keys
--thesekeyswillchangewhenyouenterdifferentsub-
menu’s to access the phone’s features. Press the corresponding
soft key buttons to use the soft keys
Alarm
-Indicates that you
have set the Phonecell’s
alarm.
LCDSoftKey
Buttons
LCD Screen
Speakerphone and
handset volume control
Redial
Flash
Mute Speakerphone LED

Phonecell®SX5D 14 Technical Manual
Service Indication
Full Service
When the power cord is connected properly, the SX5D will display
the Telular logo, emit a power on tone, and the LED will light up.
After a few seconds the greeting and mobile number will display. If
you have service, the antenna icon will display indicator lines to
show the signal strength.
No Service
When there is no service in your area, the antenna icon will have
no indicator lines. Contact your service provider to make sure cel-
lular service is activated. No calls can be made in this case.
Limited Service
If there is a signal, but full service with the system is blocked, only
emergency calls will be allowed. Contact your service provider for
more information.
Network Settings
Network Registration
If the home network is unavailable, but there is another network available (either another fre-
quency or system), then the SX5D will prompt to register to that system. If there is more than
one system, a list of available systems will display.
1) Use the arrow keys to highlight a network from the list.
2) Press SELECT. If the selected network cannot be accessed, the list of available networks will
be updated and you will have to select a different one.
Network Selection
1) Press MENU
2) Select Settings, then select Network Settings.
3) Select Select Network.
4) To use Automatic network selection, select Automatic.
To use Manual network selection, select Manual and continue
with Step 5.
5) Select a network from the list.
Preferred Networks
To Insert New Entry
1) Press MENU
2) Select Settings, then select Network Settings.
3) Select Select Network.
4) Select Set Preferred.
4) Highlight the entry above which you want to insert a
new preferred carrier.
5) Press SELECT.
6) Select Insert.
7) Select an entry from the list.
To Delete Entry
1) Press MENU
2) Select Settings, then select Network Settings.
3) Select Select Network.
4) Select Set Preferred.
5) Select the entry you want to delete.
6) Select Delete
No Service
Full Service
New entry will
be inserted
here

To Add New Network
1) Press MENU.
2) Select Settings, then select Network Settings.
3) Select Add New Network.
If you have already added some networks, a list of those net-
works will display.
4) SelectAdd.
If a list of networks displays, press the SELECT key, then select Add.
5) Enter the correct Country Code, Network Code, and Network Name as prompted.
New networks will be added to the end of the list.
To Edit or Delete an Added Network
Once you add a new network, you can edit the information you entered for that network, or
delete it.
1) Press MENU.
2) Select Settings, then select Network Settings.
3) Select Add New Network.
4) Select the network you want to edit or delete.
5) Select the option you want to use.
To Change Network Password
1) Press MENU.
2) Select Settings, then select Network Settings.
3) Select Change Network Password
4) --NEED ADDITIONAL INFORMATION--
SIM PIN Setup
SIM PIN 1 controls access to SIM Card information. When On, it requires you to enter it each
time the phone is turned on. When off it requires entry only when the SIM Card is put into a
phone. Another user could still access your phone with a different SIM Card. To lock the phone
even when a new SIM Card is inserted, see How to Lock the Phone. SIM PIN 2 accesses
Network controlled features.
To Turn On/Off SIM PIN 1
1) Press the MENU key.
2) Select Settings, then select Security Settings.
3) Select SIM PIN 1.
4) Select On or Off.
To Change SIM PIN 2
1) Press the MENU key.
2) Select Settings, then select Security Settings.
3) Select SIM PIN 2.
4) Select Change PIN
You will be prompted to enter the old PIN.
5) Enter the old PIN.
6) Enter the new PIN.
It must be numerical and be between 4 and 8 digits long.
7) Press OK to save the new PIN, or use the CLEAR key to make changes.
Phonecell®SX5D 15 Technical Manual

Phonecell®SX5D 16 Technical Manual
To Place a Call
1) Pick up the handset or press the Speaker phone button. The
SX5D is now “off-hook.”
2) Listen for dial tone.
3) Dial the phone number. The dialed number is displayed on the
display, along with the name if it is stored in your phonebook.
To Correct Dialing Errors
• To erase one digit, press the CLEAR key once.
• To erase all digits, press and hold down the CLEAR key until all
digits are erased.
To Redial the Last Telephone Number Dialed
1) Pick up the handset. The SX5D is now “off-hook”.
2) Press the REDIAL key.
To Receive a Call
When there is an incoming call, the SX5D rings, an incoming call
notification displays and blinks, and the LED blinks.
1) Pick up the handset or press the Speaker phone button.
Press the REJECT key to refuse the call. Your phone will stop
ringing, and the calling party will be disconnected.
2) Begin talking.
To Receive a Call When Caller ID is Activated
The Caller ID feature displays the caller’s number when the SX5D
rings. If the caller’s name and number are stored together in the
phonebook of your SX5D, the caller’s name and number will be
displayed. Contact your service provider to activate this feature.
NOTE: If there is a missed call (call is not answered), “MISSED CALLS” will be displayed.
To End a Call
Hang up the phone (place the handset back onto the SX5D cradle).
NOTE: If the call is ended by the other party, the SX5D will clear the line and re-establish a dial
tone. The SX5D may be used for another call or may be hung up.
To Mute a Call
1) While in a call, press the MUTE button.
A message will notify you that the microphone is muted.
2) Press the MUTE button again to unmute the microphone.
To Put a Call on Hold
1) While in a call, press the MENU key.
2) Select Hold.
The display will change from Active to Held.
3) To activate the call, press the MENU key and select Retreive.
To Adjust Volumes
You can control the levels on your phone for the keypad tones and conversation volume (what
you hear through the handset or speaker) and the ring volume of an incoming call. You can also
turn the keypad tones on or off.
To Adjust External Speaker Volume
1) Press the Speaker key.
2) Press the UP/DOWN arrow keys accordingly to adjust volume.
To Adjust Handset Volume
1) Pick up the handset
2) Press UP/DOWN keys to adjust volume.
Muted call
Call on hold
Receiving a call with Caller
ID activated.
Receiving a call
Placing a call.
Handset/Speaker Volume

To Adjust Phone Alert Volume (ringer)
1) Press the MENU key,
2) Select Settings, then Audio Settings.
3) Select Alert Volume and set desired volume level.
NOTE: If you choose “Silent”, no alert will sound.
To Change Alert Tones
You can set different alerts for different types of calls. This allows
you to tell the difference between a voice call or an SMS mes-
sage, for example, by the alert that sounds.
1) Press the MENU key
2) Select Settings, then Audio Settings.
3) Use the arrow keys to scroll through the alert types.
4) Select the alert you would like to change.
5). Select the alert sound you would like to use.
To Use the Speaker Phone
1) Press the Speaker key.
You will hear the dial tone through the speaker, and the
Speaker icon will display.
2) Enter the telephone number.
Internal Phone Book
Your SX5D has an “Internal Phone Book” in which you can store up to 99 telephone numbers
with corresponding names. You can set them up for convenient one-touch or two-touch dialing.
To Change Phone Book Settings
You can save entries to the SIM card or to the phone memory. If
you save to the SIM card, you can transfer that SIM card to anoth-
er phone and keep all your phone book entries. You also have the
option of selecting to choose where to save each entry as you
enter it.
1) Press the MENU key.
2) Select Phonebook, then Settings
3) Scroll to and select Save Entries To.
When you scroll to Save Entries To, the current setting will display.
4) Select where you would like to save phone book entries.
To Use Keypad Buttons
There are three or four letters assigned to each number on the telephone keypad. The letters
on the keypad will display when you press the appropriate number. If you press the number 3,
for example, a “D” will appear. If you press it twice, you will see the “E”, and if you press it
three times, the “F” will appear. The cusor will move on to the next space after a brief pause,
so you must select the letter quickly.
To Enter a Hard Pause
Hard pauses allow the SX5D to be used with a automated phone systems used for pagers or
automated banking. When you program a number into the phonebook, you can enter a pause
by pressing and holding “#” for more than one second. The hard pause will be displayed as “P.”
NOTE: This feature can only be used for phonebook entries.
Phonecell®SX5D 17 Technical Manual
Phonebook Settings
Speakerphone off-hook
Changing Alert Tones
Phonecell®SX5D 18 Technical Manual
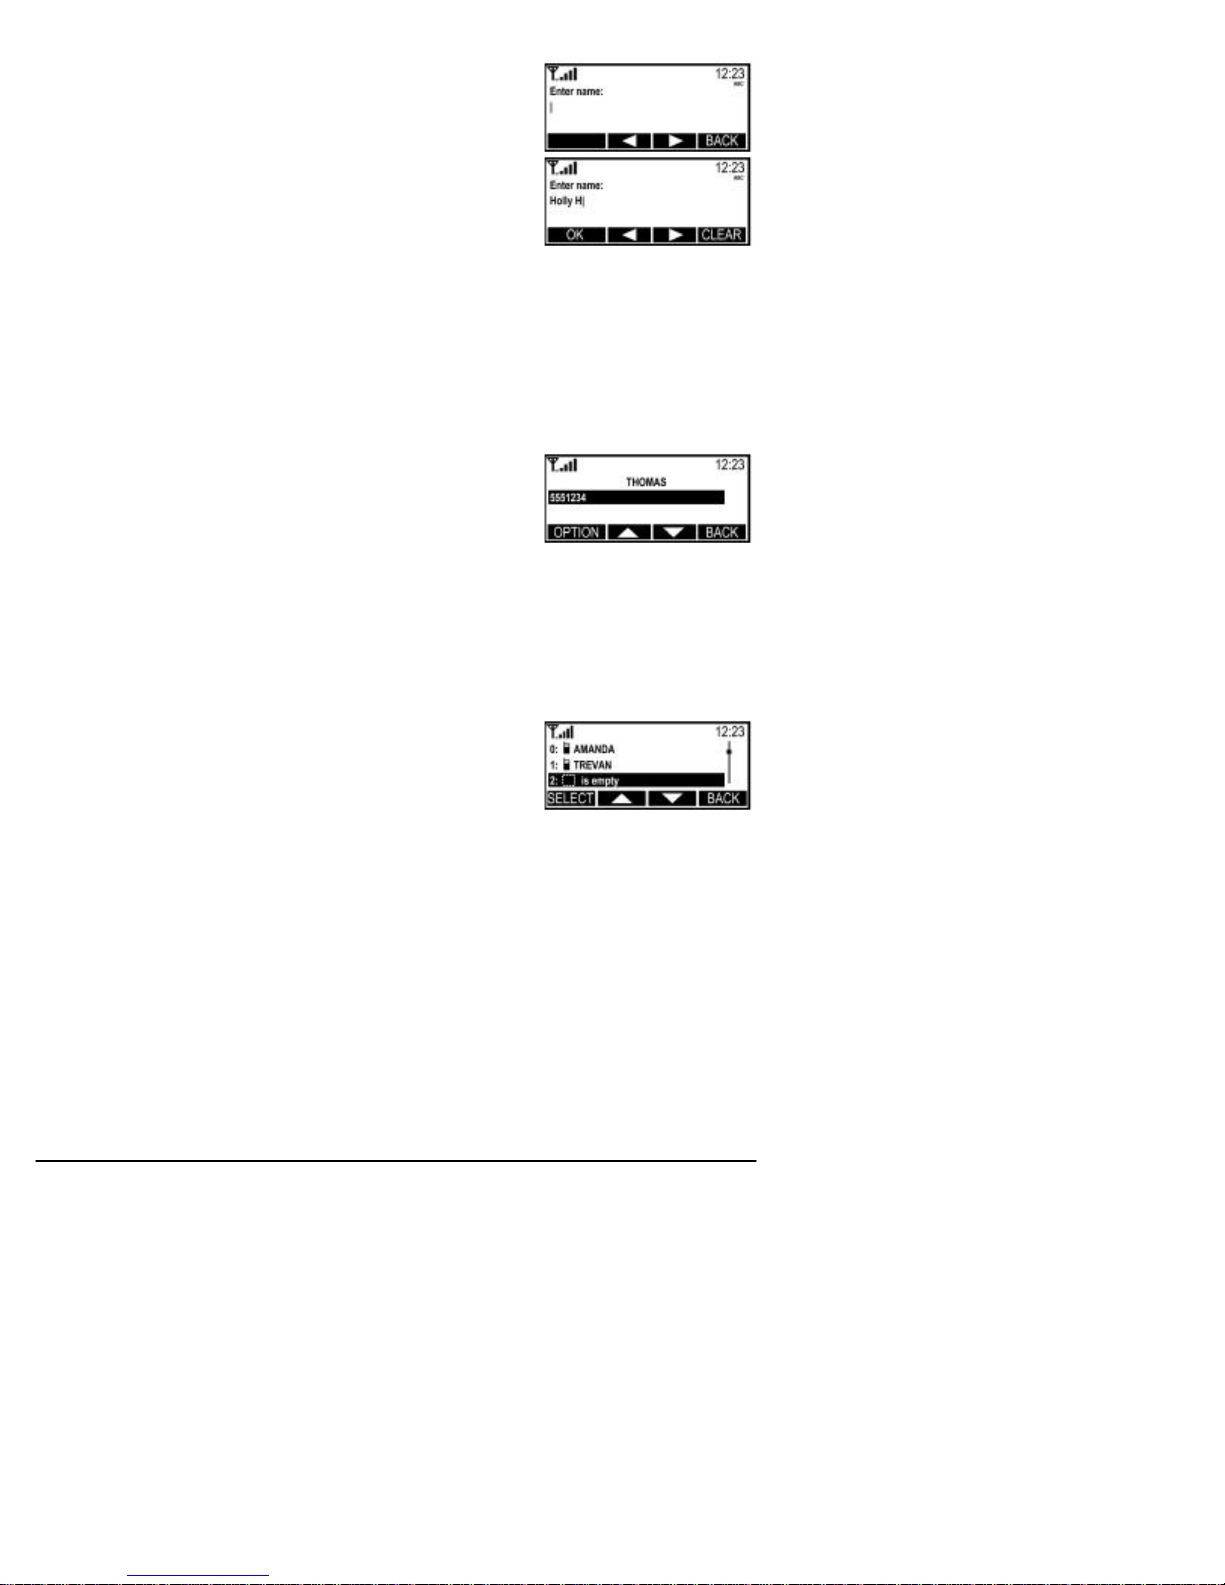
To Add a New Entry to the Phonebook
1) Press the MENU key,
2) Select Phonebook, then select Add Name
3) Enter a name by pressing the alphanumeric keys. You can only
input 16 letters.
NOTE: To correct errors in the name, press the CLEAR key.
4) Press the OK key.
5) Enter the desired telephone number (maximum of 30 digits).
6) Press the OK key.
You will be prompted to enter another number.
7) Press OK to save the entry and return to the Phonebook menu.
If you have additional numbers (up to 2 more) follow steps 5 through 7 for each number.
To Search for a Number in Memory
1) Press the NAME key.
2) Use the arrow keys to scroll through the entries, or use the keypad to view all entries that
begin with a specific letter.
NOTE: If you use the arrow keys, the list will be in order of the most recently selected entries.
3) Press the SELECT key to view the phone number(s) listed for an entry that is highlighted.
To Edit or Delete and Entry
1) Press the NAME key.
2) Use the arrow keys to scroll through the entries, or use the
keypad to view all entries that begin with a specific letter.
NOTE: If you use the arrow keys, the list will be in order of the
most recently selected entries.
3) Press the SELECT key to view the phone number(s) listed for an entry that is highlighted.
4) Press the OPTIONS key and select the option you wish to use.
Speed Dialing
Speed dialing permits one-touch dialing for up to 10 telephone numbers stored in the internal
phone book.
To Assign a Number to a Speed Dial Location
1) Press the NAME key.
2) Select the entry you wish to add to the speed dial list.
3) Press the OPTIONS key.
4) Select Add to Speed Dial.
5) Select the location (0 - 9).
NOTE:The next available location will display automatically. You can select a specific location
by pressing the desired number on the keypad. If that location is already in use, you can replace
the phone number that was stored there with a new one.
To Dial a Speed Dial Location
1) Pick up the handset or press the Speaker Phone key.
2) Press and hold the number of the location containing the number to be called.
3) The number is displayed and dials automatically.
NOTE:If you skip Step 1, the phone will automatically go off-hook in speaker phone mode when
you press and hold a number.
To View the Speed Dial List
1) Press the MENU key.
2) Select Phonebook, then select Settings.
3) Select Speed dial list.
Adding a phonebook entry

FEATURES
Call Logs
The SX5D’s memory stores the telephone numbers of the last ten
outgoing calls and the last ten incoming calls along with the dates
and times of the calls. You can display these numbers and the
SX5D can dial them automatically from the call log.
To View the Call Log
1) Press the MENU key.
2) Select Call Log.
3) Select which calls you would like to view (All, Missed,
Received, Dialed).
NOTE: Calls are denoted with the following icons:
Dialed calls Missed calls Received calls
To Dial a number from the Call Log
1) View the Call Log.
2) Highlight the call with the number you wish to dial.
3) Pick up the handset or press the Speaker Phone button.
4) A dial tone will sound, then the number will be dialed.
NOTE: This feature will not work for unavailable or private calls (denoted as Withheld in the Log).
To Clear the Call Log
1) Press the MENU key.
2) Select Call Log, then select Clear Logs
3) A notification will appear to tell you that the Call Log has been cleared.
To Check the Last Call Time
1) Press the MENU key,
2) Select Call Log, then Times & Costs.
3) Select Last Call Time.
To Check Total Accumulated Air Time
1) Press the MENU key
2) Select Call Log, then Times & Costs.
3) Select All Calls Time.
To Reset Accumulated Air Time
1) Press the MENU key
2) Select Call Log, then Times & Costs.
3) Select Clear Logs.
To Turn On/Off the Keypad Tones
1) Press the MENU key.
2) Select Settings, then Audio Settings.
3) Select Keypad Tones.
4) Select On or Off.
To Turn On/Off the Warning Tones
1) Press the MENU key.
2) Select Settings, then Audio Settings.
3) Select Warning Tones
4) Select On or Off.
Phonecell®SX5D 19 Technical Manual
View All Calls
Total Accumulated Air Time
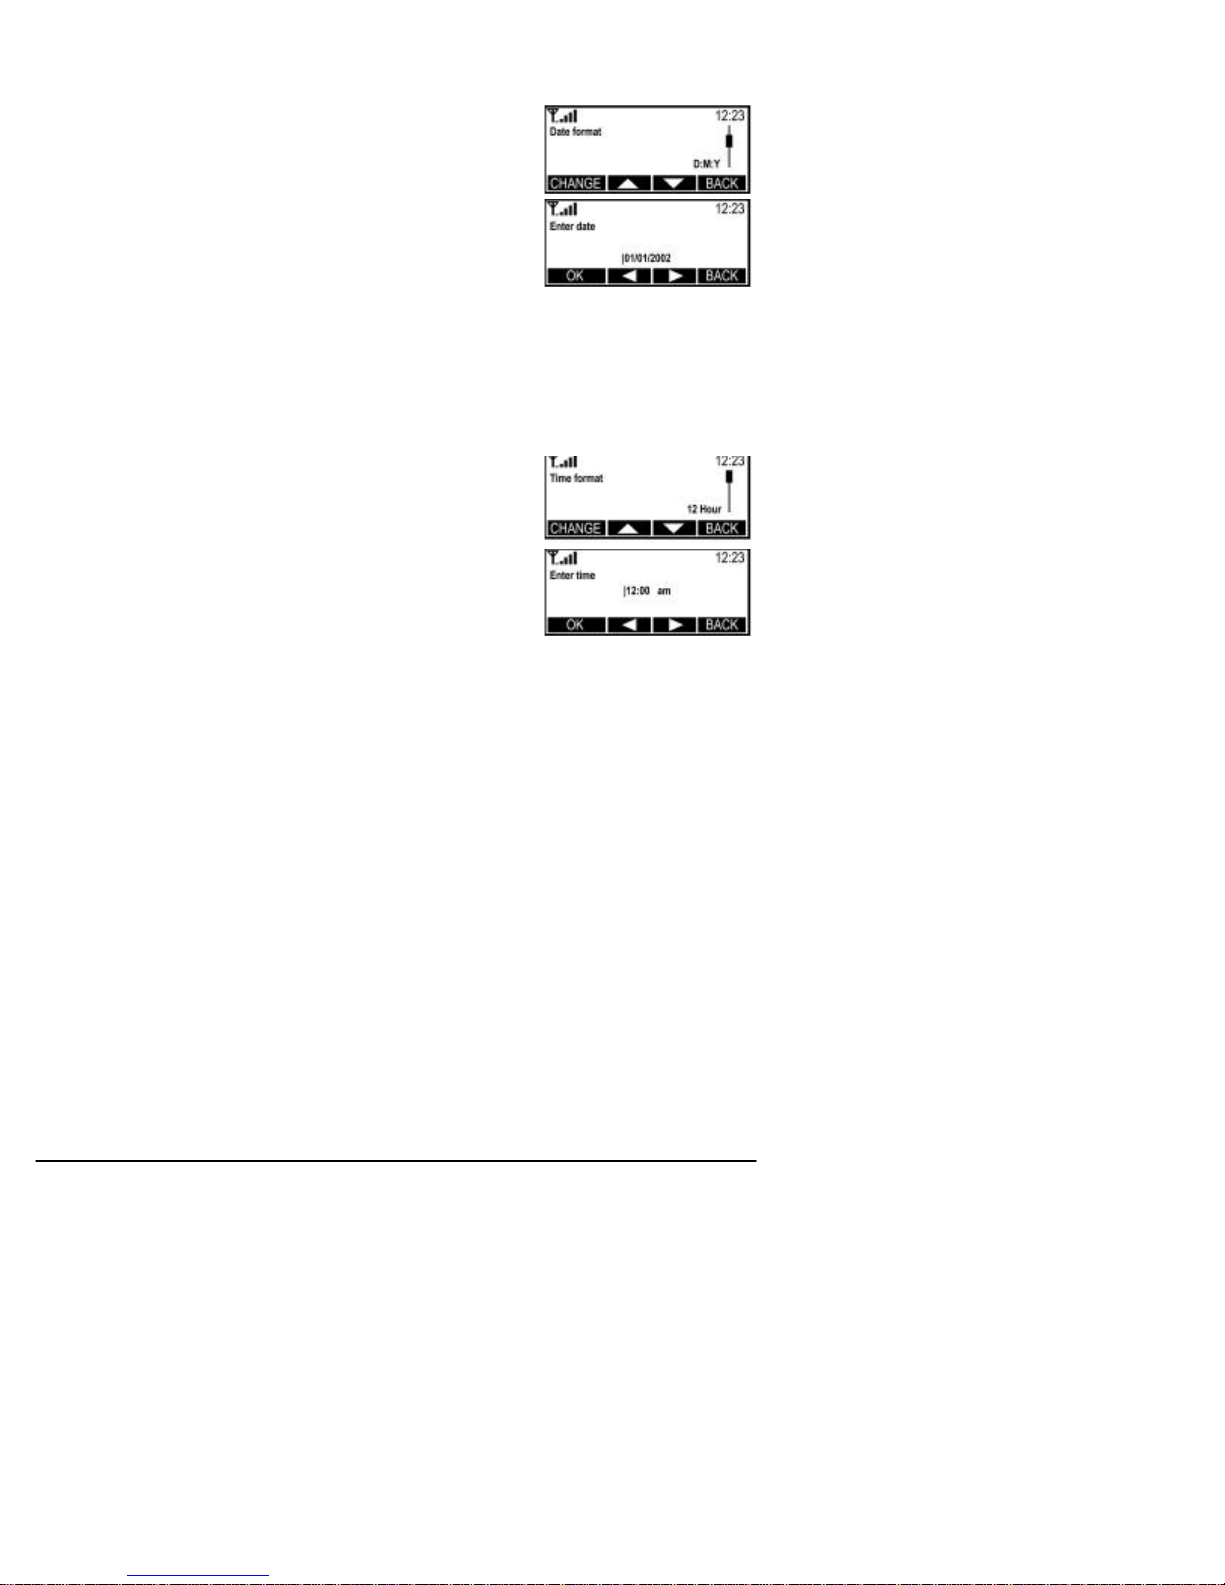
Date and Time Settings
The SX5D allows you to set the date, time, time zone, and time
format (12 or 24 hour), and customize how that information is displayed.
To Set the Date
1) Press the MENU key.
2) Select Clock, then Clock Settings.
3) Scroll to Date Format.
The current format will display.
4) Press the CHANGE key.
5) Select the way you want to view the date.
Options are Day:Month:Year, Month:Day:Year, or
Year:Month:Day
6) Press OK, then press the BACK key to return to the Clock
menu.
7) Scroll to Set Date.
8) Press the CHANGE key.
9) Enter the desired date.
10) Press OK.
To Set the Time
1) Press the Menu key.
2) Select Clock, then Clock Settings.
3) Scroll to Time Format.
The current format will display
4) Press the CHANGE key.
5) Select the time format you wish to use (12 hour or 24 hour)
6) Press OK, then the BACK key to return to the Clock menu.
7) Select Set Time.
8) Enter the desired time.
9) Press OK.
To Set the Time Zone
1) Press the Menu key.
2) Select Clock, then scroll to Set Time Zone.
3) Press the CHANGE key.
Use the two middle soft keys to scroll left or right on the graphic to highlight the time zone
you are in.
4) Press the far left soft key to select the highlighted time zone.
Alarm Settings
You can set the alarm time and tone, and you can set it for daily use or for one time only.
To Set Alarm Time and Tone
1) Press the MENU key.
2) Select Clock, then Set Alarm.
3) Select Set time, then enter the desired alarm time.
4) Press OK.
5) Select Set Tone, then select the desired alarm tone.
6) Press OK.
To Set Alarm to Repeat Every day
1) Press the MENU key.
2) Select Clock, then Set Alarm.
3) Select Repeat Daily.
Phonecell®SX5D 20 Technical Manual
Setting the Date
Setting the Time
Other manuals for PHONECELL SX5D
1
Table of contents
Other Telular Telephone manuals


