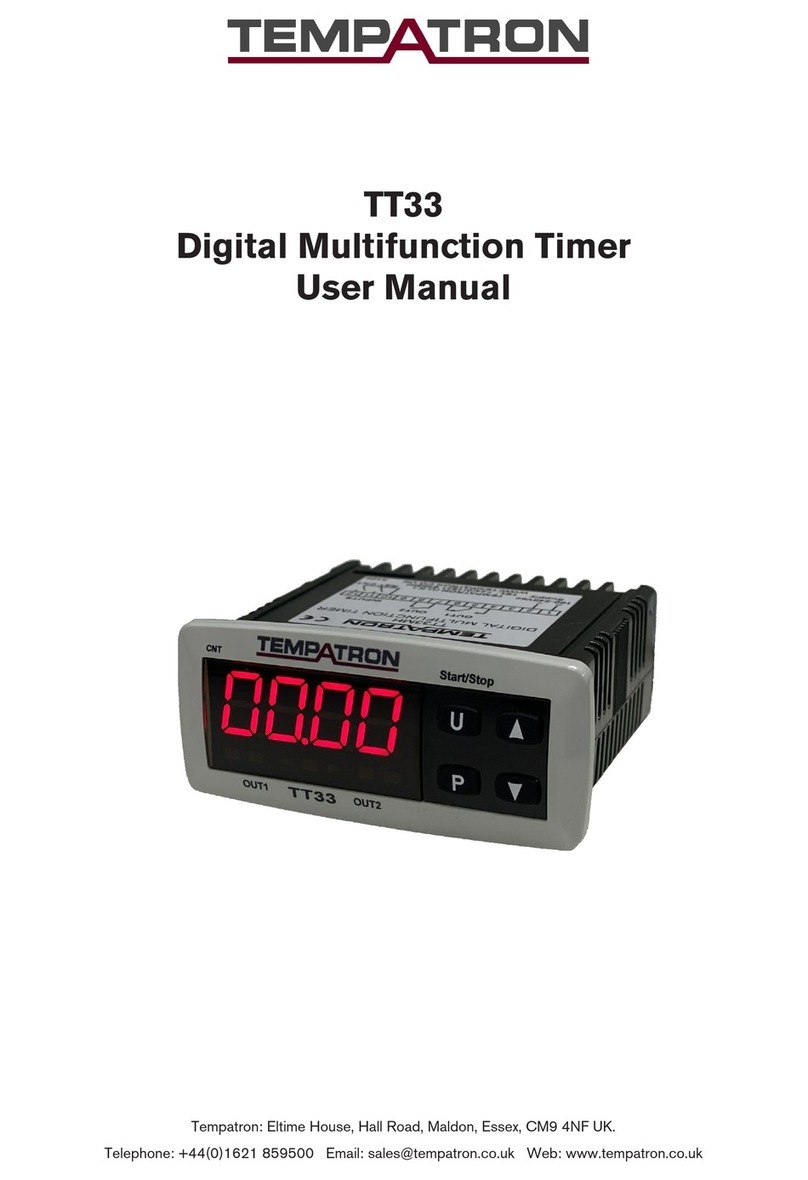
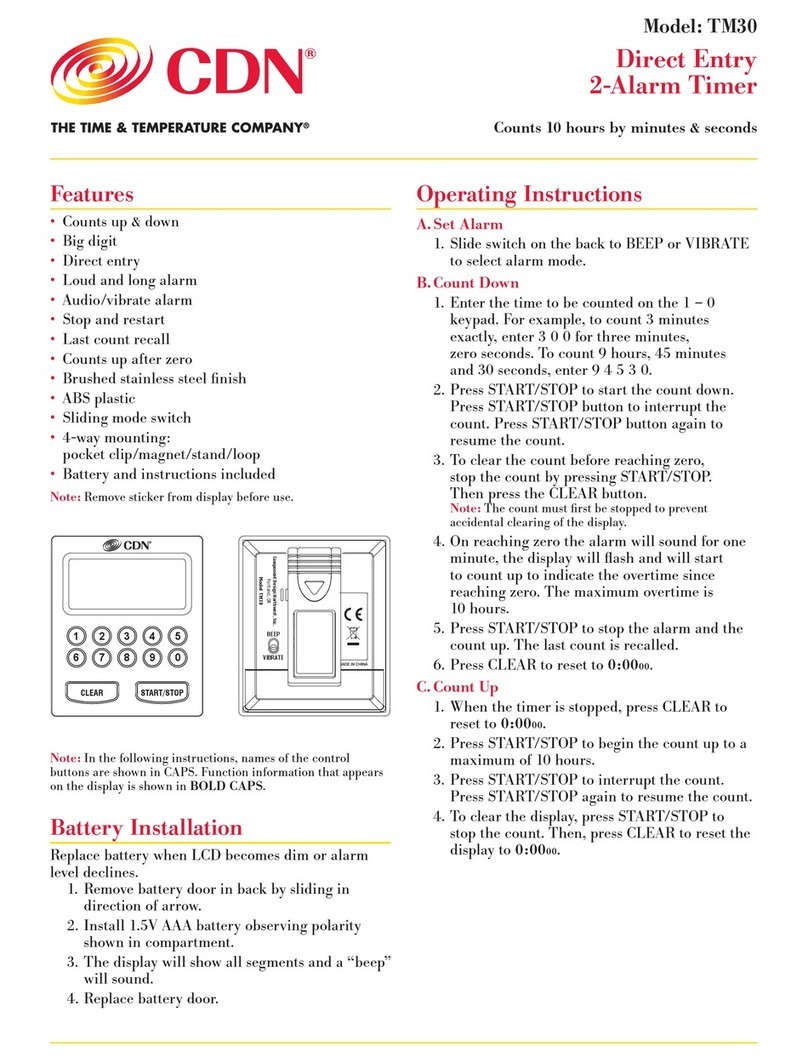
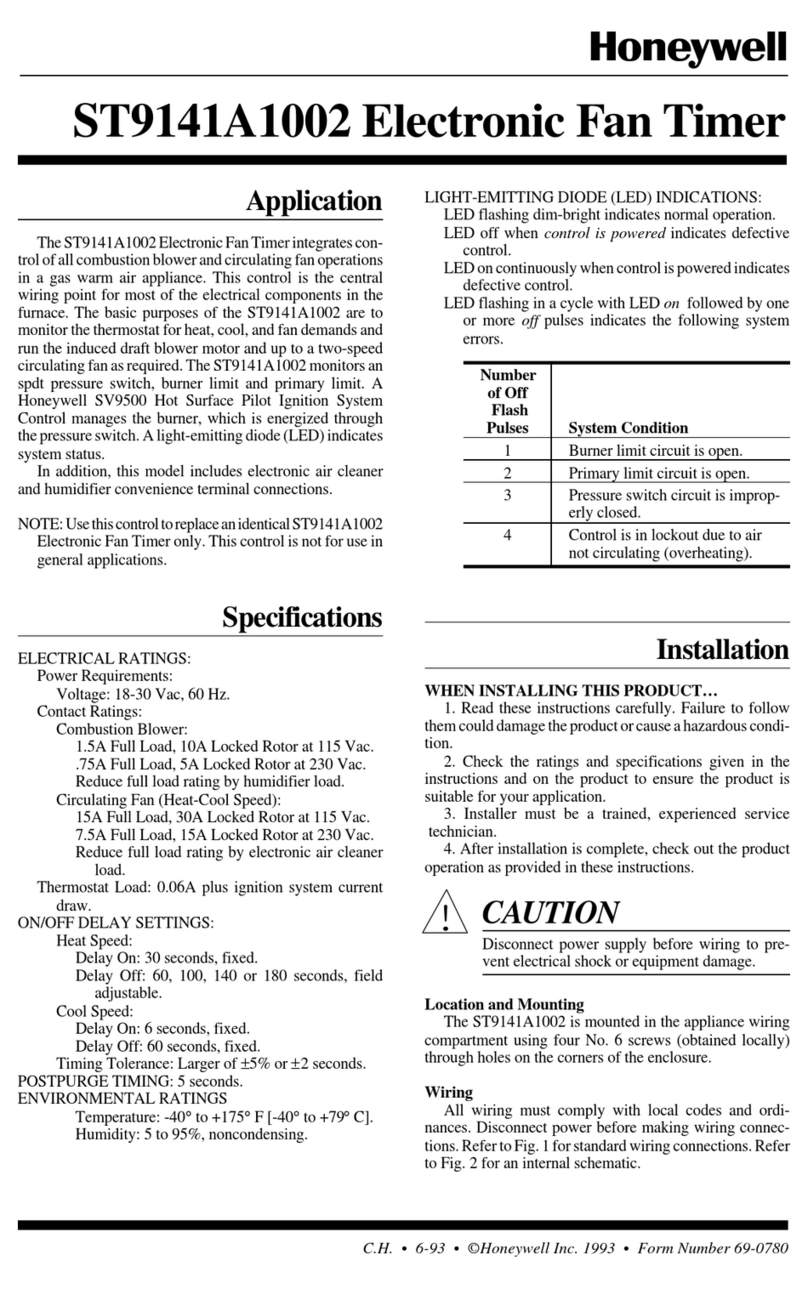
Tempatron UMT500 User manual

UMT500 Multiple Digital Timer
GB
Front Panel Functions
SEL
PRG
Tempatron, Eltime House, Hall Road, Maldon, Essex, CM9 4NF
F
SEL
Fonctions du Panneau Avant
PRG
Selects view set time mode
Allows access to set point for adjustment in set mode.
Moves adjustment to the next digit in set and program mode.
Allows access to parameters for adjustment in program mode.
Selects set mode.
Selects program mode when held for >4 seconds.
Steps through individual timer functions when in program mode.
Exits program mode when held for >4 seconds at Mde prompt
in program mode.
Increments the timer being displayed in view mode
Increments the timer being adjusted in set mode.
Increases a single digit in set mode.
Steps up through the function menu in program mode.
Increases a parameter value or option in program mode.
Decrements the timer being displayed in view mode.
Decrements the timer being adjusted in time set mode.
Decreases a single digit in set mode.
Steps up through function menu in program mode.
Decreases a parameter value or option in program mode.
The UMT multiple timer has three distinct modes of operation: View, Set
and Program.
The view mode is used to determine which timer is displayed, or to view
(but not change) the set times. To change the timer being viewed during
normal running :-
1. Press /\ or \/ to show the currently selected timer (T1 at default).
2. Press /\ or \/ again to change the selected timer. The timer number (e.g.
T3 = Timer 3) will be displayed for 3 seconds and that timer will then be in
view. If the timer selected is set to relay mode, the display will show "rly".
To view set times:-
3. Press SEL. The display will show the timer and set point number (e.g.
St21 = timer 2, set time 1) for 3 seconds and then shows that set time for a
further 3 seconds. If there is a second set time (i.e. in cct and dodo modes)
this can be displayed by pressing SEL again.
4. Use /\and \/ while viewing the set time to select the timer set point to be
displayed.
5. The timer will return to normal running after displaying the set time. The
last timer to be displayed will now be in view. To view a different timer while
running, repeat steps 1 and 2 above.
Set mode is used to change the set times.
1. Press PRG. The display will show the timer and set point number (e.g.
ST21 = timer 2, set time 1).
2. Use /\ and \/ to select the timer to be set.
3. When the relevant timer is selected, press SEL to allow the set time to
be changed.
4. Adjust the set time one digit at a time using /\ and \/. Press SEL to move
between digits.
5. When adjustment is complete, press PRG to store the new setting and
move on to the second set time if selected. If a single time mode is in use,
the timer will return to run mode.
6. Repeat steps 4 and 5 to set the second time.
7. Press PRG to return to run mode. The last timer to be set will now be in
view. To view a different timer while running, repeat steps 1 & 2 in view
mode above.
Program mode is used to set up the operating functions and parameters of
the timer. (Refer to the parameter map for programming details)
1. Press and hold PRG. The display will show PASS (if a password>0 has
been set). Press SEL and use /\ and \/ to enter each digit of the password.
Use SEL to move between password digits. When complete press PRG to
access the program functions. NOTE : if no password is set (PASS=0000)
the display will go directly to the first program parameter (MdE1).
2. Use /\ and \/ to move around the program menu (Mde1, Mde2, Mde3,
Mde4, Mde5, tdir, PASS - Mde1, Mde2 … etc.)
3. Press SEL to access the program parameter to be changed, use /\ and \/
to change the parameter (using SEL to move between digits where
required).
4. Press PRG to store the change and move on to the next variable within a
particular timer set up ( eg. Mde1, rng1, St, St11 - Mde1, rng1…etc)
5. Use /\ and \/ at the Mde prompt to move around the program menu.
6. Press and hold PRG at any Mde prompt to exit program mode. The timer
active when exiting from program mode will now be in view. To view a
different timer while running, repeat steps 1 & 2 in view mode above.
1. Set and program modes will time out if no buttons are pressed for 1
minute. The timer will return to run mode.
2. When the program routine has been accessed all timing stops, is reset
and all outputs are de-energised.
3. Timing continues in set mode. The new set times take effect when the
timer is next started.
4. The output indicator will light when the relevant output is energised.
View Mode
Set Mode
Program Mode
Notes
Sélectionne le mode affichage, programmation, temps
Permet l'accès au point de consigne pour le réglage en mode
de programmation.
Déplace le réglage sur le chiffre suivant en mode de programmation
et mode de programme.
Permet l'accès aux paramètres pour le réglage dans le mode
de programme.
Sélectionne le mode de programmation.
Sélectionne le mode de programme lorsque maintenu enfoncé
pendant >4 secondes.
Fait déplacer d'une fonction individuelle du programmateur sur
l'autre lorsqu'en mode de programme.
Permet de quitter le mode de programme lorsque maintenu enfoncé
pendant >4 secondes avec le message d'invitation Mde affiché en
mode de programme.
Incrémente le temps étant affiché en mode d'affichage.
Incrémente le temps étant réglé en mode de programmation.
Augmente un seul chiffre en mode de programmation.
Fait défiler le menu de fonction en mode de programme.
Augmente une valeur de paramètre ou option en mode de
programme.
Décrémente le temps étant affiché en mode d'affichage.
Décrémente le temps étant réglé en mode de programmation.
Diminue un seul chiffre en mode de programmation.
Fait défiler le menu de fonction en mode de programme.
Diminue une valeur de paramètre ou option en mode de
programme.
Le programmateur multiple UMT possède trois modes distincts de fonctionnement :
affichage, programmation et programme. Le mode d'affichage est utilisé pour
déterminer quel programmateur est affiché ou pour afficher (mais sans changer) les
temps programmés. Le mode de programmation est utilisé pour changer les temps
programmés. Le mode de programme est utilisé pour configurer les fonctions
opérationnelles et les paramètres du programmateur. (Reportez-vous au plan de
paramètres pour les détails de configuration).
Pour changer le programmateur étant affiché, pendant un fonctionnement normal :
1. Appuyez sur /\ou \/ pour montrer le programmateur sélectionné en cours (T1 par
défaut).
2. Appuyez à nouveau sur /\ou \/ pour changer le programmateur sélectionné. Le
numéro du programmateur (par exemple T3 = programmateur 3) sera affiché
pendant 3 secondes et ce programmateur pourra alors être vu. Si le programmateur
sélectionné est programmé en mode de relais, l'affichage montrera "rly".
Pour afficher les temps programmés :-
3. Appuyez sur SEL. L'affichage montrera le programmateur et le numéro de point
de consigne (par exemple St21 = programmateur 2, temps programmé 1) pendant 3
secondes et ensuite montrera le temps programmé pendant 3 secondes supplé
mentaires. S'il y a un deuxième temps programmé (c'est à dire en modes cct et
dodo), il peut également être affiché en appuyant à nouveau sur SEL.
4. Utilisez /\et \/ pendant l'affichage du temps programmé pour sélectionner le point
de consigne du programmateur à être affiché.
5. Le programmateur reviendra sur un fonctionnement normal après l'affichage du
temps programmé. Le dernier programmateur à avoir été affiché sera maintenant
affiché. Pour afficher un programmateur diffé
rent tout en restant en fonctionnement, répétez les étapes 1 et 2 ci-dessus.
1. Appuyez sur PRG. L'affichage montrera le programmateur et le numéro du point
de consigne (par exemple ST21 = programmateur 2, temps programmé 1).
2. Utilisez /\et \/ pour sélectionner le programmateur à être programmé.
3. Lorsque le programmateur approprié a été sélectionné, appuyez sur SEL pour
permettre le changement du temps programmé.
4. Réglez un chiffre à la fois du temps programmé en utilisant /\et \/. Appuyez sur
SEL pour vous déplacer entre les chiffres.
5. Lorsque le réglage est terminé, appuyez sur PRG pour mémoriser la nouvelle
programmation et vous déplacer sur le second temps programmé, si sélectionné. Si
un mode à temps unique est utilisé
, le programmateur reviendra sur son fonctionnement normal.
6. Répétez les étapes 4 et 5 pour programmer le second temps.
7. Le dernier programmateur à être programmé sera alors affiché. Pour afficher un
programmateur différent tout en étant en fonctionnement, répétez les étapes 1 & 2
en mode d'affichage ci-dessus.
1. Appuyez et maintenez enfoncé PRG. L'affichage montrera alors PASS (si un mot
de passe >0 a été programmé). Appuyez sur SEL et utilisez /\et \/ pour entrer
chaque chiffre du mot de passe. Utilisez SEL pour vous dé
placer entre les chiffres du mot de passe. Lorsque vous avez terminé l'entrée du
mot de passe, appuyez sur PRG pour accéder aux fonctions du programme. NOTE
: Si aucun mot de passe n'a été programmé (PASS=0000) l'affichage ira
directement sur le premier paramètre de programme (MdE1 valeur par défaut).
2. Utilisez /\et \/ pour vous déplacer dans le menu de programme. (Mde1, Mde2,
Mde3, Mde4, Mde5, tdir, PASS - Mde1, Mde2 … etc.)
3. Appuyez sur SEL pour accéder au paramètre de programme à être changé.
Utilisez /\et \/ pour changer le paramètre (en utilisant SEL pour vous déplacer entre
les chiffres lorsque cela est nécessaire).
4. Appuyez sur PRG pour mémoriser le changement et vous déplacer sur la
prochaine variable dans une configuration de programmateur particulière. ( par
exemple Mde1, rng1, St, St11 - Mde1, rng1…etc.)
5. Utilisez /\et \/ au message d'invitation Mde pour vous déplacer sur le menu de
programme.
6. Appuyez et maintenez enfoncé PRG avec tout message d'invitation Mde affiché
pour quitter le mode de programme. Le programmateur qui est actif, lors de la sortie
du mode de programme, est maintenant affiché
. Pour afficher un programmateur différent tout en étant en fonctionnement, répétez
les étapes 1 & 2 en mode d'affichage ci-dessus.
1. Les boutons Set et PRG sont désactivés lorsqu'un programmateur réglé sur le
mode de relais est affiché.
2. Les modes de programmation (set) et de programme (program) seront
interrompus si aucun bouton n'est enfoncé pendant une minute. Le programmateur
reviendra en mode de fonctionnement et les changements ne seront pas
mémorisés.
3. Lorsque la routine de programme a été accédée, tout le minutage est arrêté,
réinitialisé et toutes les sorties sont mises hors tension.
4. Le minutage continue en mode de programmation. Les nouveaux temps
programmés prendront effet la prochaine fois que le programmateur est redémarré.
5. L'indicateur de sortie s'allumera lorsque la sortie en rapport est mise sous
tension.
6. Les réglages par défaut peuvent être mémorisés en maintenant enfoncé les
boutons PRG et SEL lorsque l'alimentation électrique est branchée.
Mode d'affichage
Mode de programmation
Mode de programme
Notes

I
Email: [email protected]
D
Tel: +44 (0)1621 859500
Funzioni del quadro frontale
Funktionen der Frontplatte
SEL
SEL
PRG PRG
Auswahl der Einsicht in den eingestellten Zeitmodus.
Ermöglicht Zugang zum Einstellwert zur Änderung im
Einstellmodus).
Bringt die Änderung zur nächsten Ziffernstelle im Einstell-und
Programmiermodus
Ermöglicht Zugang zu den Parametern zur Änderung im
Programmiermodus.
Wählt Einstellmodus.
Wählt Programmiermodus, wenn >4 Sekunden gedrückt
gehalten.
Durchläuft, wenn im Programmiermodus, die einzelnen
Zeitgeberfunktionen.
Verläßt den Programmiermodus, wenn >4 Sekunden bei der
Mde-Aufforderung im Programmiermodus gedrückt gehalten.
Geht vom im Einblicksmodus (View) angezeigten Zeitgeber
auf den nächsten über.
Erhöht den Zeitgeber, der im Einstellmodus nachgestellt wird.
Erhöht eine Einzelziffernstelle im Einstellmodus.
Geht durch das Funktionsmenü im Programmiermodus.
Erhöht den Parameterwert oder die Option im Programmiermodus.
Geht vom im Einblicksmodus angezeigten Zeitgeber auf den
vorherigen über.
Senkt den Zeitgeber, der im Einstellmodus nachgestellt wird.
Senkt eine Einzelziffernstelle im Einstellmodus.
Geht durch das Funktionsmenü im Programmiermodus.
Senkt den Parameterwert oder die Option im Programmiermodus.
Der UMT-Mehrfachzeitgeber hat drei verschiedene Operationsmodi: Einblick (View),
Einstellung (Set) und Programmierung (Program). Der Einblicksmodus wird zur
Feststellung, welcher Zeitgeber angezeigt wird, verwendet, oder um die eingestellten
Zeiten einzusehen (jedoch nicht zu ä
ndern). Der Einstellmodus dient zur Änderung der eingestellten Zeiten. Der
Programmiermodus wird zur Einstellung der Betriebsfunktionen und Parameter des
Zeitgebers verwendet. (Siehe Parameterplan für Programmierdetails).
Zum Wechsel des eingesehenen Zeitgebers während Normalbetriebs :-
1. /\oder \/ drücken, um den gegenwärtig gewählten Zeitgeber anzuzeigen (T1 bei
Vorgabe).
2. Nochmals /\oder \/ drücken, um den gewählten Zeitgeber zu wechseln. Die
Zeitgebernummer (z.B. T3 = Zeitgeber 3) wird 3 Sekunden lang angezeigt und ist
dann einsehbar. Wenn der gewä
hlte Zeitgeber sich im Relaismodus befindet, dann gibt die Anzeige "rly" an.
Zur Einsicht in die eingestellten Zeiten:-
3. SEL drücken. Die Anzeige zeigt 3 Sekunden lang den Zeitgeber und die
Einstellwertnummer an (z.B. St21 = Zeitgeber 2, Einstellzeit 1) und zeigt dann diese
Einstellzeit 3 weitere Sekunden lang an. Wenn eine zweite Einstellzeit besteht (d.h..
in den Modi 'cct' und 'dodo'), dann kann dieses durch erneutes Drü
cken von SEL angezeigt werden.
4. Während des Einblicks in die eingestellte Zeit mit /\und \/ den
Zeitgebereinstellwert, der angezeigt werden soll, wählen.
5. Der Zeitgeber kehrt nach Anzeige der eingestellten Zeit auf Normalbetrieb zurück.
Der zuletzt anzuzeigende Zeitgeber wird jetzt angezeigt. Zur Einsicht in einen
anderen Zeitgeber während des Betriebs die Schritte 1 und 2 oben wiederholen.
1. PRG drücken. Die Anzeige zeigt den Zeitgeber und die Einstellwertnummer (z.B.
ST21 = Zeitgeber 2, Einstellzeit 1).
2. Mit /\und \/ den einzustellenden Zeitgeber wählen.
3. Wenn der entsprechende Zeitgeber gewählt ist, SEL drücken, damit die
eingestellte Zeit geändert werden kann.
4. Die eingestellte Zeit unter Verwendung von /\und \/ jeweils um einen Ziffernwert
ändern. Zum Wechsel zwischen den Ziffernstellen SEL drücken.
5. Nach der Nachstellung PRG drücken, um die neue Einstellung zu speichern und,
wenn gewählt, zur zweiten Einstellzeit überzugehen. Wenn einzelner Zeitmodus
verwendet wird, dann geht der Zeitgeber wieder auf Normalbetrieb über.
6. Zur Einstellung der zweiten Zeit die Schritte 4 und 5 wiederholen.
7. Der zuletzt einzustellende Zeitgeber wird jetzt angezeigt. Zur Einstellung eines
anderen Zeitgebers während des Betriebs die Schritte 1 & 2 oben im Einblicksmodus
wiederholen.
1. PRG drücken und gedrückt halten. Die Anzeige zeigt 'PASS' an (wenn ein
Kennwort>0 eingestellt ist). SEL drücken und mit /\und \/ jede Ziffer des Kennworts
eingeben. Mit SEL zwischen den Kennwortziffern wechseln. Nach Beendigung PRG
drü
cken, um die Programmierfunktionen anzugehen. HINWEIS: Wenn kein Kennwort
bestimmt ist (PASS=0000), dann geht die Anzeige direkt auf den ersten
Programmierparameter über (MdE1 Vorgabewert).
2. Mit /\und \/ das Programmiermenü durchgehen (Mde1, Mde2, Mde3, Mde4, Mde5,
tdir, PASS - Mde1, Mde2 … usw.)
3. Zum Zugang zu den zu ändernden Programmparametern SEL drücken und die
Parameter mit /\und \/ ändern (bei Bedarf mit SEL zwischen den Ziffern schalten).
4. Zum Speichern der Änderungen und Übergang zur nächsten Variablen innerhalb
einer bestimmten Zeitgebereinstellung PRG drücken ( z.B. Mde1, rng1, St, St11 -
Mde1, rng1…usw.)
5. Mit /\und \/ bei der Aufforderung 'Mde' das Programmiermenü durchgehen.
6. Bei der Aufforderung 'Mde' zum Verlassen des Programmiermodus PRG drücken.
Der beim Verlassen des Programmiermodus aktive Zeitgeber wird jetzt angezeigt.
Zur Einsicht in einen anderen Zeitgebers wä
hrend des Betriebs die Schritte 1 & 2 oben im Einblicksmodus wiederholen.
1. Die Tasten 'Set' und 'PRG' werden außer Betrieb gesetzt, wenn ein auf
Relaismodus eingestellter Zeitgeber angezeigt wird.
2. Die Einstell- und Programmiermodi schalten sich ab, wenn 1 Minute lang keine
Taste gedrückt wird. Der Zeitgeber geht dann wieder in den Betriebsmodus über und
die Änderungen werden nicht gespeichert.
3. Bei Zugang zur Programmierroutine stoppt alle Zeitgebung, wird nachgestellt und
alle Ausgabe werden außer Betrieb gesetzt.
4. Die Zeitgebung wird im Einstellmodus fortgesetzt. Die neue Einstellzeit wird
wirksam, wenn der Zeitgeber wieder eingeschaltet wird.
5. Die Ausgabeanzeige leuchtet, wenn die entsprechende Ausgabe unter Strom
gesetzt wird.
6. Die Vorgabeeinstellungen können durch Gedrückthalten von PRG und SEL beim
Einschalten der Stromzufuhr gespeichert werden.
Einblicksmodus
Einstellmodus
Programmiermodus
Anmerkungen
Sceglie il modo View tempo settato
Permette di accedere nel modo Set al punto settato per regolarlo
Permette di andare al digite seguente nei modi Set e Program
Fa accedere ai parametri per eseguire gli aggiustamenti nel modo
Program.
Sceglie il modo Set
Sceglie il modo Program se premuto per oltre 4 secondi
Nel modo Program va da una funzione individuale del timer all'altra
Esce dal modo Program se premuto per oltre 4 secondi al
messaggio guida Mde nel modo Program.
Incrementa il timer visualizzato nel modo View
Incrementa il timer cambiato nel modo Set
Fa aumentare un digite nel modo Set
Va da una funzione all'altra del menu nel modo Program
Fa aumentare il valore o opzione di un parametro nel modo
Program.
Fa diminuire il timer visualizzato nel modo View
Fa diminuire il timer cambiato nel modo Set
Fa diminuire un digite nel modo Set
Va da una funzione all'altra del menu nel modo Program
Fa diminuire il valore o opzione di un parametro nel modo Program.
Il timer multiplo UMT possiede tre modi operativi distinti: View, Set e Program
(visualizzazione, approntamento e programmazione). Si usa il modo View per
determinare quale timer viene mostrato, oltre che per visualizzare (ma non
cambiare) i tempi stabiliti. Il modo Set viene usato per cambiare i tempi
approntati mentre il modo di programmazione serve ad approntare le funzioni
operative ed i parametri del timer (per i dettagli della programmazione
consultare la mappa parametri).
Per cambiare il timer visualizzato durante il funzionamento normale :-
1. Premere /\o \/ per mostrare il timer scelto correntemente (T1
automaticamente).
2. Premere di nuovo /\o \/ per cambiare il timer scelto. Si vede il numero del
timer (es. T3 = Timer 3) per 3 secondi, poi appare il timer scelto. Se il timer
scelto è settato al modo Relay, il display mostra "rly".
Per visualizzare i tempi prescelti:-
3. Premere SEL. Il display mostra il timer ed il numero del punto settato (es.
St21 = timer 2, tempo settato 1) per 3 secondi e poi si vede quel particolare
tempo settato per altri 3 secondi. Se c'è un altro tempo settato (cioè
nei modi cct e dodo) può essere mostrato premendo di nuovo SEL.
4. Mentre è visualizzato il tempo settato usare /\e \/ per scegliere il punto settato
del timer da visualizzare.
5. Dopo aver mostrato il tempo settato, il timer ritorna al modo di funzionamento
normale. Ora si vede l'ultimo timer visualizzato. Per vederne uno diverso,
ripetere le fasi 1 e 2 sopra.
1. Premere PRG. Il display mostra il timer ed il numero del punto settato (es.
ST21 = timer 2, tempo settato 1).
2. Usare /\e \/ per scegliere il timer che si desidera approntare.
3. Dopo aver scelto il timer desiderato, premere SEL per poter cambiare il tempo
settato.
4. Regolare il tempo settato un digite per volta usando /\e \/. Premere SEL per
andare da un digite all'altro.
5. Dopo aver completato l'operazione, premere PRG per memorizzare le nuove
misure e passare al secondo tempo settato, se applicabile. Se invece si usa un
modo tempo singolo, il timer ritorna al funzionamento normale.
6. Ripetere le fasi 4 e 5 per selezionare il secondo tempo.
7. Ora viene visualizzato l'ultimo timer da essere approntato. Per vedere un
timer diverso durante il funzionamento, ripetere le fasi 1 e 2 nel modo View
sopra.
1. Premere e tenere premuto PRG. Il display mostra PASS (se è stata scelta una
password>0). Premere SEL ed usare /\e \/ per memorizzare qualsiasi digite della
password. Usare SEL per andare da un digite della password all'altro. Premere
PRG per accedere alle funzioni di programmazione. NOTA : se non è stata
scelta una password (PASS=0000) il display andrà
direttamente al primo paragrafo di programmazione (il valore implicito è MdE1).
2. Usare /\e \/ per andare da una fase all'altra del menu di programmazione
(Mde1, Mde2, Mde3, Mde4, Mde5, tdir, PASS - Mde1, Mde2 … ecc.)
3. Premere SEL per accedere al parametro di programmazione da essere
cambiato ed usare /\e \/ per cambiare il parametro (premendo SEL per andare
da un digite all'altro come necessario).
4. Premere PRG per memorizzare i cambiamenti ed andare alla variabile
seguente entro un approntamento particolare del timer ( es. Mde1, rng1, St, St11
- Mde1, rng1…ecc)
5. Usare /\e \/ al messaggio guida Mde per andare da una funzione del menu di
programmazione ad un'altra.
6. Premere e tenere premuto PRG su qualsiasi messaggio guida Mde per uscire
dal modo di programmazione. Il display mostra il timer attivo al momento di
uscita dal modo di programmazione. Per visualizzare un timer diverso durante il
funzionamento, ripetere le fasi 1 e 2 sopra nel modo di visualizzazione.
1. I pulsanti SET e PRG sono disattivati quando viene visualizzato un timer
approntato al modo Relay.
2. I modi SET e PROGRAM scompaiono se non si preme nessun pulsante per
1 minuto. Il timer ritorna al modo di funzionamento senza memorizzare i
cambiamenti.
3. Dopo aver sollecitato la routine di programmazione, si ferma qualsiasi
misurazione, poi viene resettata e tutte le uscite sono diseccitate.
4. La misurazione continua nel modo di approntamento; i nuovi tempi entrano in
effetto quando si rimette di nuovo in operazione il timer.
5. L'indicatore di output si accende quando viene eccitato l'output
corrispondente.
6. Per ritornare ai settaggi impliciti premere i pulsanti PRG e SEL, dopo aver
acceso la corrente.
Modo View
Modo Set
Modo Program
Note

E
Funciones del Panel Frontal
SEL
PRG
Selecciona el modo de visualización de ajuste de temporización
Permite el acceso al punto de ajuste para regulación en modo de
ajuste.
Pasa la regulación al dígito siguiente en modo de ajuste y de
programación.
Permite el acceso a los parámetros para regulación en modo de
programación.
Selecciona el modo de ajuste.
Selecciona el modo de programación cuando se pulsa durante >4
segundos.
Recorre las funciones de temporización individuales cuando está en
modo de programación.
Sale del modo de programación cuando se pulsa durante >4
segundos en Mde en modo de programación.
Incrementa el temporizador que se ve en modo de visualización
Incrementa el temporizador que se ajusta en modo de ajuste.
Incrementa un sólo dígito en modo de ajuste.
Se desplaza por el menú de funciones en modo de programación.
Incrementa una opción o valor de parámetro en modo de
programación.
Disminuye el temporizador que se ve en modo de visualización.
Disminuye el temporizador que se ajusta en modo de ajuste.
Reduce un sólo dígito en modo de ajuste.
Se desplaza por el menú de funciones en modo de programación.
Reduce una opción o valor de parámetro en modo de programación.
El temporizador múltiple UMT cuenta con tres modos diferenciados de
funcionamiento: Visualización, Ajuste y Programación. El modo de visualización
se utiliza para determinar qué
temporizador se ve o para ver (pero no cambiar) los tiempos ajustados. El modo
de ajuste se utiliza para cambiar los tiempos ajustados. El modo de
programación se utiliza para configurar las funciones operativas y los pará
metros del temporizador. (Consulte el mapa de parámetros para más
información sobre programación).
Para cambiar el temporizador que se ve durante el funcionamiento normal:
1. Pulse /\o \/ para ver el temporizador seleccionado en esos momentos (T1 por
defecto).
2. Pulse /\o \/ otra vez para cambiar el temporizador seleccionado. El número del
temporizador (por ej. T3 = Temporizador 3) se verá durante 3 segundos y a
continuación ese temporizador aparecerá
en pantalla. Si el temporizador seleccionado está ajustado para modo relé, la
pantalla mostrará "rly".
Para ver los tiempos ajustados:
3. Pulse SEL. La pantalla mostrará el temporizador y el número del punto de
ajuste (por ej. St21 = temporizador 2, tiempo de ajuste 1) durante 3 segundos y
a continuación mostrará
el tiempo de ajuste durante otros 3 segundos. Si existiera un segundo tiempo
de ajuste (por ej. en modos cct y dodo) podría verse pulsando SEL otra vez.
4. Utilice /\y \/ mientras ve el tiempo de ajuste para seleccionar el punto de
ajuste de temporizador a visualizar.
5. El temporizador volverá a su funcionamiento normal después de mostrar el
tiempo de ajuste. Quedará a la vista el ú
ltimo temporizador que se visualice. Para ver un temporizador diferente durante
el funcionamiento, repita los pasos 1 y 2 anteriores.
1. Pulse PRG. La pantalla mostrará el temporizador y el número del punto de
ajuste (por ej. ST21 = temporizador 2, tiempo de ajuste 1).
2. Utilice /\y \/ para seleccionar el temporizador a ajustar.
3. Cuando esté seleccionado el temporizador relevante, pulse SEL para permitir
alterar el tiempo de ajuste.
4. Regule el tiempo de ajuste de dígito en dígito con /\y \/. Pulse SEL para
moverse entre los dígitos.
5. Cuando el ajuste haya finalizado, pulse PRG para memorizar el nuevo valor y
pasar al segundo tiempo de ajuste si lo hay. Si se está utilizando un sólo tiempo,
el temporizador volverá a su funcionamiento normal.
6. Repita los pasos 4 y 5 para ajustar el segundo tiempo.
7. Quedará a la vista el último temporizador que se visualice. Para ver un
temporizador diferente durante el funcionamiento, repita los pasos 1 y 2
nteriores.
1. Pulse y mantenga pulsado PRG. La pantalla mostrará PASS (si se ha
establecido una contraseña >0). Pulse SEL y utilice /\y \/ para introducir cada
dígito de la contraseña. Utilice SEL para moverse entre los dígitos de la
contraseñ
a. Cuando haya terminado pulse PRG para acceder a las funciones de
programación. NOTA : si no hay ninguna contraseña establecida (PASS=0000)
la pantalla pasará directamente al primer parámetro de programación (MdE1 por
defecto).
2. Utilice /\y \/ para desplazarse por el menú de programación (Mde1, Mde2,
Mde3, Mde4, Mde5, tdir, PASS - Mde1, Mde2 … etc.)
3. Pulse SEL para acceder al parámetro de programación a cambiar, utilice /\y \/
para cambiar el parámetro (utilizando SEL para desplazarse entre los dígitos
cuando lo necesite).
4. Pulse PRG para memorizar el cambio y pasar a la siguiente variable dentro
de la configuración de un temporizador concreto (por ej. Mde1, rng1, St, St11 -
Mde1, rng1…etc.)
5. Utilice /\y \/ al aparecer Mde para desplazarse por el menú de programación.
6. Pulse y mantenga pulsado PRG en cualquier Mde para abandonar el modo de
programación. Quedará a la vista el temporizador activo cuando abandone el
modo de programación. Para ver un temporizador diferente durante el
funcionamiento, repita los pasos 1 y 2 anteriores del modo de visualización.
1. Los botones Set y PRG están desactivados cuando se ve un temporizador en
modo de relé.
2. Los modos de ajuste y programación se cerrarán si no se pulsa ningún botón
durante 1 minuto. El temporizador volverá al modo de funcionamiento y no se
memorizarán los cambios.
3. Cuando se accede a la rutina del programa toda temporización se detiene, se
resetea y las salidas se desactivan.
4. La temporización continúa en modo de ajuste. Los nuevos tiempos ajustados
entran en vigor cuando se arranca el temporizador la próxima vez.
5. El indicador de salida se ilumina cuando se activa la salida relevante.
6. Los valores por defecto pueden restaurarse manteniendo pulsados los
botones PRG y SEL cuando el suministro está encendido.
Modo de visualización
Modo de ajuste
Modo de programación
Notas

Parameter Function Default Value Range/options
St11-St51 First timing value 900.0 0 to Timing range
St12-St52 Second timing value 900.0 0 to Timing range
PASS Password to access 0000 0 = No Password
Program 1 - 4999 for adjustable times
5000-9999 for locked times
1996 Override Password
MODE Timing Mode dE dE = Delay On
(ndE1-5) Selection int = Interval Time
dd = Delay Off
cct = Cycling Timer
dodo = Delay On Delay Off
rLy = Relay Mode
r nG1 Timing Range SECS SECS = 0.1 to 999.9 secs
r nG2 Selection M-S = 1sec to 99min59sec
H-M = 1min to 99hrs59min
St Start Mode CtS CtS = Close to Start
PtS = Pulse to Start
Ptr = Pulse to Reset
ncYc Cycle Counter 0000 0000 = Continuous
1-9999 cycles
tdir Counting Direction uP uP or dn = Up or Down
TIMER DISPLAY SELECTION
PRG
SEL
UMT
OP1
OP2
OP3
OP4
OP5
PRG
SEL
UMT
OP1
OP2
OP3
OP4
OP5
PRG
SEL
UMT
OP1
OP2
OP3
OP4
OP5
Power on
Press /\ or V to
view timer being
displayed
Display shows t1, indicat-
ing timer 1 is currently
being displayed. Press
/\ or V to change to next
or previous timer.
Display shows t5,
indicating timer5 will
be displayed if no more
keys are pressed
PRG
SEL
UMT
OP1
OP2
OP3
OP4
OP5
PRG
SEL
UMT
OP1
OP2
OP3
OP4
OP5
PRG
SEL
UMT
OP1
OP2
OP3
OP4
OP5
Display shows t2,
indicating timer2 will
now be displayed. Press
/\ to change to next timer
Display shows t3,
indicating timer3 will
now be displayed. Press
/\ to change to next timer
Display shows t4,
indicating timer4 will
now be displayed. Press
/\ to change to next timer
After approx 2 seconds,
the display will show the
actual value of timer
selected (timer 5 in this
case)
PRG
SEL
UMT
OP1
OP2
OP3
OP4
OP5
PRG
SEL
UMT
OP1
OP2
OP3
OP4
OP5
Green LED indicators
showing energised outputs.
4 digit LED showing set times, process
time parameter messages and options.
DIMENSIONS
N
FRONT PANEL FUNCTIONS
Programming/set up
buttons (see over for
operating details).
88
70 65
Panel cut-out
70 x 45
15
PROGRAM PARAMETERS

PRG
SEL
UMT
OP1
OP2
OP3
OP4
OP5
Select timer to be displayed as show
in timer display selection
Press SEL
PRG
SEL
UMT
OP1
OP2
OP3
OP4
OP5
Display indicates timer 1
set point 2 will be displayed
if no more keys are pressed
Press /\ to change to the set
point of thenext timer.
PRG
SEL
UMT
OP1
OP2
OP3
OP4
OP5
If no further keys are
pressed, the set point of the
currently selected timer will
be shown for 2-3 seconds.
(timer 1, time 2 in this case)
Display indicates timer 1
set point 1 will be displayed
if no more keys are pressed
Press SEL to change to the
second set point of this timer.
PRG
SEL
UMT
OP1
OP2
OP3
OP4
OP5
FOR CYCLE TIMER AND DELAY ON -
DELAY OFF MODES ONLY
(cct)
(dodo)
PRG
SEL
UMT
OP1
OP2
OP3
OP4
OP5
PRG
SEL
UMT
OP1
OP2
OP3
OP4
OP5
Display indicates access
to timer 2, set point 2.
Press SEL to change the
first digit of the set time.
PRG
SEL
UMT
OP1
OP2
OP3
OP4
OP5
If no further keys are
pressed, the set point of the
currently selected timer will
be shown for 2-3 seconds.
(timer 2, time 1 in this case)
Display indicates access
to timer 1, set point 1.
Press /\ to change to the set
point of the next timer.
The display will then revert to showing the
actual value of the currently selected timer
The display will then revert to showing the
actual value of the currently selected timer
SET POINT DISPLAY
Press SEL
PRG
SEL
UMT
OP1
OP2
OP3
OP4
OP5
PRG
SEL
UMT
OP1
OP2
OP3
OP4
OP5
Display indicates timer 1
set point 1 will be displayed
if no more keys are pressed
Press /\ to change to the set
point of the next timer.
PRG
SEL
UMT
OP1
OP2
OP3
OP4
OP5
Display indicates timer 2
set point 1 will be displayed
if no more keys are pressed
Press /\ to change to the set
point of the next timer.
PRG
SEL
UMT
OP1
OP2
OP3
OP4
OP5
Use /\ or V keys to set the
first digit to the required
time. Press SEL to move to
the next digit and repeat for
each digit.
PRG
SEL
UMT
OP1
OP2
OP3
OP4
OP5
When the desired time has
been set, press PRG.
PRG
SEL
UMT
OP1
OP2
OP3
OP4
OP5
The digit will stop flashing
and the display will revert to
showing the actual value of
the currently selected timer.
FOR CYCLE TIMER AND DELAY ON -
DELAY OFF MODES ONLY
(cct)
(dodo)
PRG
SEL
UMT
OP1
OP2
OP3
OP4
OP5
Display indicates access
to timer 2, set point 1.
Press SEL to change the
first digit of the set time.
PRG
SEL
UMT
OP1
OP2
OP3
OP4
OP5
Use /\ or V keys to set the
first digit to the required
time. Press SEL to move to
the next digit and repeat for
each digit.
PRG
SEL
UMT
OP1
OP2
OP3
OP4
OP5
When the desired time has
been set, press PRG.
PRG
SEL
UMT
OP1
OP2
OP3
OP4
OP5
The digit will stop flashing and
the display will revert to showing
the actual value of the currently
selected timer (single timer
modes only).
SET POINT ADJUSTMENT
Press PRG
PRG
SEL
UMT
OP1
OP2
OP3
OP4
OP5
Supply
Supply
OP
OP
Input
Input
T T
T1 T1
T1T1 T1 T1
T2 T2 T2 T2
T2
TT
T T T T T T
T T T
dE (CtS) dE (PtS) dE (Ptr) Int (CtS) Int (PtS) Int (Ptr)
cct dodo
dd
TIMING MODES

PROGRAMMING
Press and hold
PRG for > 5 seconds
PRG
SEL
UMT
OP1
OP2
OP3
OP4
OP5
PRG
SEL
UMT
OP1
OP2
OP3
OP4
OP5
If a password other than 0000
has been set. To enter the password
press SEL, then adjust each digit
with the /\ and \/ keys, using SEL
to move between digits. When the
password is correct press PRG.
PRG
SEL
UMT
OP1
OP2
OP3
OP4
OP5
PRG
SEL
UMT
OP1
OP2
OP3
OP4
OP5
PRG
SEL
UMT
OP1
OP2
OP3
OP4
OP5
PRG
SEL
UMT
OP1
OP2
OP3
OP4
OP5
PRG
SEL
UMT
OP1
OP2
OP3
OP4
OP5
PRG
SEL
UMT
OP1
OP2
OP3
OP4
OP5
PRG
SEL
UMT
OP1
OP2
OP3
OP4
OP5
PRG
SEL
UMT
OP1
OP2
OP3
OP4
OP5
Operating mode selection for timers 1 to 5 - see table and timing chart for details
PRG
SEL
UMT
OP1
OP2
OP3
OP4
OP5
PRG
SEL
UMT
OP1
OP2
OP3
OP4
OP5
PRG
SEL
UMT
OP1
OP2
OP3
OP4
OP5
PRG
SEL
UMT
OP1
OP2
OP3
OP4
OP5
The display shows that the operating mode of timer
1 has been accessed. Press SEL to select a
different operating mode for the current timer, press
PRG to change the operating parameters (range,
start mode, etc) of the current timer or press /\ to
access the next timer mode. Pressing \/ will access
the previous timer mode. The method of selecting
the timer operating mode is the same for all 5
timers.
PRG
SEL
UMT
OP1
OP2
OP3
OP4
OP5
PRG
SEL
UMT
OP1
OP2
OP3
OP4
OP5
PRG
SEL
UMT
OP1
OP2
OP3
OP4
OP5
Operating parameter selection menu - inputs depend on operating mode - see table for details
In all cases, press SEL to access a parameter, press /\ and \/ to change
the value of that parameter and press PRG to move to next program parameter.
PRG
SEL
UMT
OP1
OP2
OP3
OP4
OP5
PRG
SEL
UMT
OP1
OP2
OP3
OP4
OP5
PRG
SEL
UMT
OP1
OP2
OP3
OP4
OP5
PRG
SEL
UMT
OP1
OP2
OP3
OP4
OP5
PRG
SEL
UMT
OP1
OP2
OP3
OP4
OP5
PRG
SEL
UMT
OP1
OP2
OP3
OP4
OP5
PRG
SEL
UMT
OP1
OP2
OP3
OP4
OP5
PRG
SEL
UMT
OP1
OP2
OP3
OP4
OP5
PRG
SEL
UMT
OP1
OP2
OP3
OP4
OP5
PRG
SEL
UMT
OP1
OP2
OP3
OP4
OP5
PRG
SEL
UMT
OP1
OP2
OP3
OP4
OP5
PRG
SEL
UMT
OP1
OP2
OP3
OP4
OP5
PRG
SEL
UMT
OP1
OP2
OP3
OP4
OP5
PRG
SEL
UMT
OP1
OP2
OP3
OP4
OP5
WIRING DIAGRAM
Press and hold the PRG key for > 5 seconds to exit the programming menu and return to normal operation
1 2 3 4 5 6 7 8
9 10 11 12 13 14 15 16 17 18 19 20
Output 1 Output 2 OP3 OP4 OP5
L 240 Vac
L 110 Vac
Neutral
5A @ 240Vac
12/24 Vac/dc
ML type
Start/reset Inputs
MH type
REF : Q03817 ISSUE 5
L/+
L/+
N/-
Table of contents
Other Tempatron Timer manuals


