Tempo Communications 915FS User manual

INSTRUCTION MANUAL
Read and understand all of the instructions
and safety information in this manual
before operating or servicing this tool.
Register this product at www.TempoCom.com
52079877 REV 2 © 2020 Tempo Communications Inc. 03/20
915FS
Optical Fiber Fusion Splicer

915FS
Tempo Communications Inc. 1390 Aspen Way • Vista, CA 92081 USA • 800-642-2155
2
Table of Contents
Preface 3
Important Safety Information 4
Section 1. Identication 9
Section 2. Operation 11
Setup .................................................................................................................................... 11
Splice Mode........................................................................................................................... 12
Fiber Preparation ................................................................................................................... 13
Splicing Procedure................................................................................................................. 14
Heating Protection Sleeve ...................................................................................................... 15
Cooling Tray .......................................................................................................................... 15
Splice-on Connectors ............................................................................................................. 16
Upgrading Software ............................................................................................................... 16
Button Functions.................................................................................................................... 16
Appendixes ........................................................................................................................... 17
Section 3. Menu Operation 18
Splice Mode Menu (S–Mode) ................................................................................................. 20
Heater Mode Menu (H–Mode) ................................................................................................ 22
Maintenance.......................................................................................................................... 24
Splice Set .............................................................................................................................. 27
Data Save.............................................................................................................................. 27
Set ........................................................................................................................................ 29
Section 4. Specications 34
Section 5. Troubleshooting 35
Appendix A. 915FS Fusion Splicer Cleaning 40
Appendix B. Practice Splicing 43
Appendix C. Tempo Communications Splice-on Connectors 45

915FS
3
Tempo Communications Inc. 1390 Aspen Way • Vista, CA 92081 USA • 800-642-2155
Preface
Description
The Tempo Communications 915FS Optical Fiber Fusion Splicer is intended to fuse bers, resulting in low splice loss and
long-term stable splices. Splice loss depends on certain conditions such as ber preparation, splicing parameters, and ber
condition.
The 915FS fusion splicer uses an active cladding alignment technology in which alignment of the ber is performed in all
three axis. This allows the technician to complete fusion splices with low splice losses as with core alignment splicers and far
surpassing the performance of V-Groove splicers.
The 915FS is perfectly suited for all FTT(x) and P2P applications.
Contents List
• 915FS fusion splicer
• 250 micron adapter pair
• 900 micron adapter pair
• SC/LC splice-on connector adapter
• Spare electrodes (one pair)
• AC adapter (power supply) with line cord
• Battery pack (installed in 915FS)
• Carry case with strap
• 1.5 mm hex wrench
• Plastic tweezers
• Cooling tray
• Electrode polisher with 10 polishing strips
• Cleaning brush
• USB cable
• Oven adapter for SOC
• Quick reference card
Safety
Safety is essential in the use and maintenance of Tempo Communications tools and equipment.
This instruction manual and any markings on the tool provide information for avoiding hazards and unsafe practices related to
the use of this tool. Observe all of the safety information provided.
Purpose of This Manual
This instruction manual is intended to familiarize all personnel with the safe operation and maintenance procedures for the
Tempo Communications 915FS Optical Fiber Fusion Splicer.
Keep this manual available to all personnel.
All specications are nominal and may change as design improvements occur. Tempo Communications Inc. shall not be liable for damages resulting from
misapplication or misuse of its products.

915FS
Tempo Communications Inc. 1390 Aspen Way • Vista, CA 92081 USA • 800-642-2155
4
Important Safety Information
General
Use this unit for the manufacturer’s intended purpose only, as described in this manual. Any other use can impair the protection
provided by the unit. Do not use the splicer on live bers.
Environmental Conditions
This tool is designed to operate at a maximum relative humidity of 95% and at altitudes up to 5000 m (16,400 ft).
Before Applying Power
Verify that the tool is set to match the available line voltage.
Do Not Operate in Explosive Atmosphere
Do not operate the tool in the presence of ammable gases or fumes.
Do Not Remove Instrument Cover
Do not remove the cover of the unit for any reason. It contains no user-serviceable parts.
SAFETY
ALERT
SYMBOL
This symbol is used to call your attention to hazards or unsafe practices which could result in an
injury or property damage. The signal word, dened below, indicates the severity of the hazard.
The message after the signal word provides information for preventing or avoiding the hazard.
Immediate hazards which, if not avoided, WILL result in severe injury or death.
Hazards which, if not avoided, COULD result in severe injury or death.
Hazards or unsafe practices which, if not avoided, MAY result in injury or property damage.
Read and understand all of the instructions and safety information in this
manual before operating or servicing this tool.
Failure to observe this warning could result in severe injury or death.

915FS
5
Tempo Communications Inc. 1390 Aspen Way • Vista, CA 92081 USA • 800-642-2155
Important Safety Information (cont’d)
Electric shock hazard:
Contact with live circuits could result in severe injury or death.
Wear eye protection when using this tool.
Fiber fragments can be extremely dangerous if they come into contacts with
eyes or skin or are ingested.
Disconnect AC power cord from AC adapter inlet or wall socket (outlet) immediately if user
observes the following or if the splicer receives the following faults:
• Fumes, bad odor, noise, or overheat occurs.
• Liquid or foreign matter falls into cabinet.
• Splicer is damaged or dropped.
If these faults occur, return unit to Tempo Communications service center for repair. Leaving
splicer in a damaged state could cause equipment failure, electric shock or re, and could result
in severe injury or death.
Electric shock hazard:
• Use only AC adapter or battery charger designed for this splicer. Using an improper AC power
source could cause fuming, electric shock, or equipment damage.
• Do not disassemble or modify splicer, AC adapter, or battery. Do not remove or bypass any
electrical or mechanical device (e.g., fuse or safety switch) incorporated into design and
manufacturing of this equipment.
• Never operate tool in an environment where ammable liquids or vapors exist. Risk of re or
explosion could result from the tool’s electrical arc in such an environment.
• Do not use compressed gas or canned air to clean tool. They may contain ammable
materials that could ignite during electrical discharge.
• Do not touch electrodes when splicer is on and power is supplied to unit. The electrodes
generate high voltage and high temperatures that could cause a severe shock or burn.
• Turn tool off and disconnect AC power cord before replacing electrodes.
Failure to observe these warnings could result in severe injury or death.

915FS
Tempo Communications Inc. 1390 Aspen Way • Vista, CA 92081 USA • 800-642-2155
6
Important Safety Information (cont’d)
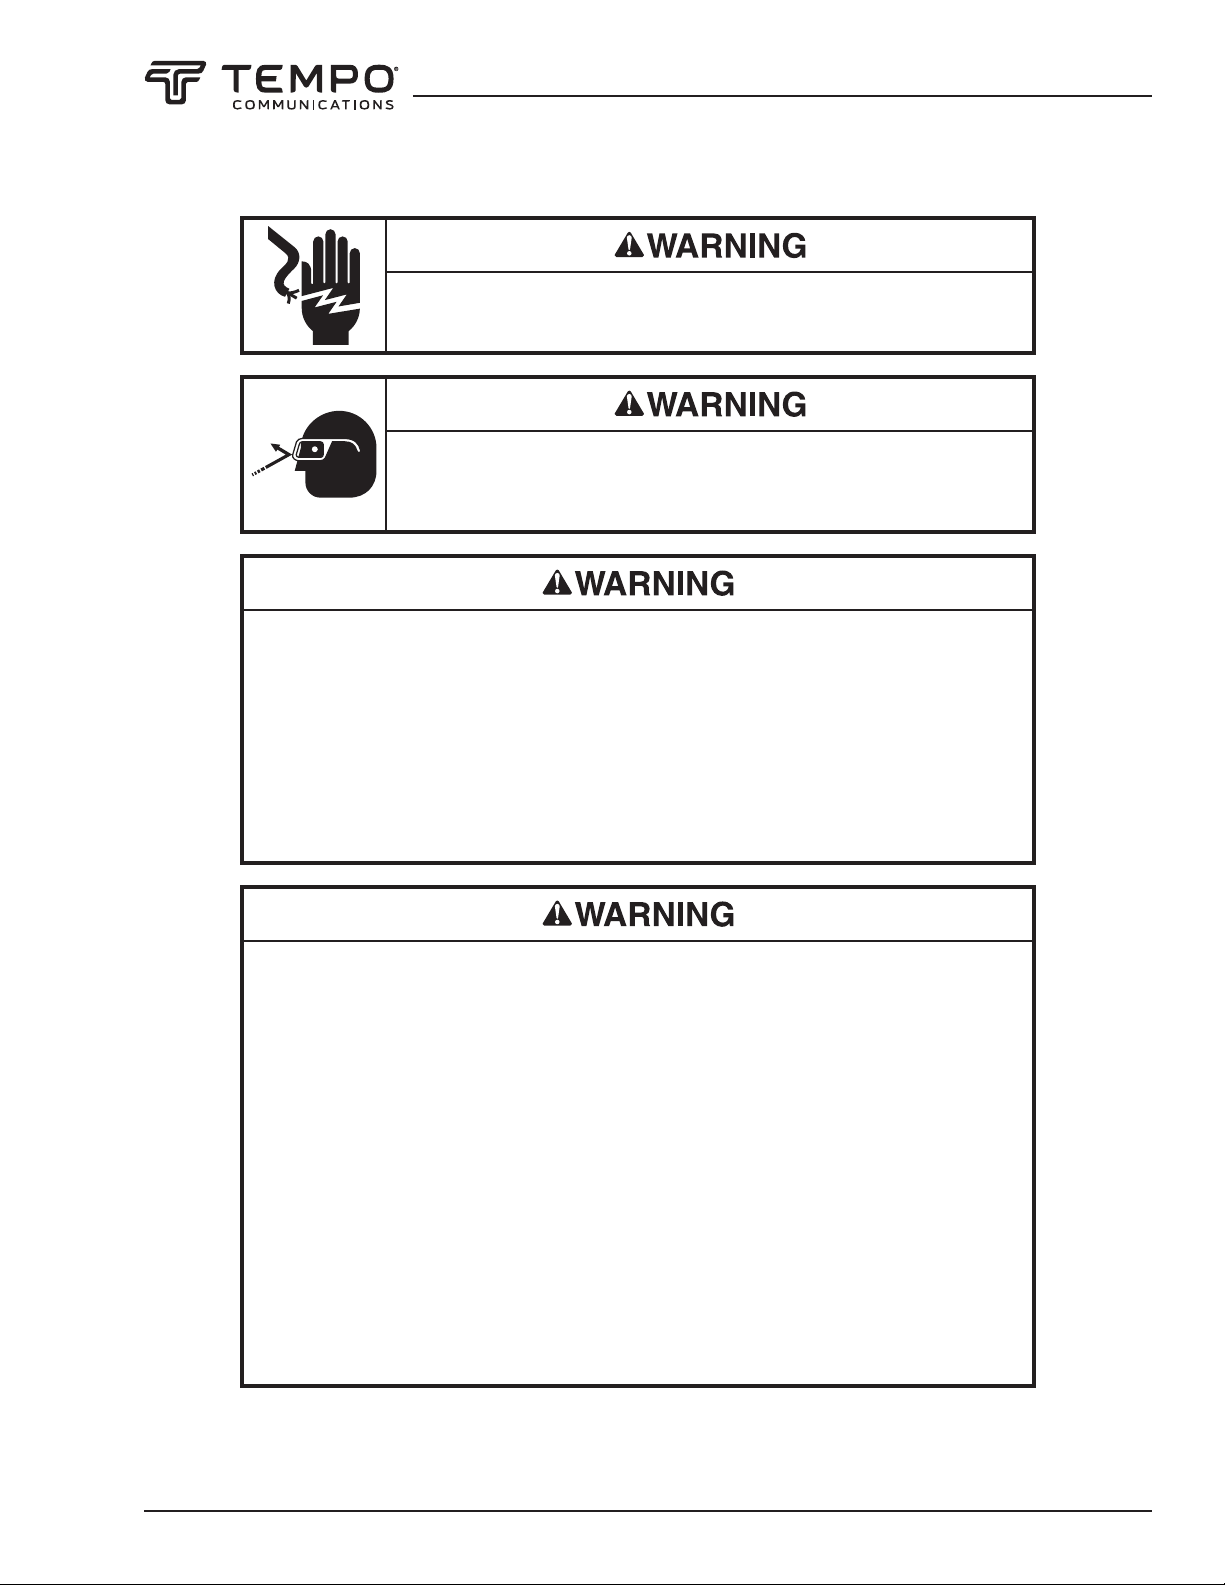
Electric shock hazard: Use only proper power source.
• Check AC power source before use. Proper AC power source is 100–240 VAC, 50–60 Hz.
Proper DC power source is 10–12 VDC. Improper AC or DC power source could cause fuming,
electric shock, or equipment damage.
• AC generators commonly produce abnormally high AC output voltage or irregular frequencies.
Measure output AC voltage with a circuit tester before connecting the AC power cord. Such
abnormally high voltage or frequency from a generator could cause fuming, electric shock, or
equipment damage. Make sure generator is regularly checked and serviced.
Failure to observe these warnings could result in severe injury or death.
Electric shock hazard:
• Do not modify, abuse, heat, or excessively pull on power cord. Use of a damaged cord could
cause fuming, electric shock, or equipment damage.
• This tool uses a three-prong (core) AC power cord that contains an earthed ground safety
mechanism. This tool must be grounded. Use only the supplied power cord. Never use a two-
prong (core) power cord, extension cord, or plug.
• Connect AC power cord properly to splicer (inlet) and wall socket (outlet). When inserting
AC plug, make sure there is no dust or dirt on terminals. Engage by pressing the female plug
into the splicer (inlet) and the male plug into the wall socket (outlet) until both plugs are fully
seated. Incomplete engagement could cause fuming, electric shock, or equipment damage.
• Do not short-circuit the terminals of AC adapter and optional battery. Excessive electrical
current could cause fuming, electric shock, or equipment damage.
• Do not touch the splicer, AC power cord, and AC plugs with wet hands.
• Do not operate splicer near hot objects, in hot temperature environments, in dusty/humid
atmospheres or when condensation is present on the tool. This may result in electric shock,
splicer malfunction, or poor splicing performance.
Failure to observe these warnings could result in severe injury or death.

915FS
7
Tempo Communications Inc. 1390 Aspen Way • Vista, CA 92081 USA • 800-642-2155
Important Safety Information (cont’d)
Explosion hazard: Follow these instructions when using lithium-ion battery:
• Do not charge battery with other methods than instructed.
• Do not dispose of battery in an incinerator or re.
• Do not charge or discharge battery near a ame or in direct sunlight.
• Do not excessively shake or jar battery.
• If battery leaks liquid residue, be careful handling battery so liquid does not contact skin or
eyes. If skin or eyes are contacted, immediately wash thoroughly and seek medical attention.
Dispose of battery and order replacement from Tempo.
• If charge did not complete in four hours or the “CHARGE” LED is constantly on, stop charging
immediately and call Tempo service center for repair.
Failure to observe these warnings could result in severe injury or death.
Battery safety:
• Do not allow anything to contact the battery terminals.
• Do not immerse batteries in liquid. Liquid may create a short circuit and damage the battery.
If batteries are immersed, contact your service center for proper handling.
• Do not place the battery into a pocket, tool pouch, or tool box with conductive objects.
Conductive objects may create a short circuit and damage the battery.
• Do not place a battery on moist ground or grass. Moisture may create a short circuit and
damage the battery.
• Do not store the battery at more than 122 °F (50 °C) or less than –4 °F (–20 °C). Damage to
the battery can result.
• Do not use another manufacturer’s charger. Other manufacturers’ chargers may overcharge
and damage the battery.
• Do not attempt to open the battery. It contains no user-serviceable parts.
Failure to observe these precautions may result in injury and may damage the unit.

915FS
Tempo Communications Inc. 1390 Aspen Way • Vista, CA 92081 USA • 800-642-2155
8
• Do not store tool in areas of extremely high temperature and humidity.
• Do not touch protection sleeve or tube heater during or immediately after heating. These
surfaces are very hot and touching them may result in burns.
• Do not place tool in an unstable or unbalanced position. Tool may shift or lose balance,
causing unit to fall.
• This tool is precision adjusted and aligned. Do not allow unit to receive a strong shock or
impact. Use supplied carrying case for transportation and storage. Carrying case protects
tool from damage, moisture, vibration, and shock.
Failure to observe these precautions may result in injury and may damage the unit.
Follow these instructions for handling electrodes:
• Use only specied electrodes.
• Set new electrodes in correct position.
• Replace electrodes as a pair.
Failure to observe this precaution may cause abnormal arc discharge, which may result in
equipment damage or degradation in splicing performance.
• Do not use any chemical other than pure alcohol (99% or greater) to clean the objective lens,
V-groove, mirror, LCD monitor, etc. Use of other chemicals may cause blurring, discoloration,
damage, or deterioration.
• This tool requires no lubrication. Oil or grease may degrade the splicing performance and
damage the splicer.
• This equipment must be repaired or adjusted by a qualied technician or engineer. Incorrect
repair may cause re or electric shock. Contact Tempo service center for repair.
Failure to observe these precautions may result in injury and may damage the unit.
Important Safety Information (cont’d)

915FS
9
Tempo Communications Inc. 1390 Aspen Way • Vista, CA 92081 USA • 800-642-2155
Section 1. Identication
Components of Splicer

915FS
Tempo Communications Inc. 1390 Aspen Way • Vista, CA 92081 USA • 800-642-2155
10
Top View
Tube Heater
Electrode Cover
V-grooves
Electrode
Ocular
Fiber Clamps

915FS
11
Tempo Communications Inc. 1390 Aspen Way • Vista, CA 92081 USA • 800-642-2155
Section 2. Operation
Setup
Installing Battery in Splicer
The 915FS can be powered by an external power adapter and battery.
Inserting the Battery
Open the battery cover and insert the battery into the battery compartment.
Then close the battery cover and lock it.
Removing the Battery
Unlock the battery cover. Open it and pull the battery out from the battery compartment. Then close the battery cover.
Two Methods of Checking Remaining Battery Capacity
• If the battery is already installed in the splicer, turn the splicer ON. The battery is automatically identied, and the
remaining battery capacity is displayed on the “Ready” screen.
• Press the battery check button on the battery pack. The remaining battery capacity is indicated on the LED indicator.

915FS
Tempo Communications Inc. 1390 Aspen Way • Vista, CA 92081 USA • 800-642-2155
12
Turning Splicer ON
Press and hold until the LED on the keypad turns ON (green color).
The “Ready” screen is displayed after all the motors reset to their initial positions.
The power source type is automatically identied. If the battery is used, the remaining battery capacity is displayed.
Splice Mode
Use SM splice mode for standard SM ber (ITU-TG.652) splicing. It performs splices in 9seconds and is the quickest mode for
SM ber splicing.
Use AUTO splice mode if ber type is not identied. Splice takes 2 seconds longer but it covers most conventional ber splicing
for the following reasons:
• AUTO mode rst identies ber type by analyzing ber prole, and the splicing condition is chosen for the type of
ber. The types of bers covered by AUTO are all the conventional bers, such as SMF (G652), BIF (G657), NZDSF (G655),
MMF (G651), etc. AUTO mode takes longer than the SM processes but is recommended in cases where the ber type is
not positively identied or if the user is new to fusion splicing.
• AUTO mode uses an automatic arc calibration function, which monitors the splicing process and ensures adequate arc
power for the splice.
Automatic Arc Calibration Function
This function calibrates the arc power at every splice. When the automatic arc calibration function is enabled, performing
the arc calibration function before a splice operation is not necessary. The automatic arc calibration function works in AUTO
modes only. It is not active in the standard splice modes. When using those modes, performing arc calibration before splicing is
strongly recommended.

915FS
13
Tempo Communications Inc. 1390 Aspen Way • Vista, CA 92081 USA • 800-642-2155
Fiber Preparation
Placing Protection Sleeve over Fiber
Place the protection sleeve over the ber. Clean optical ber with alcohol-soaked gauze or lint-free tissue approximately
100 mm (4 in) from the tip.
Note: Splice-on connectors are pre-cleaved. Do not attempt to clean the ber on the splice-on connector. Follow the instructions
supplied with the splice-on connectors.
• Clean optical ber with alcohol-soaked gauze or lint-free tissue. Dust particulates can enter
the protection sleeve, resulting in a ber break or attenuation increase.
• Make sure ber is passed through the protection sleeve.
• When protection sleeve core tube is longer than the length of outer sheath, cut off excess
sleeve to avoid micro bend after heating.
Failure to observe these precautions may result in injury and may damage the unit.
Stripping and Cleaning Fiber
Use the supplied ber stripping tool to strip the outer coating 30 to 40 mm (1.25 to 1.5 in) from its tip. Thoroughly clean the ber
with alcohol-soaked (99% or greater) gauze or lint-free tissue.

915FS
Tempo Communications Inc. 1390 Aspen Way • Vista, CA 92081 USA • 800-642-2155
14
Fiber Cleaving
Do not let the ber end-face touch anything. Place the ber into the universal adapter, and insert the adapter into the 915CL.
Follow the instructions for the 915CL to cleave the ber.
Loading Fiber into Splicer
1. Open the wind protector and install the ber adapters into the splicer, making sure the ber is positioned into the
center of the V-grooves.
2. Close the wind protector.
Splicing Procedure
To ensure a good splice, the optical ber is observed with the image processing system equipped in the 915FS. However, in
some cases the image processing system cannot detect a faulty splice. Visual inspection with the monitor is often necessary
for better splicing yield. Observe the following standard operating procedure:
• After bers are loaded into the splicer, press and the bers will move toward each other. The ber motion stops and the
cleaning arc is performed. The cleave angle and end-face quality are checked. If the measured cleave angle is greater
than its set threshold or ber chipping is detected, the beeper sounds and an error message warns the operator. The
splicing procedure pauses. If no error message is displayed, the below stated end-face conditions are used for visual
inspection. If observed, remove the ber from the splicer and repeat ber preparation. These ber cleave defects may cause
a faulty splice.
Chip Lip Incline
• After ber inspection, the bers are aligned core-to-core or cladding-to-cladding. Cladding axis offset and core axis offset
measurements can be displayed.
• After completion of ber alignment, an arc discharge is performed to splice the bers.
• Estimated splice loss is displayed upon completion of splicing. Splice loss is affected by factors stated in Section 5. These
factors are taken into account to calculate, or estimate, splice loss. The calculation is based on dimensional parameters,
such as MFD, cleave quality, and fusion splice shape after the splice. If either the cleave angle measured or the estimated
splice loss exceeds its set threshold, an error message is displayed. If the spliced ber is detected as abnormal, such as
“Fat”, “Thin” or “Bubble”, an error message is displayed. If no error message is displayed but the splice looks poor by visual
inspection through the monitor, it is strongly recommended to resplice.

915FS
15
Tempo Communications Inc. 1390 Aspen Way • Vista, CA 92081 USA • 800-642-2155
Notes:
• Splice point sometimes looks a bit fatter than other parts. This is considered a normal splice and does not affect splice
loss.
• To change threshold for estimated splice loss or cleave angle, refer to “Splice Mode” in this manual for details.
• Splice loss may be improved in some cases by additional arc discharges. Press or as displayed in the main
splicing screen, for an additional arc discharge (re-arc). Splice loss estimate and splice check are performed again.
Splice loss may be worsened in some cases by additional arc discharges (re-arcs). Additional arc discharge can be set to
“disabled”, or limited to the number of additional arcs.
• Splicing result is automatically saved in splicer memory.
Heating Protection Sleeve
1. Transfer the ber with protection sleeve from the centering device to the tube heater.
2. Close the tube heater lid.
Notes:
• Make sure the splice point is located at the center of the protection sleeve.
• Make sure the strength member in the protection sleeve is placed downward.
• Make sure the ber is not distorted.
• The splice-on connector must be installed on the right-hand side of the splicer heater. Use heater prole #1 for the
SOC.
3. Press to start tube heating. The beeper sounds and the HEAT LED (red color) turns off when tube heating is
completed.
4. Open the tube heater lids and remove the protected ber from the tube heater. Apply some tension to the ber while
removing it from the tube heater.
5. Visually inspect the nished sleeve to verify that no bubbles or debris/dust is present in the sleeve.
Cooling Tray
Place the splice into the cooling tray on the back of the 915FS splicer.

915FS
Tempo Communications Inc. 1390 Aspen Way • Vista, CA 92081 USA • 800-642-2155
16
Splice-on Connectors
The 915FS uses the Tempo Communications version of splice-on connectors. The 915FS currently supports SC, LC, FC, and ST
versions (both PC and APC nish, where applicable).
Follow the instructions supplied with the splice-on connectors packaging.
Upgrading Software
The 915FS software can be upgraded using the online software upgrade tool
at www.TempoCom.com.
Button Functions
Button Description
Turns the splicer ON/OFF
Menu key
Enter key
Return/Exit key
Left key
Right key
Up key
Down key
Start/Stop heating protection
Provides a second ARC to the fusion splice
Resets the motor position
Starts splicing work
Switches between X, Y and X/Y views

915FS
17
Tempo Communications Inc. 1390 Aspen Way • Vista, CA 92081 USA • 800-642-2155
Appendixes
Refer to the following appendixes at the end of this manual for additional operating information:
• Appendix A—915FS Fusion Splicer Cleaning
• Appendix B—Practice Splicing
• Appendix C—Tempo Communications Splice-on Connectors

915FS
Tempo Communications Inc. 1390 Aspen Way • Vista, CA 92081 USA • 800-642-2155
18
Section 3. Menu Operation
Press to enter the splicer menu. There are six main menus:
1. Splice Mode Menu (S–Mode)
2. Heater Mode Menu (H–Mode)
3. Maintenance
4. Splice Set
5. Data Save
6. Set
Explanation of Splice Modes
Mode No. Splice Mode Description
1 AUTO
For splicing in most cases; the splicer will automatically adjust splice parameters according to
ber type.
Automatic arc calibration works in this splice mode.
2 AUTO SM
For splicing standard single-mode ber (ITU-T G652).
The MFD is 9 to 10 µm at wavelength of 1310 nm.
Automatic arc calibration works in this splice mode.
3 AUTO DS
For splicing dispersion-shifted ber (ITU-T G653).
The MFD is 7 to 9 µm at wavelength of 1550 nm.
Automatic arc calibration works in this splice mode.
4 AUTO NZ
For splicing non-zero dispersion-shifted ber (ITU-T G655).
The MFD is 9 to 10 µm at wavelength of 1550 nm.
Automatic arc calibration works in this splice mode.
5 AUTO MM1 For splicing multi-mode ber (ITU-T G651). Core diameter: 50.0 to 62.5 µm.
Automatic arc calibration works in this splice mode.

915FS
19
Tempo Communications Inc. 1390 Aspen Way • Vista, CA 92081 USA • 800-642-2155
6 SM
For splicing standard single-mode ber (ITU-T G652).
The MFD is 9 to 10 µm at wavelength of 1310 nm.
User can edit all parameters of this splice mode such as prefuse power, prefuse time, arc
power, arc time, align, proof test, etc.
The manual splicing operation is provided. Automatic arc calibration does not work in this
splice mode.
7 DS
For splicing dispersion-shifted ber (ITU-T G653).
The MFD is 7 to 9 µm at wavelength near 1550 nm.
User can edit all parameters of this splice mode such as prefuse power, prefuse time, arc
power, arc time, align, proof test, etc.
The manual splicing operation is provided. Automatic arc calibration does not work in this
splice mode.
8 NZ
For splicing non-zero dispersion-shifted ber (ITU-T G655).
The MFD is 9 to 10µm at wavelength of 1550 nm.
User can edit all parameters of this splice mode such as prefuse power, prefuse time, arc
power, arc time, align, proof test, etc.
The manual splicing operation is provided. Automatic arc calibration does not work in this
splice mode.
9 MM1
For splicing multi-mode ber (ITU-T G651). Core diameter: 50.0 to 62.5 µm.
User can edit all parameters of this splice mode such as prefuse power, prefuse time, arc
power, arc time, align, proof test, etc.
The manual splicing operation is provided. Automatic arc calibration does not work in this
mode.
10 AT1(SM)
User can set the attenuation value in the range of 0.1 to 15 dB.
Set the desired splice loss. If after the splice is completed the desired loss is not achieved,
the user can adjust the splicing coefcient. Increasing the coefcient will increase the desired
loss; decreasing the coefcient will reduce the splice loss.
11 SM FAST
For splicing standard single-mode ber (ITU-T G652).
The MFD is 9 to 10 µm at wavelength of 1310 nm.
It is the fastest splice mode at 9 seconds splicing time. This mode process does not analyze
ber geometry.
12 SM G657
For splicing standard single-mode ber (BIF G657).
The MFD is 9 to 10 µm at wavelength of 1310 nm.
User can edit all parameters of this splice mode such as prefuse power, prefuse time, arc
power, arc time, align, proof test, etc.
13~60 BLANK
(other modes) User can assign these as their own custom splicing proles.
Explanation of Splice Modes (cont’d)

915FS
Tempo Communications Inc. 1390 Aspen Way • Vista, CA 92081 USA • 800-642-2155
20
Splice Mode Menu (S–Mode)
(1) Select Splice Mode
Select “S–Mode” to access the available splicing modes. Use pand qto highlight the desired splicing mode. Then press 8
to conrm.
Select an appropriate splice mode for the type of ber to be spliced, and press porqto select the splice mode. Then press 8
to conrm.
Note: “1 AUTO SM/NZ/DS/MM” mode is recommended for splicing in most cases. In this mode, the splicer automatically
adjusts splice parameters according to the ber type.
(2) Edit Splice Mode
Splicing parameters in each splice mode can be modied.
In “Select Splice Mode” menu, press uto enter “Edit Splice Mode” and modify the splice mode as shown below.
Press porqto select the parameter to be modied, and then press 8to enter the parameter setting.
Press porq to modify the parameter, and then press 8 to conrm.
Note: In AUTO mode, certain parameters cannot be changed.
Parameter Description
Arc Power In SM/DS/MM/NZ/AUTO modes the arc power is xed at 40 bits.
Arc Time Arc time is xed at 1500 ms for SM and DS modes, 2000 ms for NZ mode, and
3000 ms for MM mode. This is automatically set depending on the ber type
when AUTO mode is selected.
Edit Mode for Splicing
• Fiber Type: Select or enter the name of ber being spliced.
• Mode Title1: Enter type of ber.
• Mode Title2: Enter alternate name of ber type.
• Align: Select Core, Clad or Manual options. In manual mode the user can control the motors by hand.
• Proof Test: Enable or disable the tension test after splicing. Disable this for splice-on connector use.
• Cleave Limit: Set or disable the cleave error limit in degrees.
• Loss Limit: Set or disable the splice loss notication level.
• Axis Offset Limit: Set or disable the axis offset error limit in degrees.
• Cleaning Arc: Set or disable the duration of the cleaning arc.
• Gap: Increase the gap if the bers are “soft” and melt too easily. Decrease the gap if the bers are “hard to melt”.
• Gap Set: Set the gap closer to the larger diameter core ber when splicing dissimilar-sized bers. This may also
be necessary when splicing what the user may consider to be the same size ber but the two bers are from different
manufacturers.
• Prefuse Power: Set or disable the power to the electrode during the initial fusing cycle.
• Prefuse Time: Set or disable the duration of the prefuse cycle.
• Overlap: Set or disable the overlap closer if the bers are hard to splice or the core diameter is thick. (The harder the
closer, the thicker the closer; the softer the farther, the thinner the farther.)
• Arc1 Power: Increase or decrease or disable the Arc1 power.
• Arc1 Time: Increase or decrease or disable the Arc1 duration.
• Arc2 Power: Increase or decrease or disable the Arc2 power.
• Arc2 Time: Increase or decrease or disable the Arc2 duration.
• Arc2 ON Time: Set or disable the Arc2’s working (arcing) duration.
• Arc2 OFF Time: Set or disable the Arc2’s off duration.
• Rearc Time: Set or disable the duration of the Rearc.
Table of contents
Other Tempo Communications Tools manuals
Popular Tools manuals by other brands

Victaulic
Victaulic EndSeal OGS-200 Operating and maintenance instruction manual

ATEQ
ATEQ VT15 Quick user manual

BNB Products
BNB Products DBD-16H Tool Manual

Sealey
Sealey SA36.V2 quick start guide

Van's Aircraft
Van's Aircraft RV-12 Maintenance manual

HOLZMANN MASCHINEN
HOLZMANN MASCHINEN WSR40PRO user manual