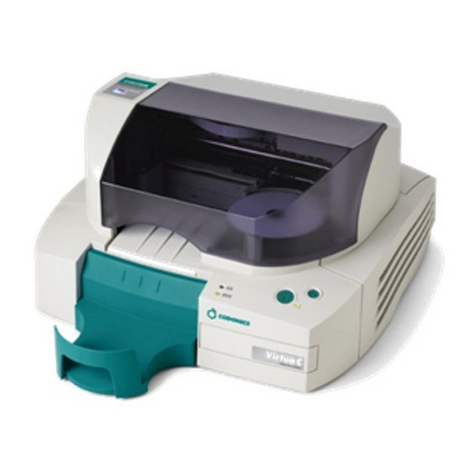
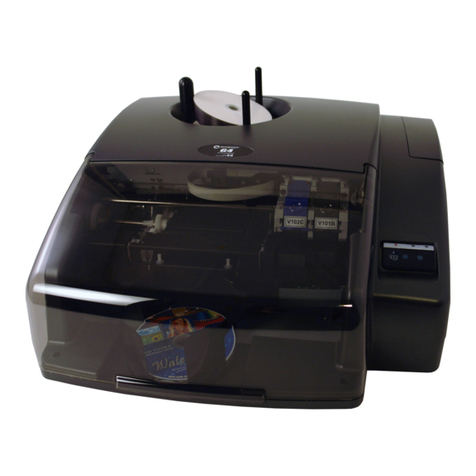
Terra ALPHA Office One User manual

ver. 1.07
A
AL
LP
PH
HA
A
O
Of
ff
fi
ic
ce
e
O
On
ne
e
CD/DVDDuplicatorand Printer
UserManual

1
Content
1BasicExplanations..........................................................................................3
1.1 HandlingaCD/DVD....................................................................................3
1.2 Different CD/DVDformats...........................................................................3
1.2.1 AudioCD.............................................................................................3
1.2.2 CD-ROM..............................................................................................3
1.2.3 CD-R....................................................................................................3
1.2.4 DVD/ DVD-R........................................................................................4
1.2.5 Structureof adisc................................................................................4
1.2.6 Recording methodsof aCD-R.............................................................4
1.3 What mediause..........................................................................................4
1.3.1 Dimensionsof the disc.........................................................................4
1.3.2 Description ofthe discs........................................................................6
1.3.3 Important dimensions...........................................................................7
1.3.4 Detailof picking disc byhead...............................................................8
1.3.5 Recording speed..................................................................................9
1.4 Legalinstruction..........................................................................................9
2Introduction....................................................................................................10
2.1 Features....................................................................................................10
2.2 Overviewof operation...............................................................................10
2.3 Hardwarerequirements.............................................................................10
2.4 Software....................................................................................................10
3Unpacking.......................................................................................................11
3.1 First check the content ofthe package:.....................................................11
3.2 Followthesedirections:.............................................................................11
4Installation......................................................................................................12
4.1 Installation and safetyinstructions............................................................12
4.2 Installation ofthe system...........................................................................12
4.2.1 Identifying the parts............................................................................12
4.2.2 Connecting the Alpha cables.............................................................14
4.2.3 Description ofthe controlpanel..........................................................15
Installation ofduplicatorAlpha.............................................................................16
4.2.3 DriverInstallation...............................................................................16
4.2.4 PrinterDriverInstallation....................................................................16
4.2.5 Installation thesoftware.....................................................................24
4.2.6 Uninstalling........................................................................................24
4.3 Description................................................................................................26
4.3.1 PrinterProperties...............................................................................27
4.3.2 MaintenanceDialog...........................................................................31
4.3.3 Howtoset print qualityand mode......................................................35
5Calibration......................................................................................................37
5.1 Calibration check.......................................................................................37
5.1.1 Running the calibration......................................................................37
5.1.2 CalibrateBin1-Bin5........................................................................38
5.1.3 CalibratePrinter.................................................................................38
5.1.4 Calibraterecorder..............................................................................38
5.1.5 CalibrateHead...................................................................................38
5.1.6 Upgrade firmware..............................................................................39
6Maintenance andCleaning............................................................................40

2
6.1 Lubricationof Shafts.................................................................................40
6.2 MaintenanceCDPInkFleece...................................................................40
6.2.1 Required Partsand Tools..................................................................40
6.2.2 Description ofInkFleeceReplacement.............................................40
6.3 Maintaining the Alpha Body......................................................................44
6.3.1 Alpha Exterior....................................................................................44
6.3.2 Alpha Interior......................................................................................44
6.3.3 PrinterCradleBar..............................................................................44
6.3.4 Handlingand Storage........................................................................44
6.3.5 Head service......................................................................................44
7Production......................................................................................................45
7.1 AutoloaderBinMode.................................................................................45
7.1.1 Standardinput andoutput bin............................................................45
7.1.2 Sequentialcontrolofbins...................................................................45
7.1.3 Individualbinmode control................................................................46
7.1.4 Individualbinmode control................................................................46
7.2 Alpha and anotherdevices........................................................................46
7.3 Optimalworking........................................................................................46
8Systemsetting................................................................................................47
9Operation........................................................................................................47
9.1 Read inexisting CDs/DVDs......................................................................47
9.2 CreateaPrint File.....................................................................................48
9.3 RecordtheCD/DVDImage toCD/DVD....................................................48
9.4 Changing anInkCartridge........................................................................49
10 Technical specification..................................................................................50
11 Warningsandnotes.......................................................................................51
12 Contacts..........................................................................................................52

3
1 BasicExplanations
1.1HandlingaCD/DVD
•Avoidfingerprintsbytaking theCD/DVDon itsedge.
•Clean CDs/DVDswithtepidWater.Donotusestrong detergentbecauseit
can destroythe surface.
•Wipe off CDs/DVDsfrominside tooutside.Neverwipe incirclesbecauseof
scratches. Radialscratchescan be betterbalanced.
•Neveruseaballpenforwriting on aCD-R/DVD-R.
•Keep CD-Rs/DVD-Rsindarkand not too hot (maximallyroomtemperature).
1.2DifferentCD/DVDformats
OriginalCDshad beendeveloped forstoring music.NewCD formatswere
developedsothatthe highstoragecapacitycan beusedforotherdata.DVDisthe
next generation of an opticaldisc format and provideshighercapacities.
1.2.1 Audio CD
1980 the companiesSonyand Philipsdefined allnecessarydetailsforbuilding
AudioCDs.Thisstandardwaspublishedinared covered booksoitiscalled Red
BookStandard.
1.2.2 CD-ROM
The YellowBookpublished 1983 bySonyand Panasonicdefinesthe standardfor
CD-ROMs.The CD-ROM(CompactDisc -Read OnlyMemory)isanon-volatile
opticaldisc. The standardCD-ROMcan hold650 -70MBof data.
Thismechanismneedsapartofmemory,sothatjustabout650 Megabytecan be
used foruserdata. ACD-ROMisnotrecordable.Existingdatacan just be read.
1.2.3 CD-R
Based on YellowBookthe OrangeBookcreatesthe standardforrecordableCDs.
The CD-R(CompactDisc-Recordable)isalsocalled CD-WO(CompactDisc-Write
Once). Thedataisstored permanentlyand canbe read wheneveryou want but they
cannot bedeleted.

4
1.2.4 DVD/ DVD-R
The DVDhassignificantlymorestorage capacitythanthe CD-ROM(4,7GB/side &
layer) and canbe used forallkindsofdata(video,audio,dataetc.).TheDVD-Ror
DVD+Rislikethe CD-Rawriteoncemedia.The datacan be recordedonce, can be
read wheneveryou want but cannot bedeleted.
1.2.5 Structure of a disc
ThereareCD-Rswithdifferentcolouring (gold,green,blue,silver).Thesecolours
arecaused bythe layeroforganicdye.Thisdyeislocated between alayerof
polycarbonateand ametalreflector,whichisusuallymade ofgoldorsilver. The dye
isverysensitive,becauseitisjustprotected bythe reflectorlayerand athin
protectivelayer.Thiscreatesahighersensitivitytothe upperside astothe
undersideof aCD-R.
Recording pitsareburned inthe dye,whichchangesthereflection factoratthis
place. Thelasercan recognizethesedifferencesand read thestored datathisway.
If the dyeorthereflectorlayerisdamaged theCD-Risnot recordable.
LikearecordCD-Rsarewritten tospirallyexceptthatCD-Rsarerecorded from
insidetooutside.The track pitchamountsto1,6 µmand everytrack hasawidthof
0,6 µm. The overalllengthofthe track is7km.
1.2.6 Recording methods of a CD-R
•Singlesession:--TheCD-Risproducedatone workingcycle.Thefinaltableof
contents(TOC)iswritten. EveryaudioCD isasinglesession CD.
•Multisession: --The CD-Risproduced inseveralworkingcycles.Inevery
sessionthe userdataarewritten first. Afterthatthe session islocked,thatmeans
writingthe TOCand linking theseparatedatablocks.CD-Rsrecordedwithmulti
sessionmethod cannotbe read byanaudioCD playerbecauseofthemissing
finalTOCof RedBookStandard.
1.3Whatmediause
Fortroublefree usingthe autoloaderyou mustpayattention tothe used CD and
DVDdiscs. It isveryimportant using CD and DVDmediawithrightdimensions.
1.3.1 Dimensions of the disc
StandardCD and DVDdiscs havean outerdiameterof120 mm.Thereisthe 15
mm holeinthe centreofthe disc.CD and DVDdiscs aremade froma1.2mm thick
disc ofpolycarbonate.NextpicturePic.A1 showsdimensionsand tolerancesofthe
CD and DVDdiscs.

5
Pic. A1–Dimensionofthedisc

6
1.3.2 Description of the discs
Compactdiscs aremade froma1.2mm thickdisc ofpolycarbonateplasticcoated
withamuchthinnerlayerof superpurityaluminiumlayerwhichisprotected byafilm
oflacquerorprintablesurface.The dyeislocatedbetween polycarbonateand
aluminiumlayer. See Pic. A2.
Pic. A2–Descriptionofthedisc
1-Innerhole
2-Polycarbonatedisc
3-Underring
4-Upperring
5-Dye
6-Reflection layer
7-Protectivelayer

7
1.3.3 Important dimensions
Thesearethemost important dimensions:
A-Radiusofthe innerhole
B-Widthof the underring
C-High of the underring
D-Thickness of thedisc
E-Widthof the upperring
F-Depthof the upperring
G-Centreline of the underring
Pic. A3–Themostimportantdimensionsofthedisc
General dimensions:
•Disc diameter120 mm+0,3/ -0.1mm
•Disc thickness (pos.E)1.2mm, ±0.05 mm
•Disc hole(pos. A), 15 mm±0.1mm
•High ofthe underring (pos.D)minimalvalue is0.2mm.Thisisthe most
importantdimension.Onthisproportion dependscorrectworkofthe autoloader
head. See Pic.A12.
•Centrelinesofthe upperringandunderring (pos.H).Theymustn'tbeinaxis.
Typicalwidth:H=> ±0.5F. Thisisthe mostimportantproportiontoo.See Pic.A
3.

8
Following picturesshowpileof theCD orDVDdisc:
Pic. A4 Pic. A5
1.3.4 Detail of picking disc byhead
Following picturesshowdetail pick CD andDVDdisc byhead oftheautoloader.
See the method howthe head takesdisc.
Pic. A6 Pic. A7
Pic. A8 Pic. A9
The Pic.A6 and Pic.A8 showpick onediscbyhead.The Pic.A7and Pic.A9
showpick twodiscs byhead. Inthiscasetheycan glued-upand head can't takesno
one disc.

9
1.3.5 Recording speed
Maximalrecording speed isn'trestricted.ButIG-Alliancerecommendstoall their
customersmaximalspeed 32xfordataand 16xforaudio.Pleasesetup recording
speed manuallyaccording usedmedia. Thisisbecauseof manyincidentsof destroy
CD during the fullspeed recording onfastdrives(48xand 52x)and becauseof
qualityofrecorded discs.If you setsomespeed and CD orDVDisrecordedby
lowerspeed,it can becausedbyinsensitivityof yourmediaand yourrecorder.
1.4Legalinstruction
Copying ofcopy-protected CDsorDVDswithnon-standardformatsorCD-Rs/DVD-
Rswithotherprogramsanddatawithoutavalidlicenceisillegal.Pleasepay
attention toanyCopyrightsbeing inforce,eitherforstandardorcustomCD-Rsand
DVD-Rs.IG-Alliancedoesnottakeanyliabilitywhen the userofthisduplication
equipmentviolatesanylaworCopyrights.The usermustcheckandobeythe
applicablelawsand copyrights.

10
2 Introduction
2.1Features
The Alphaisadesktop disc publishing systemwithintegrated CD/DVDrecorderand
6colourInk-Jetprinter, allconnected tothe computerviaonlyone USB cable.
2.2Overviewofoperation
The Alphaallowsyou torecordyourownCDs/DVDs.You can determine on the
contentsand labelbyyourself.
Withthe helpofthe deliveredsoftwareaCD/DVDimage iscreatedinthe computer.
Thisimage containsthe tree and alldatayouwant torecord. The lasersinthe Alpha
recorderburnsthedatatransmitted bythecomputeron CD-RorDVD-R.After
starting therecording theAlpha runsautomatically.CDsorDVDsaretaken and put
inthe recorder,arerecorded and gathered fromthe recorderforpassingon tothe
printerorputting theminthe outputbin.FaultyCDs/DVDsarerecognized and
sorted out. Input binsload up to120 blankCD-R’s/ DVD-R’sat one time.
2.3Hardwarerequirements
Min.PCrequirements:ProcessorPentium1GHz,256 MBRAM,USB 2.0OS:
Win2000orXP
The manufacturer recommendsconnecttheduplicatortothe
UninterruptedPower System(UPS)withatleast1100VA.(Value
1100VA assure thattheduplicator will finishstarted action when power
iscutoff)
2.4Software
AtpresenttheCD Disc Managerisavailableforthe Alphaautomaticduplicator.It
consistsof severalmodules.
•CD Disc Manager -controlsthe Alpha duplicator
•CD Xpress -CD / DVDmastering
•LabelDesigner -Graphics softwaretodesign the CD/DVDsurfacepicture
You can find information forusing thissoftwarebytheirappropriateUser’sManuals.

11
3 Unpacking
3.1Firstcheck thecontentofthepackage:
1.Alpha
2.Inkcartridge TricolorNo. 257
3.Inkcartridge PhotoNo. 258
4.Powercord
5.USB cable
6.CD withNeroSoftwarekey
7.CD withUsermanualandSW
8.Output Test CD
3.2Follow these directions:
1.Unpack the Alpha fromthe box
2.Unpack the inkcartridgesfromthe box
3.Removethe protectivematerials
4.Put the Alpha on the horizontaldesk andletitacclimate
5.Plug inthe USB cable(fromAlpha tocomputer)
6.Plug inthe powercord
7.Switchon the mainswitch(situated nearbypowercord)
8.Open the cover
9.InsertcartridgesintotheAlpha according tothe cartridge No.onthe carriage
(see chapter8.4)
10.Press shortlybutton 5(PowerSwitch–on)onthe controlpanelforswitch-on
Remark: The cartridgesare coded.Itmeansyoucanuseonlyink
cartridgesmodified forCDprinter5000Pro-seelabelonthe
cartridge. Thesecartridgesyoucan buyonlybyyoursupplier.

12
Installation
ThischapterdescribestheinstallationoftheAlphaduplicator.Ifyouareindoubtof
what todo, pleasecontact yourlocaldealerorIG-Alliance
3.3Installationandsafetyinstructions
The systemshouldbe used inaclosed roomwithatemperatureof15°C-30°Cand
humidityof15%-85%none condensing.Setthe Alpha onahorizontaland stable
surface.Aroundthe Alphaduplicatormustbe 20 cmfree spaceforguaranteeing
fastintervention on the powerswitchand good ventilation.Donotswitchoffthe
Alpha duplicatorwhilerunning.Waitabout15secondsafterpoweringdownbefore
switchingon again.
3.4Installationofthesystem
3.4.1 Identifying the parts
Thisillustration showsthe Alpha,itsbuttons,LED’s,input/outputand rejectbinand
othercomponents.Anink-jetCD/DVDprinterisinsidethe unit. You mustpay
attention tothe information howtoinstallthe system.
.1
Fig. 1a–Frontview

13
Fig. 1b-Frontview
Fig. 1c-Back view
1-Carouselwith5bins
2-Head
3-Recorder
4-Printercartridges
5-Printertray
1-USB port
2-LEDindicators
•Red -Power
•Green -Communication
3-Powerport
4-Powerswitch
5-Type label
1 2 3 4 5

14
The Recorder iswherethe duplicatorloadsdiscs astheyarerecordedone-by-one.
The RoboticArm transportsdiscs fromthe binstothe recorderand printer.
The Carousel movesbins.
The StatusLED indicatesoperation and errorconditions(Errorhandlingfordetailed
explanation of the StatusLEDconditions).
The InputBins (forthe blankdiscs)are marked withcolourlabelsand numbers
(See Chapter3.4.1.1).
The OutputBins (forfinished discs) are marked withcolourlabeland numbers.
The Rejectbin collectserrordisks.
The USB -thisportisused tocontrolthe Alphaaction.
The PowerPort isfortheconnection toyour110/230Vpowersource.
3.4.1.1Markingbins-defaultsettings
Bin1- lightgreen -input binforCD
Bin2- darkgreen -outputbinforCD
Bin3- lightblue-input binforDVD
Bin4- darkblue -outputbinforDVD
Bin5- red-reject bin
3.4.2 Connecting the Alpha cables
The fig.2showsthe connecting ofthe Alpha duplicator.Followthesedirections:
1.Put the Alpha duplicatoronthe desk.
2.Connectthe USB cable.One end isconnectedtothe USB portatthe rearof
the Alpha -pos. 1.and theothertothe PC
3.Applyapowercordtothe powerport ofthe Alpha duplicator- pos. 3.
4.If the cablesareconnectedandcartridgesareintheprinterpushthePower
Switchon button.

15
4.2.3 Description of the control panel
Fig. 2–Controlpanel
1, AlphaOffice OneControl Panel
2. PowerSwitch-onLED
It lightswhen Alphaison
3. RotateCarousel Button
Press it shortlyforthecarouselrotation
Press it2sforthe initialisation ofloader
4, LoaderSwitch-onLED
ExchangeofINK cartridgesLED
It blinks during the cartridgesexchange procedure
5. PowerSwitch-on
Press shortlyforswitch-on and2sforswitch-off
6. ExchangeofINK cartridgesButton
Press thisbuttontostartinkcartridgesexchange and than onthe end again
7. PrinterCartridgeStatusLED
It blinks when acartridge needstobe replaced
8. ResumeButton
Press itfor2secondsforeject orclosing the printertray
9. PrintertrayStatusLED
It lights -if youarepressingthe ResumeButton
It blinks -if theprintertrayismoving or
ifthereisno CD/DVDmediuminthe printertray
afterstartingthe print job. Inthiscaseinsertmediumand
press the ResumeButton
10. Cancel Button
The currentprint job isaborted bypressingtheCancelButton

16
InstallationofduplicatorAlpha
•Insertthe installationCD inCD/DVD
recorder
•Installation startsautomatically(ifnotrun
start.exe)
•Information forinstallation ofduplicator
aredescribedinthemaininstallation
window(see pictureon theright)
3.4.3 Driver Installation
Installation ofdriversforUSB –serialportconverter,USB –portand CD/DVD
recorderrunsautomatically.
3.4.4 Printer Driver Installation
3.4.4.1FirstInstallation(Plug&Play)
Connect theAlphatothepowersupply.
Switch-on isnotnecessarysincethepersonalcomputerrecognizestheprinteralso
inidlestatus.The printerisbased on theCDP5000.Proprinterand usesthesame
driver.
Connect theprinterwithanUSB cabletothePC.
The Plug &Playfunction recognizesnowautomaticallythatanewprinteris
connected and startstheinstallationroutine.
Setthe optionsliketheyare
setinthe screen shoton the
left.
Withthe button „Browse“,you
can setthe pathtothe
installation filecalled
„lsf5600k.inf”.
Again, click „Next“ tocontinue.
Fig.
3
–
Themaininstallationwindow

17
Remark: Totheendofthe installationthepersonalcomputermustbe
restarted!
Completing the Found New
HardwareWizardandstarting
the installation,bypressing the
button „Finish“.
Pleasewaituntilthe driveris
installedand allfileswerecopied.
Thiscan takesomeminutes.
Thisdialog fieldinformsyou that
the driverisnotregisteredofficially
withthe manufacturerofthe
operatingsystem.
It doesnotstate,however,
anything aboutthe qualityofthe
driver.
You can be sure,thatthedriveris
programmed and tested withthe
latest programsand tools.
You can continue theinstallation
without anydoubt.

18
3.4.4.2Manual Installation
Pleaseopen thedialog „Printers
and Faxes“.
Run the „AddPrinter
Wizard“bypressing the
button „Addaprinter“.

19
.
Click “Next”tocontinue
Select theoption„Localprinter
attached tothiscomputer“and
press the „Next“buttontocontinue.
Select afree USB Port.
Table of contents
Popular Disc Duplicator manuals by other brands
Disc Makers
Disc Makers ReflexMax1 user guide

All Pro Solutions
All Pro Solutions HERA-3 user manual
MicroBoards Technology
MicroBoards Technology MX SERIES user manual
Rimage
Rimage 2000i 6.5-7.1 Service Pack 1 Connection guide
Teac
Teac USBDUPLICATOR/11 Product specifications
StarTech.com
StarTech.com SATDUP11IMG user manual

