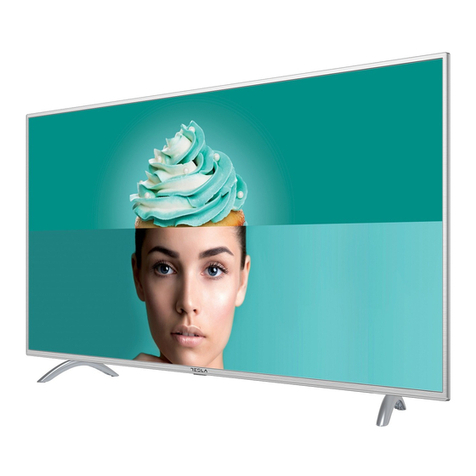
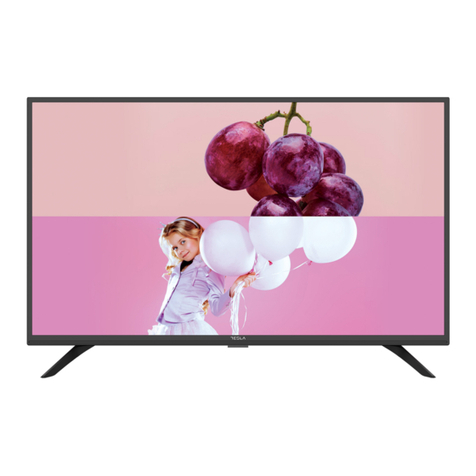
Tesla 40T320SFS User manual

40T320SFS
40T320BFS
TV
USER
MANUAL
HUN
ROUPOL S LV SRB
ENG BGR GRC HRV

OPERATING INSTRUCTION
Please read these instructions before operating
your set and retain them for future reference.
UPUTE ZA KORIŠTENJE
Prije korištenja uređaja pažljivo pročitati
upute i sačuvati ih za buduću upotrebu.
KEZELÉSI UTASÍTÁ
Kérjük, a készülék használata előtt olvassa el ezeket az
utasításokat, és őrizze ezeket meg későbbi betekintésre.
INSTRUKCJA OBSŁUGI
Przed rozpoczęciem użytkowania prosimy o zapoznanie
się z Instrukcjami i ich zachowanie do późniejszych konsultacji.
ΟΔΗΓΙΑ ΛΕΙΤΟΥΡΓΙΑΣ
Διαβάστε αυτές τις οδηγίες πριν από τη λειτουργία της μονάδας
σας και να τα διατηρήσετε για μελλοντική αναφορά.
ИНСТРУКЦИИ ЗА ЕКСПЛОАТАЦИЯ
Моля, прочетете тези инструкции, преди да използвате
устройството и ги запазете за бъдещи справки.
NAVODILA ZA UPORABO
Pred uporabo pozorno preberite navodila
in jih shranite za morebitno uporabo v prihodnosti.
INSTRUCȚIUNI DE UTILIZARE
Vă rugăm să citiți aceste instrucțiuni înainte de a folosi
televizorul și păstrați-le pentru referințe ulterioare.
ENG
HRV
HUN
POL
GRC
BGR
S LV
ROU
UPUTSTVO ZA UPOTREBU
Pre upotrebe uređaja pročitati ova uputstva
i zadržati ih radi kasnijih referenci.
SRB

3
ENG
Read all of the instructions before operating the set. Keep these instructions well for future use.
• Do not block or cover the ventilation openings on the back cover.
• Do not push objects of any kind into this unit through the cabinet slots as they could touch the current carrying
parts or short-circuit parts, resulting in fire, electric shock, or damage to the unit.
• Do not attempt to open the cabinet as this may cause damage. There are no parts inside you can service by
yourself. Refer all servicing to qualified personnel.
• Do not touch the screen surface with fingers as this may scratch or mar the TV screen.
• Do not impact the TV screen with hard pressure as this may damage the TV screen severely.
Unplug the set under the following conditions:
• If the set will not be used for a long period of time.
• If the power cord or the power outlet/plug is damaged.
• Follow the instructions to install and adjust the product. Adjust those controls that are covered in this operating
instructions as improper adjustment of other controls may result in damage. If this happens, unplug the set and
refer to the service personnel.
• If the set is subject to impact or has been dropped to have the cabinet damaged.
• Do not allow anything to rest on or roll over the power cord and the signal cable.
• Protect the power cord and the signal cable from being trampled.
• Do not overload the power cord or the power outlet.
• Do not expose the power cord and the signal cable to moisture.
• Do not place the set on an unstable cart, stand, or table.
• Place the set on a place that allows good ventilation.
• Do not use the set near damp, and cold areas. Protect the set from overheating.
• Keep the set away from direct sunlight.
• Apparatus shall not be exposed to dripping or splashing and no objects filled with liquids, such as vases, shall
be placed on the apparatus.
• Do not use the set near dust place.
• Dust the set by wiping the screen and the cabinet with a soft,clean cloth or some special liquid cleaner.
• Do not apply excessive force to the screen when cleaning.
• Do not use water or other chemical cleaner to clean the screen as this may damage the surface of the TV screen.
Warning: This operation requires two people.
To ensure a safe installation, observe the following safety notes:
• Check that the wall can support the weight of the TV set and wall mount assembly.
• Follow the mounting instructions provided with the wall mount.
• The TV set must be installed on a vertical wall.
• Make sure to use only screws suitable for the material of the wall.
Make sure that the TV set cables are placed so that there is not danger of tripping over them.
All other safety instructions about our TV sets are also applicable here.
INTRODUCTION
Precautions
Product
Power and Plug
Power Cord and Signal Cable
Use Environment
Cleaning
Hanging the TV Set on the Wall

4
ENG
Buttons on the TV
Sockets
Take a certain model for an example:
button
1. Turn on the TV.
2. The TV is on, press it to display Button menu.
3. In the Button menu, short press it to select the menu, long
press it to confirm the selection.
1. This equipment is a Class II or double insulated electrical appliance. It has been designed in such a way
that it does not require a safety connection to electrical earth.
2. Where the MAINS plug or an appliance coupler is used as the disconnect device, the disconnect device shall
remain readily operable.
3. The apparatus shall not be exposed to dripping or splashing and that no objects filled with liquids, such as
vases, shall be placed on the apparatus.
4. A warning that batteries (battery pack or batteries installed) shall not be exposed to excessive heat such as
sunshine, fire or the like.
5. No naked flame sources, such as lighted candles, should be placed on the apparatus;
6. Attention should be drawn to the environmental aspects of battery disposal;
Note: Illustrations within this publication are provided for reference only.
Note: The location and names of the sockets on the TV may vary according to TV model, and some sockets may not
available for some models.
ETHERNET
ETHERNET
This socket can be used to connect to external modem or network access
equipment.
SPDIF(coax.) SPDIF(coax.) socket (output)
This socket can be used to connect a compatible digital audio receiver.
HDMI 1
or HDMI 2
HDMI 1/HDMI 2 socket (input)
The HDMI (High-Definition Multimedia Interface) socket lets you connect a device,
such as a Blu-ray player, with a HDMI output for best picture quality. It also provides an
uncompressed digital connection that carries both video and audio data by way of an
integrated mini-plug cable.
USB 2.0
USB 2.0 socket (input)
This socket can be used to connect a USB device.
(Note: Please don’t turn on the unit when USB 3.0 drive is inserted,as it might cause
compatibility problems. )
SAT IN SAT in - IN socket (input)
This socket can be used to connect the satellite receiver port.
ANT/CABLE IN ANT/CABLE IN socket (input)
This socket can be used to connect the outside aerial or cable network.

5
ENG
Remote Control Functions
Most of your television’s functions are available on the menu that appear on the screen. The remote control
supplied with your set can be used to navigate through the menus and to configure all the general settings.
Note: The location and names of the buttons on the remote control may vary according to TV model, and not all
buttons available on all models.
MINI AV IN
MINI AV IN socket (input)
The MINI AV IN sockets can be used to connect a range of equipment, including video
recorders, camcorders, decoders, satellite receivers, DVD players, or games consoles.
The VIDEO IN socket provides composite video connection.
CI+ CI+ socket
This CI socket can be used to put the CI card in to accept the Scrambled programs.
HEADPHONE
HEADPHONE socket (output)
Allow you to connect earphones to listen to the sound coming from the TV .
Note: Excessive sound pressure from earphones can cause hearing loss.
1. q(POWER button) Turns the TV on or standby.
2. (MUTE button) Turns the volume off or on.
3. 0 ~ 9 (Numeric buttons) Enters channel numbers.
4. SUBTITLE Press to display the Subtitle Language menu.
5. Goes to the YouTube homepage.
6. VOL +/VOL- (VOLUME UP/DOWN) Increases or decreases the
TV’s volume.
7. TV In the other sources, presses to back TV.
8. SOURCE Brings up the SOURCE menu.
9. USB Goes to the multimedia files in USB.
10. CH ./ ,(CHANNEL UP/DOWN) Scans up or down through
the current channel list.
11. To display the option menu.
12. To display program information, if available.
13. ECO To select desired power saving mode.
14. (SETTING button) Brings upthe main menu.
15. (HOME button) Goes to the smart TV homepage.
16. ( Up, down, left and right direction buttons) High
lights different items in the menu system and adjusts
the menu controls.
17. OK When in the menu system, confirms your selection or
changes settings.
18. (BACK button) In menu mode, goes back to the
previous menu or interface.
19. EXIT Exits the menu system.
20. Goes to the Netflix homepage.
21. COLOURED
BUTTONS
(Red/Green/Yellow/Blue) Selects tasks.
22. SLEEP Press to set the TV to turn off after a given amount
of time. To cancel the sleep timer, press until off
appears.
23. ZOOM-/ZOOM+ Press to select the desired screen format.
Note: This function is not available in USB mode.
This manual suits for next models
1
Table of contents
Other Tesla TV manuals

Tesla
Tesla 32T303BH User manual

Tesla
Tesla 32D615BHS User manual

Tesla
Tesla T617 User manual

Tesla
Tesla M325 SMART User manual

Tesla
Tesla 43T319 User manual

Tesla
Tesla 40T319 User manual

Tesla
Tesla 32T315BH User manual

Tesla
Tesla DVB-T2 User manual

Tesla
Tesla 32M325BHS User manual

Tesla
Tesla 32M312BH User manual