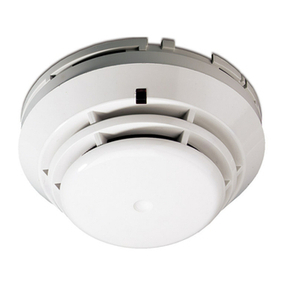
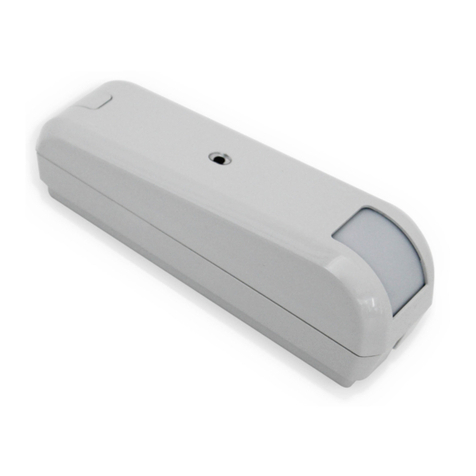
Tevel CANARY User manual

CANARY
USER MANUAL
DESCRIPTION
CANARY is an electronic device for detection of explosive gases (propane-butane and earth gas)
that are being used in domestic housework. It can detect very small concentrations of gas below
5% of Lower Explosive Level (LEL). When the alarm level is exceeded, the device mediates light
and sound signal (approx. 85 dB). Until the gas is present, the alarm keeps howling.
*LEL Lower Explosion Level. LEL is level at which the mixture of air and explosive gas can ignite at
the present of spark or any other energy.
SECURITY WARNINGS
• This appliance can be used by children aged from 8 years and above
and persons with reduced physical, sensory or mental capabilities or
lack of experience and knowledge if they have been given supervision or
instruction concerning use of the appliance in a safe way and
understand the hazards involved.
• Children shall not play with the appliance.
• Cleaning and maintenance shall not be made by children without
supervision.
• Before installation, use or maintenance read carefully this manual.
• The device should be kept in original package in a dry place and within
the prescribed temperature range.
• Any device processing or changes in design are not allowed.
• The manufacturer does not assume responsibility for personal injury,
death or any other damages resulting from the processing device,
improper use or inadequate maintenance.
• In the case of repairs or maintenance only use of manufacturer original
spare parts are allowed.
• Connection and mounting of the device must be carried out exclusively
by suitably qualified personnel.
• Canary can only be connected to the grid power supply 230V
CONNECTION AND OPERATION:
The device is connected on an electric grid (230V/50Hz) through connection wire with the plug.
When the device is connected, 4 phases take place:
TEST: For approx. 3 seconds the piezo beeper switches ON. Then the green, red and orange
control lights on the device flash with 3 seconds interval. Device performs test cca 40 seconds.
O.K.: If the device works properly and there is no explosive gas present, the green light will
impulsively blink.
ALARM: When the alarm level is exceeded, the sound signal and red control light are impulsively
switched on. If the concentration of the explosive gas is still rising, the speed of beeping and the
red light flashing will increase. As long the explosive gas is present, the alarm will continuously
howl. When the concentration of gas falls, the alarm is shut down automatically.
FAULT: In case of malfunction on a sensor, the device will impulsively switch on the sound signal
together with the orange control light. The device is not working properly. It needs to be serviced or
replaced
IMPORTANT
• This device reacts in the presence of other highly flammable and vaporizable substances.
• A damaged connecting cord can only be replaced by the manufacturer, customer service or any
other authorized person.
• Risk of electric shock
• Mount device directly to the source of danger.
• In the case of propane-butane gas the device should be mounted next to the gas tank, approx.
0-20 cm of the floor. Propane-b tane is heavier than air therefore it is gathering near to the
floor.
• If gas installation with natural gas is used than device should be mounted above the conducting
valve. Nat ral gas is lighter than air therefore it is gathering nder ceiling.
• If direct assembling is not possible, the device is mounted as shown on picture.
STEPS DURING THE ALARM
• Do not switch OFF or ON any electrical devices or any other sparkling devices.
• Open the doors and windows to ventilate the room!
• Check and eliminate the cause of gas leaking or call nearest gas service
• Device stops howling after the concentration is below set level < 5% LEL
TECHNICAL DATA
• power supply: 230 V, 50-60 Hz
• connection power: 3 W
• relay output: 250 V/5 A (relay version only)
• alarm level : 5% LEL
• alarm level 2: 25% LEL
• sensor: semiconductor
• lifetime: 7 years
• working temperature: + 0 to +40
o
C
• storage temperature: + 0 to +60
o
C
• dimensions: 25 x 70 x 50 mm
• weight: 250 g
MANUFACTURE AND SALE
Tevel, d.o.o.
Borovniško naselje 7
4 2 Kisovec, Slovenia
Tel: +386 3 56 72 050 / Fax: +386 3 56 7 9

WARRANTY
The manufacturer ensures error free operation of the device for a period of 2 months from the date of
purchase according to general warranty conditions.
Original receipt is considered as warranty card, if warranty card was not enclosed at a time of purchase.
TEVEL, d.o.o. ensures that the devices are dispatched error free of any kind. In the case of failure,
please contact the dealer or manufacturer. If any kind of failure accurs during warranty period the buyer
shall contact the manufacturer or dealer. Buyer must fill-up the reclamation papers with the required
data: case of failure, date of purchase, serial number and receipt number. Together with reclamation
papers the buyer must deliver the original receipt and warranty card to the manufacturer or dealer.
Warranty period for this device is valid from the date of purchase.
WARRANTY STATEMENT
Warranty is valid from the date of purchase. Manufacturer TEVEL, d.o.o. hereby declares that device will
be free from defects during warranty period if the buyer will handle with the device according to this
manual. We commit that we will eliminate all technical flaws and defects arising under normal use free of
charge.
The warranty applies to the time indicated in this document, under the following conditions:
• if a buyer has handled with the device in accordance with the user manual,
• if device is not mechanically damaged,
• If we receive the device also with confirmed warranty card or receipt,
• if device was not altered by person without our permission
• if non-original spare parts were not installed in the device
If during the warranty period the device is not corrected within 45 days of receipt of an authorized
workshop, we will replace it with a new device. In case of failure we will extended warranty period for
repair time. The warranty does not cover acts of god such as fire, flood, hurricanes, tornadoes, etc. The
warranty does not cover mechanical damage applied by user, lightning surges, errors caused by
incorrect use, improper maintenance, incorrect installation, etc.
The warranty also does not cover parts which are subject to normal wear. We assume obligation that we
will offer maintenance and spare parts after the warranty period for a period specified by law.
DECLARATION OF CONFORMITY
We hereby declare that the product is in conformity with the European regulations.
MOUNTING
Device is mounted to a wall with suitable screw. Device can also be mounted with double-sided
tape.
CONNECTION OF DEVICE WITH RELAY
Before connecting remove 4 screws on the bottom of the case. Remove the upper part of the case.
To connect the device with relay output use double insulated cable with a minimum wire cross
section of 0.75mm
2
. Un is external power supply which depends on the power supply of the
connected device.
a) Connection of EM valve
b) Connection of alarm horn or flashlight (or both)
Popular Security Sensor manuals by other brands

Trebs
Trebs KC-186 Operation manual
Dr. Smart
Dr. Smart Inverter Air-Conditioner Detector Operation manual

PCB Piezotronics
PCB Piezotronics IMI SENSORS HTTO640B31 Installation and operating manual

SPX
SPX Radiodetection RD8000 user guide

Buckingham
Buckingham 20192CM Adjustment instructions
Baumer
Baumer FVDK 10P66YS Technical data
