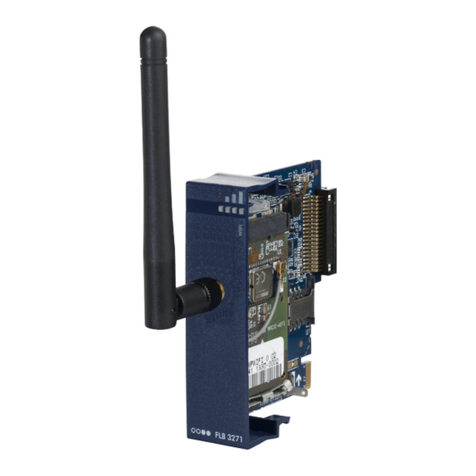
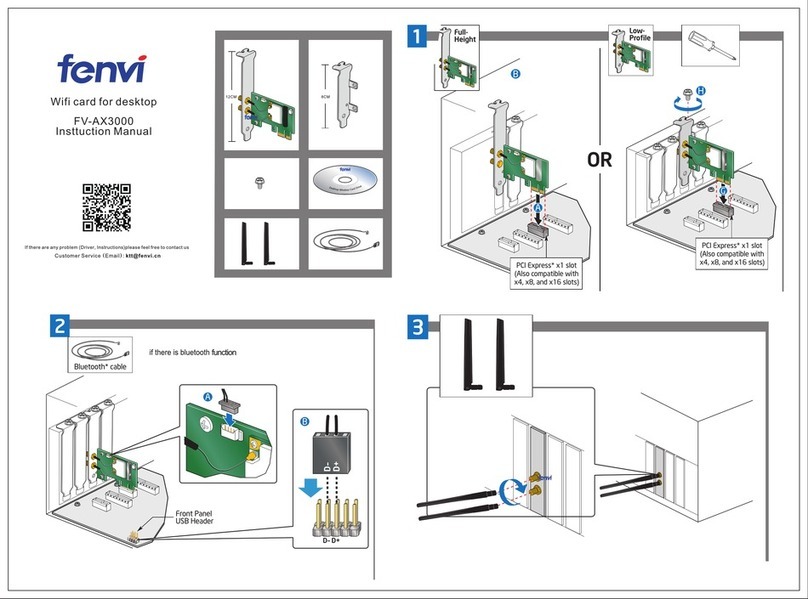
Thales payShield 10K User manual

cpl.thalesgroup.com
payShield
®10K
I
nstallation and User Guide
PUGD0535
-006

payShield 10K Installation and User Guide
© 2021 Thales Group
All Rights Reserved
Date: January 2021
Doc. Number: PUGD0535-006, updated 15 January 2021
All information herein is either public information or is the property of and owned solely by Thales DIS
France S.A. and/or its subsidiaries or affiliates who shall have and keep the sole right to file patent
applications or any other kind of intellectual property protection in connection with such information.
Nothing herein shall be construed as implying or granting to you any rights, by license, grant or otherwise,
under any intellectual and/or industrial property rights of or concerning any of Thales DIS France S.A. and
any of its subsidiaries and affiliates (collectively referred to herein after as “Thales”) information.
This document can be used for informational, non-commercial, internal and personal use only provided
that:
•The copyright notice below, the confidentiality and proprietary legend and this full warning notice appear
in all copies.
•This document shall not be posted on any network computer or broadcast in any media and no
modification of any part of this document shall be made.
Use for any other purpose is expressly prohibited and may result in severe civil and criminal liabilities.
The information contained in this document is provided "AS IS" without any warranty of any kind. Unless
otherwise expressly agreed in writing, Thales makes no warranty as to the value or accuracy of information
contained herein.
The document could include technical inaccuracies or typographical errors. Changes are periodically added
to the information herein. Furthermore, Thales reserves the right to make any change or improvement in
the specifications data, information, and the like described herein, at any time.
Thales hereby disclaims all warranties and conditions with regard to the information contained herein,
including all implied warranties of merchantability, fitness for a particular purpose, title and non-
infringement. In no event shall Thales be liable, whether in contract, tort or otherwise, for any indirect,
special or consequential damages or any damages whatsoever including but not limited to damages
resulting from loss of use, data, profits, revenues, or customers, arising out of or in connection with the use
or performance of information contained in this document.
Thales does not and shall not warrant that this product will be resistant to all possible attacks and shall not
incur, and disclaims, any liability in this respect. Even if each product is compliant with current security
standards in force on the date of their design, security mechanisms' resistance necessarily evolves
according to the state of the art in security and notably under the emergence of new attacks. Under no
circumstances, shall Thales be held liable for any third party actions and in particular in case of any
successful attack against systems or equipment incorporating Thales products. Thales disclaims any
liability with respect to security for direct, indirect, incidental or consequential damages that result from any
use of its products. It is further stressed that independent testing and verification by the person using the
product is particularly encouraged, especially in any application in which defective, incorrect or insecure
functioning could result in damage to persons or property, denial of service or loss of privacy.
Copyright © 2018-2021 Thales Group. All rights reserved. Thales and the Thales logo are trademarks and
service marks of Thales and/or its subsidiaries and affiliates and are registered in certain countries. All
other trademarks and service marks, whether registered or not in specific countries, are the properties of
their respective owners.
Follow this link to find the End User Licensing Agreement: https://cpl.thalesgroup.com/legal/eula

payShield 10K Installation and User Guide
© Thales Group Page 1
All Rights Reserved
Contents
1 Introduction . . . . . . . . . . . . . . . . . . . . . . . . . . . . . . . . . . . . . . . . . . . . . . . . . . . . . . . 1-9
1.1 Documentation Overview . . . . . . . . . . . . . . . . . . . . . . . . . . . . . . . . . . . . . . . . . . . . 1-9
1.2 Audience . . . . . . . . . . . . . . . . . . . . . . . . . . . . . . . . . . . . . . . . . . . . . . . . . . . . . . . . . 1-9
1.3 payShield 10K General Description . . . . . . . . . . . . . . . . . . . . . . . . . . . . . . . . . . . . 1-9
1.4 Typical Configuration. . . . . . . . . . . . . . . . . . . . . . . . . . . . . . . . . . . . . . . . . . . . . . . 1-10
1.4.1 Command Flow . . . . . . . . . . . . . . . . . . . . . . . . . . . . . . . . . . . . . . . . . . . . . . . . . 1-11
1.5 Smart cards . . . . . . . . . . . . . . . . . . . . . . . . . . . . . . . . . . . . . . . . . . . . . . . . . . . . . . 1-11
1.6 Customer Trust Authority (CTA) . . . . . . . . . . . . . . . . . . . . . . . . . . . . . . . . . . . . . . 1-12
1.6.1 Customer Security Domain . . . . . . . . . . . . . . . . . . . . . . . . . . . . . . . . . . . . . . . . 1-13
1.7 Keys . . . . . . . . . . . . . . . . . . . . . . . . . . . . . . . . . . . . . . . . . . . . . . . . . . . . . . . . . . . 1-13
1.7.1 Encryption Mechanism . . . . . . . . . . . . . . . . . . . . . . . . . . . . . . . . . . . . . . . . . . . . 1-13
1.7.2 HSM Recovery Key . . . . . . . . . . . . . . . . . . . . . . . . . . . . . . . . . . . . . . . . . . . . . . 1-13
1.7.3 Local Master Keys (LMKs) . . . . . . . . . . . . . . . . . . . . . . . . . . . . . . . . . . . . . . . . . 1-14
1.7.3.1 Multiple LMKs . . . . . . . . . . . . . . . . . . . . . . . . . . . . . . . . . . . . . . . . . . . . . . . . . 1-14
1.7.4 Zone Master Key . . . . . . . . . . . . . . . . . . . . . . . . . . . . . . . . . . . . . . . . . . . . . . . . 1-15
1.7.4.1 Zone PIN Key . . . . . . . . . . . . . . . . . . . . . . . . . . . . . . . . . . . . . . . . . . . . . . . . . 1-15
1.7.5 Terminal Master Key . . . . . . . . . . . . . . . . . . . . . . . . . . . . . . . . . . . . . . . . . . . . . 1-15
1.7.5.1 Terminal PIN Key . . . . . . . . . . . . . . . . . . . . . . . . . . . . . . . . . . . . . . . . . . . . . . 1-15
1.7.6 Terminal Authentication Key . . . . . . . . . . . . . . . . . . . . . . . . . . . . . . . . . . . . . . . 1-15
1.7.7 Terminal Encryption Key . . . . . . . . . . . . . . . . . . . . . . . . . . . . . . . . . . . . . . . . . . 1-16
1.7.8 PIN Verification Key . . . . . . . . . . . . . . . . . . . . . . . . . . . . . . . . . . . . . . . . . . . . . . 1-16
1.7.9 Card Verification Key . . . . . . . . . . . . . . . . . . . . . . . . . . . . . . . . . . . . . . . . . . . . . 1-16
1.7.10 Master Session Key . . . . . . . . . . . . . . . . . . . . . . . . . . . . . . . . . . . . . . . . . . . . . 1-16
1.8 Key Shares . . . . . . . . . . . . . . . . . . . . . . . . . . . . . . . . . . . . . . . . . . . . . . . . . . . . . . 1-16
1.9 Host Commands supporting multiple LMKs . . . . . . . . . . . . . . . . . . . . . . . . . . . . . 1-17
1.9.1 LMK Usage in Host Commands . . . . . . . . . . . . . . . . . . . . . . . . . . . . . . . . . . . . . 1-18
1.10 payShield 10K license packages. . . . . . . . . . . . . . . . . . . . . . . . . . . . . . . . . . . . . 1-19
1.11 Trusted Management Device (TMD) . . . . . . . . . . . . . . . . . . . . . . . . . . . . . . . . . . 1-21
1.11.1 Introduction. . . . . . . . . . . . . . . . . . . . . . . . . . . . . . . . . . . . . . . . . . . . . . . . . . . . 1-21
1.11.2 Background . . . . . . . . . . . . . . . . . . . . . . . . . . . . . . . . . . . . . . . . . . . . . . . . . . . 1-21
1.11.3 Description . . . . . . . . . . . . . . . . . . . . . . . . . . . . . . . . . . . . . . . . . . . . . . . . . . . . 1-21
1.11.4 How Keys Are Shared With payShield and 3rd Parties . . . . . . . . . . . . . . . . . . 1-22
1.11.5 Example Sequence of Steps to Set-Up and Transfer Keys . . . . . . . . . . . . . . . 1-23
2 Backwards Compatibility and Differences. . . . . . . . . . . . . . . . . . . . . . . . . . . . . . 2-25
2.1 payShield 9000 / payShield 10K . . . . . . . . . . . . . . . . . . . . . . . . . . . . . . . . . . . . . . 2-25
2.1.1 Host Interface and Commands. . . . . . . . . . . . . . . . . . . . . . . . . . . . . . . . . . . . . . 2-25
2.1.2 Options for Managing payShield 10K. . . . . . . . . . . . . . . . . . . . . . . . . . . . . . . . . 2-26
2.1.3 Modifications made to the console commands . . . . . . . . . . . . . . . . . . . . . . . . . 2-26
2.1.4 Feature Comparison. . . . . . . . . . . . . . . . . . . . . . . . . . . . . . . . . . . . . . . . . . . . . . 2-27
2.1.5 Front Panel. . . . . . . . . . . . . . . . . . . . . . . . . . . . . . . . . . . . . . . . . . . . . . . . . . . . . 2-29
2.1.6 Front Panel LEDs . . . . . . . . . . . . . . . . . . . . . . . . . . . . . . . . . . . . . . . . . . . . . . . . 2-29
2.1.7 Front Panel Key Lock Positions . . . . . . . . . . . . . . . . . . . . . . . . . . . . . . . . . . . . . 2-29
2.1.8 Rear Panel . . . . . . . . . . . . . . . . . . . . . . . . . . . . . . . . . . . . . . . . . . . . . . . . . . . . . 2-30
2.1.9 Enhanced Security Features . . . . . . . . . . . . . . . . . . . . . . . . . . . . . . . . . . . . . . . 2-30
2.1.10 Diagnostics. . . . . . . . . . . . . . . . . . . . . . . . . . . . . . . . . . . . . . . . . . . . . . . . . . . . 2-31
2.1.11 Monitoring. . . . . . . . . . . . . . . . . . . . . . . . . . . . . . . . . . . . . . . . . . . . . . . . . . . . . 2-31
2.1.12 Transitioning Smart Cards . . . . . . . . . . . . . . . . . . . . . . . . . . . . . . . . . . . . . . . . 2-31
2.1.12.1 Transitioning legacy Manager Smart Cards . . . . . . . . . . . . . . . . . . . . . . . . . 2-32

payShield 10K Installation and User GuidepayShield 10K Installation and User Guide
© Thales Group Page 2
All Rights Reserved
2.1.12.2 Transitioning non-supported legacy HSM Smart Cards . . . . . . . . . . . . . . . . 2-33
2.1.12.3 Copying a card at the console . . . . . . . . . . . . . . . . . . . . . . . . . . . . . . . . . . . 2-33
2.1.13 User Documentation . . . . . . . . . . . . . . . . . . . . . . . . . . . . . . . . . . . . . . . . . . . . 2-33
3 Physical Description . . . . . . . . . . . . . . . . . . . . . . . . . . . . . . . . . . . . . . . . . . . . . . . 3-35
3.1 Front panel . . . . . . . . . . . . . . . . . . . . . . . . . . . . . . . . . . . . . . . . . . . . . . . . . . . . . . 3-35
3.1.1 Key locks and keys . . . . . . . . . . . . . . . . . . . . . . . . . . . . . . . . . . . . . . . . . . . . . . 3-35
3.1.1.1 Changing the HSM state via the key locks . . . . . . . . . . . . . . . . . . . . . . . . . . . 3-35
3.1.2 Smart Card Reader . . . . . . . . . . . . . . . . . . . . . . . . . . . . . . . . . . . . . . . . . . . . . . 3-36
3.1.3 Front panel LEDs. . . . . . . . . . . . . . . . . . . . . . . . . . . . . . . . . . . . . . . . . . . . . . . . 3-36
3.1.3.1 Health LED . . . . . . . . . . . . . . . . . . . . . . . . . . . . . . . . . . . . . . . . . . . . . . . . . . . 3-37
3.1.3.2 Service LED . . . . . . . . . . . . . . . . . . . . . . . . . . . . . . . . . . . . . . . . . . . . . . . . . . 3-37
3.1.3.3 Tamper LED . . . . . . . . . . . . . . . . . . . . . . . . . . . . . . . . . . . . . . . . . . . . . . . . . 3-38
3.1.3.4 Boot-up LED Sequence . . . . . . . . . . . . . . . . . . . . . . . . . . . . . . . . . . . . . . . . . 3-38
3.1.3.5 Blue LED. . . . . . . . . . . . . . . . . . . . . . . . . . . . . . . . . . . . . . . . . . . . . . . . . . . . . 3-38
3.1.4 Air Inlets. . . . . . . . . . . . . . . . . . . . . . . . . . . . . . . . . . . . . . . . . . . . . . . . . . . . . . . 3-38
3.2 Rear panel . . . . . . . . . . . . . . . . . . . . . . . . . . . . . . . . . . . . . . . . . . . . . . . . . . . . . . 3-39
3.2.1 AC/DC power supplies. . . . . . . . . . . . . . . . . . . . . . . . . . . . . . . . . . . . . . . . . . . . 3-39
3.2.1.1 Swapping out the Power Supply . . . . . . . . . . . . . . . . . . . . . . . . . . . . . . . . . . . 3-39
3.2.2 Fan trays . . . . . . . . . . . . . . . . . . . . . . . . . . . . . . . . . . . . . . . . . . . . . . . . . . . . . . 3-40
3.2.3 Battery . . . . . . . . . . . . . . . . . . . . . . . . . . . . . . . . . . . . . . . . . . . . . . . . . . . . . . . . 3-40
3.2.4 AC Power on/off switch . . . . . . . . . . . . . . . . . . . . . . . . . . . . . . . . . . . . . . . . . . . 3-41
3.2.5 PCIe card interface . . . . . . . . . . . . . . . . . . . . . . . . . . . . . . . . . . . . . . . . . . . . . . 3-41
3.2.6 Ethernet ports . . . . . . . . . . . . . . . . . . . . . . . . . . . . . . . . . . . . . . . . . . . . . . . . . . 3-41
3.2.7 USB Type A port . . . . . . . . . . . . . . . . . . . . . . . . . . . . . . . . . . . . . . . . . . . . . . . . 3-41
3.2.8 Erase Button and LED . . . . . . . . . . . . . . . . . . . . . . . . . . . . . . . . . . . . . . . . . . . . 3-41
3.2.9 Ground Lug . . . . . . . . . . . . . . . . . . . . . . . . . . . . . . . . . . . . . . . . . . . . . . . . . . . . 3-41
4 Installation . . . . . . . . . . . . . . . . . . . . . . . . . . . . . . . . . . . . . . . . . . . . . . . . . . . . . . . 4-43
4.1 Pre-installation tasks. . . . . . . . . . . . . . . . . . . . . . . . . . . . . . . . . . . . . . . . . . . . . . . 4-43
4.1.1 Mechanical and Electrical Specifications. . . . . . . . . . . . . . . . . . . . . . . . . . . . . . 4-43
4.1.1.1 Physical Characteristics . . . . . . . . . . . . . . . . . . . . . . . . . . . . . . . . . . . . . . . . . 4-43
4.1.1.2 Power Considerations. . . . . . . . . . . . . . . . . . . . . . . . . . . . . . . . . . . . . . . . . . . 4-43
4.1.1.3 Environmental Considerations . . . . . . . . . . . . . . . . . . . . . . . . . . . . . . . . . . . . 4-44
4.1.1.4 Battery consideration . . . . . . . . . . . . . . . . . . . . . . . . . . . . . . . . . . . . . . . . . . . 4-44
4.2 Installation Procedure . . . . . . . . . . . . . . . . . . . . . . . . . . . . . . . . . . . . . . . . . . . . . . 4-44
5 payShield 10K 10G Ethernet Hardware Platform Variant. . . . . . . . . . . . . . . . . . 5-49
5.1 Introduction . . . . . . . . . . . . . . . . . . . . . . . . . . . . . . . . . . . . . . . . . . . . . . . . . . . . . . 5-49
5.2 Rear Panel Overview . . . . . . . . . . . . . . . . . . . . . . . . . . . . . . . . . . . . . . . . . . . . . . 5-50
5.3 General Notes. . . . . . . . . . . . . . . . . . . . . . . . . . . . . . . . . . . . . . . . . . . . . . . . . . . . 5-50
5.4 Installing 10Gb ports . . . . . . . . . . . . . . . . . . . . . . . . . . . . . . . . . . . . . . . . . . . . . . . 5-50
5.5 Power Consumption . . . . . . . . . . . . . . . . . . . . . . . . . . . . . . . . . . . . . . . . . . . . . . . 5-51
6 payShield Management Options . . . . . . . . . . . . . . . . . . . . . . . . . . . . . . . . . . . . . 6-53
7 Commission using payShield Manager. . . . . . . . . . . . . . . . . . . . . . . . . . . . . . . . 7-55
7.1 Introduction . . . . . . . . . . . . . . . . . . . . . . . . . . . . . . . . . . . . . . . . . . . . . . . . . . . . . . 7-55
7.2 Prerequisites. . . . . . . . . . . . . . . . . . . . . . . . . . . . . . . . . . . . . . . . . . . . . . . . . . . . . 7-55
7.3 Preparing for Commissioning . . . . . . . . . . . . . . . . . . . . . . . . . . . . . . . . . . . . . . . . 7-55
7.3.1 Configuring payShield 10K for Static IP (if required) . . . . . . . . . . . . . . . . . . . . . 7-55
7.3.2 Install Smart Card Reader Driver. . . . . . . . . . . . . . . . . . . . . . . . . . . . . . . . . . . . 7-56
7.3.3 Check the Proxy Configuration . . . . . . . . . . . . . . . . . . . . . . . . . . . . . . . . . . . . . 7-56
7.3.4 Configure DNS. . . . . . . . . . . . . . . . . . . . . . . . . . . . . . . . . . . . . . . . . . . . . . . . . . 7-56

payShield 10K Installation and User Guide
© Thales Group Page 3
All Rights Reserved
7.3.5 Connect to the Network . . . . . . . . . . . . . . . . . . . . . . . . . . . . . . . . . . . . . . . . . . . 7-57
7.4 Connecting to payShield 10K, Installing Browser Extensions and
Configuring Smart Card Reader. . . . . . . . . . . . . . . . . . . . . . . . . . . . . . . . . . . . . . . . . . 7-58
7.4.1 Connecting to payShield 10K . . . . . . . . . . . . . . . . . . . . . . . . . . . . . . . . . . . . . . . 7-58
7.4.2 Installing Thales Browser Extensions. . . . . . . . . . . . . . . . . . . . . . . . . . . . . . . . . 7-59
7.4.3 Configure the Smart Card reader . . . . . . . . . . . . . . . . . . . . . . . . . . . . . . . . . . . . 7-65
7.5 Commissioning payShield 10K . . . . . . . . . . . . . . . . . . . . . . . . . . . . . . . . . . . . . . . 7-66
7.5.1 Open the Commissioning Wizard page . . . . . . . . . . . . . . . . . . . . . . . . . . . . . . . 7-67
7.5.2 Create a new Security Domain. . . . . . . . . . . . . . . . . . . . . . . . . . . . . . . . . . . . . . 7-68
7.5.3 Load the Security Domain . . . . . . . . . . . . . . . . . . . . . . . . . . . . . . . . . . . . . . . . . 7-73
7.5.4 Set HSM Recovery Key (HRK) passphrases . . . . . . . . . . . . . . . . . . . . . . . . . . . 7-78
7.5.5 Create Left and Right Remote Access Control key cards . . . . . . . . . . . . . . . . . 7-79
7.5.6 Adding Additional Warranted HSMs to the Security Domain . . . . . . . . . . . . . . . 7-84
7.6 Additional Information . . . . . . . . . . . . . . . . . . . . . . . . . . . . . . . . . . . . . . . . . . . . . . 7-85
7.6.1 Using payShield Manager with MacOS Catalina . . . . . . . . . . . . . . . . . . . . . . . . 7-85
8 Using payShield Manager . . . . . . . . . . . . . . . . . . . . . . . . . . . . . . . . . . . . . . . . . . . 8-89
8.1 Introduction to payShield Manager . . . . . . . . . . . . . . . . . . . . . . . . . . . . . . . . . . . . 8-89
8.2 Logging into payShield Manager. . . . . . . . . . . . . . . . . . . . . . . . . . . . . . . . . . . . . . 8-89
8.3 Top Tab descriptions. . . . . . . . . . . . . . . . . . . . . . . . . . . . . . . . . . . . . . . . . . . . . . . 8-91
8.3.1 Summary Tab. . . . . . . . . . . . . . . . . . . . . . . . . . . . . . . . . . . . . . . . . . . . . . . . . . . 8-91
8.3.2 Status Tab . . . . . . . . . . . . . . . . . . . . . . . . . . . . . . . . . . . . . . . . . . . . . . . . . . . . . 8-91
8.3.3 Operational Tab . . . . . . . . . . . . . . . . . . . . . . . . . . . . . . . . . . . . . . . . . . . . . . . . . 8-92
8.3.4 Domain Tab . . . . . . . . . . . . . . . . . . . . . . . . . . . . . . . . . . . . . . . . . . . . . . . . . . . . 8-93
8.3.5 Configuration Tab. . . . . . . . . . . . . . . . . . . . . . . . . . . . . . . . . . . . . . . . . . . . . . . . 8-93
8.4 Virtual Console Tab. . . . . . . . . . . . . . . . . . . . . . . . . . . . . . . . . . . . . . . . . . . . . . . . 8-94
8.4.1 Quick Links. . . . . . . . . . . . . . . . . . . . . . . . . . . . . . . . . . . . . . . . . . . . . . . . . . . . . 8-94
8.4.2 Terminate Session . . . . . . . . . . . . . . . . . . . . . . . . . . . . . . . . . . . . . . . . . . . . . . . 8-94
8.5 Lower screen icons . . . . . . . . . . . . . . . . . . . . . . . . . . . . . . . . . . . . . . . . . . . . . . . . 8-94
8.5.1 payShield 10K States . . . . . . . . . . . . . . . . . . . . . . . . . . . . . . . . . . . . . . . . . . . . . 8-95
8.5.1.1 Online . . . . . . . . . . . . . . . . . . . . . . . . . . . . . . . . . . . . . . . . . . . . . . . . . . . . . . . 8-95
8.5.1.2 Offline . . . . . . . . . . . . . . . . . . . . . . . . . . . . . . . . . . . . . . . . . . . . . . . . . . . . . . . 8-95
8.5.1.3 Secure . . . . . . . . . . . . . . . . . . . . . . . . . . . . . . . . . . . . . . . . . . . . . . . . . . . . . . . 8-95
8.5.1.4 Switching to Online or Offline State . . . . . . . . . . . . . . . . . . . . . . . . . . . . . . . . 8-95
8.5.1.5 Switching to Secure State . . . . . . . . . . . . . . . . . . . . . . . . . . . . . . . . . . . . . . . . 8-95
8.5.2 Time Remaining . . . . . . . . . . . . . . . . . . . . . . . . . . . . . . . . . . . . . . . . . . . . . . . . . 8-96
8.5.3 Information . . . . . . . . . . . . . . . . . . . . . . . . . . . . . . . . . . . . . . . . . . . . . . . . . . . . . 8-96
8.5.4 User . . . . . . . . . . . . . . . . . . . . . . . . . . . . . . . . . . . . . . . . . . . . . . . . . . . . . . . . . . 8-96
8.5.5 Status . . . . . . . . . . . . . . . . . . . . . . . . . . . . . . . . . . . . . . . . . . . . . . . . . . . . . . . . . 8-97
8.5.6 Smart Card Operations . . . . . . . . . . . . . . . . . . . . . . . . . . . . . . . . . . . . . . . . . . . 8-97
8.5.7 Login/Logout of Users . . . . . . . . . . . . . . . . . . . . . . . . . . . . . . . . . . . . . . . . . . . . 8-98
8.5.7.1 Login Additional Users . . . . . . . . . . . . . . . . . . . . . . . . . . . . . . . . . . . . . . . . . . 8-98
8.5.7.2 User Logout. . . . . . . . . . . . . . . . . . . . . . . . . . . . . . . . . . . . . . . . . . . . . . . . . . . 8-98
8.6 Summary Page . . . . . . . . . . . . . . . . . . . . . . . . . . . . . . . . . . . . . . . . . . . . . . . . . . . 8-99
8.6.1 Summary Dashboard . . . . . . . . . . . . . . . . . . . . . . . . . . . . . . . . . . . . . . . . . . . . . 8-99
8.6.2 Health Dashboard . . . . . . . . . . . . . . . . . . . . . . . . . . . . . . . . . . . . . . . . . . . . . . 8-100
8.6.2.1 How to resolve reported errors . . . . . . . . . . . . . . . . . . . . . . . . . . . . . . . . . . . 8-100
8.6.3 Configuration Dashboard . . . . . . . . . . . . . . . . . . . . . . . . . . . . . . . . . . . . . . . . . 8-103
8.6.4 Local Master Key . . . . . . . . . . . . . . . . . . . . . . . . . . . . . . . . . . . . . . . . . . . . . . . 8-104
8.7 Status page . . . . . . . . . . . . . . . . . . . . . . . . . . . . . . . . . . . . . . . . . . . . . . . . . . . . . 8-105
8.7.1 Device Information . . . . . . . . . . . . . . . . . . . . . . . . . . . . . . . . . . . . . . . . . . . . . . 8-106
8.7.2 Utilization Statistics . . . . . . . . . . . . . . . . . . . . . . . . . . . . . . . . . . . . . . . . . . . . . 8-107
8.7.3 Health Statistics/Diagnostics . . . . . . . . . . . . . . . . . . . . . . . . . . . . . . . . . . . . . . 8-111
8.7.3.1 Health/Stats. . . . . . . . . . . . . . . . . . . . . . . . . . . . . . . . . . . . . . . . . . . . . . . . . . 8-111
8.7.3.2 Diagnostics . . . . . . . . . . . . . . . . . . . . . . . . . . . . . . . . . . . . . . . . . . . . . . . . . . 8-112

payShield 10K Installation and User GuidepayShield 10K Installation and User Guide
© Thales Group Page 4
All Rights Reserved
8.7.3.3 Maintenance . . . . . . . . . . . . . . . . . . . . . . . . . . . . . . . . . . . . . . . . . . . . . . . . . 8-113
8.7.4 Error Log . . . . . . . . . . . . . . . . . . . . . . . . . . . . . . . . . . . . . . . . . . . . . . . . . . . . . 8-113
8.7.5 Audit Log . . . . . . . . . . . . . . . . . . . . . . . . . . . . . . . . . . . . . . . . . . . . . . . . . . . . . 8-114
8.7.6 Software Info . . . . . . . . . . . . . . . . . . . . . . . . . . . . . . . . . . . . . . . . . . . . . . . . . . 8-121
8.7.6.1 Software - how to update software . . . . . . . . . . . . . . . . . . . . . . . . . . . . . . . . 8-122
8.7.7 FIPS/Licensing. . . . . . . . . . . . . . . . . . . . . . . . . . . . . . . . . . . . . . . . . . . . . . . . . 8-123
8.7.7.1 License Summary - how to update Licensing . . . . . . . . . . . . . . . . . . . . . . . . 8-123
8.7.7.2 Installed Licenses . . . . . . . . . . . . . . . . . . . . . . . . . . . . . . . . . . . . . . . . . . . . . 8-124
8.7.7.3 FIPS Validated Algorithms . . . . . . . . . . . . . . . . . . . . . . . . . . . . . . . . . . . . . . 8-125
8.7.8 Import Certificate . . . . . . . . . . . . . . . . . . . . . . . . . . . . . . . . . . . . . . . . . . . . . . . 8-125
8.7.8.1 General Information . . . . . . . . . . . . . . . . . . . . . . . . . . . . . . . . . . . . . . . . . . . 8-125
8.7.8.2 TLS Management . . . . . . . . . . . . . . . . . . . . . . . . . . . . . . . . . . . . . . . . . . . . . 8-126
8.7.8.3 Secure Host Communications . . . . . . . . . . . . . . . . . . . . . . . . . . . . . . . . . . . 8-126
8.8 Operational . . . . . . . . . . . . . . . . . . . . . . . . . . . . . . . . . . . . . . . . . . . . . . . . . . . . . 8-127
8.8.1 Local Master Keys . . . . . . . . . . . . . . . . . . . . . . . . . . . . . . . . . . . . . . . . . . . . . . 8-128
8.8.1.1 Generate LMK - create trusted officer . . . . . . . . . . . . . . . . . . . . . . . . . . . . . 8-128
8.8.1.2 Verify an LMK Card . . . . . . . . . . . . . . . . . . . . . . . . . . . . . . . . . . . . . . . . . . . 8-137
8.8.1.3 Create an Authorizing Card . . . . . . . . . . . . . . . . . . . . . . . . . . . . . . . . . . . . . 8-137
8.8.1.4 Duplicate an LMK Card. . . . . . . . . . . . . . . . . . . . . . . . . . . . . . . . . . . . . . . . . 8-138
8.8.1.5 Generate an LMK . . . . . . . . . . . . . . . . . . . . . . . . . . . . . . . . . . . . . . . . . . . . . 8-138
8.8.1.6 Install an LMK from RLMK Card Set. . . . . . . . . . . . . . . . . . . . . . . . . . . . . . . 8-139
8.8.1.7 Delete an Installed LMK . . . . . . . . . . . . . . . . . . . . . . . . . . . . . . . . . . . . . . . . 8-139
8.8.1.8 Replace an installed LMK . . . . . . . . . . . . . . . . . . . . . . . . . . . . . . . . . . . . . . . 8-140
8.8.1.9 Set the Default LMK . . . . . . . . . . . . . . . . . . . . . . . . . . . . . . . . . . . . . . . . . . . 8-140
8.8.1.10 Set the Management LMK . . . . . . . . . . . . . . . . . . . . . . . . . . . . . . . . . . . . . 8-141
8.8.1.11 Enter Authorized State . . . . . . . . . . . . . . . . . . . . . . . . . . . . . . . . . . . . . . . . 8-142
8.8.1.12 Single Authorization Mode . . . . . . . . . . . . . . . . . . . . . . . . . . . . . . . . . . . . . 8-143
8.8.1.13 Multiple Authorization Mode . . . . . . . . . . . . . . . . . . . . . . . . . . . . . . . . . . . . 8-143
8.8.1.14 Key Change Storage . . . . . . . . . . . . . . . . . . . . . . . . . . . . . . . . . . . . . . . . . 8-143
8.8.1.15 Install LMK from RLMK card set . . . . . . . . . . . . . . . . . . . . . . . . . . . . . . . . . 8-143
8.8.1.16 Delete an installed LMK . . . . . . . . . . . . . . . . . . . . . . . . . . . . . . . . . . . . . . . 8-144
8.8.1.17 Replace an Old LMK. . . . . . . . . . . . . . . . . . . . . . . . . . . . . . . . . . . . . . . . . . 8-144
8.9 Domain . . . . . . . . . . . . . . . . . . . . . . . . . . . . . . . . . . . . . . . . . . . . . . . . . . . . . . . . 8-145
8.9.1 payShield Security Group . . . . . . . . . . . . . . . . . . . . . . . . . . . . . . . . . . . . . . . . 8-146
8.9.2 Security Domain . . . . . . . . . . . . . . . . . . . . . . . . . . . . . . . . . . . . . . . . . . . . . . . 8-147
8.9.2.1 Commission a Smart Card . . . . . . . . . . . . . . . . . . . . . . . . . . . . . . . . . . . . . . 8-147
8.9.2.2 Decommission a Card . . . . . . . . . . . . . . . . . . . . . . . . . . . . . . . . . . . . . . . . . 8-152
8.9.2.3 Copy a Domain Card . . . . . . . . . . . . . . . . . . . . . . . . . . . . . . . . . . . . . . . . . . 8-152
8.9.2.4 Create a New Security Domain . . . . . . . . . . . . . . . . . . . . . . . . . . . . . . . . . . 8-152
8.9.2.5 HRK Operations . . . . . . . . . . . . . . . . . . . . . . . . . . . . . . . . . . . . . . . . . . . . . . 8-152
8.10 Configuration . . . . . . . . . . . . . . . . . . . . . . . . . . . . . . . . . . . . . . . . . . . . . . . . . . 8-154
8.10.1 Host Settings . . . . . . . . . . . . . . . . . . . . . . . . . . . . . . . . . . . . . . . . . . . . . . . . . 8-155
8.10.2 Active Host Interface . . . . . . . . . . . . . . . . . . . . . . . . . . . . . . . . . . . . . . . . . . . 8-155
8.10.3 Ethernet . . . . . . . . . . . . . . . . . . . . . . . . . . . . . . . . . . . . . . . . . . . . . . . . . . . . . 8-156
8.10.3.1 IP . . . . . . . . . . . . . . . . . . . . . . . . . . . . . . . . . . . . . . . . . . . . . . . . . . . . . . . . 8-157
8.10.3.2 Access Control List (ACL). . . . . . . . . . . . . . . . . . . . . . . . . . . . . . . . . . . . . . 8-158
8.10.3.3 TCP/UDP . . . . . . . . . . . . . . . . . . . . . . . . . . . . . . . . . . . . . . . . . . . . . . . . . . 8-159
8.10.3.4 TLS . . . . . . . . . . . . . . . . . . . . . . . . . . . . . . . . . . . . . . . . . . . . . . . . . . . . . . . 8-160
8.10.3.5 Printer Settings . . . . . . . . . . . . . . . . . . . . . . . . . . . . . . . . . . . . . . . . . . . . . . 8-161
8.10.4 Security Settings . . . . . . . . . . . . . . . . . . . . . . . . . . . . . . . . . . . . . . . . . . . . . . 8-163
8.10.4.1 Security Parameter Descriptions . . . . . . . . . . . . . . . . . . . . . . . . . . . . . . . . 8-165
8.10.5 Management Settings . . . . . . . . . . . . . . . . . . . . . . . . . . . . . . . . . . . . . . . . . . 8-165
8.10.5.1 Management - Interface . . . . . . . . . . . . . . . . . . . . . . . . . . . . . . . . . . . . . . . 8-165
8.10.5.2 Management - Timeouts. . . . . . . . . . . . . . . . . . . . . . . . . . . . . . . . . . . . . . . 8-167

payShield 10K Installation and User Guide
© Thales Group Page 5
All Rights Reserved
8.10.5.3 Management - TLS Certificate . . . . . . . . . . . . . . . . . . . . . . . . . . . . . . . . . . 8-168
8.10.6 General Settings. . . . . . . . . . . . . . . . . . . . . . . . . . . . . . . . . . . . . . . . . . . . . . . 8-168
8.10.6.1 General - PIN Blocks. . . . . . . . . . . . . . . . . . . . . . . . . . . . . . . . . . . . . . . . . . 8-169
8.10.6.2 General - Alarms . . . . . . . . . . . . . . . . . . . . . . . . . . . . . . . . . . . . . . . . . . . . . 8-170
8.10.6.3 General - Fraud . . . . . . . . . . . . . . . . . . . . . . . . . . . . . . . . . . . . . . . . . . . . . . 8-171
8.10.6.4 General - Date and Time. . . . . . . . . . . . . . . . . . . . . . . . . . . . . . . . . . . . . . . 8-172
8.10.6.5 General - Miscellaneous . . . . . . . . . . . . . . . . . . . . . . . . . . . . . . . . . . . . . . . 8-172
8.10.7 Configure Commands . . . . . . . . . . . . . . . . . . . . . . . . . . . . . . . . . . . . . . . . . . 8-173
8.10.8 Audit Settings . . . . . . . . . . . . . . . . . . . . . . . . . . . . . . . . . . . . . . . . . . . . . . . . . 8-175
8.10.8.1 Audit - General . . . . . . . . . . . . . . . . . . . . . . . . . . . . . . . . . . . . . . . . . . . . . . 8-175
8.10.8.2 Audit - Console Commands . . . . . . . . . . . . . . . . . . . . . . . . . . . . . . . . . . . . 8-176
8.10.8.3 Audit - Host Commands . . . . . . . . . . . . . . . . . . . . . . . . . . . . . . . . . . . . . . . 8-177
8.10.8.4 Audit - Management Commands. . . . . . . . . . . . . . . . . . . . . . . . . . . . . . . . . 8-178
8.10.9 SNMP Settings . . . . . . . . . . . . . . . . . . . . . . . . . . . . . . . . . . . . . . . . . . . . . . . . 8-179
8.10.10 Load/Save Settings . . . . . . . . . . . . . . . . . . . . . . . . . . . . . . . . . . . . . . . . . . . 8-180
8.11 Virtual Console . . . . . . . . . . . . . . . . . . . . . . . . . . . . . . . . . . . . . . . . . . . . . . . . . 8-180
9 Migrating LMKs . . . . . . . . . . . . . . . . . . . . . . . . . . . . . . . . . . . . . . . . . . . . . . . . . . 9-183
9.1 Introduction . . . . . . . . . . . . . . . . . . . . . . . . . . . . . . . . . . . . . . . . . . . . . . . . . . . . . 9-183
9.2 Multiple LMKs . . . . . . . . . . . . . . . . . . . . . . . . . . . . . . . . . . . . . . . . . . . . . . . . . . . 9-183
9.3 Overview of the process . . . . . . . . . . . . . . . . . . . . . . . . . . . . . . . . . . . . . . . . . . . 9-183
9.4 Generating new LMK component Smart Cards. . . . . . . . . . . . . . . . . . . . . . . . . . 9-184
9.4.1 Types of LMK component cards. . . . . . . . . . . . . . . . . . . . . . . . . . . . . . . . . . . . 9-185
9.5 Formatting LMK Smart Cards . . . . . . . . . . . . . . . . . . . . . . . . . . . . . . . . . . . . . . . 9-185
9.5.1 HSM LMK Cards . . . . . . . . . . . . . . . . . . . . . . . . . . . . . . . . . . . . . . . . . . . . . . . 9-185
9.5.2 payShield Manager LMK Cards . . . . . . . . . . . . . . . . . . . . . . . . . . . . . . . . . . . . 9-185
9.6 Generating LMK Component Cards . . . . . . . . . . . . . . . . . . . . . . . . . . . . . . . . . . 9-186
9.6.1 HSM LMK Cards . . . . . . . . . . . . . . . . . . . . . . . . . . . . . . . . . . . . . . . . . . . . . . . 9-186
9.6.2 payShield Manager RLMK Cards. . . . . . . . . . . . . . . . . . . . . . . . . . . . . . . . . . . 9-186
9.7 Creating Copies of LMK Component Cards . . . . . . . . . . . . . . . . . . . . . . . . . . . . 9-186
9.7.1 Duplicating HSM LMK cards . . . . . . . . . . . . . . . . . . . . . . . . . . . . . . . . . . . . . . 9-186
9.7.2 Duplicating a payShield Manager RLMK card . . . . . . . . . . . . . . . . . . . . . . . . . 9-187
9.8 Loading the new LMK . . . . . . . . . . . . . . . . . . . . . . . . . . . . . . . . . . . . . . . . . . . . . 9-187
9.8.1 Using the Console . . . . . . . . . . . . . . . . . . . . . . . . . . . . . . . . . . . . . . . . . . . . . . 9-187
9.8.1.1 Loading (or forming) the LMK . . . . . . . . . . . . . . . . . . . . . . . . . . . . . . . . . . . . 9-187
9.8.1.2 Checking the LMK . . . . . . . . . . . . . . . . . . . . . . . . . . . . . . . . . . . . . . . . . . . . . 9-187
9.8.2 Using payShield Manager . . . . . . . . . . . . . . . . . . . . . . . . . . . . . . . . . . . . . . . . 9-188
9.8.2.1 Installing the LMK . . . . . . . . . . . . . . . . . . . . . . . . . . . . . . . . . . . . . . . . . . . . . 9-188
9.8.2.2 Checking the LMK . . . . . . . . . . . . . . . . . . . . . . . . . . . . . . . . . . . . . . . . . . . . . 9-188
9.9 Loading the old LMK . . . . . . . . . . . . . . . . . . . . . . . . . . . . . . . . . . . . . . . . . . . . . . 9-188
9.9.1 Using the Console . . . . . . . . . . . . . . . . . . . . . . . . . . . . . . . . . . . . . . . . . . . . . . 9-188
9.9.2 Using payShield Manager . . . . . . . . . . . . . . . . . . . . . . . . . . . . . . . . . . . . . . . . 9-189
9.10 Migrating keys between Variant LMKs . . . . . . . . . . . . . . . . . . . . . . . . . . . . . . . 9-189
9.10.1 BW Host command . . . . . . . . . . . . . . . . . . . . . . . . . . . . . . . . . . . . . . . . . . . . 9-189
9.10.2 BX Response to the Host . . . . . . . . . . . . . . . . . . . . . . . . . . . . . . . . . . . . . . . . 9-192
9.11 Migrating keys from Variant to Key Block LMKs . . . . . . . . . . . . . . . . . . . . . . . . 9-193
9.11.1 BW Host command . . . . . . . . . . . . . . . . . . . . . . . . . . . . . . . . . . . . . . . . . . . . 9-193
9.11.2 BX Response to the Host . . . . . . . . . . . . . . . . . . . . . . . . . . . . . . . . . . . . . . . . 9-195
9.12 Migrating keys between Key Block LMKs . . . . . . . . . . . . . . . . . . . . . . . . . . . . . 9-196
9.12.1 BW Host command . . . . . . . . . . . . . . . . . . . . . . . . . . . . . . . . . . . . . . . . . . . . 9-196
9.12.2 BX Response to the Host . . . . . . . . . . . . . . . . . . . . . . . . . . . . . . . . . . . . . . . . 9-197
9.13 Migrating keys from Key Block to Variant LMKs . . . . . . . . . . . . . . . . . . . . . . . . 9-197
9.14 Migrating keys for PCI HSM compliance. . . . . . . . . . . . . . . . . . . . . . . . . . . . . . 9-198
9.15 Re-encrypting PINs . . . . . . . . . . . . . . . . . . . . . . . . . . . . . . . . . . . . . . . . . . . . . . 9-198
9.15.1 BG Host Command . . . . . . . . . . . . . . . . . . . . . . . . . . . . . . . . . . . . . . . . . . . . 9-198

payShield 10K Installation and User GuidepayShield 10K Installation and User Guide
© Thales Group Page 6
All Rights Reserved
9.15.2 BH Response. . . . . . . . . . . . . . . . . . . . . . . . . . . . . . . . . . . . . . . . . . . . . . . . . 9-199
9.16 Re-encrypting decimalization tables . . . . . . . . . . . . . . . . . . . . . . . . . . . . . . . . . 9-200
9.17 Switching to the new LMK . . . . . . . . . . . . . . . . . . . . . . . . . . . . . . . . . . . . . . . . 9-201
9.18 Taking advantage of Multiple LMKs . . . . . . . . . . . . . . . . . . . . . . . . . . . . . . . . . 9-202
9.19 Clean-up after migration to a new LMK . . . . . . . . . . . . . . . . . . . . . . . . . . . . . . 9-203
9.19.1 Deleting the Old LMK from Key Change Storage . . . . . . . . . . . . . . . . . . . . . 9-203
9.19.1.1 Using the console . . . . . . . . . . . . . . . . . . . . . . . . . . . . . . . . . . . . . . . . . . . . 9-203
9.19.1.2 Using payShield Manager. . . . . . . . . . . . . . . . . . . . . . . . . . . . . . . . . . . . . . 9-203
9.19.1.3 Using a Host Command . . . . . . . . . . . . . . . . . . . . . . . . . . . . . . . . . . . . . . . 9-203
9.19.2 Deleting the New LMK . . . . . . . . . . . . . . . . . . . . . . . . . . . . . . . . . . . . . . . . . . 9-204
9.19.2.1 Console. . . . . . . . . . . . . . . . . . . . . . . . . . . . . . . . . . . . . . . . . . . . . . . . . . . . 9-205
9.19.2.2 Using payShield Manager. . . . . . . . . . . . . . . . . . . . . . . . . . . . . . . . . . . . . . 9-205
Appendix A - Console Commands. . . . . . . . . . . . . . . . . . . . . . . . . . . . . . . . . . . 10-207
Appendix B - Configuring Ports Using the Console . . . . . . . . . . . . . . . . . . . . . 11-449
B.1 Configure the Management Port . . . . . . . . . . . . . . . . . . . . . . . . . . . . . . . . . . . 11-449
B.2 Configure the Printer Port. . . . . . . . . . . . . . . . . . . . . . . . . . . . . . . . . . . . . . . . . 11-451
B.3 Configure the Host Ports . . . . . . . . . . . . . . . . . . . . . . . . . . . . . . . . . . . . . . . . . 11-451
B.3.1 Configuring the Software. . . . . . . . . . . . . . . . . . . . . . . . . . . . . . . . . . . . . . . . 11-451
B.3.1.1 Message Header Length . . . . . . . . . . . . . . . . . . . . . . . . . . . . . . . . . . . . . . 11-452
B.3.1.2 Ethernet Communications . . . . . . . . . . . . . . . . . . . . . . . . . . . . . . . . . . . . . 11-452
B.3.1.3 Software Parameters . . . . . . . . . . . . . . . . . . . . . . . . . . . . . . . . . . . . . . . . . 11-453
Appendix C - Commission payShield Manager using Console Commands. . 12-457
C.1 Background information . . . . . . . . . . . . . . . . . . . . . . . . . . . . . . . . . . . . . . . . . . 12-457
C.2 Prerequisites . . . . . . . . . . . . . . . . . . . . . . . . . . . . . . . . . . . . . . . . . . . . . . . . . . 12-458
C.3 Procedure. . . . . . . . . . . . . . . . . . . . . . . . . . . . . . . . . . . . . . . . . . . . . . . . . . . . . 12-458
C.3.1 Secure the HSM . . . . . . . . . . . . . . . . . . . . . . . . . . . . . . . . . . . . . . . . . . . . . . 12-458
C.3.2 Generate a Customer Trust Authority . . . . . . . . . . . . . . . . . . . . . . . . . . . . . . 12-458
C.3.3 Create the HRK passphrases . . . . . . . . . . . . . . . . . . . . . . . . . . . . . . . . . . . . 12-460
C.3.4 Commission the HSM . . . . . . . . . . . . . . . . . . . . . . . . . . . . . . . . . . . . . . . . . . 12-461
C.3.5 Commission Smart Cards . . . . . . . . . . . . . . . . . . . . . . . . . . . . . . . . . . . . . . . 12-463
C.3.6 Migrate LMK Cards to become RLMK Cards . . . . . . . . . . . . . . . . . . . . . . . . 12-463
Appendix D - Technical Support Contacts . . . . . . . . . . . . . . . . . . . . . . . . . . . . 13-465

payShield 10K Installation and User Guide
© Thales Group Page 7
All Rights Reserved
Revision Status
Revision Date Changes
001 March 2019 Initial Issue
002 December 2019 Editorial updates
Addition of FF1 License
Correction in Section 2.1.4, Feature Comparison
003 January 2020 Editorial updates
004 March 2020 FF1 license (Section 1.10, “payShield 10K license packages”, on
page 19)
payShield Monitor updated
VR command updated (Chapter 8, “Connect to the payShield 10K”
and in Appendix , “Console Commands”)
payShield Monitor dashboard updated (Section 8.6.1, “Summary
Dashboard”, on page 99
payShield Monitor Summary License updated (Section 8.7.7.1,
“License Summary - how to update Licensing”, on page 123
payShield Monitor Software tab modified (Section 8.7.6.1, “Software
- how to update software”, on page 122
004a April 2020 Minor editorial changes
005 October 2020 payShield 10K 10G Ethernet Hardware Platform Variant support
documented in Chapter 5, “payShield 10K 10G Ethernet Hardware
Platform Variant”.
Links to Chapter 5 added to: Chapter 1, “Introduction”, Chapter 2,
“Backwards Compatibility and Differences”, Chapter 3, “Physical
Description”, Chapter 4, “Installation”
006 January 2021 Editorial updates
Trusted Management Device update (Section 1.11, “Trusted
Management Device (TMD)”, on page 21)

payShield 10K Installation and User GuidepayShield 10K Installation and User Guide
© Thales Group 2020 Page 8
All Rights Reserved

payShield 10K Installation and User Guide
© Thales Group Page 9
All Rights Reserved
1 Introduction
1.1 Documentation Overview
Documentation for the payShield 10K Hardware Security Module (HSM) is streamlined into the following manuals:
•payShield 10K Installation and User Guide
•payShield 10K Security Manual
•payShield 10K Host Programmer’s Manual
•payShield 10K Applications Using payShield 10K
•payShield 10K Core Host Commands Manual
•payShield 10K Legacy Command Reference Manual
•payShield 10K Regulatory Users Warnings and Cautions
Note: Console Commands are now included in this manual, Appendix A.
1.2 Audience
The manual’s audience includes:
•Network installers
•Trusted officers/data security administrators
– Physical key holders
– Physical card holders
– Compliance officers
1.3 payShield 10K General Description
The payShield 10K payment hardware security module (HSM) provides cryptographic functions to support network
and point-to-point data security. The payShield 10K acts a peripheral device to a Host computer. It provides the
cryptographic facilities required to implement key management, message authentication, and Personal
Identification Number (PIN) encryption in real time online environments.

payShield 10K Installation and User GuidepayShield 10K Installation and User Guide
© Thales Group Page 10
All Rights Reserved
The HSM is secured by physical locks, electronic switches and tamper-detection circuits. It supports a large number
of standard commands and can be customized to perform client-specific cryptographic commands.
Standard command functions include:
•Generating and verifying PINs, such as those used with bank accounts and credit cards
•PIN solicitation, to obtain a new PIN from a card holder (against a reference number)
•Generating encrypted card values, such as Card Verification Values (CVV) for the plastic card industry
•Generating keys for use in Electronic Funds Transfer Point of Sale (EFTPOS) systems
•Key management in non-EFTPOS systems
•Generating and verifying Message Authorization Codes (MACs) for messages transferred via
telecommunications networks
1.4 Typical Configuration
A typical payShield 10K configuration consists of two or more payShield units connected as “live” units. A multi-unit
configuration permits concurrent operation for high throughput, and, under control of the application program,
provides automatic and immediate backup in the event of a fault in a single unit.
Typically, redundancy is built into the system design by providing more capacity than is required to allow commands
to be switched away from a failed or withdrawn unit. Optionally, it is possible to have a backup unit not connected to
the Host but ready for connection in place of a faulty unit. This is not the preferred practice because the unit may
remain idle for a long time and may itself have developed a fault.
In addition to the “live” units, a typical system contains at least one HSM connected to a test or development
computer system. This allows changes in the environment to be tested, without disturbing the live system.
The figure that follows illustrates a deployment architecture that includes both payShield 9000s and payShield 10Ks.

payShield 10K Installation and User Guide
© Thales Group Page 11
All Rights Reserved
1.4.1 Command Flow
Note: The payShield 10K is normally online to the Host and does not require operator monitoring or intervention.
The HSM processes commands from the Host.
•The Host sends command messages, which consist of command codes and other fields that are required
by the HSM in order to process the commands, to the HSM.
•The HSM processes the command messages and generates response messages, which also contain a
variable number of fields (depending on the message type).
Note: Some commands, mainly involving plain text data, are entered by the user via the associated HSM
console.
The flow of data through components is represented in the figure that follows.
The throughput of the HSM depends on the types of commands that are executed, and the method and speed of
the Host connection.
1.5 Smart cards
The payShield 10K uses smart cards to provide a convenient means of handling sensitive information.
Smart cards are used for storing three distinct types of information:
•Key components - particularly the Local Master Key (LMK)
•Authorizing Officer credentials
•HSM alarm, security and Host settings
There are two types of smart cards:
•payShield Manager smart cards
•HSM smart cards
Note: Additionally, there are 2 types of HSM smart cards. (See figure that follows.)

payShield 10K Installation and User GuidepayShield 10K Installation and User Guide
© Thales Group Page 12
All Rights Reserved
The differences between smart cards are identified in the following table.
Note: Follow this link for additional information: Section 2.1.12, “Transitioning Smart Cards”, on page 31.
1.6 Customer Trust Authority (CTA)
Every commissioned HSM or smart card contains an Elliptic Curve Digital Signature Algorithm (ECDSA) public/
private key pair. In order to have confidence in the authenticity of the various public keys, each such key is held in
the form of a certificate.
The certificate is signed by a private key that is also created by the user on an HSM. This root private key is normally
described as a Customer Trust Authority (CTA).
Operations payShield Manager Smart Card HSM Smart Card
Formatting Can only be formatted using payShield
Manager
Can only be formatted using the FC
command using USB-C console
Save Settings (Alarm, Host,
Security, Audit, Command,
Pin Block)
Can be used to save payShield 10K
settings via payShield Manager and
remote card reader only
Can be used to save payShield 10K
settings via USB-C console and embedded
card reader only
Customer Trust Authority
(CTA)
Can be used as CTA cards both on
embedded and remote card reader
Cannot be used on an embedded card
reader
Local Master Key (LMK) Can be used as LMK card both on
embedded card reader and remote card
reader
Can be used as LMK card from embedded
card reader only

payShield 10K Installation and User Guide
© Thales Group Page 13
All Rights Reserved
The CTA is split across a number of CTA smart cards. (Section 1.8, “Key Shares”, on page 16 further explains the
split/sharing concept.) The CTA is temporarily loaded into an HSM prior to signing the smart card or HSM public key
certificates. The corresponding CTA public key (used to verify the certificates) is stored in each smart card and in
the HSM.
A CTA must be reassembled onto a payShield in order to perform certain operations, including commissioning a
payShield. After a CTA has been created, it may be used to commission multiple payShields and numerous smart
cards to be used in the same security domain.
The CTA functionality is standard in all payShield HSMs that support payShield Manager. All user interaction with
the CTA functionality is via either the console interface or payShield Manager.
1.6.1 Customer Security Domain
The term “customer security domain” is used to describe the set of smart cards and HSMs, such that (secure)
remote communication between the cards and the HSM in the group is permitted.
A necessary condition for a smart card and an HSM to communicate is that their public keys are both signed by the
same CTA. However, this is not a sufficient condition, and it is quite possible to have non-overlapping security
groups created via the same CTA.
In addition to having matching CTAs, whitelists within each HSM define which smart cards can communicate with a
specific HSM and what role they possess.
1.7 Keys
1.7.1 Encryption Mechanism
The HSM mechanism for encryption of locally stored keys uses a double length DES key, i.e., the Local Master Key
(LMK), stored in the tamper-resistant memory of the HSM. All other cryptographic keys are encrypted under the LMK
and stored external to the HSM, usually in a key database on the Host system that is accessible by Host
applications. In order to provide key separation (e.g., key encryption keys, MAC keys, PIN verification keys, etc.),
different key types are encrypted under different variants of the LMK. Hence, if the “wrong” key is provided in a
command, either accidentally or deliberately, a key parity error occurs (highly likely) or a processing error occurs
(occasionally).
1.7.2 HSM Recovery Key
One concern relating to the HSMs used in the remote management solution is that if an HSM becomes “tampered”,
the public and private keys are removed from memory and it becomes necessary to generate a new key pair. This
could involve a considerable operational inconvenience.
Therefore, a recovery mechanism involving an AES HSM Recovery Key (HRK) is available to simplify the task of
restoring a public/private key pair to the HSM’s secure memory and re-establishing the previous security group.

payShield 10K Installation and User GuidepayShield 10K Installation and User Guide
© Thales Group Page 14
All Rights Reserved
1.7.3 Local Master Keys (LMKs)
Each payShield 10K has its own master key. This key is known as the “Local Master Key”. Every generated key is
then encrypted under this Local Master Key.
The LMK is used to protect (by encryption) all of the operational keys plus some additional sensitive data that are
processed by the HSM.
The payShield 10K can support multiple LMKs, such that up to 20 LMKs, of different types, can be in use at any one
time. Each LMK can be managed by a separate security team. This allows a single payShield 10K to be used for
multiple purposes - such as different applications or different clients.
The LMK may be common to a number of HSMs. Storing only a single key in the HSM minimizes recovery and
operational downtime, in the event of a problem with the unit.
There are two types of LMKs:
•Variant LMK
A Variant LMK is a set of 40 double- or triple-length DES keys, arranged in pairs, with different pairs (and
variants of those pairs) being used to encrypt different types of keys.
Note: The term “Variant LMK” refers to the “variant” method of encrypting keys; a Variant LMK is not itself a
variant of any other key.
•Key Block LMK
A Key Block LMK is either a triple-length DES key, or a 256-bit AES key, and is used to encrypt keys in a key
block format. A Key Block LMK is not compatible with a Variant LMK, and it can only be used to encrypt keys
in the key block format.
Note: The term “Key Block LMK” refers to the “key block” method of encrypting keys; a Key Block LMK is
not itself stored in the key block format.
For an HSM to operate, the LMKs must be created and loaded. Because the DES /AES algorithms depend on a key
for secrecy, and because the security of all keys and data encrypted for storage depend on the LMKs, they must be
created and maintained in a secure manner. Provision is made to allow the LMKs to be changed and keys or data
encrypted under them to be translated to encryption under the new LMKs.
All keys when stored locally (i.e., not in transit between systems) are encrypted under the LMK.
1.7.3.1 Multiple LMKs
The availability of multiple LMKs makes it easier to migrate operational keys from an old LMK to a new one. Such
LMK migration should be performed every few years for security purposes, but may also be necessary for
operational reasons, e.g., when upgrading from double- to triple-length Variant LMKs or from Variant LMKs to Key
Block LMKs.
Although the payShield 10K allows for changing the LMK, it means that all operational keys need to be translated
from encryption under the old LMK to encryption under the new LMK before they can be used. A “big bang” approach
typically requires very careful planning and coordination, with possible downtime or need for additional HSM
capacity. The use of multiple LMKs allows users to adopt a phased approach to LMK change.
It is possible to install multiple LMKs within a single payShield 10K. The precise details of the number and type of
installed LMKs are controlled via the payShield 10K's license file.

payShield 10K Installation and User Guide
© Thales Group Page 15
All Rights Reserved
1.7.4 Zone Master Key
A Zone Master Key (ZMK) is a key-encrypting key which is distributed manually between two (or more)
communicating sites, within a shared network, in order that further keys can be exchanged automatically (without
the need for manual intervention). The ZMK is used to encrypt keys of a lower level for transmission. For local
storage, a ZMK is encrypted under one of the LMK pairs.
Within the VISA environment this is known as a ZCMK.
The payShield 10K supports the use of a single-length, double-length or triple-length DES ZMK, or a 128-bit, 192-
bit or 256-bit AES ZMK.
1.7.4.1 Zone PIN Key
A Zone PIN Key (ZPK) is a data encrypting key which is distributed automatically, and is used to encrypt PINs for
transfer between communicating parties (for example, between acquirers and issuers). For transmission, a ZPK is
encrypted under a ZMK; for local storage it is encrypted under one of the LMK pairs.
The payShield 10K supports the use of a single-length, double-length or triple-length DES ZPK.
1.7.5 Terminal Master Key
A Terminal Master Key (TMK) is a key-encrypting key which is distributed manually, or automatically under a
previously installed TMK. It is used to distribute data-encrypting keys, within a local (non-shared) network, to an ATM
or POS terminal or similar. The TMK is used to encrypt other TMKs or keys of a lower level for transmission. For
local storage, a TMK is encrypted under one of the LMK pairs.
The payShield 10K supports the use of a single-length, double-length or triple-length DES TMK, or a 128-bit, 192-
bit or 256-bit AES TMK.
1.7.5.1 Terminal PIN Key
A Terminal PIN Key (TPK) is a data-encrypting key which is used to encrypt PINs for transmission, within a local
network, between a terminal and the terminal data acquirer. For transmission, a TPK is encrypted under a TMK; for
local storage it is encrypted under one of the LMK pairs.
The payShield 10K supports the use of a single-length, double-length or triple-length DES TPK.
1.7.6 Terminal Authentication Key
A Terminal Authentication Key (TAK) is a data-encrypting key which is used to generate and verify a Message
Authentication Code (MAC) when data is transmitted, within a local network, between a terminal and the terminal
data acquirer. For transmission, a TAK is encrypted under a TMK or ZMK; for local storage it is encrypted under one
of the LMK pairs.
The payShield 10K supports the use of a single-length, double-length or triple-length DES TAK, or a 128-bit, 192-
bit or 256-bit AES TAK.

payShield 10K Installation and User GuidepayShield 10K Installation and User Guide
© Thales Group Page 16
All Rights Reserved
1.7.7 Terminal Encryption Key
A Terminal Encryption Key (TEK) is a data-encrypting key which is used to encrypt and decrypt messages for
transmission, within a local network, between a terminal and the terminal data acquirer. For transmission, a TEK is
encrypted under a TMK or ZMK; for local storage it is encrypted under one of the LMK pairs.
The payShield 10K supports the use of a single-length, double-length or triple-length DES TEK, or a 128-bit, 192-
bit or 256-bit AES TEK.
1.7.8 PIN Verification Key
A PIN Verification Key (PVK) is a data-encrypting key which is used to generate and verify PIN verification data and
thus verify the authenticity of a PIN. For transmission, a PVK is encrypted under a TMK or under a ZMK; for local
storage, it is encrypted under one of the LMK pairs.
The payShield 10K supports the use of a single-length, double-length or triple-length DES PVK.
1.7.9 Card Verification Key
A Card Verification Key (CVK) is similar to a PIN Verification Key, but for Card information instead of a PIN.
The payShield supports the use of a single-length, double-length or triple-length DES CVK.
1.7.10 Master Session Key
The master/session key management scheme involves setting up a master key between two communicating parties
(for example, an acquirer and an issuer or an acquirer and a terminal) under which data-encrypting keys are
exchanged for use during a session. Key installation and updating must be organized by the institutions involved
(i.e., within the application programs).
The HSM supports master/session key management in both shared and local networks, but distinguishes between
the two and maintains separate key hierarchies.
1.8 Key Shares
By assigning key and policy management to more than one Security Administrator a strong separation of duties over
HSM management is enforced. Each Security Administrator is assigned a smart card. Each smart card has a “key
share”. To create a “key”, each “key share” must be presented. With “key sharing”, no one person has complete
control over the security of data.

payShield 10K Installation and User Guide
© Thales Group Page 17
All Rights Reserved
Figure 1 “key share” concept overview
1.9 Host Commands supporting multiple LMKs
The basic mechanism for Host commands to support multiple LMKs and LMK schemes is as follows:
Two additional (optional) fields are added at the end of each Host command request message. These fields are:
For Ethernet-attached Host computers, the HSM can infer the LMK Identifier to use for a particular command from
the TCP port on which the command is received. Historically, Host commands sent via TCP/IP have been directed
to the HSM's Well-Known Port, and this continues to be supported. However, Host commands directed to [the Well-
Known Port +1] will automatically use LMK Id 00; Host commands directed to [the Well-Known Port +2] will
automatically use LMK Id 01; etc. The situation for an HSM using the default Well-Known Port value of 1500 is
summarized in the table below:
Field Length & Type Details
Delimiter 1 A Value '%'. Optional; if present, the LMK Identifier field must
be present.
LMK Identifier 2 N LMK identifier; min value = '00'; max value is defined by
license; must be present if the above Delimiter is present.
Command received on TCP Port LMK Used
1500 Default LMK ID (or % nn construct)
1501 LMK ID 00
1502 LMK ID 01

payShield 10K Installation and User GuidepayShield 10K Installation and User Guide
© Thales Group Page 18
All Rights Reserved
1.9.1 LMK Usage in Host Commands
The HSM uses the following mechanisms to determine which LMK Id to use with a Host command:
•The Management LMK is automatically used for command processing and the Delimiter and LMK Identifier fields
should not be included in the command message. The only commands that belong in this category are the “Q0”,
“Q2”, “Q4” and “Q8” commands.
•For commands using key blocks, the LMK that is identified in the key block header(s) is used; if the Delimiter
and LMK Identifier are present in the command message, then all LMK identifiers must agree.
•If the Delimiter and LMK Identifier are present at the end of the command message, then the specified LMK is
used in the command processing.
•For commands received via the Ethernet Host port using TCP/IP, the HSM infers the LMK Id to use based on
the specific TCP port on which the command was received.
•For all other commands where the Delimiter and LMK Identifier are not present in the command message, the
Default LMK is used in command processing.
1503 LMK ID 02
Command received on TCP Port LMK Used
This manual suits for next models
1
Table of contents
Other Thales Network Card manuals
