manuals.online logo
Brands
  1. Home
  2. •
  3. Brands
  4. •
  5. Thames & Kosmos
  6. •
  7. Toy
  8. •
  9. Thames & Kosmos BUBBLE BLOWER User manual

Thames & Kosmos BUBBLE BLOWER User manual

Franckh-Kosmos Verlags-GmbH & Co. KG, Pfizerstr. 5-7, 70184 Stuttgart, Germany | +49 (0) 711 2191-0 | www.kosmos.de
Thames & Kosmos, 301 Friendship St., Providence, RI, 02903, USA | 1-800-587-2872 | www.thamesandkosmos.com
Thames & Kosmos UK Ltd, Goudhurst, Kent, TN17 2QZ, United Kingdom | 01580 212000 | www.thamesandkosmos.co.uk
STEP 2
Attach the sliding switch to the chassis
bracket.
Important! Take a look at the terminals at
the rear. The area where no wire is
attached is the “off” position. Slide the
switch to “off.”
STEP 6
STEP 1
STEP 5
STEP 3
Securely clip on the fan cover.
STEP 4
Now insert the contact springs into the
chassis bracket holes, narrow end down.
We are calling the contact springs “A,”
“B,” and “C” from left to right.
STEP 7
General Information
How to Assemble the Bubble BlowerContents
DEAR PARENTS!
Please help your child with
assembly, and offer your
support and assistance with
the experiments. Before
starting the experiments, read
through the manual together
and be sure to follow all of the
steps described there. Please
be careful not to let small kit
parts get into the hands of
small children. Encourage
your child to repeat an
experiment if it doesn’t yield
the desired result the first
time. Above all, pay attention
to the safety information.
Have fun with the experiments!
st Edition 
©  Franckh-Kosmos Verlags-GmbH  Co. KG
Pfizerstrasse -, D- Stuttgart
Tel. + () -
This work, including all its parts, is copyright protected. Any use outside
the specific limits of the copyright law without the consent of the
publisher is prohibited and punishable by law. This applies specifically
to reproductions, translations, microfilming, and storage and processing
in electronic systems and networks. We do not guarantee that all
material in this work is free from copyright or other protection.
Project management: Dr. Mark Bachofer; Technical product
development: Dr. Petra Müller; Manual design: Atelier Bea Klenk, Berlin;
Packaging design: Peter Schmidt Group GmbH, Hamburg
Manual and packaging layout: Michael Schlegel, komuniki, Würzburg;
Text: Mark Bachofer; Check into it: Tobias Pehle, Unna; Photos: Stefan
Körber (foam); Katja Jentschura (exploding bubble) (both © fotolia.
com); Oliver Klasen, Stuttgart (girl); Manual and packaging illustrations:
Andrea Mangold, Munich (soap bubble recipe), Medien Kommunikation,
Unna (mixing the soap), all others Andreas Resch, St. Ulrich am Waasen,
Austria
st English Edition ©  Thames  Kosmos, LLC, Providence, RI,
U.S.A.
®Thames  Kosmos is a registered trademark of Thames  Kosmos,
LLC.
Editing: Ted McGuire; Additional Graphics and Layout: Dan Freitas
Distributed in North America by Thames  Kosmos, LLC.
Providence, RI ; Phone: --;
Email: support@thamesandkosmos.com
We reserve the right to make technical changes. Printed in China / Imprimé en Chine
First, assemble the fan. Mount the motor
on the gear box in such a way that the
wires point toward the lower edge of the
box. Place the cover over the motor.

You will also need:
› Two AA batteries (.-volt, type
AA/LR/penlight)
› Soap bubble liquid (purchased
or made yourself, see back side)
› Small Phillips-head screwdriver
(“crosshead” screwdriver)
Attach the soap bubble wheel to the gear
box. First place it on and then screw in the
screw tightly.
In this step, you will be installing the gear
box on the chassis. To do that, first hook
on the left side (from the perspective of
the battery compartment) of the gear
box, and then press down on the right
side until it clicks into place.
1
2
3
4
5
6
7
8
9
10
Now turn the gear box over and insert the
fan wheel onto the motor shaft.





a
ABC
EXPERIMENT MANUAL




Motor cover
Motor
Contact spring ()
Sliding switch
Screw

Chassis with battery compartment
and soap solution holder
Gear box
Fan wheel
Fan cover
Soap bubble wheel





NOTE ! Not suitable for children under 3 years of age. There is a danger of choking due
to small parts that may be swallowed or inhaled.
NOTE ! Only for use by children 8 years and older. Instructions are included for parents
or other supervising individuals. Please follow them! Save the packaging and
instructions. They contain important information.
• To operate the bubble blower, you will need two AA batteries (1.5-volt, type LR6/AA/
penlight), which could not be included in the kit due to their limited shelf life.
• The supply terminals are not to be short-circuited. A short circuit can cause the wires
to overheat and the batteries to explode.
• Different types of batteries or new and used batteries are not to be mixed.
• Do not mix old and new batteries.
• Do not mix alkaline, standard (carbon-zinc), or rechargeable (nickel-cadmium)
batteries.
• Always insert batteries in the right polarity orientation, pressing them gently into the
battery compartment.
• Do not recharge non-rechargeable batteries. They could explode!
• Rechargeable batteries are only to be charged under adult supervision.
• Rechargeable batteries are to be removed from the toy before being charged.
• Exhausted batteries are to be removed from the toy.
• Dispose of used batteries in accordance with environmental provisions.
• Be sure not to bring batteries into contact with coins, keys, or other metal objects.
• Avoid deforming the batteries.
• The wires are not to be inserted into socket-outlets.
None of the electrical or electronic components in this kit should be
disposed of in the regular household trash when you have finished using
them; instead, they must be delivered to a collection location for the
recycling of electrical and electronic devices. The symbol on the product,
instructions for use, or packaging will indicate this.
The materials are reusable in accordance with their designation. By reusing or recycling
used devices, you are making an important contribution to the protection of the
environment. Please consult your local authorities for the appropriate disposal
location.
EXPERIMENT 1
Insert the batteries into the
compartment.
Note! Pay attention to the
polarity. You will find tiny
plus and minus signs on the
battery. The same signs
appear in the battery
compartment. Insert the
batteries in such a way that
the plus sign on the battery
lines up with the plus sign
in the compartment, and
the minus sign on the
battery lines up with the
minus sign in the
compartment.
WHAT KIND OF WATER IS
BEST FOR SOAP BUBBLES?
Ordinary tap water and spring
water often contain minerals such
as calcium, which makes them “hard.” For soap
bubbles, on the other hand, “soft” water
(without calcium) is better, because the softer
the water is, the longer the bubbles will last. The
best thing to use is so-called “distilled water.”
STEP 8
Note!
Do not pour any liquid onto the
batteries or the contact springs. Be
careful not to let any soap solution get
into your eyes. If this happens, rinse
immediately with water!
Your Blower Machine Blows Soap Bubbles
WHY The motor turns the
soap bubble wheel. As the wheel turns,
it dips into the soap bubble solution.
The rings on the wheel take up the
soap bubble solution. At the same
time, the motor powers a small fan.
The fan blows air into the rings. That is
what creates the soap bubbles.
Check It Out
How to Assemble the Bubble Blower
Fill the soap solution container in the
chassis with soap bubble solution. Be
careful not to spill any, and do not fill it
higher than the marked line.
Now you will connect up
the electrical circuit:
•Attach the black battery
compartment wire to
spring C.
•Attach the red battery
compartment wire to
spring A.
•The red motor wire goes
to B.
•The black motor wire
goes to C.
•The red sliding switch
wire goes to A.
•The black sliding switch
wire goes to B.
Important: To attach the wires, the
contact springs have to be bent
far enough to create a slight gap
into which you insert the wire.
c
A
B
C
The soap bubble blowing
machine is turned on and
off with the sliding switch.
As soon as you switch it
on, the soap bubble wheel
will start to turn and the
fan will blow lots of
shimmering bubbles of
varying sizes.
Check It Out
If you just mix soap and water,
what you get is bubbles that
burst quickly. To make a
really good soap bubble
solution, you have to add
something to the mixture to make
the soap bubbles last longer –
glycerin. This alcohol-containing
Colors come from white light, which
contains a combination of all visible
colors. Light moves in waves, and each
wave has a different length. When light
waves strike a film of soap, most of the
light travels through the soap skin. A
small portion, however, gets thrown back
(reflected), like with a mirror. In this
process, the light waves on the front wall
of the soap bubble and the waves on the
back wall become superimposed on each
other, over and over. This phenomenon is
known as interference (wave
superposition). This kind of interference is
the reason for the alternating pattern of
different colors on a soap bubble.
HOW LONG HAVE THERE
BEEN SOAP BUBBLES??
Soap bubbles are an age-old
amusement. Soap was invented
by the ancient Sumerians over
, years ago. Since that time,
soap bubbles have been inspiring
people the world over.
liquid makes the bubbles
tougher, more thick-
skinned, and longer-
lasting. Still, there is no
single best recipe,
because soap solutions
always behave differently
depending on the climate and time
of year.
IS THERE A RECIPE FOR
SUPERBIG BUBBLES?
–
+
–
+
EXPERIMENT 2
Making Your Own Soap Bubble Solution
Of course, you can buy soap bubble solution
almost anywhere. But it’s much more exciting
to make your own. It’s more fun too!
YOU WILL NEED:
 liter distilled water; - tablespoons of
dishwashing liquid;  teaspoon glycerin
(from the drug store); small bucket or bowl
HERE’S HOW:
. Mix 2 to 3 tablespoons of dishwashing
liquid (which contains a lot of soap or
detergent) and one teaspoon of glycerin
with one liter of distilled water.
. Stir the ingredients together in a small
bucket or a bowl and let the mixture sit for
one or two days. As you will see, you can
hardly get a better soap bubble solution
than this!
HOW DO THE COLORS
GET INTO THE SOAP
BUBBLES?

Safety Information
Information about Environmental Protection
b
Other Thames & Kosmos Toy manuals

Thames & Kosmos Robot Safari User manual

Thames & Kosmos

Thames & Kosmos Robot Safari User manual

Thames & Kosmos 620615 Eco-Battery Vehicles User manual

Thames & Kosmos

Thames & Kosmos 620615 Eco-Battery Vehicles User manual

Thames & Kosmos Aircraft Engineer User manual

Thames & Kosmos

Thames & Kosmos Aircraft Engineer User manual

Thames & Kosmos Mega Cyborg Hand User manual

Thames & Kosmos

Thames & Kosmos Mega Cyborg Hand User manual

Thames & Kosmos 553013 User manual

Thames & Kosmos

Thames & Kosmos 553013 User manual

Thames & Kosmos ANiMALS User manual

Thames & Kosmos

Thames & Kosmos ANiMALS User manual

Thames & Kosmos DLX User manual

Thames & Kosmos

Thames & Kosmos DLX User manual

Thames & Kosmos Stem Experiment Kit Amazing Minerals User manual

Thames & Kosmos

Thames & Kosmos Stem Experiment Kit Amazing Minerals User manual

Thames & Kosmos Vibrobot User manual

Thames & Kosmos

Thames & Kosmos Vibrobot User manual

Thames & Kosmos Air Plus Water Power Plus User manual

Thames & Kosmos

Thames & Kosmos Air Plus Water Power Plus User manual

Thames & Kosmos BOTANY Experimental Greenhouse Science Kit User manual

Thames & Kosmos

Thames & Kosmos BOTANY Experimental Greenhouse Science Kit User manual

Thames & Kosmos 623715 User manual

Thames & Kosmos

Thames & Kosmos 623715 User manual

Thames & Kosmos Solar Mechanics User manual

Thames & Kosmos

Thames & Kosmos Solar Mechanics User manual

Thames & Kosmos KIDS FIRST ROBOT PET SHOP User manual

Thames & Kosmos

Thames & Kosmos KIDS FIRST ROBOT PET SHOP User manual

Thames & Kosmos Ooze Labs 575004 User manual

Thames & Kosmos

Thames & Kosmos Ooze Labs 575004 User manual

Thames & Kosmos RuBBeR BaND RACERS User manual

Thames & Kosmos

Thames & Kosmos RuBBeR BaND RACERS User manual

Thames & Kosmos Ooze Labs 575009 User manual

Thames & Kosmos

Thames & Kosmos Ooze Labs 575009 User manual

Thames & Kosmos Remote Control Machines User manual

Thames & Kosmos

Thames & Kosmos Remote Control Machines User manual

Thames & Kosmos 659240 User manual

Thames & Kosmos

Thames & Kosmos 659240 User manual

Thames & Kosmos 620380 User manual

Thames & Kosmos

Thames & Kosmos 620380 User manual

Thames & Kosmos Gyroscopes & Flywheels User manual

Thames & Kosmos

Thames & Kosmos Gyroscopes & Flywheels User manual

Thames & Kosmos 635213 User manual

Thames & Kosmos

Thames & Kosmos 635213 User manual

Thames & Kosmos Candy Claw Machine User manual

Thames & Kosmos

Thames & Kosmos Candy Claw Machine User manual

Thames & Kosmos Gumball Machine Maker User manual

Thames & Kosmos

Thames & Kosmos Gumball Machine Maker User manual

Popular Toy manuals by other brands

Compass WARP 360 instruction manual

Compass

Compass WARP 360 instruction manual

minicopter Heli-Baby NT manual

minicopter

minicopter Heli-Baby NT manual

BLOTZ B10-MW-108 instructions

BLOTZ

BLOTZ B10-MW-108 instructions

Eduard 17 523 manual

Eduard

Eduard 17 523 manual

LEGO 41062 Assembly guide

LEGO

LEGO 41062 Assembly guide

thomann Otamatone instruction manual

thomann

thomann Otamatone instruction manual

Fisher-Price W2047 quick start guide

Fisher-Price

Fisher-Price W2047 quick start guide

Faller FIRE STATION instructions

Faller

Faller FIRE STATION instructions

REVELL S-100 & Flak 38 Assembly manual

REVELL

REVELL S-100 & Flak 38 Assembly manual

marklin 20611 instruction manual

marklin

marklin 20611 instruction manual

Trix H0 44 Series instructions

Trix

Trix H0 44 Series instructions

Our Generation In the Kitchen Battery Replacement

Our Generation

Our Generation In the Kitchen Battery Replacement

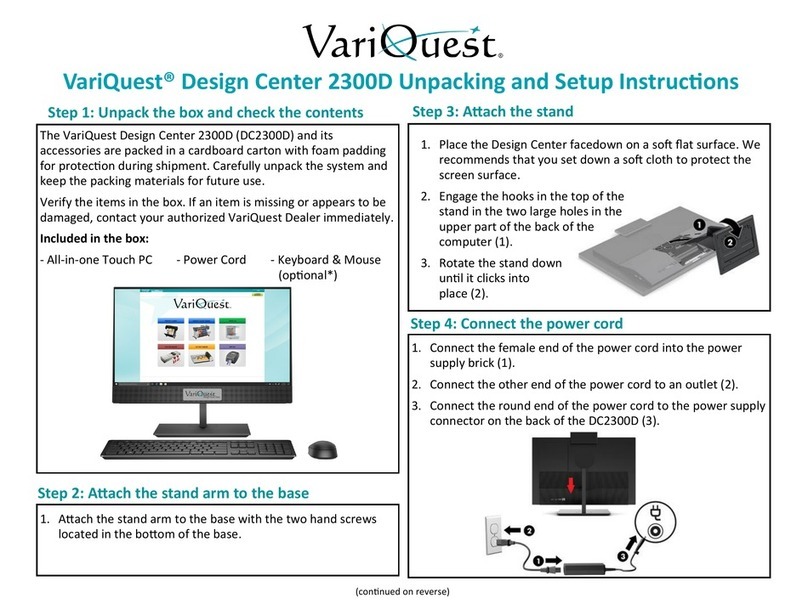
Variquest Design Center 2300D Unpacking and setup instructions

Variquest

Variquest Design Center 2300D Unpacking and setup instructions

Fisher-Price Barbie POWER WHEELS GMF65 owner's manual

Fisher-Price

Fisher-Price Barbie POWER WHEELS GMF65 owner's manual

LaserPegs PB1430B Power Block Model instructions

LaserPegs

LaserPegs PB1430B Power Block Model instructions

Eduard 22 059 manual

Eduard

Eduard 22 059 manual

marklin 37416 user manual

marklin

marklin 37416 user manual

Haba The Little or chard instructions

Haba

Haba The Little or chard instructions

manuals.online logo
manuals.online logoBrands
  • About & Mission
  • Contact us
  • Privacy Policy
  • Terms and Conditions

Copyright 2025 Manuals.Online. All Rights Reserved.