The COM COM-DB90 User manual

Owner’s Manual
COM-DB90Mobile Radio &
S4S Stereo Intercom
Premium UTV Communication System

i
Congratulations on your purchase and welcome to the COMplete Radio InterCOM
COMmunication family. We thank you for your purchase with care the unit should give you good
service.
Please read these instructions carefully, by doing so you will get full use of the products
This Manual is broken up into parts:
1. Radio manual
2. Intercom manual
Email if you have any questions or concerns that this manual does not address.
Copyright © 2020 by TheCOM; https://utvcom.com
www.utvcom.com
info@utvcom.com

ii
Contents
COM-DB90 Dual Band Mobile Radio ............................................................................................ 1
Features................................................................................................................................... 1
Info & Warnings......................................................................................................................... 1
FCC Notice ................................................................................................................................. 2
RF Energy Exposure................................................................................................................... 2
Getting to Know The COM-DB90 ............................................................................................. 4
Front of the Radio................................................................................................................... 4
Back of the Radio.................................................................................................................... 6
Hand Mic ................................................................................................................................ 7
Screen Icons............................................................................................................................ 8
Antenna....................................................................................................................................... 9
Mounting Tips......................................................................................................................... 9
Antenna Ground Wire............................................................................................................. 9
Powering TheCOM................................................................................................................... 10
Turing off the Mobile Radio................................................................................................. 10
Operations................................................................................................................................. 10
Adjusting the volume............................................................................................................ 10
Receiving & Transmitting a Call.......................................................................................... 10
Selecting a Channel............................................................................................................... 10
Toggling between Bands A/B/C/D....................................................................................... 11
Function Menu.......................................................................................................................... 12
Other Settings and Options....................................................................................................... 18
Programing............................................................................................................................ 18
Keypad Lock-out .................................................................................................................. 18
PTT ID.................................................................................................................................. 18
Scanning Modes.................................................................................................................... 18
Troubleshooting TheCOM-DB90............................................................................................. 19
Specifications............................................................................................................................ 20
Technical Specifications....................................................................................................... 20
Receiver Specifications......................................................................................................... 20
Transmit Specifications ........................................................................................................ 20
Frequency List .......................................................................................................................... 21
S4S Stereo Intercom..................................................................................................................... 24

iii
Introduction............................................................................................................................... 24
Main Features............................................................................................................................ 25
Installing TheCOM................................................................................................................... 26
General Install Guidelines..................................................................................................... 26
Headsets.................................................................................................................................... 27
Installing Helmet Headsets................................................................................................... 27
Mic Placement ...................................................................................................................... 27
Fitting the headset parts to your helmet................................................................................ 27
Front Keypad Controls.............................................................................................................. 29
Power On / Off...................................................................................................................... 29
Volume Controls................................................................................................................... 29
VOX...................................................................................................................................... 29
Rear Intercom Ports .................................................................................................................. 30
Power Wires.......................................................................................................................... 30
PTT ....................................................................................................................................... 30
Radio..................................................................................................................................... 30
Audio Out.............................................................................................................................. 30
Phone / Audio In................................................................................................................... 31
HS-1...................................................................................................................................... 31
HS-2...................................................................................................................................... 31
HS-3...................................................................................................................................... 31
HS-4...................................................................................................................................... 31
Bluetooth................................................................................................................................... 32
Troubleshooting the S4S........................................................................................................... 32
Contact Info .............................................................................................................................. 33

1
COM-DB90 Dual Band Mobile Radio
Features
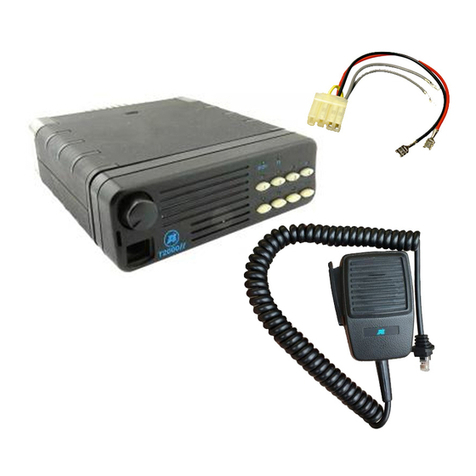
TheCOM-DB90 mobile 2-way radio is unique for its compact body, powerful output and
frequency range design. It's also designed with new and personalized operation menu to give you
easy-to-use and exceptional operation experience. We believe its mini size and cost-effective
price will allow the off-road community the ability to install the radio in more locations without
having to modify their vehicles.
Before operation and to obtain the best performance, we recommend that you read this user
manual carefully to become familiar with the features.
➢Frequency range VHF 136-174 MHz / UHF 400 –480 MHz
➢Color Display
➢Simple plug and play connection to the S4S intercom
Info & Warnings
IMPORTANT! Changes or modifications to this unit not expressly approved by TheCOM could
void your right to operate this unit. Your radio is set up to transmit a regulated signal on an
assigned frequency. It is against the law to alter or adjust the settings inside the mobile radio to
exceed those limitations. Any adjustment to your radio must be made by qualified technicians.
This device complies with Part 15 of the FCC Rules. Operation is subject to the following two
conditions;
1. this device does not cause any harmful interference, and
2. this radio must accept any interference that may cause undesired operations.
Use only “TheCOM” supplied or approved accessories, cables and headsets.
Turn off your radio prior to entering any area with flammable materials. Do not operate or turn
on your mobile radio at a gas station or while fueling your vehicle.
Do not mount your radio in the area over an air bag deployment area if equipped or in a location
that obstructs the drives sight.
Do not expose the radio to direct sunlight for prolonged periods of time, nor place it close to a
heat source.
Do not transmit for long intervals, as it may overheat the mobile radio.
Do not pressure wash your COM for any reason. To clean, blow off as much dust and debris then
wipe with a damp cloth while the unit is in the OFF position. Allow to dry for several hours then
operations may resume.

2
If the unit emits smoke or an odor, you should immediately cut off the power supply. Then
Protect your unit as much as possible from dusty, damp and wet conditions and never submerge
TheCOM
Use the correct power supply. TheCOM is designed to operate at about 12.0 to 13.8V; do not use
24V power supply to TheCOM or mobile radio.
If there's any electromagnetic interference, please keep the mobile radio away from the sources
such as TV set, engine generator etc.
FCC Notice
The COM-DB90 operates on UHF/VHF frequencies, which require a Federal Communications
Commission (FCC) license (learn more here https://www.fcc.gov/). You must be licensed prior
to operating. Serious penalties may result from unlicensed use or operation in violation of FCC
rules, as stipulated in the Communications Act’s Sections 501 and 502 (amended). You will be
issued a call sign by the FCC that should be used for station identification when operating your
radio. You should also cooperate by engaging in permissible transmissions only, avoiding
channel interference with other users, and being prudent with the length of your transmission
time.
To obtain a license or ask questions about the license application, contact the FCC at 1-888-
CALL FCC or go to the FCC’s website: https://www.fcc.gov/
Request form 605.
This device complies with part 15 of the FCC Rules. Operation is subject to the following two
conditions:
1. This device may not cause harmful interference, and
2. This device must accept any interference received, including interference that may cause
undesired operation
The scanning receiver in this equipment is incapable of tuning, or readily altered, by the user to
operate within the frequency bands allocated to the Domestic public Cellular
Telecommunications Service in Part 22.
WARNING: Modification of this device to receive cellular radiotelephone service signals is
prohibited under FCC rules and federal law.
RF Energy Exposure
The COM-DB90 is designed to comply with the following national and international standards
and guidelines regarding exposure of human beings to radio frequency electromagnetic energy.
➢United States Federal Communications Commission (FCC), Code of Federal

3
Regulations: 47 CFR part 2 sub-part J
➢To control your exposure and ensure compliance with the general population or
uncontrolled environment exposure limits, transmit no more than 50% of the time. The
radio generates measurable RF energy exposure only when transmitting.
➢The consumer must maintain a minimum safe separation distance of 2 ft from the antenna
when transmitting.

4
Getting to Know The COM-DB90
Please check the packaging of your radio for any signs of damage. Carefully open the box, if you
find the radio or the included accessories are damaged or lost, immediately contact your dealer or
Front of the Radio
1. V/M Mode Switch (Channel/Frequency)
2. Monitor (Moni) function
3. Call key
4. FM radio function key
5. Power, On/Off (Press) & Volume Knob (Rotate)
6. Exit Menu, Toggle A/B/C/D bands
7. Display screen
8. RJ-45 Microphone Connector
9. Channel Selector (rotate) Menu Knob (Press) Confirm Key (Press)

5
Toggle between
Memory & Channel
mode (for simple
channel driven radio
leave on memory
mode)
Current band indicator
(similar to AM and FM on
your car radio
Radio Volume &
press and hold to
power down or
power up
Channel
Selector or
press to
enter radio
menu
Toggle between
bands A, B, C & D

6
Back of the Radio
1. TRRS 3.5 mm connection for S4S intercom connection –Pinout diagram below:
2. DATA, Programming Jack TRS 3.5 mm: (Restricted to comply with FCC Part 90)
3. Cooling Fan
4. SO-239 RF Antenna Connector: Connects to PL-259 Antennas
5. 12V DC Power supply (13.8 Volts –7 Amps peak)

7
Hand Mic
1. “MENU” - Function key VFO/MR Toggle (Long Press)
2. “UP”: - Toggle up
3. “DOWN” - Toggle down
4. “EXIT” - Exit the ABCD band selection, activate alarm (Long Press)
5. “*/SCAN” - Scanning function
6. “#/LOCK” - High / Low Power Toggle, Keypad Lock (Long Press)
7. “0” - Number 0
8. “1” - Number 1
9. “2” - Number 2
10. “3” - Number 3
11. “4” - Number 4
12. “5” - Number 5
13. “6” - Number 6
14. “7” - Number 7
15. “8” - Number 8
16. “9” - Number 9

8
Screen Icons
`
Offset / simplex indicator
Not used on this model
Wide / Narrow Band
Output power H/L
DTF signaling
Frequency Reversal
CTCSS Tone
Keypad Lock
Radio can Transmit & Receive
Battery indictor
Shows Receive
signal intensity.
Shows transmit
output power.
Shows microphone signal
transmit intensity.
Shows the numerical
receive intensity

9
Antenna
Do not transmit without an antenna attached to the mobile radio. This can cause stress and harm
to the internal transmitter and damage the mobile radio.
Choose an antenna suitable for transmitting on user frequencies with an impedance of 50 ohm. If
an antenna is not properly tuned for the frequency you transmit on this could cause reflective
damage to the radio. Target an SWR of 1.5:1 and never exceed a SWR of 2.5.
Mounting Tips
It is best to mount the antenna to the vehicle’s roof, roll bar or similar location. Specific
installation requirements vary between vehicles. Use the following guidelines to install the
antenna.
1. Mount the antenna as high on the vehicle as possible. The higher the better.
2. Metal surfaces covered by fiberglass or vinyl may affect radio range. Avoid these
locations.
3. If possible, mount the antenna in the center of whatever surface you choose.
4. Coax cable and connectors should be rated for 50 ohm.
5. Choose the proper length coax cable for your application. We offer many lengths that
typically fit most UTV’s.
a. If you have extra length, try to re-rout the coax to use up the extra length.
b. Never coil the coax in a coil or coil the extra around the antenna.
6. Route the antenna cable through an accessible entry point, such as a firewall grommet or
kick panel.
7. When routing the coax cable, avoid noise sources that create RF energy, such as the
ignition system, gauges, power wires, rotation shafts, etc.
8. Prevent cable damage, such as pinching the coax, sharp edges or right angles. Use
sweeping curves .and avoid pinch points between seams. Make use of existing gaskets,
grommets and weather stripping to protect the cable along its route or drill relief holes.
9. Additional grounding of the coax cable may be necessary. To achieve this simply connect
a ground wire to a ground location on the vehicle (such as the bodies bare metal) then to
the underside of the base of the NMO connector.
Antenna Ground Wire
Place the antenna ground wire against the bottom side of the NMO connector. Make sure each
terminal is in intimate connection with the NMO connector and bare steel on the chassis of the
vehicle.
Blue terminal to the
nearest chassis ground
Red terminal to the
bottom of the NMO

10
Powering TheCOM
It is preferred that TheCOM be connected (the positive lead RED wire) directly to the positive
post of the vehicle’s battery. If this is not available a fuse block may be used. If external noises
are heard through the radio such as “alternator wine” (could be from pumps, switches, lights,
clutch fans, other accessories) it is recommended that the power be re-rout directly to the battery
posts.
Turning on the Mobile Radio
Press and hold the volume knob down until the display lights up.
Turing off the Mobile Radio
Press and hold the volume knob down until the display powers down.
Operations
Adjusting the volume
The volume control on the mobile radio affects the overall volume to TheCOM users. It is
typically set a half a turn from the bottom. Turning the volume clockwise will increase the radio
volume and counterclockwise will lower the volume. It is best to adjust the volume while
someone else is broadcasting. For best results we suggest setting the radio to the local weather
channel (see below common channels for weather frequency) and slowly turn the radio volume
clockwise until desired volume is clear. Sometimes backing the volume on the radio slightly will
give a clearer communication from outside signals. After the radio is set, fine tune the volume
with the individual volume controls found on the intercom.
Receiving & Transmitting a Call
Both the receiving radio and the transmitting radio need to be on the same frequency (channel)
that includes privacy codes (CTCSS or DCS codes).
To make a call, press and hold the PTT button wait a moment before speaking and speak into the
microphone. If using a headset, make sure that mic is right against your lips. If using a hand mic,
hold the hand mic about 1-2 inches from your mouth.
To receive a call release the PTT and listen for the transmission to come through. Adjusting your
volume as necessary.
Selecting a Channel
Turn the selector knob to select your desired channel. Alternatively, the up and down arrows on
the mic will change the channel as long as the keypad is not locked. Additional frequencies are
programed into the radio like the weather channels, but they are receive only.

11
Toggling between Bands A/B/C/D
Pressing the “Exit/ABCD” will toggle between the four different band on the radio.
Current Main
Band
indicator.
Band
A
B
C
D
This Icon
shows that this
band is being
monitored

12
Function Menu
Note that due to part 90 requirements many of the menu functions have been restricted or
deactivated.
To enter the menu press the knob to the right of the screen. Menus may be quickly jumped to by
typing the menu number in on the hand mic.
Menu
#
Menu
Name
Description
Secondary
Menu
Notes
0
TMR
Transmit Multi Receive -
This mode selects what
displays are monitored in
the background besides
the primary selected
channel
Off
Disable TMR
M+A
Main band + A band standby
M+B
Main band + B band standby
M+C
Main band + C band standby
M+D
Main band + D band standby
M+A+B
Main band +A & B band standby
M+A+C
Main band + A & C band standby
M+A+D
Main band + A & D band standby
M+B+C
Main band + B & C band standby
M+B+D
Main band + B & D band standby
M+C+D
Main band + C & D band standby
M+A+B+C
Main band + A, B & C band standby
M+A+C+D
Main band + A, C & D band standby
M+B+C+D
Main band + B, C & D band standby
A+B+C+D
All bands are monitored on standby
1
STEP
Frequency Step Size Setup
2.50k
In frequency step in VFO
(frequency) mode, press (up) and
(down) to select step figure.
5.00k
6.25k
10.00k
12.50k
25.00k
2
SQL
Squelch Level
00 > 09
10 Squelch levels
00 = minimum / normally open
3
TXP
Transmit Power
High
Full Power ~20W
Low
Reduced power ~7W
4
SCR
Scrambler
On
Scrambler Function Enabled
Off
Scrambler Function Disabled
5
TOT
TX Time Out Timer
15 > 600 sec
15 Second Steps
6
APO
Auto Power Off
30, 60 > 300
Minutes
Time set that the radio will power
down after the last signal is received
Off
Turns off APO option
7
WN
Bandwidth
Wide Band
25.0 kHz

13
Menu
#
Menu
Name
Description
Secondary
Menu
Notes
Narrow
Band
12.5 kHz
8
ABR
Unused Setting
--
--
9
Beep
Keypad audible tone
On/Off
Turn On/ Off keypad tone
10
R-DCS
Receive - Analog Tone
Squelch
D023N >
D754I
Squelch opens when proper DCS
code is detected
Off
No DCS code required
11
R-CTCS
Receive - Analog Tone
Squelch
67.0 >
254.1 Hz
Squelch opens when proper CTCSS
tone is detected
Off
No CTCSS tone required
12
T-DCS
Transmit - DCS Code
D023N >
D754I
Transmits specified code
Off
No DCS codes transmitted
13
T-CTCS
Transmit - CTCSS Code
67.0 >
254.1 Hz
Transmits specified code
Off
No CTCSS codes transmitted
14
DTMFST
Determines when DTMF
codes are heard through
speaker
Off
No DTMF tone heard
DS-ST
Only manually keyed DTMF codes
are heard
ANI-ST
Only automatically keyed DTMF
codes are heard
DT-ANI
All DTMF codes are heard
15
BCL
Busy Channel Lockout
On
Prevents transmit if active signal on
the channel
Off
No lockout
16
SC-ADD
Add Scan Channel
On
Add channel to scan list
Off
Remove channel from scan list
17
SC-REV
Scan Resume Method
TO
(Time Operations) Scan stops when
a signal is detected the scan
resumes after approximately 5
seconds (even if the channel is still
active).
CO
(Carrier Operation) Scan stops when
a signal is detected. Scan resumes
when signal disappears
SE
(Search Operation) Scan stops when
signal is detected. Scanning will not
resume.
18
OPTSIG
Optional Signaling
Off
No Optional signaling
DTMF
DTMF signaling selected
2 Tone
2 Tone signaling selected
5 Tone
5 Tone signaling selected

14
Menu
#
Menu
Name
Description
Secondary
Menu
Notes
19
SPMUTE
Speaker Mute Setting
QT
Squelch opens for CTCSS/DCS tones
only.
AND
Squelch opens when CTCSS/DCS
tone is recognized along with the
optional signaling.
OR
Squelch opens when either the
CTCSS/DCS tone or the optional
signaling is recognized.
20
PTT-ID
PTT-ID- When to send
Off
Do not send
BOT
Send at beginning of transmission
EOT
Send at the end of transmission
Both
send at both beginning and end
21
PTT-LT
PTT ID - transmit Delay
0 > 30
Set delay time before transmitting
PTT-ID
22
S-INFO
Auto Group Dialing
Group
Signal Code
Memory
1 > 15 (Can only be set with
software)
23
EMC-TP
Alarm Mode
ALARM
Turn on alarm sound
ANI
Send alarm code and ID Code
Both
Both of the above
Off
Alarm mode completely disabled
24
EMC-CH
Alarm Channel
000 > 199
Specified Alarm Channel
25
SIG-BP
Signal Beep
On
Pager ring at reception of matching
2Tone / 5Tone / DTMF
Off
26
CHNAME
Channel Name edit
Channel Mode, edit the current
name
27
CA-MDF
Channel A Display Mode
FREQ
In channel mode, display the
selected format in display A
CH
NAME
28
CB-BDF
Channel B Display Mode
FREQ
In channel mode, display the
selected format in display B
CH
NAME
29
CC-MDF
Channel C Display Mode
FREQ
In channel mode, display the
selected format in display C
CH
NAME
30
CD-BDF
Channel D Display Mode
FREQ
In channel mode, display the
selected format in display D
CH
NAME
31
LANGUA
Language
English
Screen prompts display language

15
Menu
#
Menu
Name
Description
Secondary
Menu
Notes
Chinese
32
AUTOLK
Auto Keypad Lock
On
Keypad Auto Lock Enabled
Off
Keypad Auto Lock Disabled
33
MAINFC
Main LCD display
foreground color (Text)
Select Color
Black, White, Red, Blue, Green,
Yellow, Indigo, Purple, Gray
34
MAINBC
Main LCD display
background color
Select Color
Black, White, Red, Blue, Green,
Yellow, Indigo, Purple, Gray
35
MENUFC
On screen menu
foreground color (text)
Select Color
Black, White, Red, Blue, Green,
Yellow, Indigo, Purple, Gray
36
MENUBC
On screen menu
background color
Select Color
Black, White, Red, Blue, Green,
Yellow, Indigo, Purple, Gray
37
STA-FC
Status (Top) bar display
foreground color (text)
Select Color
Black, White, Red, Blue, Green,
Yellow, Indigo, Purple, Gray
38
STA-BC
Status (Top) bar display
background color
Select Color
Black, White, Red, Blue, Green,
Yellow, Indigo, Purple, Gray
39
SIG-FC
Bottom bar display
foreground color (text)
Select Color
Black, White, Red, Blue, Green,
Yellow, Indigo, Purple, Gray
40
SIG-BC
Bottom bar display
background color (text)
Select Color
Black, White, Red, Blue, Green,
Yellow, Indigo, Purple, Gray
41
RX-FC
Main LCD receiving color
foreground color (text)
Select Color
Black, White, Red, Blue, Green,
Yellow, Indigo, Purple, Gray
42
TX-FC
Main LCD TX color
foreground color (text)
Select Color
Black, White, Red, Blue, Green,
Yellow, Indigo, Purple, Gray
43
TXDISP
Transmit Display
Power
Display Power level on bottom
display bar

16
Menu
#
Menu
Name
Description
Secondary
Menu
Notes
MIC-V
Display Mic Audio level on bottom
display bar
44
MEM-CH
Program Channel
000 > 199
Indicates channel number to be
stored to memory
45
DEL-CH
Delete Channel
000 > 199
Indicates channel number to be
deleted from memory
46
SFT-D
Frequency shift direction
Off
No offset (simplex)
+
Plus frequency shift
-
Minus frequency shift
47
OFFSET
Frequency shift offset
amount
00.00 >
69.99
frequency shift in MHz
48
ANI
ANI ID Code
Can only be set with software
49
ANI-L
ANI Length
3, 4, 5
Length of ANI ID code
50
REP-S
Repeater Activation Tone
1000Hz,
1450Hz,
1750Hz,
2100Hz
Audible tone for repeater activation
51
REP-M
Repeater forwarding Mode
Off
Function Off
CARRI
Forward after receiving carrier
CTDCS
Forward after receiving correct
CTDCS
TONE
Forward after receiving correct
mono audio (Menu 42)
DTMF
Forward after receiving assigned
DTMF code (ANI)
52
TMR-MR
TMR - Return time delay to
primary channel; this is the
time delay before
returning indicator to the
primary channel for TMR
(Menu # 0).
Off
Function Off - Transmits always on
Primary channel
1 > 50
seconds
This is the delay time before
returning to the primary channel
after secondary signal is clear
53
STE
Squelch tail elimination
requires both radios to
have function "ON"
Off
Function Off
On
Eliminates squelch tail at end of
transmission
54
RP-STE
Repeater Squelch Tail
Elimination Requires a
repeater using this
function
Off
Function Off
1 > 10
Delay time (sec)
55
RPT-DL
Repeater squelch tail delay
Off
Function Off
1 > 10
Delay time (sec)
56
DTMF-G
DTMF Gain / Audio level
0 > 60
0 = Lowest Audio Gain;
60 = Highest Gain
57
PONKEY
Turn on radio by
connected power supply
Off
After energizing, radio powers on
automatically
Table of contents

