The GigRig G3 S User manual

G3S Quickstart Guide V.1 / ©The GigRig Ltd 2023
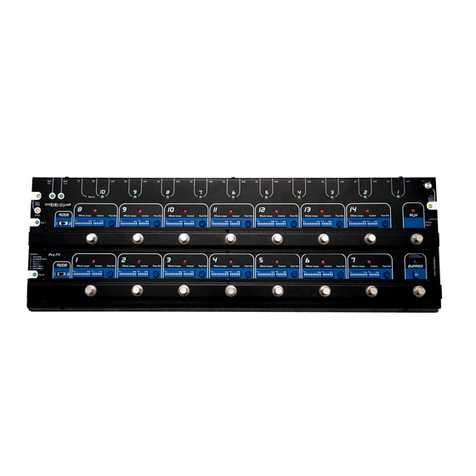
We are delighted to introduce TheGigRig G3 S pedalboard switching system.
The G3 S functions in exactly the same way as the original G3 with the addition of oled screens to display
preset names next to the footswitches, with the exception of footswitches 1&8. Preset names for these
footswitches can be seen on the main display. The new software also enables you to sync your G3 S to our web
editor for easy MIDI editing and preset naming. Head to thegigrig.com for more details.
We want you to jump right in, so here is what you need to know to get started.
BACK PANEL CONNECTIONS
TOP PANEL
CONNECTIONS
1. Connect your effects to the back panel of G3, SEND from G3 to the effect input and from the output of the
effect to the G3 loop RETURN.
2. Connect your amp(s), PLEASE NOTE if you are only using one amplifier you MUST use OUT1 as this is your
earth/ground. Connect to your second amplifier or channel/DAW using OUT2 as this is isolated and phase
reversible.
3. Connect your tuner to the TUNER/AUX output. Connect any MIDI pedals and REMOTE SWITCHES you want
to use.
4. Connect your power to G3. We recommend using TheGigRig Generator supplied with G3.
PROGRAMING
1. Choose a preset that you wish to programme by pressing a PRESET FOOTSWITCH. It will light up and the
corresponding number will also appear on the LCD screen.

G3S Quickstart Guide V.1 / ©The GigRig Ltd 2023
2. Select the EFFECTS LOOPS and CONTROL FUNCTIONS you want to turn on with that preset.
3. Repeat for the other presets you wish to programme. There is no store button, G3 remembers every time
you press a button and automatically saves after each step.
STOMPBOX MODE
This enables you to add any loop or combination of loops and CONTROL FUNCTIONS on top of any standard
PRESET. This enables you to build sounds on the fly giving you the ultimate flexibility.
1. Choose the PRESET you want to turn into a STOMPBOX mode preset, E.g. using PRESET 10.
2. Select the LOOP(s) you want to turn on. In this example, I want to add a delay that is in LOOP
9
3. Now make sure everything else is turned off including OUTPUTS and PHASE OUT 2.
4. Now press the STOMPBOX MODE button. A little yellow light will turn on next to the main preset light.
This means this preset is now set up in STOMPBOX mode.
Preset 10 is now in STOMPBOX and is used to add the delay in LOOP 9, ON TOP of any other preset.
You can have as many STOMPBOX MODE presets as you like. In the STANDARD
setting, all stompbox mode presets will clear when you press any normal preset,
but you can set this to stay on in the DEEP EDIT MENU, where you can also set
your STOMPBOX preset up in momentary.
NAVIGATING THE DEEP EDIT MENU
Press the button on the left-hand side of the LCD screen to
access the DEEP EDIT MENU.
Use footswitches 1,2,3 & 4 (labelled with ) to
navigate through the menu to edit;
MIDI, PARALLEL & WET/DRY SIGNAL PATHS, DELAY/REVERB TRAILS,
PRESET NAMES, BLUETOOTH SOFTWARE UPDATES, STOMPBOX
MODES, PRESET BANK COPY & PASTE, SCREEN BRIGHTNESS, etc.
Editing the menu options in G3 has been designed to be as intuitive as possible, but for additional guidance
please refer to the full manual.

G3S Quickstart Guide V.1 / ©The GigRig Ltd 2023
FULL MANUAL AVAILABLE TO DOWNLOAD FROM: https://www.thegigrig.com/manuals
WARRANTY
The GigRig warrants the product to be free from defects in material and workmanship for a period of 2 years from the original date of
purchase.
If the product fails within the warranty period, The GigRig will repair or, at our discretion, replace the product and cover the cost of
return shipping to the original purchaser. This warranty covers defects in manufacturing discovered while using this product as
recommended by The GigRig. This warranty does not cover loss or theft, nor does the coverage extend to damage caused by misuse,
abuse, unauthorized modification, improper storage, lightning, or natural disasters.
Damage caused by any of the above circumstances may result in a non-warranty repair fee. Legal: In the case of malfunction, the
purchaser’s sole recourse shall be repair or replacement, as described in the preceding paragraphs. The GigRig will not be held liable
to any party for damages that result from the failure of this product. Damages excluded include, but are not limited to, the following:
lost profits, lost savings, damage to other equipment, and incidental or consequential damages arising from the use, or inability to use
this product.
In no event will The GigRig be liable for more than the amount of the purchase price, not to exceed the current retail price of the
product. The GigRig disclaims any other warranties, express or implied. By using the product, the user accepts all terms herein.
Disposal: TheGigRig contains no batteries or Lead. Return the unit to TheGigRig Ltd for disposal or use standard disposal for electrical
equipment recommended in your country. Do not dispose of electrical equipment in household waste!
TheGigRig is protected by copyright, moral rights, patent, and design registration.
Patent Granted GB2405987
USA Patent Pending US10/937,997 Design Registration # 3014412
‘GigRig’is a stylized trademark. No 2343300
Any individual or company found copying the functionality, look or feel, circuits, circuit function or software functions for commercial
gain will be liable for legal action. Licenses may be granted to non-competing companies.
The GigRig and its Power supply are RoHs compliant.
Tested and compliant to EN 60950 safety standard.
The power supply is approved to all USA and European
Regulations including UL. See separate instructions supplied with the power supply
We are passionate about ensuring you have the best experience possible using our gear. If there is any way we
can help you, please get in touch at support@thegigrig.com
With G3 the possibilities are endless, and of course, we compromised on nothing to
bring you the most powerful, fully featured and tonally transparent switcher in the
world. We simply can’t wait to see what you do with it!
Scan the QR Code to download the Manual and explore the G3 in detail.
Need further assistance? Please contact us via support@thegigrig.com
Table of contents
Other The GigRig Switch manuals


