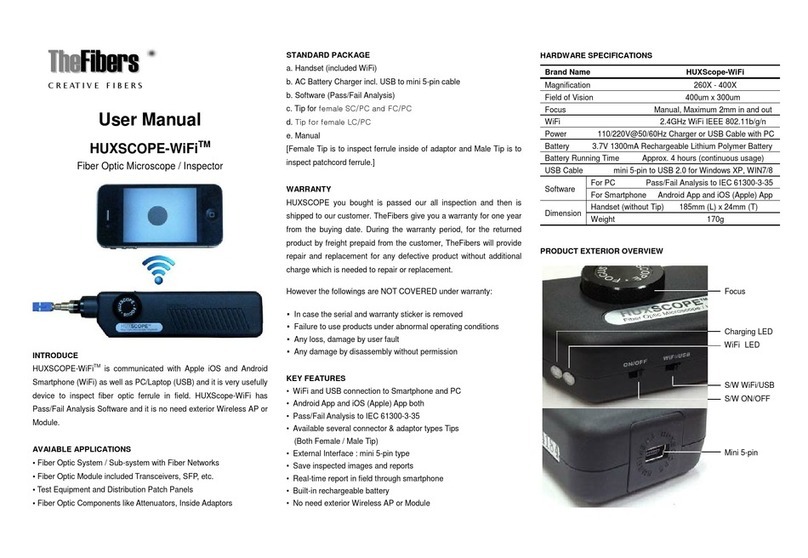
TheFibers HUXSCOPE User manual

User Manual
HUXSCOPETM
Fiber Optic Microscope / Inspector
INTRODUCE
HUXSCOPETM is very usefully device to inspect ferrule in field. You
can use it to inspect the connector installed inside hardware device.
It can provide visual to you. So you can understand and control
condition of your equipments easily. HUXSCOPETM will be the best
partner for your fiber optic business.
AVAIABLE APPLICATIONS
▪Fiber Optic System / Sub-system with Fiber Networks
▪Fiber Optic Module included Transceivers
▪Test Equipment and Distribution Patch Panels
▪Fiber Optic Components like Attenuators, Inside Adaptors
STANDARD PACKAGE
a. Handset b. 5.6” LCD Monitor c. Rechargeable Battery
d. Each 1pc Tip for female SC/PC and FC/PC and LC/PC Tip
e. AC Power Adaptor f. Manual g. Carrying Case
WARRANTY
HUXSCOPE you bought is passed our all inspection and then is
shipped to our customer. Please contact reseller or our company if
you can find some failure when you use it at first.
TheFibers give you a warranty for one year from the buying date.
During the warranty period, the returned product by freight prepaid
from the customer, TheFibers will provide repair and replacement for
any defective product without additional charge which is needed to
repair or replacement. However the following are expressly NOT
COVERED under warranty:
▪Any loss, damage by un-approved Battery and AC Adaptor
▪In case the serial and warranty sticker is removed
▪Failure to use products under abnormal operating conditions
▪Any loss, damage by user fault
▪Any damage by disassembly without permission
KEY FEATURES
One handed operation
Wide 5.6” TFT LCD monitor
Foldable Monitor and adjustable Angle
Easy focusing and charging by AC 100~220V
Save Data on PC by USB devic
Brightness & Contrast adjustable
Complied with RoHS
HARDWARE SPECIFICATIONS
Magnification 260X by 5.6” LCD, 400X by USB
or 9” CRT Monitor
Filed of Vision 400um x 300um
Focus Manual, Maximum 2mm in and
out
CCD 1/4” Sharp CCD sensor
Monitor 5.6” TFT LCD
Battery and
Power Supply
9.6V 2700mA NH-AA
Rechargeable Battery, AC
adaptor
USB Device
Video Capture Device with
Software for Windows
98/2000/XP
Dimen-
sion
Handset
(without Tip) 185mm (L) x 24mm (T)
Monitor
(when folded) 150 (W) x 125 (D) x 52 (H)mm
Video Output NTSC (default) or PAL
Manufacturer : TheFibers Inc.
A-1109 Keumkang Penterium IT Tower,
282 Hagui-ro, Anyang-City,
Korea
Tel : +82-31-381-6108 Fax : +82-31-381-6109
T
Th
he
eF
Fi
ib
be
er
rs
s
C
C
R
R
E
E
A
AT
T
I
I
V
V
E
E
F
F
I
I
B
B
E
E
R
R
S
S

PRODUCT OVERVIEW
PRODUCT SETUP
1. Pick up handset plug and insert it to connector on LCD
monitor module.
2. Please check battery or AC adaptor. You use 2 type for
power; one is battery(Ni-MH, 2700mA, 9.6V) and the other
is AC adaptor. Battery type is used when you use it in field
without power source. AC adaptor is used when you work
in factory or some place to get outlet. If you choose way to
supply power, see next step following your power type
2-1. Battery type
We provide 9.6V, 2700mA, Ni-MH battery which is
included in LCD monitor module. You can work over 4
hours by the battery which is full. You can always check
battery status by LED lamp on LCD monitor module. The
lamp provides battery status by changing color. The lamp
show GREEN when the battery is full. But the lamp
changes RED when the battery reaches low. You can see
the how to charge more detail next step.
2-2. AC adaptor type
We also provide AC adaptor. The AC adaptor has a jack.
You have to plug the jack into power connector to use AC
adaptor.
3. Please see the switch on the side of LCD module. The
switch is for controlling power on-off. And the switch has
another function. If the switch is positioned power on to
work with AC adaptor, you can also charge battery at
same time. When the switch turns power on, the LED
lamp is GREEN in case of full battery or AC adaptor.
4. If every thing is working, you adjust LCD monitor’s
contrast and bright by wheel beside LCD panel until you
get the result you want.
5. If you order USB Device (Cable), you can save the image
to your computer by capture after connected DIN and
USB to your computer.
HOW TO USE
Operation
1. To install and change tip : We basically provide 2.5mm
for SC/PC and FC/PC Tip. Some time you need 1.25mm
LC/PC Tip. At that time you simply change the Tip from 2.5mm
to 1.25mm. The Tip and Handset have screw matched each
other. So you can remove the Tip from Handset easily. Please
keep clean lens in Handset when removing and exchanging the
Tip (the Handset has optical part, lens, to enlarge end-face).
The lens is important to get clean images. So we recommend
you should be careful.
2. If you finish install or change Tip, insert the tip into adaptor
or female side of fiber optic devices. You can feel reaching
edge of the adaptor. At that time you can see something on
LCD monitor. To get clean images, you have to rotate FOCUS
button. The button rotates over 360° and Lens is in and out
following the action.
3. You can get clean image when you find optimal position of
lens.
Charging battery
1. Connect the jack of the adaptor we provide to the slot of
the LCD monitor module. And turn the power switch.
2. LED is RED at the start time. But when battery is full, you
can see LED is GREEN. To full charging, it needs 12 hours.
Caution :1. Please don’t charge the battery over 24 hours.
2. Please don’t disassembly Handset and Monitor.
3. Don’t use un-approved battery and AC Adaptor.
4. Please don’t remove Serial Sticker for Warranty.
T
Th
he
eF
Fi
ib
be
er
rs
s
C
C
R
R
E
E
A
AT
T
I
I
V
V
E
E
F
F
I
I
B
B
E
E
R
R
S
S
Other TheFibers Microscope manuals
