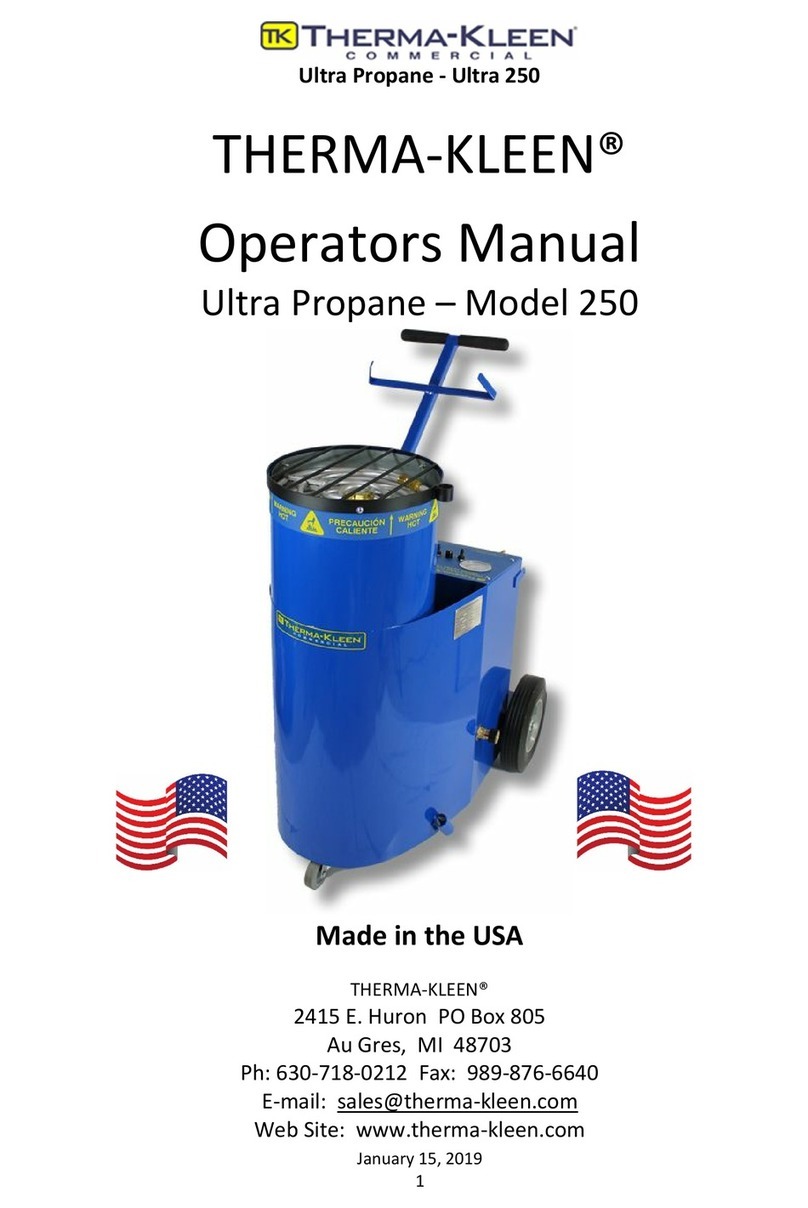
THERMA-KLEEN Therma-Steem XL1 User manual

Therma-Steem® Model XL1
January 14, 2019
1
THERMA-KLEEN®
Operators Manual
Therma-Steem® Model XL1
Made in the USA
THERMA-KLEEN
2415 E. Huron PO Box 805
Au Gres, MI 48703
Ph: 630-718-0212 Fax: 989-876-6640
E-mail: [email protected]
Web Site: www.therma-kleen.com

Therma-Steem® Model XL1
January 14, 2019
2
OWNERS MANUAL
Do Not Use This System Without Reading This Manual First
You should be familiar with the information in this manual before you operate your
equipment. The manual is structured so that it can be used for your reference.
Page Description
3 SERVICE INFORMATION
4 MACHINE SPECIFICATIONS
5 SAFETY INFORMATION
8 GROUNDING
8 OPERATING INSTRUCTIONS
10 SHUT-DOWN
10 CONTROL PANEL
11 STEAM CONTROL VALVE
11 RESERVOIR TANK
11 LOW WATER ALARM
12 BOILER
12 DRAIN
12 HOSE MAINTENANCE
13 COOLING FAN
13 GUN TRIGGER
13 MAINTENANCE
14 STAINLESS STEEL BODY
15 FILTER
15 ELECTRICAL REQUIREMENTS
16 OPERATING TEMPERATURES
16 ACCESSORIES
21 PARTS LIST
23 WARRANTY
All information, illustrations and specifications contained within this manual are based
on the information available at the time of production.
THERMA-KLEEN®, reserves the right to make changes at any time.

Therma-Steem® Model XL1
January 14, 2019
3
SERVICE INFORMATION:
Therma-Steem® Model XL1 & XL2
Please take the time to fill out the form on this page. When completed, this reference
form will provide information essential to the proper servicing and ordering of parts for
your THERMA-STEEM® Industrial XL-1 & XL-2 Model.
OWNER:
Name of Business: ________________________________________________________
Address: _________________________________________________________________
City, _________________________________ State: __________ Zip Code: __________
Telephone: _________________________ E-mail: ______________________________
Serial #: ______________________ Date Shipped: ____________________________
Our sales and parts department will be glad to answer any questions or provide
troubleshooting help over the phone. All parts will be shipped via UPS unless otherwise
specified. The warranty card must be filled out on our Web Site to activate your
warranty.
www.THERMA-KLEEN.com
Address: Therma-Kleen, Inc.
P.O. Box 805, 2415 E. Huron Rd. Au Gres, MI 48703
Telephone: 630-718-0212 Fax: 989-876-6640
E-Mail: sales@therma-kleen.com

Therma-Steem® Model XL1
January 14, 2019
4
MACHINE SPECIFICATIONS:
Water pressure: 155 psi / 10.7 bars
Maximum water temperature: 365˚F / 185° C
Size: 23”W x 38” L x 30” H (includes side
brackets, 17” without)
Weight (Empty): 260 lbs.
Electrical Requirements: 208/220V, 480V, 575V, 3 phase
Amps: 208/220 volt: 60 amps
480 volt: 23 amps
575 volt: 20 amps
Heating Element: 20 kW
Boiler Capacity: 5 gallons
Reservoir Tank: 7 gallons
Locking Wheels: 5”
Semi-pneumatic Wheels: 10”
WHAT IS VAPOR STEAM CLEANING:
Vapor Steam Cleaning is a unique way of cleaning. Understanding how vapor cleaning
works will enable you to clean more effectively. The dry vapor, in the form of gas,
penetrates into the surface pores and violently expands, forcing dirt and debris to the
surface where the particulate is either suspended in a re-condensed water molecule or
driven into an absorbent cloth. The dry vapor is super-heated and is hot enough to kill
bacteria and sanitize all surfaces. Vapor cleaning does not rely on pressure in order to
clean efficiently. Once the vapor is emitted from the tool head, physics take over and
the vapor works on its own. Therefore, only enough vapors are required to fill the pores
under the tool head and it is not necessary nor desirable to operate the equipment at
full volume. More effective cleaning results are achieved by turning the volume down
and let the vapor and heat do the cleaning. If the equipment is operated at too high of a
volume, the unit will not maintain pressure for extended periods of time, it will use too
much water and oversaturated the surface that you are cleaning.

Therma-Steem® Model XL1
January 14, 2019
5
SAFETY:
READ ALL INSTRUCTIONS BEFORE USING THE VAPOR CLEANING SYSTEM.
Under no circumstances shall Therma-Kleen or its agents be held responsible for any
injury or damage to people or property that may be caused by failure to follow the
instructions below or by improper use of the equipment.
WARNING:
Your Therma-Steam unit is designed to be an entirely safe if used
properly and incorporates the latest and most state-of-the art safety
features.
Paying Close Attention to your system and surroundings are necessary
when your Vapor Steam System is being used.
TO REDUC THE RISK OF ELECTRICAL SHOCK, FIRE OR PERSONAL INJURY, FOLLOW ALL THE
INSTRUCTIONS AND ALWAYS USE BASIC PRECAUTIONS, INCLUDING THE FOLLOWING:
1ALWAYS - Check the machine, power & steam hose for damage prior to start-
up. If damage is detected, it must be repaired prior to use.
2CAUTION - Before use check the electrical cord for damage,
ware & tare, cuts or abrasion.
a. DO NOT - use your machine with a damaged electrical cord.
3NEVER - Plug the unit into an un-grounded electrical receptacle.
4CAUTION - The Electrical Outlet must be a GFI (Ground Fault Interrupt). If you
are unsure the receptacle is grounded, contact a certified electrician.
a. CAUTION - If the Power Outlet is damaged, have a certified electrician repair
the outlet.
b. NEVER - Touch the electrical plug or unplug the unit with
wet hands or while standing in a wet environment.
c. NEVER - Allow the electrical power cord to lie in water
while cleaning.
d. NEVER –Unplug from the receptacle by pulling on the
cord, always grasp the plug itself Make sure the unit is
unplugged.

Therma-Steem® Model XL1
January 14, 2019
6
5NEVER - Touch the system with wet hands or while standing in a wet
environment.
6NEVER - Allow the machine to get wet as electrical shock may occur.
7CAUTION - Use extra caution when using the system around water (Swimming
Pools, Spas, Toilets, Etc.)
8DO NOT - allow the electrical power cord or Steam Hose to be run over,
stepped on or have something placed or dropped on it.
9DO NOT - allow the Electrical Power Cord or Steam Hose to be caught in a
closed door or pull over a sharp corner.
10 CAUTION - Turn off all controls prior to unplugging the unit.
11 ALWAYS - wear long sleeves, long pants, eye goggles, and
gloves while operating your cleaner.
12 CAUTION - Make sure all attachments are secured before
activating the gun.
a. CAUTION - Only operate the unit when it is in a Horizontal position.
13 WARNING - To prevent scalding or burning, ALWAYS keep your hands and body
away from the nozzle tip during operation and wear appropriate protective
clothing.
a. DO NOT - touch the steam nozzle while in use, or until after it cools.
b. DO NOT - grab the hot steam hose without appropriate gloves.
14 NEVER - Point or direct the wand or steam at any person,
animal or electrical outlet or anything which could be
damaged.
15 DO NOT - move or lift the machine by pulling on the electrical
cord.
16 DO NOT - move or lift the machine by pulling on the steam
hose or gun.
17 DO NOT - bend the steam hose past the 2” bend radius. This will shorten the
life of your hose.
18 DO NOT - use you Vapor Steam Cleaner if it has been dropped or damaged.
19 DO NOT - allow the Vapor Steam System to become wet.
20 DO NOT - operate without water, this will damage the cleaner’s heating
element, low water sensor and/ or pump.
21 DO NOT - fill the water reservoir under a water tap. Always use a funnel and
pour from a measured container so as not to over fill the reservoir. Consult the
machine specifications to determine the reservoir capacity.

Therma-Steem® Model XL1
January 14, 2019
7
22 NEVER UN-SCREW - the boiler fill cap or drain plug while water is
still hot or there is pressure in the unit as this may result in a
dangerous release of steam or water which can cause a scalding
hazard.
a. By activating the trigger on the gun will help dissipate pressure in the boiler
23 CAUTION - Hand tighten the boiler fill cap.
a. DO NOT - over tighten as this will lead to premature failure of the sealing
gasket.
24 DO NOT - run chemicals through system, this could be harmful to people and
the cleaner.
25 CAUTION - Use caution when working in confined spaces, as the steam could
cause debris to kick back towards you and the steam may seem greater.
26 DO NOT - use this unit to clean items that may be harmed by steam or linger
too long on surfaces that may cause damage.
27 DO NOT - leave this unit unsupervised when in use or while cooling.
28 DO NOT - allow children to use or handle machinery.
29 CAUTION - Replace worn or damaged power cords, gaskets and “O”-rings.
30 DO NOT - try to repair your machine, contact an Authorized Service Company
or the factory. Retain your box for shipping.
31 DO NOT - allow objects to get into the output nozzle. Do not try to operate the
Vapor Cleaning System with any of the openings blocked. Keep openings free
of dust, lint, hair, or anything which may reduce the flow of Vapor
32 CAUTION - Always keep all parts of the body away from the output nozzle,
moving parts.
33 CAUTION - Extra care must be taken when using the unit on stairways.
34 CAUTION - Never use the Vapor Cleaner to clean animals.
35 CAUTION - If the “Air Vent Cap” becomes damaged or is lost, DO NOT replace
with any other cap as it is not a pressure cap. Please reference the service part
section of this manual and contact Therma-Kleen® for a replacement.
36 ALWAYS - Turn off unit when not in use –and allow to cool before storing.
37 ALWAYS - Unplug the Vapor System Electrical Cord when the system is not in
use.
38 ALWAYS - Completely empty all water from the unit when not being used.
39 NEVER - Transport the unit with any water remaining in the
machine.
40 NEVER - Leave the unit outside or allow it to be exposed to
Freezing Temperatures.

Therma-Steem® Model XL1
January 14, 2019
8
a. Freezing will severely damage the unit, internal components and hose.
WARNING:
Your Therma-Kleen Vapor Steam Cleaner MUST BE PLUGGED INTO A GROUNDED
OUTLET, or electrical shock can occur. Check with a certified
electrician if there is any doubt that the outlet is grounded. Do
not modify the Power Cord/Plug provided with the Therma-Kleen
Vapor System. If it will not fit the outlet, have a properly
grounded outlet installed by a certified electrician.
NOTE:
The 25 ft. length of the input power cord should not normally be increased. If
additional length is required, consult the national & local electrical codes and
ordinances as well as seeking the advice of a qualified electrical engineer before
proceeding.
WHY THIS UNIT MUST BE GROUNDED:
If the unit should malfunction or break down, grounding provides a path of least
resistance for the electrical current to pass, reducing the risk of electrical shock.
All Therma-Kleen units are equipped with a power cord with an equipment
grounding conductor. (Plugs are not normally supplied for higher voltage
machines). An appropriate plug must be inserted into an appropriate outlet
which is properly grounded in accordance with national & local electrical codes
and ordinances.
Therma-Kleen Model XL1 are designed for use with a normal 208/240, 480,
575 volt 3-phase grounded circuit.
OPERATING INSTRUCTIONS:
Note: See machine control panel for power requirements for your particular model prior
to operating this machine. Always wear gloves, goggles, and long sleeves and pants.
1. Before plugging in the electrical cord, Check to insure ALL switches are in the
“OFF” position.
NOTE:when the machine is plugged into an electrical outlet, there is always
electrical power going to the machine.

Therma-Steem® Model XL1
January 14, 2019
9
2. Remove the air vent cap from the reservoir (on top of machine). Using the funnel
provided. Fill the reservoir with clean water, from a measured container, taking
care not to spill or overfill the reservoir tank (approx. 7 gal. when empty). Distilled
water is recommended.
3. Plug the Vapor Steam Cleaner into an appropriate grounded outlet.
4. Turn the MAIN Power switch to the “ON” position.
5. Insert the 4 prong (208/220, 480, 575 volt), 3 phase power cord plug into an
appropriate electrical socket
6. Insert the 4 prong, 3 phase power cord plug end into an appropriate electrical
socket. Plug end may have to be supplied by the customer to match the existing
socket in the building. Make sure the voltage is still correct.
7. Then turn the MAIN POWER switch to the “ON”position. The green light will then
activate.
8. If the boiler requires water, the pump will activate, indicated by the
blue light and a “vibrating-type” sound. The boiler will fill with approx.
4 gallons of water. It will take approximately 30 minutes to fill the
boiler when the boiler is empty.
9. After the pump sound ends and the blue light goes out, indicating the pump has
stopped, it is now safe for you to activate the HEATER switch. IMPORTANT: NEVER
turn “ON” the HEATER switch until the pump has stopped, indicating the boiler is
full.
10. Temperature reading is indicated by temperature gauge on panel. Temperature is
set by factory. DO NOT tamper with.
11. You may now top off the reservoir (at opening) with water, if desired, replacing
the reservoir vent cap.
12. When the boiler is at maximum temperature (about 365˚ F), the amber HEATER
light will cycle ON and OFF, indicating highest temperature. It will take
approximately 15 minutes to reach maximum temperature.
13. Place attachments on gun, ensuring that the connections are hand tightened.
14. Then, open the flow of steam with the steam control knob situated on the side of
the machine.
15. When the ADD WATER white light illuminates, the reservoir is empty. You may
elect to remove the reservoir vent cap and refill with water and resume cleaning.
16. When the blinking red light is activated, this indicates low water in the boiler, the
alarm will sound and the heater is de-activated. To re-activate the heater, fill the
reservoir. The pump will then fill the boiler from the reservoir. When the boiler
has cooled sufficiently (approx. 340˚F), the reset button (located under the red

Therma-Steem® Model XL1
January 14, 2019
10
indicator light) can then be pushed, which will then re-activate the heater. An
empty boiler takes approx. 30 minutes to fill.
SHUT DOWN:
1. Turn HEATER and MAIN power switches to “OFF”positions
2. Unplug machine.
3. Release steam from boiler by depressing trigger on gun.
4. Close the steam control knob on the side of the machine.
5. Unscrew the steam hose before storing on brackets.
6. Drain any water which may be in the unit.
7. Store in a warm dry location.
8. NEVER store the unit in a freezing environment. Frozen water will
destroy the unit.
9. NEVER ship or transport the unit unless it is completely empty of all
water.
CONTROL PANEL;
A On/Off switch (left) for Main Power with GREEN indicator light (right).
B On/Off switch (left) for heater with AMBER indicator light (right).
C Add water WHITE indicator light.
D BLUE indicator light comes on when the boiler is being filled.
E Low water (RED blinking) indicator light.
F Reset button for low water alarm.
G Fuse holder with ABC 3 amp/ 110-volt fuse
H Temperature Control-DIN.
I Water Reservoir vent cap (on top of machine, not shown).
J Operating Instructions (on the top of machine, not shown).

Therma-Steem® Model XL1
January 14, 2019
11
STEAM CONTROL KNOB:
This knob is located on the side of the machine
and controls the volume of steam. Turn
counter-clockwise to increase volume, clock-
wise decreases volume. For maximum pressure
and temperature, leave the knob turned to the
highest pressure setting. Always close when you
are finished cleaning and/or when you want to
remove the hose.
RESERVOIR TANK:
The reservoir tank with your unit holds approx. seven (7) gallons of water. The reservoir
is designed to contain the water supply, which is fed to the boiler and additional water as
the boiler calls for it. When you engage the MAIN power
switch, when the boiler is empty, the boiler will require
water and the pump will then turn “ON”. DO NOT turn
on the heater to the boiler before the pump stops
pumping, indicating that the boiler is full. The blue light
indicates that the boiler is calling for more water and
water is pumping to the boiler. The reservoir has a
reservoir vent cap, which covers the fill opening; this can
be removed to add more water at any time. This cap is
an air vent fitting. DO NOT substitute or replace with a garden hose fitting. Do not run
the pump dry. DO NOT fill the reservoir with a garden hose. Use distilled water to
protect the heating element.
LOW WATER ALARM:
When the reservoir is out of water and the boiler is almost empty, a low water alarm will
sound, and the red light will flash to let you know that the heater has shut off and you
are out of water. If you elect to refill, you may do so, but the heater will not reactivate
until the temperature reads approx. 340˚F, at which time you may press the reset button
on the control panel to reactive the heater and resume prior working temperatures of
365˚F. This sensor protects your heating element.

Therma-Steem® Model XL1
January 14, 2019
12
BOILER:
DISTILLED WATER:
We only recommend the use of distilled water. This would eliminate the
possibility of creating hard-water stains while you are cleaning and prevent
excessive build-up of mineral deposits in the boiler. If you are using tap water,
remember that the life of the heating element may be shortened due to
mineral/scale build-up. The heating element and/or the boiler will not be covered
under warranty if this situation happens.
CHEMICALS:
VERY IMPORTANT: NEVER INTRODUCE CHEMICALS INTO THE SYSTEM.
It may void your warranty and may result in malfunction and/or damage to your
system.
DRAIN:
Your machine has two drains. One is for the reservoir and the other one is for the
boiler. The boiler drain plug is located underneath and toward the back (by the
handle end) of the machine. The reservoir drain plug is the other. A flathead
screwdriver may be used to remove plugs. This will release the water. Use
caution since the water in the boiler may remain hot for a significant period of
time. Replace plugs carefully.
NOTE: The machine must never be exposed to freezing temperatures without
water being completely removed from the system. If any water remains in the
system damage will occur.
HOSE MAINTENANCE:
This unit is supplied with a high temperature, all stainless-steel hose. It is very important
to protect the integrity of this hose by not exceeding the bend radius of 2”. If a hose is
subjected to excessive wear and tear, it will not be covered under warranty. Please
inspect your hose and cover on a regular basis for any wear. Always remove the hose
from the machine before winding the hose on the hose brackets to eliminate excess
bending. DO NOT USE THIS HOSE IF IT IS DAMAGED. DO NOT PULL OR MOVE THE
MACHINE BY PILLING/TUGGING ON THE HOSE. DO NOT OVERTIGHTEN SWIVEL
CONNECTOR WHEN ATTACHING THE HOSE, THIS WILL SHORTEN THE LIFE OF THE “O”
RING IN THE SWIVEL.

Therma-Steem® Model XL1
January 14, 2019
13
COOLING FANS:
The THERMA-STEEM® XL1/XL2 has 3 cooling fans built into the
housing to reduce internal temperatures. DO NOT use this
machine if you notice that the one or more of fans are not
operating. DO NOT spray steam or water into the fans.
Fans are located on the sides of the machine.
TRIGGER GUN:
Your machine comes with a trigger gun on the steam hose. When you change the
attachments, it is very important that you lock the trigger gun in the locked closed
position so you cannot accidentally squeeze the trigger and release steam. To lock
simply swing the red lever down toward the handle.
Locked Unlocked
MAINTENANCE:
BOILER:
Use distilled water to prevent accumulation of mineral deposits. WARNING –Exposing
the unit to freezing temperatures will damage the boiler as well as any other part of the
machine which has water in it.
Removing hard water scale is often the most common and overlooked of vapor steam
cleaner maintenance, because if involves the part of the unit no seen. As water is heated
and converted to steam any minerals in the water can be left behind in the form of
mineral deposits/scale in the boiler tank. This will at some point impede the flow of
water and steam through the system. Decaling the boiler is not as difficult as it may
seem.

Therma-Steem® Model XL1
January 14, 2019
14
DESCALING: There are two benign methods of removing scale.
Baking Soda:
i. Empty the tank
ii. Mix 1 ½ ounces of baking soda with one quart of distilled water.
iii. Fill the empty tank with this mix
iv. Tighten the cap and allow the unit to heat up and stay warm for 1 to 2
hours.
v. Run the unit for about one minute, turn off and unplug the power cord
and allow the unit to cool, usually about for 3 to 4 hours.
vi. Remove the drain plug and empty the tank.
vii. Flush the tank as many times as necessary to remove all debris in the
tank.
viii. Reinstall the drain plug.
Vinegar:
i. Remove the drain plug on the bottom of the unit.
ii. Mix together a solution of ½ distilled vinegar & ½ distilled water.
iii. Using the funnel, fill the water tank with this solution.
iv. Turn on the unit, allow it to heat up and steam out about ½ of the
mixture.
v. Turn off the unit and let it rest for 30 minutes.
vi. Repeat this process until the steam flow returns to normal (could be 2
to 3 times). NOTE: There is an odor associated with this process.
After each use the water tank should be emptied. We realize that it’s tempting to just
leave the water in the tank for the next cleaning go-around but taking the time to empty
the tank before storing will lessen scale build up from mineral deposits. Not to mention
avoiding the musty odor that can be produced from steaming with stagnant water.
STAINLESS STEEL BODY:
The housing and handle on your THERMA-STEEM® XL1 are made of stainless steel. We
recommend that you preserve the finish by keeping the machine dry and polished.
Use a good stainless-steel cleaner, being careful not to remove any instructions. DO NOT
wash down or spray water on controls or fans.

Therma-Steem® Model XL1
January 14, 2019
15
FILTER CONNECTED TO THE PUMP:
The filter connected to the pump (see below) needs to be
checked on a regular basis. Even if distilled or filtered
water is being used in this machine, the filter may still get
clogged with mineral sediment. To check the filter, look
for discoloration and/or detach from the pump line and
see if you are able to blow air through it. If discolored or
little or no air goes through, the filter should be replaced.
When reinstalling a filter make sure it is installed the same
way and direction as it was originally installed.
ELECTRICAL REQUIREMENTS:
Check your serial plate on the back of your machine to determine the voltage. Only plug
your machine into the correct voltage. 220/480/575-3 phase.
480 volt models:
This unit draws 23 amps. Replace with 25 amp fast acting fuse. See inside panel for
style.
575 volt models:
This unit draws 20 amps. Replace with 25 amp fast acting fuses. See inside panel for
style.
If you need to replace the fuse on the control panel:
1.) Turn all the switches to the “OFF” position to cut the power to the machine.
2.) Unplug your machine from the power outlet.
3.) Push down and twist on the fuse cap to release the cap and fuse.
4.) Pull the fuse from the cap and replace with an ABC fast acting 3-amp fuse.
5.) Place the fuse and cap back in the fuse holder and push down while twisting. This
will lock the cap into place. Make sure it is locked.
If you need to replace a fuse on the inside:
DO NOT act as a service technician.
Contact an electrician to inspect and handle repairs for your machine.
If needed, call our Factory for technical service.

Therma-Steem® Model XL1
January 14, 2019
16
OPERATING TEMPERATURES:
The maximum temperature in the boiler is 365˚F.
This is controlled by a DIN digital controller, which
is located on the control panel of the machine.
The temperature control is set at the factory; DO
NOT tamper with. Your warranty will be voided.
At this temperature, your unit will achieve its
highest pressure of 155 PSI. The temperature on
this model will be controlled with this component
to maintain a constant temperature and pressure
as it is being used.
STANDARD ACCESSORIES INCLUDED:
(1) - 25 ft. Stainless Steel Hose with Trigger Gun 4031
(1) - Curved Nozzle Attachment 5013
(1) - Triangle Brush 5016
(1) - Blast Nozzle Attachment 5014
(2) - Microfiber Cloth 3534
(1) - 3 ft. Extension 5009
(1) - 20” Extension 5008
(3 Each) -1” Nylon, Brass & Stainless-Steel Brushes 4010/4011/4012
(1) - 2 ½” Nylon Brush 4009
(1) - 2 ½“ Brass Brush 4008
(1) - 2 ½“ Stainless-Steel Brush 4102
(1) - Funnel 3499
(1) - Pair of Gloves 4052
(1) - Goggles 4053
(2) –Towels 3199
ACCESSORIE DESCRIPTION:
All attachable accessories for the Model XL1 use threaded ends due to the higher
pressures.
Each of the accessories and attachments are recommended of the following specific
cleaning tasks:

Therma-Steem® Model XL1
January 14, 2019
17
Triangle Brush:
The Triangle Brush may be used for diverse applications
on many surfaces. It can be used on almost any dry
surface type including (but on limited to), Fabric, All
Metals, Ceramic, Stone, Porcelain, Vinyl, Leather and
Plastic.
Generally, use of the triangle brush is dictated by the size of the object or surface being
cleaned, rather than a specific surface type. The Triangle Brush is used when the surface
is too large to be cleaned with the Detail Tool or too small to be cleaned by the Wide
Brush. The Triangle Brush can also be used on large areas that are too dirty for the Wide
Brush to work effectively.
Use of a Cloth: The Triangle Brush can be used with or without a cloth. If a cloth is to be
used, there are clips on the brush to attach the cloth. When
used without a cloth on a hard surface, the surface will need to
be wiped with a clean, dry cloth immediately after passing over
the surface with the Triangle Brush.
Rough Textured surfaces: It is more desirable to clean without a
cloth or mitten over the brush.
Fabrics: A cloth is or is not necessary when cleaning fabrics. Placing a cloth over the
brush is not necessary when the desired goal is to sanitize the fabric more than to clean
it. To remove certain carpet stains, place a terry cloth or microfiber cloth on the stain
and gently apply the brush to the stain. The stain will incrementally be driven into the
cloth. Gradually move the cloth to absorb the stain into the clean areas of the cloth,
until the stain is gone.
Most of the time, better results will be achieved by placing a terry or microfiber cloth
over the Triangle Brush. This is done by placing the cloth on a smooth surface and neatly
folding the cloth over the brush. Push down on the clips (located on top of the brush)
and tuck the cloth underneath. Release the clips and the cloth will be securely fastened
to the brush. When covered with an absorbent cloth, cleaning becomes a one-step
process. Simply wipe the surface slowly and all dirt and debris will be driven into the
cloth, hard surfaces will usually dry in less than a minute.

Therma-Steem® Model XL1
January 14, 2019
18
WIDE BRUSH:
The 12” Wide Brush is used to clean larger areas. The Wide
Brush is faster that a mop and certainly does a more
effective job. The Wide Brush is generally used more for
daily or weekly cleaning & sanitization rather than
restoration.
MATERIALS –Fabrics, Metals, Ceramic, Stone, Porcelain,
Vinyl, Leather, Plastic, Wooden Floors, Waxed Floors –Carpet (200 degrees or less for
Nylon carpets), Upholstered Chairs, Draperies, Etc. or any other surface that extreme
heat does not harm the surface which you intend to clean.
USE –the size of the area more than the type of surface dictates the use of the Wide
Brush.
CLOTH –Use of a Cloth: The Triangle Brush can be used with or without a cloth. If a
cloth is to be used, there are clips on the brush to attach the
cloth. When used without a cloth over it, on a hard surface,
the surface will need to be wiped with a clean, dry cloth or
mop immediately after passing over the surface. When
cleaning a rough textured surface, it is more desirable to clean without a cloth over the
brush. Fabric surface –same as Triangle Brush.
VAPOR VOLUME –adjust the volume to about 3/8. Occasionally more volume will be
required, however volume should always be less than ½. If the volume is turned too high
the surface will become oversaturated, requiring more time to dry, also it will become
difficult for the unit to maintain pressure for extended periods of time
SQUEEFGEE:
The Squeegee can be used on Glass, Windows, Countertops and other
smooth surfaces. As with the other tools, the Squeegee will both
clean & sanitize.
Glass Cleaning –Adjust the volume to ¼ or less. Start at the top of the
window in one corner and pull down to the bottom of the glass & repeat until the entire
surface has been cleaned. Turn off & squeegee dry & wipe the bottom of the pane or sill
with a clean dry cloth. Excessive vapor volume will result in too much water on the glass,
simply turn down the vapor volume.
Smooth Surfaces –Adjust the volume to ¼ or less. Start on one corner and slowly
proceed from one side the other. Wipe with a clean dry cloth when excessive water
becomes present.

Therma-Steem® Model XL1
January 14, 2019
19
DETAIL & BLAST TOOLS:
Use –to clean small areas that are difficult or impossible to clean using any other
method. You will be able to clean arras which are too small to
clean with a tooth brush. Example –Faucets, Fixtures,
Dishwasher Edges, Stains in Carpets, Car Interiors, Deodorize,
Etc.
The detail tool should almost always be used with the detail
brush attached to the end of the detail tool. has an
Exceptions to this are when cleaning condensers, radiators,
artificial plants and real plants which are sprayed with a cool
vapor from a distance is the preferred method of cleaning.
Because of the increased pressure of the Model 400, the detail tool has a threaded end.
Operate this tool at ¼ volume. For best results first gently rub the surface with the end
of the tool, heating it. Make a second pass, after the surface in heated and dirt & debris
will be completely removed. Once clean wipe the surface with a dry absorbent cloth.
Clean hard to reach areas and corners first, then proceed with the appropriate larger
brush.
NYLON DETAIL BRUSH
1” Dia. 2-1/2” Dia.
Use - to be used where there is a possibility of scratching the
surface, such as Bath Tubs, Door Jambs, Grout, Glass Shower
Doors (Pre-steam) Etc. When in doubt about which brush to
use, the Nylon brush first. This brush can generally be used
on almost any surface except on flat latex wall paint and
non-water proof ceiling tiles.
STAINLESS STEEL DETAIL BRUSH:
1” Dia. 2-1/2” Dia.
Use - Stainless Steel is hard and should only be used on
surfaces that are scratch resistant. Always test in a small
area before proceeding. This brush can be used on
surfaces such as masonry, certain tiles such as Quarry tile
and high-quality stainless steel. This brush can be used to
remove some painted areas if the surface will undergo a sanding process prior to
repainting. If in doubt test an out of the way area first. The stainless-steel brush will
also leave a black mark, which is difficult to remove on certain types of tile.

Therma-Steem® Model XL1
January 14, 2019
20
BRASS DETAIL BRUSH:
1” Dia. 2-1/2” Dia.
Use - This brush can be used on many metal surfaces as
well as on some Tile, Ovens, Etc. Always test on an out of
the way area before to Use. Brass is softer than stainless
steel and will consequently wear faster. This brush works
well on oxidized aluminum surfaces, it will however, have a
polishing effect and make the surface look brighter than arras which have not been
cleaned with this tool.
HORSE HAIR DETAIL BRUSH: Optional
1” Dia. 2-1/2” Dia.
Use - Most commonly used on material which is
delicate and has fine details. The Natural Horse Hair is
naturally soft, durable and nonabrasive, and packed
with thousands of genuine horse hairs which tend to
wrap around a surface and because they are fine, they
tend to penetrate deeper than other brush materials.
They are perfect for delicate jobs such as leather, vinyl, cloth, porcelain, scratch sensitive
plastic, Jewelry, Automotive Detaining as it works well by gently cleaning all Interior
surfaces, air vents, convertible tops, etc. They are generally considered safe on all
surfaces, but it is best to test on an inconspicuous area before beginning.
TRIGGER GUN:
A safety feature on your machine is a Steam Hose Trigger Gun with a Trigger Lock.
Whenever the system is powered up and you set the steam gun/wand down it is very
important that you engage the trigger lock to avoid accidental steam discharge. Also,
whenever you change attachments, it is very important you place the guns trigger in the
locked position towards the handle.
To Lock the Trigger simply slide the red lever, located on the trigger, toward the handle
Unlocked Position Locked Position
Table of contents
Other THERMA-KLEEN Steam Cleaner manuals
