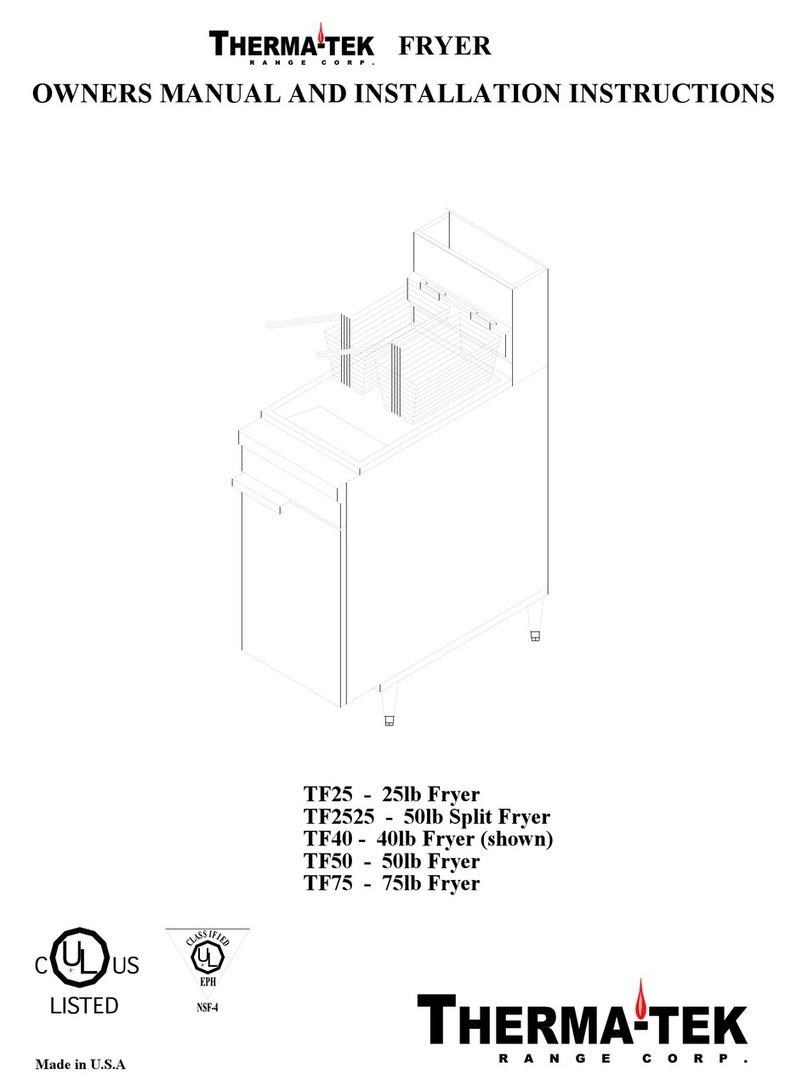
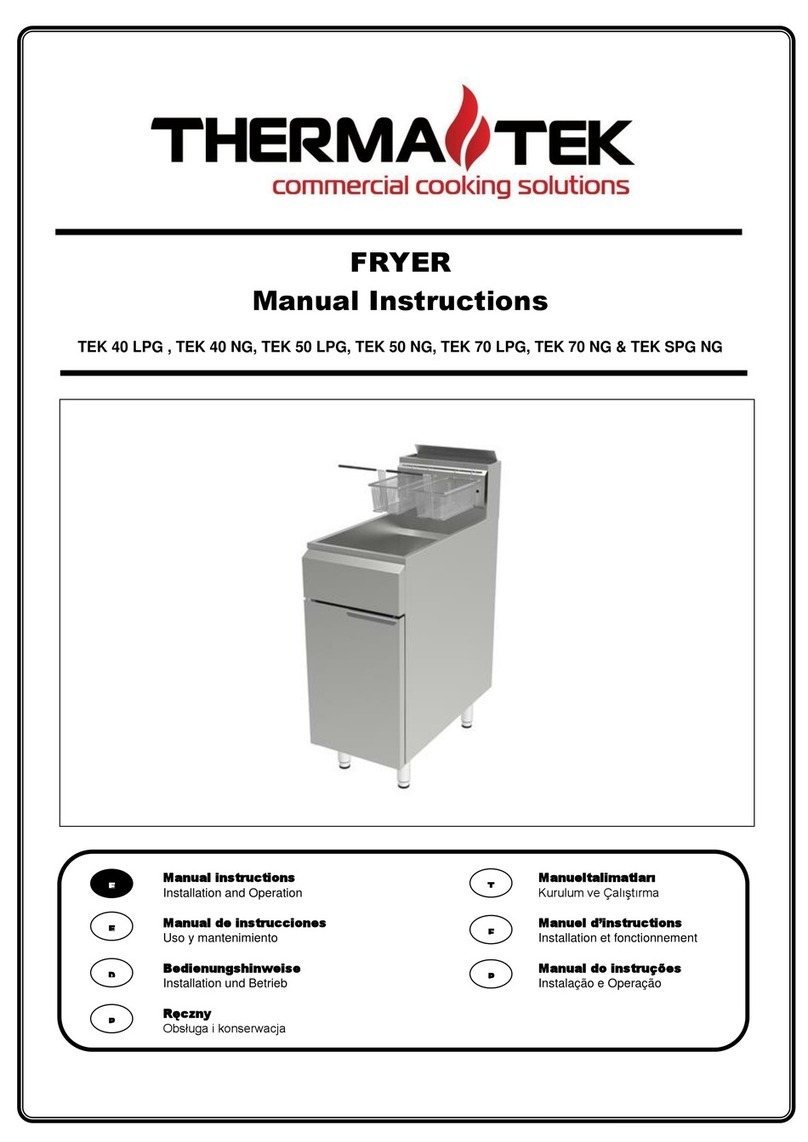
Therma-tek TEK40 Operating and maintenance manual

Manual Date 05/30/19
PRINTED in USA
LIQUID SHORTENING GAS FRYERS
Model TEK40 - 3 Tube Burners, 40lb Vat ( 90,000 btu/hr)
Model TEK50 - 4 Tube Burners, 50lb Vat (120,000 btu/hr)
Model TEK70 - 5 Tube Burners, 70lb Vat (150,000 btu/hr)
INSTALLATION, MAINTENANCE & OPERATING MANUAL
(covers both Stationary and Mobile Applications)
** Either Natural Gas (NG) or Liquid Propane (LP) can supply the fryers **
Remember that Oil & Water won't mix. Don't attempt to fight an Oil Fire using Water.
In the event that a gas odor is detected, shut off the gas supply at the main shut-off valve and contact the
local gas company or your gas provider/supplier for service!
Thank you for choosing our fryers for your operational requirements. Follow these instructions carefully.
If properly used and maintained, you can expect to enjoy years of reliable, efficient and top quality use.
Note: Product line is subject to ongoing, continuous upgrades and improvements. The specifications defining
each model are subject to change without notice.
Keep this manual for training and as a reference guide when service or maintenance is required.
Keep a copy of your Bill of Sale and final building inspection report for the fryer installation as both will help
establish your appliance's warranty period and the date this coverage started.

1
TABLE OF CONTENTS
WARNING IF A GAS ODOR IS DETECTED – (Precautionary actions to take) COVER PAGE
IMPORTANT FOR YOUR SAFETY 2
INTRODUCTION 3
General
Ordering Parts
Fryer Capacity
Unpacking
INSTALLATION 4
Clearances
Location
Fryer Capacity
Flue Installation
CODES AND STANDARDS 6
ASSEMBLY 6
Flue Exhaust
Gas Connection
Gas Pressure
Testing the Gas Supply Piping Connection
Mobile Fryer Installations
Leveling the Fryer
OPERATION 10
Over-Temperature Shut Down
Before First Use / Cleaning
Filling Tank with Shortening
Lighting the Pilot
Turning On the Fryer
Turning Off the Fryer
Extended Shutdown
BASIC FRYING INSTRUCTIONS 12
Fry Basket Guidelines & Fry Basket Capacity
Extended Shortening Life
Draining the Tank
Daily Filtering
CLEANING
14
Maintenance & Sanitation Calendar < Daily, Monthly, Semi-Annually >
BOIL OUT PROCEDURE 15
FLUE VENT INSPECTION & MAINTENANCE 16
Service in the US and Canada
TROUBLESHOOTING CHART & GUIDE 16
WARRANTY 17
SPECIFICATION and COMMERCIAL DUTY 3RD PARTY APPROVALS 18
DIAGRAMS, EXPLODED VIEWS 19
Exploded View With Replacement/Accessory Part Numbers
Electrical Control Schematic Diagram (Describes Mili-volt System)
Descriptive Drawing of the Fry Tank
SAFETY APPAREL (RECOMMENDED) 24
BENEFITS, FEATURES AND OPTIONS REGARDING THIS FRYER 25
TUNING THE GAS CONTROL SYSTEM COMPONENTS 26

2
IMPORTANT FOR YOUR SAFETY
Proper operation/performance of your liquid shortening gas fryer.
READ THE INSTALLATION, OPERATING AND MAINTENANCE INSTRUCTIONS THOROUGHLY BEFORE INSTALLING,
MAINTAINING, RESETTING, MONITORING, OPERATING OR SERVICING THIS EQUIPMENT. THIS MANUAL HAS BEEN
PREPARED FOR PERSONNEL QUALIFIED TO INSTALL GAS EQUIPMENT. AFTER CAREFULLY REVIEWING AND
FOLLOWING THE INSTRUCTIONS/DIRECTIONS IN THIS MANUAL, ONLY QUALIFIED PERSONNEL THAT HAVE READ THIS
MANUAL SHOULD PERFORM THE INITIAL FIELD START-UP AND EQUIPMENT ADJUSTMENTS .
This fryer is intended and approved for commercial use only- it is not built for residential applications.
IMPROPER INSTALLATION, SERVICE, ADJUSTMENT, ALTERATION, OR MAINTENANCE CAN CAUSE PROPERTY DAMAGE,
PREMATURE PERFORMANCE FAILURES, INJURY OR POSSIBLY DEATH.
WARNING: FAILURE TO COMPLY (EVEN PARTIALLY) WITH THE RULES GIVEN IN THIS MANUAL WILL INVALIDATE
THE PRODUCT WARRANTY AND RELIEVES THE MANUFACTURER OF ANY RESPONSIBILITY.
This instruction booklet must be kept with the fryer for future consultation. If the fryer is sold or transferred to
another user, make sure the booklet always goes with the appliance so that the new owner can have the necessary
information on operation and the relative instructions.
IN A PROMINENT LOCATION, POST INSTRUCTIONS TO BE FOLLOWED IN THE EVENT THE SMELL OF GAS IS DETECTED.
THIS INFORMATION CAN BE OBTAINED FROM THE LOCAL GAS SUPPLIER. If a gas odor is detected, IMMEDIATELY
CLOSE THE MAIN GAS SUPPLY SHUT OFF VALVE WHICH STOPS ALL THE GAS FLOWING TO THIS APPLIANCE.
To maintain the equipment warranty, the installation and service work must be performed by qualified technicians and
factory supplied replacement parts or equipment mounted accessories must be used. Only use factory or distributor
authorized and approved casters or leveling legs to support this fryer. It should stand upright and level in its desired
location before it is turned on with a gas supply line connection to the gas valve feeding the pilot/burners.
Caution: This fryer is built for liquid shortening use only (not solid), Directly adding solid shortening
like
palm oil, coconut oil and tallow to the fryer, when the tube burners are not fully immersed, can damage
this appliance and voids its manufacturer’s warranty. If it is desired to use a solid shortening, pre-melt it
before
carefully and safely pouring the liquid oil into the fry vat. Once the burner tubes are fully covered with
shortening, solid shortening can be directly added to bring the oil level up to the fry vat maximum fill level.
DO NOT ATTEMPT TO LIGHT THE PILOT OR LEAVE THE PILOT LIT WHEN THE FRY VAT IS EMPTY OR IF THE
OIL LEVEL DOES NOT COMPLETELY COVER THE TUBE BURNERS. IGNORING THIS CAUTION VOIDS THE FRYER
WARRANTY. If the pilot and main burners go out, the unit must be shut down for ≥ 5 minutes before the fryer
is lighted again to return it to service.
FOR YOUR SAFETY
DO NOT STORE OR USE GASOLINE OR OTHER FLAMMABLE VAPORS OR LIQUIDS
IN THE VICINITY OF THIS OR ANY OTHER GAS COOKING APPLIANCE.
Keep the area around all gas cooking appliances free and clear of combustible materials!!
CAUTION: Hot oil may splatter or splash out of the appliance at any time creating a potential slip and fall or burn risk.
When working on, monitoring or operating the unit wear proper safety apparel!

3
GENERAL
INTRODUCTION
Our commercial gas fryers are produced with quality workmanship and materials. Proper installation, usage
and maintenance will result in years of satisfactory, cost effective performance producing flavorful, high
quality, delicious fried food for your operation.
This manual is applicable to a model listed on the cover page. Procedures in this manual apply to all models
unless specified. Pictures and illustrations can be of any model unless the picture or illustration needs to be
model specific and is identified as such.
ORDERING PARTS
To speed up your order, provide the model number, serial number, gas type, part needed, item part number
(if known) and quantity needed.
FRYER CAPACITY
MODEL
# of Heat Tubes
BTU / Hour
Width Inch (cm)
Shortening lbs (kg)
3 tube burner N&L
3
90,000
15.5 (39)
35-40 (16-18)
4 tube burner N&L
4
120,000
15.5 (39)
45-50 (21-23)
5 tube burner N&L
5
150,000
21.0 (53)
65-73 (29-33)
UNPACKING
This fryer was carefully inspected before leaving the factory. Upon acceptance of the shipment, the
transportation company assumes full responsibility for its safe delivery. Immediately after unpacking the
fryer, check for possible shipping or concealed damage. If it is damaged, save the packaging material and
contact the carrier within 2 days of delivery.
Check that the following have been included:
w Wire Basket Support Rack (in position this rack rests on top of the tube burners)
w Basket Hanger
w Adjustable Legs (4) {in some case could be 4 casters, 2 of which have brakes}
w Drain Pipe Extension
w Twin Fry Baskets (2)
w Extended exhaust gas flue chimney with deflector plate
w Manual and Warranty Card – Retain manual for future reference, send in filled out card.
Do not use the door or its handle in an attempt to lift the fryer.
NOTE: Some key parts or components may be shipped in separate cartons, in the fry vat, in the fry vat or
even in the fryer principal shipping container or its packaging materials. Be careful not to discard, misplace
or throw out these items which are needed to successfully, safely and efficiently operate this appliance.
Use only factory or distributor approved and authorized fryer support leveling legs or casters for this
appliance to operate it safely and keep its warranty in force.

4
INSTALLATION
Before installing the fryer, verify that the type of gas (natural or liquid propane [LP]) agrees with the
specifications on the fryer data plate. The fryer data plate is located on the inside of the door panel. Make
sure the fryer is configured for the proper elevation (height above sea level) of the facility.
Record the gas fryer model and serial number for future reference in the space provided below. This
information is on the fryer data plate. Also record the installation date.
Fryer Model No: Installation Date: Serial No:
CLEARANCES
• Allow space and accessibility for proper appliance servicing and operation.
• Minimum clearance from combustible construction:
• 6” (15 cm) from the SIDES of the fryer
• 6” (15 cm) from the BACK of the fryer
The fryer may be installed on combustible floors (if factory approved leveling legs or casters are used –
the warranty is voided if any other mounting method is used)
• Minimum clearance from noncombustible construction:
• 0” from the SIDES of the fryer
• 0” from the BACK of the fryer
• Between the fryer and any open-top flame units or unshielded heaters and burners:
• 16” (41 cm) A Flame Guard can be used if allowed by the local codes and officials
LOCATION
• The installation must meet the local building codes and should be approved by authorized building and
fire inspectors before the fryer is started up in operation.
• Install fryer in an area with sufficient air supply for complete tube burner gas combustion.
• Do not obstruct the flow of the appliance’s combustion and ventilation air.
• Provide adequate clearance for air openings into the combustion chamber.
• Do not permit fans to blow directly onto fryer as they can negatively impact the burner or pilot valve
performance possibly even extinguishing the pilot flame.
• Avoid wall-type fans, which create cross-currents within a room. Avoid open windows next to the
fryer’s sides or back. Test the room ventilation air ducts to ensure they aren’t blowing directly on this
appliance as that might create performance issues
• Ensure the floor allows the fryer to sit level and securely when its in position for proper operation,
service and cleaning
• No electrical connection is required for this appliance as the standard control scheme uses mili-volt
components [and possibly a piezo igniter] that don’t use/need a 115/220 v circuit.
• If mobile, an approved quick connect gas supply hose with restraint cable is needed.
• The hook up determines what restraint will prevent tipping over the fryer and avoid the risk of hot
oil splashing, spilling or sloshing out of the unit
• Install the fryer under an approved, operational and properly sized ventilation exhaust hood with the
required 6” minimum overhang surrounding the fryer {a make-up air style is suggested} that comes
with a built in and tested fire protection (i.e. Ansul™) system
• The appliance’s electrical schematic diagram is located on inside of door.
• Do not directly connect the fryer flue or exhaust to the ventilation hood.
• The hood grease filters should be at least 18” above the fryer exhaust flue.

5
FLUE INSTALLATION:
BEFORE USING FRYER INSTALL AND ASSEMBLE THE 10-5/8” FLUE AND DEFLECTOR PLATE
TO THE FRYER.
1. Unpack the flue box and flue wrap
2. Slide the flue box over the flue and secure it with the two self-tapping screws using a 5/16” socket
3. Slide the flue wrap over the flue [Ensure the fryer is properly positioned under the hood with proper
overhang on all sides of the appliance – code requires ≥ a 6” hood overhang distance]
4. Secure it with four self-tapping screws two on the back and one on each side using a 5/16” socket

6
CODES AND STANDARDS
The fryer must be installed in accordance with all applicable national and local codes, regulations and
ordinances. A final building and fire protection inspection should be conducted and the installation approved
prior to putting the new fryer into service.
In the United States:
State and local codes, or in the absence of local codes, comply with:
• National Fuel Gas Code, ANSI-Z223.1/NFPA #54 (latest edition). Copies may be obtained from The
American Gas Association Accredited Standards Committee Z223, @ 400 N. Capital St. NW,
Washington, DC 20001, the Secretary Standards Council, NFPA, 1 Batterymarch Park Quincy, MA
02169-7471 or on-line.
• NFPA Standard #96 Vapor Removal from Cooking Equipment, latest edition, obtain from the National
Fire Protection Association, Battery march Park, Quincy, MA.
• ANSI standards Z 21.69 and Z 21.41 if mounted on casters making it mobile for cleaning and servicing
(ensure the fryer is stable and level in all locations where it will operate or be worked on) If the unit
must be disconnected from its restraint cable for any reason, be sure it is reconnected prior to placing
the appliance back in service.
• In the commonwealth of Massachusetts all gas appliances vented through a ventilation hood or
exhaust system with a damper or with a power means of exhaust shall comply with the
commonwealth’s regulation standard or number 248 CMR.
In Canada:
Comply with all prevailing Local codes
• CAN/CSA-B149.1 Natural Gas and Propane Code Installation (latest edition),available from the
Canadian Gas Association 350 Sparks Street, Ottawa, Ontario Canada K1R 7S8.
• CSA C22.1 Canadian Electric Code L4W 5N6.
• CSA Standards 6.16 and 6.9 if mounted on a manufacturer or distributor approved caster set making it
mobile (see following comments about use of a restraint cable)
ASSEMBLY
The fryer must be properly restrained to prevent tipping and the splashing of hot liquid. The means of
restraint may be the manner of installation, such as connection to a battery of appliances, installing the fryer
in an alcove, or by separate means such as adequate ties or restraining cable if on casters so it’s mobile and
can be rolled into different safe positions..
If the unit must be disconnected from its restraint cable for any reason, be sure it is reconnected prior to
placing the appliance back into service.
FLUE EXHAUST GAS
• Comply with Vapor Removal from Cooking Equipment, ANSI-NFPA Standard #96 (latest edition),
available from the National Fire Protection Association, Batterymarch Park, Quincy, MA 02269.
• Locate the fryer under a hood with adequate connection to an exhaust duct. The hood must extend 6”
(15 cm) beyond fryer on both sides as well as in front of and behind the fryer if mounted in an island
cooking bank set-up, rather than against a back wall.

7
• Clearance above the fryer should be adequate for all combustion byproducts to be removed efficiently
and safely without creating a potential fire hazard.
No structural material on the fryer or its flue chimney including physical alterations should be made so
it can be placed under an approved exhaust hood with fire protection
• An 18” (46 cm) minimum clearance should be maintained between the flue vent and the grease
removal filters of the hood venting system.
• Never make flue connections directly between the fryer and exhaust hood.
• Do not obstruct the flow of the gases from the appliance. Proper air balance should be maintained in
the room. The exhaust system must meet all applicable local air exchange requirements, regulations,
ordinances and building codes.
• Ensure that your ventilation system does not cause a down draft at the fryer’s flue opening, a down
draft will not allow the fryer to exhaust properly and will cause overheating which may cause
permanent damage. Damage caused by down drafts aren’t covered under the equipment warranty.
Never allow anything to obstruct the flue or ventilation exiting from the fryer flue.
• NEVER put anything on top of the flue open area which may impact the exhaust gas flow.
CONNECTION GAS
All gas supply connections and any pipe joint compound must be resistant to the action of
propane gases or any other reasonable corrosion causes or catalysts.
The gas inlet is located on the lower rear of the fryer. Codes require that a gas shutoff valve be installed in the
gas line ahead of the fryer. Installing the fryer and gas plumbing safely in accordance with the local codes and
manufacturer directives including an approved pressure regulator is the purchaser’s (end user’s) responsibility
not the fryer manufacturer or distributor.
The gas supply line must be at least the equivalent of ½” (12.7 mm) iron pipe for single units and 1-1/4” (31.75
mm) for batteries. If using the optional quick-disconnect flex hose, ¾” (19 mm) iron pipe feeding it is
appropriate for single fryer applications.
Each fryer is equipped with a ½” – ¾” coupling that facilitates the proper gas supply line connection using
approved piping and possibly an approved quick disconnect hose with its required restraint cable hook-up to
hold it in position that is required by code if on casters (a mobile appliance set-up).
Make sure the pipes are clean and free of obstructions, dirt, and piping compound. A battery set up may
require one or two connections of appropriate size for the gas requirement to properly supply each gas
cooking appliance in that battery line-up.
Prior to lighting, check all joints in the gas supply line for leaks.
Use soap and water solution. Do not use an open flame.
After piping has been checked for leaks, fully purge gas pipes to remove any trapped air in the line prior to
bringing the fryer on line and into service.

8
GAS PRESSURE (ALL MODELS): Natural Gas, Town Gas or LP {Liquid Propane Gas}
The gas pressure must be set at 4” W.C. (Water Column) (0.8 kPa) for natural gas and 10” W.C. (2.75 kPa) for
gas. If incoming pressure exceeds ½ PSI (3.45 kPa), an additional pressure regulator must be installed.
{Meeting this requirement is the owner’s responsibility} The name plate indicates which form of gas fuel
supply is to be connected to this fryer LP or Natural Gas
All gas piping should be performed by a licensed plumber and approved by an authorized local building code
and fire protection inspector.
TESTING THE GAS SUPPLY PIPING CONNECTION
• When test pressures exceed ½ PSI (3.45 kPa), the fryer and its individual shutoff valve must be
disconnected from the gas supply piping system.
• When test pressures are ½ PSI (3.45 kPa) or less, the fryer must be isolated from the gas supply piping
system by closing its individual shutoff valve.
If any leaks must be repaired, ensure the line is free of any residual gas and then execute the needed remedial
action safely and properly to conform the prevailing codes and ordinances.
MOBILE FRYER INSTALLATION
Approved casters, the quick disconnect supply hose and a secure restraining device aren’t/may
not be supplied with these fryers. A provided set of leveling legs is typical which allows a
stationery safe hook-up with the connection of proper gas piping.
Separate instructions for installing casters are included with each purchased caster kit/set:
• The installation must be made with a connector that complies with the current Standard for
Connectors for Movable Gas Appliances, ANSI Z-21.69 or Connectors for Moveable Gas Appliances,
CAN/CGA-6.16, and a quick-disconnect device that complies with the Standard for Quick-Disconnect
Devices for Use with Gas Fuel, ANSI Z-21.41 or Quick-Disconnect Devices for Use with Gas Fuel, CANI-
6.9.
• When installing a quick disconnect you must also install a means for limiting the movement of the
fryer. This restraining device prevents the gas line or quick disconnect hose from being strained. The
restraining device should be attached to the mounting system/cutout on the fryer’s back panel. {See
illustration for location}
• The manufacturer/distributor offers an approved and proven mobile gas appliance installation kit
consisting or proper strength and size casters (2 with brakes), approved quick disconnect hose and
rated restraining cable. Its use maintains the factory equipment warranty – other set ups may result in
that protection being voided

9
If disconnecting the restraining device is needed for servicing or cleaning the unit, reconnect
the restraining device after the fryer is placed back into its original position.
• The fryer must use with an approved restraint cable and quick disconnect gas supply flexible hose
connector complying with all applicable codes.
• The fryer set up must have a proven restraining means to prevent transmitting strain to the restraining
connector. [See the above illustration for a better understanding of this requirement.]
• The fryer must be installed with the casters provided or approved by its manufacturer.
• If the restraint cable is ever to be disconnected, first turn the gas supply off, reconnect the restraint
cable before returning the appliance into normal operation.
LEVELING THE FRYER
Check if the fryer is level by placing a “level” on top of the fryer after all the gas connections have been made.
Ensure that the fryer is level front-to-back and side-to-side in its final installed position.
If using casters, lock the wheels after unit is level and confirm that the fryer will essentially stay level and
stable as it is moved into the various envisioned locations for operation, cleaning and servicing the unit. (Be
careful if moving a full vat as the oil may splash out)

10
OPERATION
Hot oil and parts can cause burns.
Use care when operating, cleaning and servicing the fryer.
Spilling hot frying compound or boil out solution can cause severe burns.
Do not move the fryer without draining all frying compound and liquid from the tank.
Note: Hot oil can splash, foam or splatter out of the fryer if moved or even stationary
creating a potential burn and slip and fall hazard condition. Use appropriate safety
apparatus and apparel (at least gloves & face shield) when servicing, cleaning,
monitoring or operating the gas fryer.
OVER-TEMPERATURE SHUTDOWN
If the shortening becomes overheated, a high-temperature shutoff safety device will turn the gas valve off and
extinguish the pilot. If the fryer shuts down due to overheating, DO NOT attempt to re-light the pilot until the
shortening temperature is below 300° F (149° C).
If an overheating situation persists, contact the Authorized Service Office. Contact information can be found
on the Cover Page.
BEFORE FIRST USE
Cleaning: New units are wiped down at the factory to remove any visible signs of dirt, oil, grease, etc.
remaining from the manufacturing process. Before any food preparation, thoroughly wash the protective oil
from all surface parts and the tank interior with hot soapy water to remove any film residue and dust or
debris. A fryer boil out with cleaning compound is suggested, this occurs at the factory prior to crating and
shipping through the normal distribution channels.
Do not use chlorine or sulfate/sulfide cleaners. Wash any accessories shipped with unit.
Rinse fryer and accessories thoroughly and drain the fryer. Wipe tank completely dry with a soft,
clean cloth.
FILLING TANK WITH SHORTENING
Solid shortening should NOT be used with these fryers. Directly Melting solid shortening in the fry tank will
damage the tank and void your warranty. If solid shortening is to be used (i.e. palm or coconut oil) it should be
completely melted remotely in another appliance and then carefully and safely poured in the fry vat until all
the tube burners are completely submerged in cooking oil. Any other practice or melting procedure voids
the fryer warranty and could damage the appliance or oil.
If the fryer will be emptied and not immediately refilled with oil, extinguish the gas pilot by shutting off the
gas valve. Do not attempt to re-light the system until the vat is filled with oil. (A lit pilot may damage an empty tank)
Don’t attempt to add liquid shortening to a fry tank that is not completely dry as the water may boil and
bubble as the oil is heated. Hot oil can splatter or slosh out of the vat causing a potential operator burn or
slip and fall hazard in the locale/area/vicinity immediately adjacent to the fryer.

11
1. Close the drain valve.
2. Fill the fryer tank with liquid shortening.
3. Shortening level should be between the min and max lines in the fryer tank.
4. Shortening will expand when heated. Do not fill the fryer tank (vat or pot) past the MAX line. Add
fresh shortening as needed to maintain oil level. DO NOT fill above the maximum fill fine embossed
into the fry vat. If no portion of a tube burner is exposed to air, solid shortening may be added
directly into the fryer, a little at a time to avoid any scorching or shortening of the oil life.
LIGHTING THE PILOT
1. Open the door.
2. Turn the thermostat OFF (see figure, view A). The thermostat is located behind the door.
3. Push the gas control valve knob and turn to OFF. Wait 5 minutes to vent unburned gas.
4. Push and turn gas control valve knob to the “L” in PILOT (see figure below, view B).
5. While still holding the knob in, light the pilot with a suitable flame. Continue to depress the knob until
pilot stays lit when knob is released. If the pilot doesn’t remain lit, repeat steps 3 through 5.
6. Depress and turn gas control knob to ON (See figure below, view C).
7. If gas supply is interrupted, repeat steps 2 through 6.
A lit pilot is needed for proper fryer operation. The pilot is tested at the factory prior to shipping.

12
TURNING ON THE FRYER
1. Set the temperature knob to desired temperature.
2. After the set temperature is reached, the thermostat shuts off the gas flow to the burners.
3. The pilot remains lit. The burners cycle on and off, to maintain the temperature at the set point.
TURNING OFF THE FRYER
1. Turn the thermostat OFF.
2. To keep the pilot lit, turn the gas valve to “L” in Pilot. {only the pilot stays lit in this position}
3. To shut off all gas to the system, including the pilot, turn the gas valve knob to OFF.
EXTENDED SHUTDOWN
1. Turn the thermostat knob to OFF.
2. Push in the pilot knob and turn to OFF.
3. Thoroughly drain the fryer. Refer to DRAINING THE FRYER.
4. Clean the fryer according to CLEANING.
5. Turn off the main gas shutoff valve.
A complete fryer boil-out is suggested after any extended shutdown before bringing it back on-line.
NOTE: If the pilot is extinguished, a control safety sensor (thermopile) cuts off the gas supply to it.
BASIC FRYING INSTRUCTIONS
• Set the desired temperature and allow shortening to heat up to that temperature.
• Fry items should be of similar size to ensure equal doneness.
• Drain or wipe dry raw or wet foods to minimize splatter when lowering into hot oil.
• Add fresh shortening as needed top maintain the shortening level between the recommended
(embossed) minimum and maximum fill level (volume) lines.
FRY BASKET GUIDELINES
• Don’t overfill baskets. (See table for recommended basket capacities below) Carefully lower each
basket into the hot oil to minimize turbulence, splatter and damage to the fry basket itself.
• When frying doughnuts and fritters, turn product only once during frying.
• When cooking French fries or onion rings, shake the basket several times.
• Batter-covered foods should be dropped carefully, one by one, into shortening or basket (If a basket is
used, first dip the basket into the oil to reduce batter-build up on basket surfaces.)
• When frying is completed, remove basket or product. Hang basket on the rear basket hanger allowing
the excess oil to flow back into the fry vat (kettle/pot/tank).
FRY BASKET CAPACITY
• For the 3-tube and 4-tube models: Recommended maximum pounds per basket of frozen French fries
are 1.5 lbs. (0.7 kg). {NEVER put more than 2 lb of frozen fries into any one basket}
• For the 5-tube fryer, its recommended maximum frozen fry load is 3 pounds per basket (1.4 kg).

13
EXTENDING SHORTENING LIFE
Shortening life can be extended by the following guidelines:
o Do not salt foods over the fryer
o Use good-quality shortening
o Filter shortening daily (at a minimum)
o Replace shortening if it becomes poorly flavored
o Keep equipment and surrounding clean
o Set thermostat correctly, lower the temperature to 210°F (99°C) during idle periods
o Remove excess moisture and particles from food products before they’re fried.
o Maintain the proper oil level at all times
o Keep the vat covered minimizing oxidation during idle times and lower the thermostat
o Ensure crumbs and food particles are skimmed away and discarded at least twice daily
(preferably at least once an hour and whenever the facility enters an idle period)
§ Load the baskets with dry ice crystal free product (moisture breaks down the oil)
§ Use a skimmer to remove any floating fried food that is not in a fry basket
§ Remove loose food particles or items immediately before they start to burn. Carbonized food will reduce oil life.
DRAINING THE TANK
1. Turn the thermostat to OFF.
2. Wearing safety apparel (at least face shield and gloves) screw the extended drain pipe into position so
the tank can drain into a safe proper size secondary container
3. To keep the pilot lit, turn the gas valve to PILOT.
4. Direct the drain spout into the container that you want to drain the shortening into.
5. Open the drain valve. The oil will drain into the container. When the container is full or the fryer tank
is empty, close the drain valve. Repeat this step until the vat is empty.
6. If desired, perform the weekly clean-out as described under CLEANING.
7. Once tank is completely empty, add new oil and set thermostat to desired temperature.
Note: It is recommended to conduct a fryer boil out with cleaning compound at least monthly.
Do not leave the fryer unattended during a tank boil out, this boil out solution may foam and over-flow the
vat. If this happens turn the thermostat and gas valve off. Turn the gas valve back on and re-light the fryer,
then resume the boil out after the foam has dissipated.
DAILY FILTERING
Hot oil and hot parts can cause burns.
Use care when operating, cleaning, and servicing the fryer.
• Filter shortening at least once a day. Refer to the instructions provided with your filtering equipment.
• A cold fryer won’t drain properly. Always filter shortening between 250°F and 325°F. The shortening in
the cold zone area may remain hard if the heat is only on for a few minutes. If necessary, use the clean-
out rod to carefully stir the hard shortening to an area above the cold zone where it can melt. Use the
tank brush to help clear sides and tubes of debris. Carefully applying some filtered hot oil with the
brush can aid in better cleaning the vat side walls. Use the crumb scoop to help clean the cold zone
removing any food particles that may accumulate in this area.
• This fryer is designed for efficient filtering of the shortening if a paper cone filter set up, plastic mesh
filter net with handle or a portable power filter system is used as the oil filtering method.

14
CLEANING
Hot oil and hot parts can cause burns.
Use care when operating, cleaning, and servicing the fryer.
Do not use chlorine or sulfate/sulfide cleaners.
GAS FRYER MAINTENANCE & SANITATION CALENDAR
Daily Tasks: Clean your fryer regularly with the tank brush along with a damp cloth, and polish with a soft dry
cloth. If regular cleaning is neglected, grease can burn on and discolorations may form. Fingerprints are
sometimes a problem on highly polished surfaces of stainless steel. They can be minimized by applying a
cleaner that will leave a thin oily or waxy film.
• Clean all exterior surfaces of your fryer at least once daily.
• Use a damp cloth with warm water and a mild soap or detergent.
• Remove discolorations by washing with any detergent or soap and water. Use a self-soaping, non-
metallic scouring pad for particularly stubborn grime and discolored surfaces.
• Always rub with the grain of the stainless steel or other metallic finish.
• Do not use a metallic scoring pad or harsh cleaners.
1. Empty tank into separate approved hot oil storage vessel while filtering the oil at about 275°F (135°C)
2. Clean the crumbs out of the cold zone and off the wall
3. Use brush and clean cloth to clean between the tube burners & remove all debris from the tank walls
4. Carefully refill the fry tank with the oil after testing it using a color tube or strip – use fresh oil when the
testing indicates that it is time to discard the old oil – otherwise the same oil refills the fry vat (top off
with fresh oil as needed.)
5. Clean and sanitize the area around the fryer
6. Wash the basket hanger (if it’s removable) or wipe the basket hanger rods with a cloth if permanent
7. Clean the fry baskets & fryer rack that rests on the tube burner – removing all crumbs & food particles
8. Chart that these event are done nightly & have the shift or general manager evaluate their execution
9. Keep the fryer exterior clean and free of accumulated grease to prevent stubborn stains from forming.
If regular cleaning is neglected, grease will become polymerized as well as get burned on and
discolorations may form.
10. Rinse thoroughly, and then polish with a soft dry cloth. You want the clean tank to be bone dry-
after it’s been cleaned and is dry, refill the tank with oil or wipe it with oil to reduce the risk of
oxidation (rust) occurring even though the vat is made of stainless steel
Weekly Tasks:
1. Clean behind fryer
2. Clean under fryer
3. Clean the sides of the fryer
4. Confirm the fry vat temperature control is accurate and doesn’t need calibration – if it does schedule
this activity with a service technician or QA associate
Monthly Tasks:
1. Perform a fry tank boil out
2. Test fryer warm up time {to be within 2 minutes of the initial warm up time (oil to go from 80° to
275°F)[27°- 135°C]}
3. Check the burner flame for appearance as well as calibration

15
Semi-annual Task:
1. Confirm the high limit safety and pilot thermopile safeties are functional
2. Clean the burner orifices and re-tune
3. Run a burner test- [confirm the gas consumption is with-in 2% of the original value at time of
commissioning]
4. Inspect the burner baffles for overall condition and thickness – replace if worn, thin, deformed or out of
position.
5. Have the unit inspected by a factory trained service technician for over-all state of repair
6. Inspect the safety apparel and other accessories including fry baskets for overall state of repair
• If any issues of excessive wear or performance are found replace that element
• Validate the calibration of the thermometer used to calibrate the thermostat
• Use clean-out rod to clear drain {run a drain time test (should be within 10 seconds of
commissioning value)}
7. Record the measured evaluation test results for future reference and to see deviation over time
8. Confirm the fry time, fry oil temperature after the batch is finished and lifted from the oil and recovery
time to return to 350°F – this should be the same or within 10 seconds for each test
BOIL OUT PROCEDURE
Weekly or as required (a boil out frequency of no less than monthly is strongly suggested):
1. Drain the tank as described under DRAINING THE TANK.
2. Once the shortening has been drained, flush out scraps and sediment with a small amount of warm
shortening, using tank brush. Allow the tank to drain thoroughly.
3. Close the drain valve and fill tank water. Use a low foaming cleaner/degreaser to clean the fry tank.
Follow the instructions on the side of the package. Do not use chlorine or sulfate/sulfide cleaners.
Commercial Fryer Boil Out powder is suggested
4. Add commercial boil-out solution. [Solution height is between the MIN and MAX embossed tank
levels].
5. Set thermostat to the temperature recommended for the solution being used. Do not exceed 210°F.
Allow solution to simmer for about 15 to 20 minutes.
6. Drain the cleaning solution from the tank.
7. Close the drain valve and refill the tank with water. Add 1 cup (1/4 L) of vinegar or mild citric acid
solution to neutralize alkaline left by the cleaner. Solution level must be between the MIN and MAX
level on the fryer tank.
8. Bring the solution to a simmer, turn the thermostat off. Allow to stand for a few minutes.
9. Drain the tank according to DRAINING THE TANK. Rinse thoroughly with clear, hot water. All traces of
cleaner must be removed. Dry the tank thoroughly.
10. Close the drain valve and add shortening. Follow the FILLING TANK WITH SHORTENING procedure in
this manual. The fryer is now ready for use.
While the vat must be dry before refilling it with oil – do not turn the fryer on to help dry it.
Damage to the vat (distortion) can occur and the equipment warranty becomes void.

16
FLUE VENT INSPECTION & MAINTENANCE
Hot oil and hot parts can cause burns.
Use care when operating, cleaning, and servicing the fryer.
Spilling hot oil or fryer boil out solution or compound can cause severe burns.
Do NOT move a fryer without draining all frying compound and liquid from the tank.
CAUTION: A dirty fry vat or clogged tube burner orifice may negatively impact the finished fried food quality,
the fryer performance and its capacity. It’s recommended that in addition to at least monthly fryer
boil outs that the appliance get a complete preventative maintenance tune up and component
cleaning or replacement {if needed} twice a year. Our trained field service technicians can perform
this tune up if asked to do so. This is NOT a warranty service; it must be paid for.
When the fryer is cool, inspect the flue and its connection semi-annually. Check the flue and clear any
obstructions. If anything is loose or worn, tighten the connection and replace the parts as needed.
SERVICE IN THE USA / CANADA:
Contact the Authorized Service Office. Information is on the Cover Page.
TROUBLESHOOTING CHART & GUIDE
PROBLEM
PROBABLY CAUSE
NO HEAT
Thermostat dial is not turned on
Pilot not lit
Gas supply not turned on
Wire connections loose (call service)
Wires connections need cleaning (call service)
Thermopile failure (call service)
Quick disconnect hose not connected
INSUFFICIENT OR TOO MUCH HEAT:
Thermostat dial not set to desired temperature
High limit tripped (call service)
Temperature probe malfunction (call service)
Burner flame not tuned or baffles are burned out
TANK WILL NOT DRAIN:
Shortening too cold to flow- re-heat it to over 275°F (135°C)
Drain pipe clogged with debris- dislodge with cleanout rod
Ball valve handle is jammed or loose so it won’t open

17
TERMS OF SALE
FOB: THERMA-TEK, 115 ROTARY DRIVE, HAZLETON, PA 18202
INSPECTION: Shipments must be inspected promptly upon receipt. No claims for damaged merchandise or missing parts or
other errors will be recognized unless written notice thereof is given to Therma-Tek Commercial Cooking Equipment
Company within 30 days after shipping date.
RETURNED GOODS: Returned goods are subject to a 15% restocking charge along with any reconditioning charges. Any
authorized product return, must be returned in its original unused and undamaged condition, in its original carton, with all
accessories and user manuals included. A Return Materials Authorization Number (RMA) by Therma-Tek must be granted,
and returned goods must be shipped freight prepaid. Custom units built to buyer specifications may not be returned or
cancelled.
SHIPMENTS: All equipment ships under class 85. FOB: Hazleton, PA 18202
PRODUCT REVISIONS: Therma-Tek Commercial Cooking Equipment Company reserves the right without prior notice to make
changes and revisions in product specifications, design and materials at it discretion and without notice.
PRICES: All prices are subject to change without notice. Prices do not include sales or any other local state tax. All prices are
in U.S. Dollars.
TERMS: Net 30 days subject to Therma-Tek credit department approval. All amounts past due are subject to 1 1⁄2% per
month service charge
LIMITED WARRANTY: TWO (2) YEAR PARTS AND LABOR FOR U.S.
THERMA-TEK LIMITED WARRANTY: The Therma-Tek Commercial Cooking Equipment Company warranty applies to all
equipment that has been unaltered, properly installed and maintained in accordance with national and local codes and in
accordance with the Therma-Tek installation manuals.
Therma-Tek products are warranted to the original purchaser to be free from defects in material and workmanship under
normal use and service for a period of (2) two years from the date of original installation. Equipment must be no older than
two (2) years from date of manufacture to carry the one (2) year parts and labor warranty. Equipment is not warranted when
used in a non-commercial location. Porcelain items are excluded from this warranty. Parts wear is not considered a defect.
Faucets, cast iron parts and glass items are warranted for 90 days. This warranty does not apply to equipment damaged,
altered or abused accidentally or intentionally, modified by unqualified service personnel or with missing or altered serial
name plates. Therma-Tek agrees to repair or replace defective parts (with normal shipping charges) due to flaws in material
or workmanship during the warranty period. Labor to repair or replace defective parts shall be warranted when and only
performed by an authorized Therma-Tek service agency. Travel over 50 miles, holiday or overtime labor charges are not
covered.
Any use of any third-party or non Therma-Tek replacement parts will void the warranty
Any Therma-Tek Commercial Cooking Equipment Company product purchased, shipped or installed out of the 48 contiguous
U.S. states is limited to a one (1) year parts only warranty. Replacement parts are F.O.B. Therma-Tek, Hazleton, Pennsylvania
18202.
Proper installation, initial check out, air shutter adjustments, or normal maintenance such as lubrication, adjustment or
calibration of controls is the responsibility of the dealer, owner/user or installing contractor and is not covered by this
warranty.
© 2019 Therma-Tek Commercial Cooking Equipment Company, A Division of TEKMA Corporation, Miami, Florida 33147

18
SPECIFICATION & COMMERCIAL DUTY 3RD PARTY APPROVALS
DIMENSION
Model
Width (in)
Depth (in)
Height (in)
Gas Connection (in)
Total BTU/hr
A
B
C
D
E
F
G
H
I
3 Tube Burner N&L
15.5
14.0
30.3
14.0
47.2
34.7
6.0
7.0
4.2
90,000
4 Tube Burner N&L
15.5
14.0
30.3
14.0
47.2
34.7
6.0
7.0
4.2
120,000
5 Tube Burner N&L
21.0
18.0
30.3
14.0
47.2
34.7
6.0
7.0
4.2
150,000
GAS SUPPLY AND BURNER INFORMATION
Supply pressure should be at minimum of 4" W.C. for natural gas or 10" W.C. for propane. The fryer comes with ¾” NPT male
connector on a ½” pipe, allowing you to connect with either ¾” or ½” NPT female connector.
Model
Burners
Gas
Type
Manifold
Pressure
Number
of heat tube
Rate Each
BTUs / Hour
Total Rate
BTUs / Hour
Orifice
Size
3 Tube Burner
Main
Natural
4" W.C.
3
30,000
90,000
#40
Propane
10" W.C.
3
30,000
90,000
#52
4 Tube Burner
Main
Natural
4" W.C.
4
30,000
120,000
#40
Propane
10" W.C.
4
30,000
120,000
#52
5 Tube Burner
Main
Natural
4" W.C.
5
30,000
150,000
#40
Propane
10" W.C.
5
30,000
150,000
#52
* Minimum supply pressure is 4" W.C. for natural gas and 10" W.C. for propane.
** Orifice sizes are for units installed at altitudes between 0 and 2000 feet above sea level.
Note, it is recommended that each burner require its own restricting orifice.
Commercial Duty 3rd Party Approvals:
Conforms to ANSI STD Z83. 11-2016,
Certified to CSA STD 1.8-2016
Conforms to NSF/ANSI Std.4
5004906
5004906

19
DIAGRAMS, EXPLODED VIEWS
EXPLODED VIEW With Replacement/Accessory Part Numbers
1. Gas Parts for Fryer ( 5 tube shown)
Key
Part Number
Qty
Description
1
Part of 14031A
1
Knob, for thermostat
2
16031A
1
Thermostat, High Limit 450 oF Safety,
3
14031A
1
Mili-volt Thermostat for Fryer , Regulates Temperature 200 ~ 400 oF
4
1
Adaptor , 1/2" to 3/4"
5
13031A
1
Safety thermopile 18” for Polit
6
12011A
1
Pilot for Natural Gas
12021A
1
Pilot for Liquid Propane
7
12041A
1
Sylphon Tubing, ¼” for Thermopile
8
11011A
1
Mili-volt Combination valve for Natural Gas
11021A
1
Mili-volt Combination valve for Liquid Propane
9
20031A
ea
Burner, Fryer
10
21011A
ea
Orifice # 40 , for Natural Gas
21021A
ea
Orifice # 52 , for liquid Propane
11
10061A
1
Gas Supply Piping 3 - burner Manifold
10062A
1
Gas Supply Piping 4 - burner Manifold
10063A
1
Gas Supply Piping 5 - burner Manifold
This manual suits for next models
2
Table of contents
Other Therma-tek Fryer manuals
Popular Fryer manuals by other brands

Philips
Philips Cucina HD6151 manual
Midea
Midea MF-TN35D2 instruction manual
Henny Penny
Henny Penny KFC Velocity Series Service manual

BRAYER
BRAYER BR2831 instruction manual

Giles & Posner
Giles & Posner GBF-35 Banked Operation & service manual

Superior
Superior 301HLDS Series Assembly, installation and operation instructions
