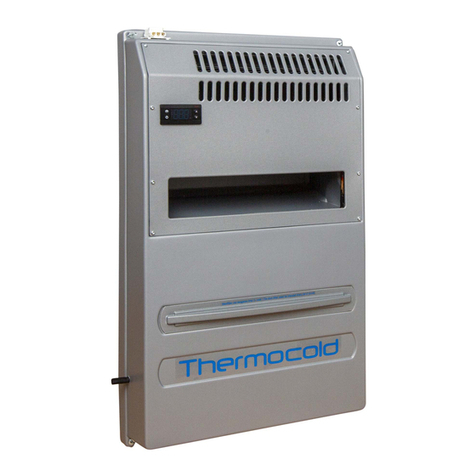
Thermocold TC6 Assembly instructions

2
www.thermocold.no
ENGLISH
__________________________________________________________________________
Safety and usage advisory
Please read the following information. If you do not comply with this,
damages to persons or equipment may occur, and all warranty and
reliability duties will be void.
WARNING!
Risk of fire and electrocution.
Risk of damage to persons or cooling unit.
WARNING!
Risk of fire
Flammable materials
Intended use
This product is designed for private use.
•
The cooling unit must not be placed outdoors. It is not suited
for outdoor use even if the area is covered with a tarp.
General safety warnings
•
When the product is worn out, it must not be disposed of as
household waste. It must be submitted to an appropriate collection
site for recycling EE waste (electric and electronic waste)
•
Contact Thermocold or the nearest service partner for any
inquiries and issues with the cooling unit.
•
Do not destroy the cooling circuit where the coolant is circulating
using a drill or cutting tool.
•
Refrigerant that may pour out in the event of a puncture may
cause skin irritation and eye damage.
•
Do not cover or block the vents of the cooling unit.
•
Repairs to the cooling unit must only be conducted by trained
personnel. Repairs conducted by untrained personnel may result in
danger to users.
•
Disconnect the power supply during repairs/maintenance on
the cooling unit.
•
When unplugging the unit, do not pull the cable.
•
Do not connect the cooling unit if the power outlet is loose.
•
Ensure that the power cable is not crushed or
damaged after the cooling unit is installed.
•
Do not connect the plug of the cooling unit to an extension cord.

3
www.thermocold.no
ENGLISH
__________________________________________________________________________
•
Do not use portable or other external power supplies unless these
are approved by Thermocold.
•
Flammable objects or products that contain flammable gases,
e.g. spray bottles, as well as explosive materials must not be
stored in refrigerated rooms or corner refrigerators along with the
cooling unit
•
Do not use flammable spray materials such as propane gas
near the cooling unit.
•
Do not use mechanical equipment or other means to increase the
speed of the defrosting process other than such equipment
recommended by Thermocold. Make an inquiry to Thermocold or a
service partner if you are in doubt.
•
It is dangerous to expose the product to rain, snow and wind due
to electrical safety.
•
Do not spray water directly onto the outer or inner
components of the cooling units.
•
Electrical devices must not be used inside the refrigerated
room/corner refrigerator unless recommended by Thermocold
•
The label that describes technical specifications is located
behind the dust filter drawer in the cooling unit.
•
Children may not play with the cooling unit.
•
Children between the ages of 3 and 8 are
permitted to load things into and out of the
corner refrigerator/refrigerated room.
•
This cooling unit is not intended for use by persons (including
children) with reduced physical, sensory or mental capacity, or a
lack of experience and knowledge, unless they have received
guidance and instruction on the use of the device by a person
responsible for their safety.
•
These usage and assembly instructions shall be provided to the
next owner of the cooling unit when ownership is transferred.
Disposal of waste product, Compliance with WEEE directive
This product complies with the EU directive involving electronic and electrical
equipment (2012/19/EU). This product has the classification symbol for the
sorting of electrical waste (WEEE).
This product is made from high-quality parts and materials that can be re-used
and recycled.
The product must not be disposed of alongside normal household waste and
other waste at the end of its service life.
Bring it to a collection point for the recycling of electrical and electronic
products.
Please consult with local authorities to get information on sorting and collection
sites.

4
www.thermocold.no
ENGLISH
__________________________________________________________________________
Information on packaging
•The packaging for this cooling unit is produced from recyclable materials in
accordance with national environmental regulations.
HC warning
•The product is equipped with a cooling system that contains the cooling
medium R600a:
This gas is flammable. Be careful so that the cooling system and pipes are not
damaged during use or transport. In the event of any damage, keep the
cooling unit a distance away from potential fire sources that may cause
ignition. Air out the refrigerated room, corner refrigerator or the premises in
which the cooling unit is located. The refrigerant may cause eye damage if it
leaks.
Please contact Thermocold for further advice.
WARNING!
Fire hazard
Flammable refrigerant
Thermocold KFD A/S’ liability does not cover:
1. Repairs / Actions taken by unauthorised personnel or non-original parts, and the
assembly of the device in other installations or products Thermocold does not have
control over.
2. Installation that does not comply with the local electrical safety authority's provisions
and installation instructions.
3. Use of the cooling unit in violation of the user manual. Inadequate maintenance.
4. Transport damage not reported to transporter/Thermocold and accidents after
delivery that are beyond the control of the provider/dealer, such as lightning strikes,
electrical disruptions and high/low voltage variation beyond indicated voltage.
5. Improper refrigerated room construction. Poor or inadequate ventilation.
Inadequate dust filter maintenance. Corrosion and deposits resulting from
surrounding environment.
Repairs and compensation:
1. Thermocold or the dealer may themselves decide between them whether errors or
issues should be repaired at the customer\s location, or at their own or other
designated workshop.
2. The customer is entitled to compensation for financial loss pursuant to the Sale of
Goods Act. However, the supplier is not in any circumstances liable for compensation for
indirect losses, section 67 (2).
3. If damage is dealt to objects with a direct or close connection to the product's use or
function, the supplier is only liable to the extent this follows from inalienable legal
provisions. This also applies to personal injuries, and injuries of this nature shall be
handled in cooperation between the customer and the supplier.

5
www.thermocold.no
ENGLISH
__________________________________________________________________________
Table of contents
Safety and usage advisory..............................................................................................................2
Buyer’s rights ...................................................................................................................................6
Read before assembling the cooling unit......................................................................................7
Energy saving and food storage ....................................................................................................8
Adjusting the temperature of the cooling unit..............................................................................9
Dimensions and technical specifications TC 6, TC 10, TC 10 FLEX ........................................10
Cleaning and maintenance............................................................................................................11
Troubleshooting and service........................................................................................................12
Equipment list installation option 1 – 6 .......................................................................................13
Installation option 1 – Self-assembled cold room with plastic cover ......................................14
Installation option 4 – Modular cold room, free–standing A/B .................................................17
Installation option 5 – Modular cold room, free–standing A/B .................................................18
Installation alternative 6 – Corner refrigerator with air vent/air barrier ...................................19
Installation option 7 – TC 10 Flex.................................................................................................20

6
www.thermocold.no
ENGLISH
__________________________________________________________________________
Buyer’s rights
Guarantee
Thermocold guarantees that the product provided has the features and quality described in
brochures and other such materials. Small changes due to product changes may occur. The
warranty runs 2 years from when the product is delivered to the customer. It is important that the
customer follows the use and installation instructions closely. Even in normal use, the product will
be subject to wear, necessitating preventive maintenance and thus the replacement of disposable
components such as fans, starting equipment for the compressor, thermostats and lights. These
are components with variable lifespans depending on installation, use and maintenance. These
are not covered beyond the complaints period of 5 years, but by the warranty in accordance with
the Sale of Goods Act.
Consumer purchases:
These terms regulate the customer’s rights with regard to Thermocold as a supplier of new
products intended for use in private households. The supplier is obligated to correct errors or
flaws, provided the customer has the receipt.
Buyer’s rights:
The deadline for complaints is two years. When the product or parts of the product are
intended to last significantly longer, the deadline is five years. All complaints are subject to a
requirement that the defect was present at the time of delivery.
However, the customer will lose the right to raise a complaint if they do not complain within a
reasonable time frame after the flaw is discovered or should have been discovered.
In the event of flaws subject to sales legislation, Thermocold retains the right to repair the product
within the deadline in accordance with the Sale of Goods Act.
Trade purchases
Trade purchases are all purchases not made by consumers. If the product is located in cafés,
restaurants, street kitchens, hotels, motels, businesses with other commercial activities, or in
schools, institutions, dormitories, kindergartens, sports facilities, shared households and where
the customer fully or partially pays for the use of the product or in a rental situation, as well as if
the product is used to preserve a product the customer sells. The complaint period and warranty
period will then be 1 year. This applies to any losses the flaw may cause due to, e.g. operational
losses, lost profits and other consequences involving financial losses. This limitation to the
supplier’s responsibility does not apply if the customer has been found grossly negligent. In
general, the terms and conditions for consumer purchases apply.
Thermocold makes reservations for potential printing errors and retains the right to change any
product specifications.

7
www.thermocold.no
ENGLISH
__________________________________________________________________________
Read before assembling the cooling unit
•
Wait for two to three hours after assembling the cooling unit to the wall
before starting it. This is done because the oil for the compressor must
first run back.
•
Check that the copper pipes are not in contact with metal or plastic, this
also applies to the hose in the plastic tub.
•
Make sure that the drainage tube is in the bottom of the evaporation tray.
•
Connect the plug and check that both the fans and the compressor
are running normally.
Thermocold cooling units are assembled from the refrigerated room side through
the wall to the warm side.
This provides much greater flexibility with regard to assembly solutions.
A stable, appropriate cold room is contingent on appropriate insulation in the
floor/ceiling/walls, and that the ambient temperature on the warm side of the cold
room
remains 16 to 27°C.These are the most optimal operating conditions, causing the
least wear.
It is important that the cooling unit has a good supply of fresh air and that the
room in which it is installed is well-ventilated.
All walls adjacent to the cold room/corner refrigerator should be insulated.
The cooling unit requires a voltage of 220-240V and a minimum 10A grounded
fuse. The plug can be installed to the warm or cold side of the cooling unit.
Use a label when placing the plug within the plastic cover or ventilation grates.
Ensure that a physical barrier / air barrier or air vent is used to separate intake and
exhaust from the fan on the warm side. This is so that the warm air can be removed
and replaced by cooler fresh air.
See assembly alternatives 1-7 to see what is required for your
assembly alternative.
Winter operations kit should be installed in temperatures below +16°C

8
www.thermocold.no
ENGLISH
__________________________________________________________________________
Energy saving and food storage
Thermocold products place a strong focus on the best possible storage of food and raw
ingredients in corner refrigerators and cold rooms.
Energy-saving measures:
•
If the door stands open, this will increase running hours and energy consumption.
•
Good tidiness is required for the air to circulate properly.
Tips for storing food:
The temperature will vary from bottom to top. This is because food goods will best be stored at
different temperatures. Proper storage is essential for preserving taste and for maintaining the
shelf life of food goods.
In short, we recommend the following:
Milk, meat and bread topping products shall be placed so that there is proper circulation around
the products, allowing for quicker cooling.
Vegetables that contain a lot of water, such as carrots and cucumbers, should be
packed in plastic or freezer bags.
We recommend placing other vegetables in plastic containers with lids.
This also applies if you store fruit such as apples, oranges, salad and tomatoes. Potatoes
should be kept in light-proof sacks or in light-proof boxes with lids.
This is to protect the goods from cold circulating air and to provide additional protection against
the loss of moisture, in addition to the plastic packaging.
As maintaining good hygiene in the room is important, the walls have a food-safe protective
surface, reducing bacterial growth and making it easier to clean surfaces.
A full overview of the storage of the most common products can be found on Thermocold’s
website.

9
www.thermocold.no
ENGLISH
__________________________________________________________________________
Adjusting the temperature of the cooling unit
The temperature can be set from 3 - 20 °C The
operating display indicates the room’s air temperature.
When setting 4°C, the displayed temperature will vary
by +/- approx. 2.5°C
Place a thermometer in a glass of water to measure the temperature of the food goods.
Temperature adjustment:
1. Press “up” to increase the temperature
2. Press “down” to decrease the temperature
3. Wait 10 seconds The new temperature has now been set.
Manual defrosting:
Use manual defrosting if a mass of ice has built up on the heat sinks of
the cooling unit. Duration 30 minutes.
1. Press “manual defrosting” for 6 seconds to activate manual defrosting.
2. Press “manual defrosting” for 6 seconds to deactivate manual defrosting.
On/Off Standby mode:
Use Standby mode when you want to turn off cooling on the cooling unit.
1. Press and hold “On/Off” for 10 seconds to deactivate cooling on the cooling unit
2. Press and hold “On/Off” for 10 seconds to activate cooling
Parameter settings: (Intended for service technician)
1. Press “up/down” and hold for 5 seconds to access the parameter
menu.
2. First parameter group is displayed “tHE”
3. Press “up/down” to find the desired group
4. Press "OK”
5. First parameter is displayed
6. Press “up/down” to find the desired parameter
7. Press "OK”
8. Press “up/down” to find the desired setting.
9. Press "OK”
The display will automatically return to the indicated temperature
after 30 seconds, or after you press “back” twice

__________________________________________________________________________
10
www.thermocold.no
NORW
80 mm
*
TC 10 FLEX
Dimensions and technical specifications TC 6, TC 10, TC 10 FLEX
TC 6
TC 10
TC 10 FLEX
Light aperture in
wall installation
440x740
440x740
440x650
Minimum distance from
ceiling to top of light
80mm
80mm
80mm
Minimum air volume
200cm²
200cm²
200cm²
Climate class
T
T
T
Ambient temperature
15-43°C
15-43°C
15-43°C
Voltage:
220-240V 50Hz
220-240V 50Hz
220-240V 50Hz
Amperage draw:
1.46 A
1.46 A
1.67 A
Net weight
27 kg
27 kg
27kg
Cooling capacity (W /
390W/ 8000 litres
450W / 12,000 litres
450W / 12,000 litres
Cooling agent
R600a 106g
R600a 106g
R600a 106g
Automatic defrosting
YES
YES
YES
Condensation
drain
YES
YES
YES
Dust filter
YES
YES
YES
Exhaust
80
Intake
Installation option 1 in example
illustration Air is led through the plastic

__________________________________________________________________________
11
www.thermocold.no
NORW
Cleaning and maintenance
The consumer is responsible for conducting cleaning and maintenance
on the cooling unit. This is required to maintain warranty.
Dust filter cleaning
Clean the dust filter of the cooling unit every 3 months or more
frequently where needed. Loosen the dust filter drawer (2), pull out the
dust filter frame (2) and vacuum clean the sheet of dust.
Cleaning cold room/corner refrigerator
To prevent mould growth, it is important to regularly clean the cold room. Use
mild soap and dry using a damp cloth.
1. Thermostat
2. Dust filter / Dust filter drawer
3. Condenser
4. Condenser fan
5. Evaporator fan
6. Evaporator/heat sink
7. Compressor
8. Evaporation basin
9. Condensation drainpipe. Rubber gasket on inside of cover
10. Condensation drain/overflow drain

__________________________________________________________________________
12
www.thermocold.no
NORW
Troubleshooting and
service
Issue
Cause
Needs
Action
Poor cooling
Dust filter is clogged
Clean dust filter
To be corrected by user
Ambient temperature is too high
Improve ventilation
To be corrected by user
Condenser fan defect
Replace fan motor
To be corrected by service
partner or trained personnel.
Contact Thermocold or
service partner to
Evaporator is clogged with ice
Manual removal
To be corrected by user
Lack of air barrier
Install air barrier
To be corrected by user/service
partner. Contact Thermocold or
service partner to purchase
parts.
No cooling
Compressor is not running
Check fuse
Contact Thermocold
or service partner
Thermostat set to Standby mode
Deactivate Standby mode
To be corrected by customer
Water pouring over
the front end of the
unit.
Drainpipe for condensed water is clogged
Poke up drainpipe for
condensed water with
a 35-cm length of wire
To be corrected by customer
Door has been left open
Close the door
To be corrected by customer
Magnetic seal of cold room door does not
seal against frame/wall
Adjust the door so that it
seals against frame or wall.
Use magnetic seal if necessary.
To be corrected by
customer/service partner.
Contact Thermocold or service
Sealing gasket around the cooling unit
is unsealed or worn out.
Ensure that the gasket seals all
around between the cooling
unit and the wall.
Change the gasket if necessary.
To be corrected by
customer/service partner.
Contact Thermocold or service
partner to purchase parts
Air leaks into cold room or
corner refrigerator.
In the event of high humidity, this occurs
more often.
Check that all seals in walls,
ceiling and floor are sealed.
Inspect the magnetic seal of
the door and sealing gasket
around the cooling unit.
Seal joints with silicone.
Replace sealing gasket and/or
magnetic seal if necessary.
To be corrected by
customer/service partner.
Contact Thermocold or service
partner to purchase parts
Water out of drainage
i
Door has been left open
Close the door
To be corrected by customer
Air leak into cold room or
corner refrigerator.
In the event of high humidity, this occurs
more often.
Check that all seals in walls,
ceiling and floor are sealed.
Inspect the magnetic seal of
the door and sealing gasket
around the cooling unit.
Seal joints with silicone.
Replace sealing gasket and/or
magnetic seal if necessary.
To be corrected by
customer/service partner.
Contact Thermocold or service
partner to purchase parts
Vibration or noise
The plastic edge of the cooling
unit is in contact with the wall of
the cold room
Loosen the cooling unit so that
the sealing gasket, rather than
the plastic edge of the cooling
unit, is in contact with the wall.
To be corrected by
customer/service partner
Evaporator or condenser fan
imbalanced
Replace fan motor
To be corrected by service
partner or trained personnel.
Contact Thermocold or
service partner to
Condenser fan defect
Replace fan motor
To be corrected by service
partner or trained personnel.
Contact Thermocold or
service partner to
For service needs, contact:
-
Thermocold KFD AS service department Tel. +47 69 10 24 00
-
Local service partner/dealer: See the Thermocold website www.thermocold.no
Have the serial number at hand. This can be found behind the dust filter drawer (point 2 under cleaning and
maintenance)

__________________________________________________________________________
13
www.thermocold.no
NORW
Equipment list installation option 1 – 6
Type of
cooling unit
Plastic cover /
Plastic cover
for modular
Metal air
vent
Ventilation
grates
Insulatin
g strip
Air barrier
short
(55cm)
Air barrier
long (240cm)
Alt. 1
TC 6 / TC10
X
X
X
Alt. 2
TC 6 / TC10
X
X
X
Alt. 3
TC 6 / TC10
X
X
X
Alt. 4 A
TC 6 / TC10
X
Alt. 4 B
TC 6 / TC10
X
X
X
Alt. 5
TC 6 / TC10
X
X
X
Opt.6
TC 6
X
Alt. 7
TC 10 FLEX
X
X
X
Plastic cover
Plastic cover for modular
room
Metal air pilot duct
Ventilation grates 2 pcs
Insulating strip
Air barrier short 55 cm
Air barrier long 240 cm

__________________________________________________________________________
14
www.thermocold.no
NORW
Installation option 1 – Self-assembled cold room with plastic cover
1.
Adapt hole in wall 440x480 mm as illustrated. Distance from ceiling to top of light aperture minimum
80 mm. Minimum air flow 200 cm²
2.
The plug for the mains lead is installed outside the cold room. If it protrudes beyond the plastic cover,
the mains lead must be fastened so that it cannot fall down into the condenser fan.
3.
Build the cold room in accordance with prevailing laws and regulations. See the
Thermocold website www.thermocold.no for tips and advice for construction.
4.
Fix the insulating strips around the opening on the inside of the cold room side using staples or tape.
5.
Lift the unit into position from the cold room side and fasten with screws in each corner.
The gasket should be against the wall, not the cooling unit.
6.
Adjust the air barrier that separates intake and exhaust. Make sure that it protrudes approx. 10 mm
outside the wall, so that it is placed in contact with the recess in the plastic cover, see detail marked
3.
7.
Attach the air seal with one screw in the truss on each.
8.
Screw the plastic cover to the wall and not to the unit. Make sure the recess in the plastic cover is
correctly placed against the air barrier. The entire air slot above and below the air barrier behind the
plastic cover must be open for free air flow.
9.
Plug in the mains lead and ensure that the unit starts up.
Exhaust
80mm
Intake
Structure
Seen
from the
outside of the
Insulation min.100 mm
and vapour barrier
.
Seen from the
outside of the cold
Plastic cover.
Fully installed
from the
outside of the
Cross-section.
See detail 3

__________________________________________________________________________
15
www.thermocold.no
NORW
Installation option 2 – Self-assembled cold room with ventilation grate
1.
Adapt hole in wall 440x480 mm as illustrated. Distance from ceiling to top of light
aperture minimum 80 mm. Minimum air flow 200 cm²
2.
The plug for the mains lead is installed outside the cold room. If it protrudes beyond the
plastic cover, the mains lead must be fastened so that it cannot fall down into the
condenser fan.
3.
Build the cold room in accordance with prevailing laws and regulations. See the
Thermocold website www.thermocold.no for tips and advice for construction.
4.
Make an air vent above and below the recess in the wall on the outside of the cold room as
illustrated. Min 50x440 mm.
5.
Cut out for the ventilation grates w420xh110 in the wall on the outside of the cold room at the top
and bottom of the air vent.
6.
Adjust the air barrier against the chipboard/plasterboard between the posts. It should be 80 mm
narrower than the thickness of the wall.
7.
Adjust and attach the air seal 250 mm from the bottom of the recess. It should be 8 and screw it
stuck so that it remains pressed between the posts in the air vent. Ref. cross-section figure item 3
8.
Fix the insulating strips around the opening on the inside of the cold room side using staples or tape.
9.
Lift the unit into position from the cold room side and fasten with screws in each corner.
The gasket should be against the wall, not the cooling unit.
10.
Screw stuck the lower ventilation grate with slats down (2), upper with slats up (1).
11.
Plug in the mains lead and ensure that the unit starts up.
Exhaust
80mm
Intake
Structure 150mm
Seen from the
outside of the cold
Insulation 100mm
and vapour barrier
Seen from the
outside of the cold
Ventilation grates
installed
horizontally
Fully
installed from the
Cross-section.
See detail 3

__________________________________________________________________________
16
www.thermocold.no
NORW
Structure 150mm
Seen from the
outside of the cold
room
Insulation 150mm
and vapour barrier
Seen from the
outside of the cold
Installation option 3 – Self-assembled cold room with ventilation grate
1.
Adapt hole in wall 440x480 mm as illustrated. Distance from ceiling to top of light aperture
minimum 80 mm. Minimum air flow 200 cm
2.
The plug for the mains lead is installed outside the cold room. If it protrudes beyond the
plastic cover, the mains lead must be fastened so that it cannot fall down into the
condenser fan.
3.
Build the cold room in accordance with prevailing laws and regulations. See the
Thermocold website www.thermocold.no for tips and advice for construction.
4.
Make an air vent above and below the recess in the wall on the outside of the cold room as
illustrated. Min 50x440 mm.
5.
Cut out for the ventilation grates w420xh110 in the wall on the outside of the cold room at the top
and bottom of the air vent.
6.
Adjust the air barrier against the chipboard/plasterboard between the posts. It should be 80 mm
narrower than the thickness of the wall.
7.
Adjust and attach the air seal 250 mm from the bottom of the recess. It should be 8 and screw it
stuck so that it remains pressed between the posts in the air vent. Ref. cross-section figure item 3
8.
Fix the insulating strips around the opening on the inside of the cold room side using staples or tape.
9.
Lift the unit into position from the cold room side and fasten with screws in each corner.
The gasket should be against the wall, not the cooling unit.
10.
Screw stuck the lower ventilation grate with slats down (2), upper with slats up (1).
11.
Plug in the mains lead and ensure that the unit starts up.
Exhaust
80mm
Intake
Ventilation grates
installed vertically
Fully installed from
the outside
Cross-section.
See detail 3

__________________________________________________________________________
17
www.thermocold.no
NORW
Installation option 4 – Modular cold room, free–standing A/B
1.
Ensure that the hole in the modular wall is 440x480 mm Distance from the ceiling to the
top of the light aperture minimum 80 mm. Minimum air flow 200 cm²
2.
The plug for the mains lead is installed outside the cold room. If it protrudes beyond the
air vent, the mains lead must be fastened so that it cannot fall down into the condenser
fan.
3.
Lift the unit into position from the cold room side and fasten with screws in each corner.
The gasket should be against the wall, not the cooling unit.
4.
Installation A:
Screw the air vent to the outside of the cooling unit. Ensure that the air vent is even with the ceiling of the
cold room. (see figure installation A)
5.
Installation B:
The plastic cover for the modular room is installed to the cold room wall, not the cooling unit.
Ensure that the recess in the plastic cover is in contact with the air barrier. (see figure installation B and detail 3)
6.
Plug in the mains lead and ensure that the unit starts up.
Detail
Installation A / Air vent
Installation B / Plastic cover
for modular room

__________________________________________________________________________
18
www.thermocold.no
NORW
Installation option 5 – Modular cold room, free–standing A/B
1.
Ensure that the hole in the modular wall is 440x480 mm Distance from the ceiling to the
top of the light aperture minimum 80 mm. Minimum air flow 200 cm²
2.
The plug for the mains lead is installed outside the cold room. If it protrudes beyond the air
vent, the mains lead must be fastened so that it cannot fall down into the condenser fan. If the
plug is installed behind the ventilation grates, this must be labelled.
3.
Make a cut for the ventilation grates w420xh110 in the wall on the outside of where the
cooling unit is to be placed, horizontally or vertically.
4.
Make an air vent on the outside of the cold room as illustrated. Min. size 50x440 mm.
5.
Adjust and attach the air seal 250 mm from the bottom of the recess. Screw it/fasten it so that it
remains pressed between the wall and the cooling unit.
6.
7.
Adjust the air barrier along the ceiling so that the warm air exiting the unit does not have an
opportunity to circulate and get sucked into the lower end of the unit again. See figure
8.
Lift the unit into position from the cold room side and fasten with screws in each corner.
The gasket should be against the wall, not the cooling unit.
9.
Screw stuck the lower ventilation grate with slats down (2), upper with slats up (1).
10.
Plug in the mains lead and ensure that the unit starts up.

__________________________________________________________________________
19
www.thermocold.no
NORW
Installation alternative 6 – Corner refrigerator with air vent/air barrier
1.
Ensure that the hole in the modular wall is 440x480 mm Distance from the ceiling to the
top of the light aperture minimum 80 mm. Minimum air flow between grates 200 cm²
2.
Install the plug 2200mm from the floor and up, and 800mm from the corner and out.
3.
NB! Must be conducted by an authorised electrician.
4.
If an air conduit is not installed to the rear wall, an air barrier must be installed. See figure
5.
Install 1 pc ventilation grate to the base. Install 2 pcs ventilation grates above the door for a
ceiling-height kitchen.
6.
Take the mains lead out over the air vent and attach the mains lead so that it cannot fall down into
the condenser fan.
7.
Lift the unit into position from the cold room side and fasten with screws in each corner.
The gasket should be against the wall, not the cooling unit.
8.
Plug in the mains lead and ensure that the unit starts up.

__________________________________________________________________________
20
www.thermocold.no
NORW
Installation option 7 – TC 10 Flex
1.
Start by removing the old cooling unit out of the wall.
2.
The light aperture for the TC 10 Flex should be 440 - 560 mm x 650 mm. The distance from
ceiling to top of light aperture must be at least 140 mm.
3.
Tape the insulating strips in the light aperture.
4.
Bring the cooling unit into the cold room and place it in the middle of this light aperture. Screw it to
every corner.
5.
Install the included insulation to each side of the back of the cooling unit.
6.
Install the air barrier
7.
Install the plastic cover Screw this to the existing wall. Not the cooling unit
8.
Plug in the mains lead and ensure that the unit starts up.
Air barrier and
On the outside of the cold
insulatin
g strips On the outside of
On the outside of the cold
On the inside of the cold
This manual suits for next models
2
Table of contents
Other Thermocold Cooling Box manuals

