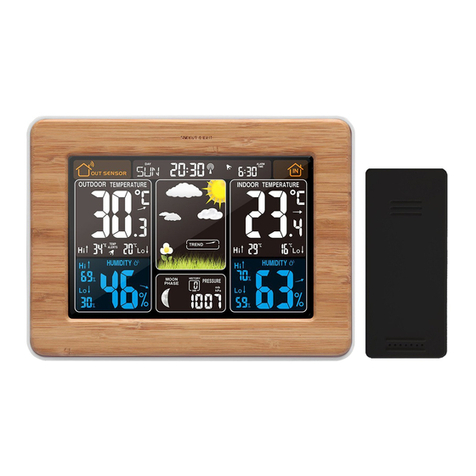
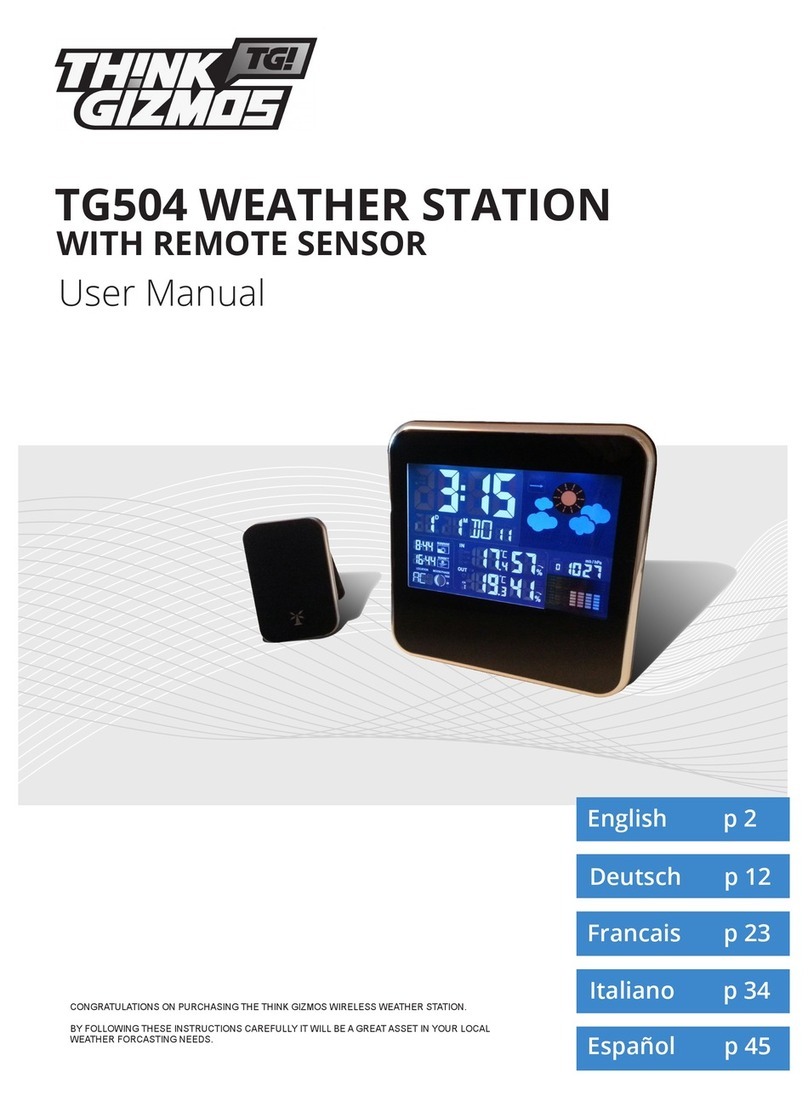
ThinkGizmos TG647 User manual

TG647 WEATHER STATION
CONGRATULATIONS ON PURCHASING THE THINK GIZMOS WIRELESS WEATHER STATION.
BY FOLLOWING THESE INSTRUCTIONS CAREFULLY IT WILL BE A GREAT ASSET IN YOUR LOCAL
WEATHER FORCASTING NEEDS.
User Manual
WITH REMOTE SENSOR
English p 1
Español p 12

ENGLISH MANUAL - CONTENTS
1.
2.
3.
4.
1.1 Weather Station Features ...................................................................................3
1.2 Remote Sensor (Transmitter) Features .............................................................3
3.1 Important Information ....................................................................................... 5
3.2 Initial Operation................................................................................................... 5
3.3 Backlight ............................................................................................................... 5
2.1 Weather Station Appearance ............................................................................ 4
6.1 Setting the Daily Alarm ....................................................................................... 8
6.2 Activating and Deactivating the Alarm.............................................................. 8
6.3 Alarm Information............................................................................................... 8
6.4 Automatic Snooze Function .............................................................................. 8
WEATHER STATION FEATURES
IMPORTANT INFORMATION
WEATHER STATION FEATURES CONTINUED
ALARM SETTING
2
5.
7.1 °C/°F Temperature Display ................................................................................ 9
7.2 Ice Alert ................................................................................................................ 9
7.3 Maximum/Minimum Temp and Humidity ....................................................... 9
TEMPERATURE AND HUMIDITY INFO
6.
7.
8.1 Weather Forecast .............................................................................................. 10
8.2 Charging Function ............................................................................................ 10
WEATHER FORECAST AND CHARGING
8.
9. 9.1 Warranty Information ..................................................................................... 11
WARRANTY
4.1 Automatic Time Setting ...................................................................................... 6
4.2 Automatic Time Further Information................................................................ 6
TIME SETTINGS
5.1 Manual Time Setting .......................................................................................... 7
TIME SETTINGS CONTINUED

1. WEATHER STATION FEATURES
3
1.1 Weather Station Features
●WWVB Radio Controlled Time
●Time in optional 12/24 hour format.
●Daily Alarm Feature.
●Automatic snooze function.
●Low battery indicator
●Weather forecasting function
●Temperature display in °C or °F.
●Thermometer: Indoor measurement ranges: 0°C (32°F) - 50°C (122°F), outdoor
measurement ranges: -20°C (-4°F) - 60°C (140°F).
●Hygrometer: Indoor and Outdoor measurement range: 20%-95% RH.
●Minimum / maximum display for air humidity and temperature.
●Ice Alert.
●LED back light display.
●Batteries: 2xAA (not included).
●DC power supply: 5VDC (Included).
1.2 Remote Sensor (Transmitter) Features
●Transmitter frequency: 433MHz.
●Range of transmission is up to 60m (Open Space).
●Wall mountable.
●Batteries: 2xAAA (not included).

2. WEATHER STATION FEATURES CONTINUED
2.1 Weather Station Appearance
4
A1: Weather Forecasting
A2: Outdoor Temperature
A3: Outdoor Humidity
A4: Indoor Temperature
A5: Indoor Humidity
A6: Time
A7: WWVB Signal Icon
B1: SNOOZE/LIGHT button
B2: MODE button
B3: MEM button
B4: ▲ button
B5: ▼ button
B8: BACKLIGHT HI/LO button
B9: USB charger output
B10: DC power input socket
B11: Battery compartment
Weather Station Back and Top:
Weather Station LCD:

3. IMPORTANT INFORMATION
5
3.1 Important Information
●In order to get the full screen brightness and easy visability of all numbers and symbols,
we recommend you use the included mains adaptor rather than batteries for the main
unit.
●The remote sensor will work better if the main unit is powered by the included mains
adaptor rather than batteries.
●Regarding the wireless remote sensor (which can be positioned indoors or outdoors), if
it is used outside particulatly in cold conditions we recommend the use of Lithium AAA
(requires 2) batteries as this will result in a more powerful signal and ensure no signal
loss. This is only precautionary advice and the remote sensor does work ne with normal
Alkaline batteries.
●The weather station needs to be powered for 12 hours before an accurate predition will
display.
3.2 Initial Operation
●Open the Weather Station Battery compartment.
●Insert 2 x AA batteries observing the correct polarity (+ and - marks) or connect the
mains power. Close the battery compartment.
●When the power is connected all the icons on the LCD display will light up for 3 seconds,
you will hear a beep tone and the weather station will start to detect the indoor
temperature and humidity.
●Next the Weather Station will attempt to connect with the outdoor sensor. This lasts
approximately 3 minutes and is displayed by the RF icon ashing.
●Remove the battery compartment on the Wireless Outdoor Sensor, insert 2 x
AAA batteries observing the correct polarity (+ and - marks) and close the battery
compartment.
●Once the weather station has created a connetion to the outdoor sensor the clock will
start automatically searching for the WWVB Signal to set the time and date.
●If Weather Station failed to receive transmission from the outdoor sensor (“- -” is
displayed on the LCD), press and hold ▼button for 3 seconds to receive transmission
manually. The RF icon will ash on the LCD and the outdoor temperature will show
when it is connected.
3.3 Backlight
●When using battery power the backlight will be o. Press the SNOOZE/LIGHT button to
enable the backlight for 15 seconds.
●When using Mains power the backlight will be lit continuously. To change the brightness
of the backlight switch the backlight switch to eiher HI or LO.

4. TIME SETTINGS
4.1 Automatic Time Setting
●The Weather Station automatically starts the WWVB Signal search after 7 minutes of any
restart or change of batteries.
●To manually start the WWVB signal search, press and hold down the ▲button for 2
seconds.
●The radio mast icon will ash showing it is searching for signal.
●Once the signal is found the Time will be automatically set. If no signal is found within 7
minutes the radio mast icon will dissapear and it will automatically start searching again
in 1 hour.
4.2 Automatic Time Further Information
●During the WWVB signal search mode only the SNOOZE/LIGHT and ▲button will
function, all other buttons have no function. If you wish to carry out any other functions
press the ▲button to cancel the WWVB signal search.
●A ashing radion mast icon indicates that the WWVB signal search is in progress.
●A continuously displayed radio mast icon indicates that the WWVB signal has been
received successfully.
●At 1:00 / 2:00 / 3:00am the Weather Station automatically carries out a synchronization
procedure with the WWVB signal to correct any deviations to the exact time. If this
synchronization attempt is unsuccessful (The radio mast symbol disappears from the
display), the system will automatically attempt another synchronization at the next full
hour. This procedure is repeated automatically up to 5 times.
●If the clock cannot receive the WWVB signal, you have the option of setting the time
manually and instructions can be found on page 7. As soon as the reception of the
WWVB signal is received the Weather Station is re-adjusted automatically.
●We recommend a minimum distance of 2.5 meters (8.2 Feet) to all sources of
interference, such as televisions or computer monitors.
●Radio reception can be weaker in rooms with concrete walls and in oces. In such
extreme circumstances, place the system close to the window for better signal reception.
6

5. TIME SETTINGS CONTINUED
7
5.1 Manual Time Setting
Note: After 20 seconds without pressing any button, the clock switches automatically from
Set Mode to Normal Time Mode.
●Press MODE button to conrm your setting, the temperature display shown by °C starts
to ash. Now use ▲and ▼buttons to set the temperature unit in °C or °F.
●Press and hold down the MODE button for 2 seconds, the 12/24 hour mode display
starts to ash. Now use ▲and ▼buttons to set the correct 12/24 hour mode.
●Press MODE to conrm your setting, the Time Zone display starts to ash. Now use ▲
and ▼ buttons to set the time zone (PST, MST, CST and EST).
●Press MODE to conrm your setting, the DST display starts to ash. Now use ▲and ▼
buttons to set DST to on or o.
●Press MODE to conrm your setting, the Hour display starts to ash. Now use ▲and ▼
buttons to set the correct hour.
●Press MODE to conrm your setting, the Minute displays starts to ash. Now use ▲and
▼buttons to set the correct minute.
●Press MODE to conrm your setting, the weather forecast pattern display starts to ash.
Now use ▲and ▼buttons to select the current weather pattern.
●Press MODE to conrm your setting and to end the setting procedure.
Time Zone Settings:
●EST: Eastern Standard Time
●CST: Central Standard Time
●MST: Mountain Standard Time
●PST: Pacic Standard Time

6. ALARM SETTING
8
6.1 Setting the Daily Alarm
Note: After 20 seconds without pressing any button, the clock switches automatically from
Set Mode to Normal Time Mode.
Pressing the MODE button once will change the display from showing the time to showing
the alarm time.
Proceed as follows to set the alarms:
●Press the MODE button once to show the alarm time then press and hold down the
MODE button for 2 seconds until the alarm time hour display starts to ash.
●Press the ▲and ▼ keys to to set the correct hour. Press MODE to conrm the settings.
●The minute display will start to ash. Press the ▲and ▼keys to to set the correct
minute. Press MODE to conrm the settings.
●The Snooze time of the alarm will start to ash. Press the ▲and ▼keys to to set the
correct snooze time.
●Press MODE to conrm the settings and end the alarm setting procedure.
6.2 Activating and Deactivating the Alarm
●Press the ▲ button once activate the alarm. The icon will show on the display when
the alarm is active.
●Press the ▲ button again to deactivate the alarm. The icon will no longer be shown on
the display.
6.3 Alarm Information
●Press any button except the SNOOZE/LIGHT button to deactivate the alarm when it
sounds.
●If not manually stopped the alarm will sound for 2 minutes before automatically
stopping.
●Once the alarm has been stopped it does not need resetting as it will automatically
sound 24 hours later at the set time.
●Rising Alarm (length: 2 minutes) changes the volume four times whilst the alarm signal is
heard.
6.4 Automatic Snooze Function
Proceed as follows to activate the automatic snooze function:
●While the alarm is sounding, press the SNOOZE/LIGHT button to activate the snooze
function.
●This moves the alarm back by by the set time and the alarm will restart at this time.
●The snooze function can be interrupted by pressing any button.

7. TEMPERATURE AND HUMIDITY INFO
7.1 °C/°F Temperature Display
●The temperature is displayed either in °C/°F. The temperature unit can be by following
the manual time setting instructions on page 7.
●If the temperature reading is below the minimum range then LL.L will be displayed. If it
is above the maximum reading then HH.H is displayed.
7.2 Ice Alert
●The Ice Alert symbol appears and will be ashing next to the outdoor temperature
when the temperature is between –1°C to + 3°C or +30°F to + 37°F.
9
7.3 Maximum/Minimum Temp and Humidity
To toggle the indoor/outdoor max/min temperature and humidity press the MEM button:
●Once to show maximum temperature and humidity and show MAX on the display.
●Twice to show the minimum temperature and humidity and show MIN on the display.
●Three times to return to the current temperature and humidity.
To reset the max/min temperature and humidity hold the MEM button for about 3 seconds.

8. WEATHER FORECAST AND CHARGING
10
8.1 Weather Forecast
The weather station use the air pressure data to create a weather forecast for the next 8
hours.
The following weather symbols are used to represent the weather forecast:
Note:
●The data shown within the rst 12 hours after inserting the batteries may not be correct, as the weather
station has to get used to the environmental circumstances after the restart.
●The weather station shows the forecast for the next 8 hours not the current weather.
●Please take the weather forecast from your local weather forecasting service into account as well as the
forecast from your weather station. If there are discrepancies between the information from your device
and from the local weather forecasting service, please take the advice of the latter as authoritative.
●The weather forecast is calculated from evaluation of uctuations in the barometric pressure and may
deviate from the actual weather conditions.
8.2 Charging Function
●When using the 5V power adapter, the USB plug on the back of the weather station can
be used for charging mobile phones etc.

9. WARRANTY
9.1 Warranty Information
Think Gizmos, Unit 19, Lawson Hunt Industrial Park,
Broadbridge Heath, West Sussex, RH12 3JR
Tel.: +44/(0)203 384 8304
What is Covered:
This warranty covers any defects in materials or workmanship, with the exceptions stated
below.
How Long Coverage Lasts:
This warranty runs for 1 Year from the date your Weather Station is delivered.
What is not covered:
Any problem that is caused by abuse, misuse, or an act of God (such as a ood) are not
covered.
What We Will Do:
If the Product proves defective during the warranty period, we will provide you with the
instructions for the return, and we will take one of the following actions: (i) replace the
Product with a product that is the same or equivalent to the Product you purchased; (ii)
repair the Product; or (iii) refund to you the whole of or part of the purchase price of the
Product.
How To Get Service:
To obtain instructions on how to obtain service under this warranty, contact our customer
service by phone or email. You will nd the contact details of our customer service below.
Customer service may ask you questions to determine your eligibility under this warranty,
and if you are eligible you’ll be given instructions for returning the defective Product. If
we send you a replacement or repair your Product, we will pay the cost of delivering the
replacement or repaired Product to you.
Do not return the item to the original place of purchase, please contact Think
Gizmos direct.
11

TG647 WEATHER STATION
FELICITACIONES POR ADQUIRIR EL THINK GIZMOS ESTACION METEOROLÓGICA.
SIGUIENDO ESTAS INSTRUCCIONES CON CUIDADO VA A SER UN GRAN ACTIVO EN TUS LOCAL
WEATHER FORCASTING NECESIDADES.
User Manual
WITH REMOTE SENSOR
English p 1
Español p 12

MANUAL ESPAÑOL – CONTENIDO
1.
2.
3.
4.
6.1 Conguración de las alarmas diarias.............................................................. 18
6.2 Activación y desactivación de las alarmas...................................................... 18
6.3 Información acerca de la alarma..................................................................... 18
6.4 Función automática Snooze ............................................................................ 18
CONFIGURACIÓN DE LA ALARMA
13
5.
7.1 Presentación de temperatura ° C / ° F ........................................................... 19
7.2 Alerta de hielo ................................................................................................... 19
7.3 Temperatura Máxima / Mínima y Humedad ................................................. 19
TEMPERATURA Y HUMEDAD
6.
7.
8.1 Previsión meteorológica .................................................................................. 20
8.2 Función de carga .............................................................................................. 20
PRONÓSTICO METEOROLÓGICO Y CARGA
8.
9. 9.1 Información acerca de la garantía ................................................................. 21
GARANTÍA
4.1 Conguración automática de la hora... .......................................................... 16
4.2 Tiempo automático Más información............................................................. 16
AJUSTES DE HORA
5.1 Ajuste manual del tiempo ............................................................................... 17
AJUSTES DE HORA
1.1 Características de la estación meteorológica .................................................13
1.2 Características del sensor remoto (transmisor) ............................................13
3.1 Información importante .................................................................................. 15
3.2 Operación inicial ................................................................................................ 15
3.3 Luz de fondo ...................................................................................................... 15
2.1Aspecto de la estación meteorológica ............................................................ 14
CARACTERÍSTICAS DE LA ESTACIÓN METEOROLÓGICA
INFORMACIÓN IMPORTANTE
CARACTERÍSTICAS DE LA ESTACIÓN METEOROLÓGICA

1. CARACTERÍSTICAS DE LA ESTACIÓN METEOROLÓGICA
14
1.1 Características de la estación meteorológica
●Reloj WWVB controlado por radio frecuencia.
●Función de tiempo opcional de formato 12/24 horas.
●Función de alarma diaria.
●Función dormitar .
●Indicador de batería baja
●Función de pronóstico de tiempo
●La temperatura se muestra en °C o °F.
●Temperatura: Rango de medida de la temperature interior: 0°C (32°F) - 50°C (122°F),
Rango de medida de la temperature exterior: -20°C (-4°F) - 60°C (140°F).
●Humedad: Rango de medida interior y exterior: 20%RH ~ 95%RH.
●Valor mínimo y máximo de temperature y humedad.
●Alerta de hielo.
●Pantalla de luz trasera LED.
●Pilas: 2xAA (no incluidas).
●Fuente de alimentación DC: 5VDC (incluido).
1.2 Características del sensor remoto (transmisor)
●Frecuencia del transmisor: 433 MHz.
●Rango de transmisión es de hasta 60m (espacio abierto)
●Puede colocarse sobre la pared o mesa.
●Pilas: 2xAAA (no incluidas).

2. CARACTERÍSTICAS DE LA ESTACIÓN METEOROLÓGICA
2.1 Aspecto de la estación meteorológica
15
A1: Pronóstico de Tiempo
A2: Temperatura Exterior
A3: Humedad Interior
A4: Temperatura Interior
A5: Humedad Interior
A6: Hora
A7: Ícono RCC
B1: SNOOZE/LIGHT de tacto
B2: Botón MODE
B3: Botón MEM
B4: Botón ▲
B5: Botón ▼
B8: Selector BACKLIGHT HI/LO
B9: Enchufe USB
B10: Alimentación DC
B11: Compatimiento de Batería
Botón trasero y alimentación:
LCD:

●Abrir la tapa del compartimiento de la batería.
●Insertar 2 baterías AA observando su polaridad [ las marcas “+” y “ –“].
●Cuando inserte las baterias, todos los iconos de la pantalla LCD se encenderan
brevemente durante 3 segundos, se escuchará un pitido y detectará la temperatura y la
humedad interiores.
●La Estación Meteorológica comenzará a realizar una conexión con el sensor remoto
exterior. Esta operación dura alrededor de 3 minutos y se muestra mediante un símbolo
de antena RF de recepción que parpadea en el área de visualización “OUTDOOR” del
receptor.
●Abra la cubierta del compartimento de la batería del sensor de exterior inalámbrico,
inserte 2 baterías AAA observando la polaridad [ marcas “+” y “–“] .
●Una vez que la estación meteorológica ha creado una conexión con el sensor exterior,
el reloj comenzará a buscar automáticamente la señal WWVB para ajustar la hora y la
fecha.
●Si la estación meteorológica falla al recibir la transmission desde el sensor ( mostrará
“- -” en la pantalla LCD), presiona y sostiene ▼durante 3 segundos para obtener
la transmisión manual. El ícono RF parpadeará en la pantalla LCD, y la Estación
Metereológica recibirá la señal.
16
3. INFORMACIÓN IMPORTANTE
3.1 Información importante
●Con el n de conseguir la iluminación total de la pantalla y visibilidad de todos los
números y símbolos, recomendamos utilizar el adaptador de red (incluido) con la unidad
principal en lugar de pilas.
●El sensor remoto funcionará mejor si la unidad principal está alimentada por la fuente
de alimentación incluida en lugar de por pilas.
●En cuanto el sensor remoto inalámbrico (que puede estar ubicado en el interior o
exterior) si se usa exterior, particularmente en condiciones de frío, recomendamos el
uso depilas de litio AA (requiere 2) dará lugar una señal más potente y garantiza que no
habrá pérdida de señal. Esto es un consejo de precaución, el sensor remoto funciona
bien con pilas alcalinas normales.
●La estación meteorológica necesita estar conectada durante 12 horas para poder
mostrar una previsión precisa.
3.2 Operación inicial
3.3 Luz de fondo
●Al utilizar la fuente de alimentación de la batería, pulse el botón SNOOZE/LIGHT, la luz
de fondo se ilumina durante 15 segundos.
●Mientras se utiliza el sistema de iluminación de la DC, la luz de fondo permanecerá
activa. Para cambiar el brillo de la luz, apague el interruptor de luz de fondo en HI o LO.

4. AJUSTES DE HORA
4.1 Conguración automática de la hora
●El reloj inicia automáticamente la búsqueda de la señal WWVB después de 7 minutos
de cualquier reinicio o cambio de baterías nuevas. El icono de la antena de la radio
comienza a parpadear.
●Para iniciar la recepción manual de la señal WWVB, presionar y sostener el botón ▲
durante 2 segundos.
●El icono del mástil de radio parpadeará mostrando que está buscando señal.
●Una vez que se encuentre la señal, la hora y la fecha se establecerán automáticamente.
Si no se detecta ninguna señal dentro de los 7 minutos, el icono del mástil de radio
desaparecerá y se iniciará automáticamente la búsqueda de nuevo en 1 hora.
4.2 Tiempo automático Más información
●Durante el modo de recepción RC, sólo las funciones SNOOZE/LIGHT y ▲funcionan,
otras funciones de los botones no tienen función. Si desea realizar otras funciones de
funcionamiento, pulse el botón ▲ para salir de la recepción RC modo.
●El icono de la antenna de la radio parpadeante indica que la recepción de la señal WWVB
ha comenzado.
●El icono de la antena de radio que se vizualiza continuamente indica que la señal WWVB
se ha recibido correctamente.
●A las 1:00 / 2:00 / 3:00 am, el reloj realiza automáticamente el procedimiento de
sincronización con la señal WWVB para corregir cualquier desviación a la hora exacta.
Si este intento de sincronización no tiene éxito (el icono del la antena de la radio
desaparecerá de la pantalla), el sistema intentará automáticamente otra sincronización
en la próxima hora completa. Este procedimiento se repite automáticamente hasta un
total de 5 veces.
●Si el reloj no puede recibir la señal WWVB (porque la distancia es demasiado grande
para recibir una señal del transmisor), tiene la opción de ajustar la hora manualmente y
las instrucciones pueden encontrarse en la página 28. Tan pronto como la recepción del
WWVB La estación meteorológica se reajusta automáticamente.
●Recomendamos una distancia mínima de 2,5 metros a todas las fuentes de interferencia,
como televisores o monitores de ordenador.
●La recepción de radio es más débil en las habitaciones con paredes de hormigón (por
ejemplo: en las bodegas) y en las ocinas. En tales circunstancias extremas, coloque el
sistema cerca de la ventana.
17

5. AJUSTES DE HORA
18
5.1 Ajuste manual del tiempo
Después de 20 segundos sin pulsar ningún botón, el reloj cambia automáticamente del
modo de ajuste al modo de hora normal.
●Presione y sostenga el botón MODE durante 2 segundos, la temperatura comenzará a
parpadear. Ahora utilice ▲and ▼para elegir °C o °F.
●Presione MODE para conrmar su elección, la hora 12/24 comenzará a parpadear.
Ahora utilice ▲and ▼para elegir el modo 12/24 que necesite.
●Presione MODE para conrmar su elección, las zonas comenzará a parpadear. Ahora
utilice ▲and ▼ para elegir la zona correcta (PST MST CST and EST).
●Presione MODE para conrmar su elección, el ícono DST comenzará a parpadear. Ahora
utilice ▲and ▼ para elegir DST en on o en o.
●Presione MODE para conrmar su elección, la hora comenzará a parpadear. Ahora
utilice ▲and ▼para elegir la hora correcta.
●Presione MODE para conrmar su elección, los minutos comenzará a parpadear. Ahora
utilice ▲and ▼ para elegir el minuto correcto.
●Presione MODE para conrmar su elección, el pronóstico de tiempo comenzará a
parpadear. Ahora utilice ▲and ▼para elegir.
●Presione MODE para conrmar su elección y para terminar con su elección.

6. CONFIGURACIÓN DE LA ALARMA
19
6.1 Conguración de las alarmas diarias
Luego de 20 segundos sin presionar ningun botón el reloj se colocará en su modo
automático.
Al presionar el botón MODE una vez cambiará la visualización de mostrar la hora a mostrar
la hora de la alarma.
Proceda de la siguiente manera para ajustar las alarmas:
●Pulse una vez el botón MODE, la hora de la alarma de la pantalla LCD, luego Mantenga
pulsado el botón MODE durante 2 segundos hasta que la hora de la hora de la alarma
empiece a parpadear.
●Utilice los botones ▲y ▼ para ajustar la hora deseada. Pulse el botón MODE para
conrmar la conguración.
●El minuto de la hora de la alarma comienza a parpadear. Utilice los botones ▲y ▼para
ajustar los minutos requeridos. Pulse el botón MODE para conrmar la conguración.
●el tiempo de repetición de la alarma comenzará a parpadear. Utilice los botones ▲y
▼para ajustar el minuto de repetición que necesita.
●Pulse el botón MODE para conrmar su conguración y nalizar el procedimiento de
conguración.
6.2 Activación y desactivación de las alarmas
●Pulse el botón ▲ una vez para activar la alarma. El icono aparecerá en la pantalla
cuando la alarma esté activa.
●Pulse de nuevo el botón ▲ para desactivar la alarma. El icono ya no se mostrará en la
pantalla.
6.3 Información acerca de la alarma
●Presiona cualquier botón excepto SNOOZE/LIGHT para apagar la alarma.
●La alarma sonará durante 2 minutos si no se desactiva presionando cualquier tecla.
●En este caso, la alarma se repetirá automáticamente después de 24 horas.
●Alarma ascendente (duración: 2 minutos) cambia el volumen cuatro veces mientras se
escucha la señal de alarma.
6.4 Función automática Snooze
Proceda como se indica a continuación para activar la función de repetición automática:
●Mientras la alarma está sonando, pulse la tecla SNOOZE/LIGHT para activar la función
de repetición.
●Esto devuelve la alarma por el tiempo establecido y la alarma se reiniciará en este
momento.
●La función de snooze puede ser interrumpida pulsando cualquier botón.

7. TEMPERATURA Y HUMEDAD
7.1 Presentación de temperatura °C/°F
●La temperatura se muestra en °C / °F. La unidad de temperatura se puede ajustar
siguiendo los ajustes manuales de la hora en la página 29.
●Si la lectura de temperatura está por debajo de los rangos, se mostrará LL.L Si la lectura
de la temperatura está por encima de los rangos, se visualizará la HH.H.
7.2 Alerta de hielo
●El símbolo de alerta de hielo aparece y parpadea junto a la temperatura exterior
cuando la temperatura exterior es de –1°C a + 3°C o de +30°F a + 37°F.
20
7.3 Temperatura Máxima / Mínima y Humedad
Para cambiar los datos máximos, mínimos y de humedad interiores / exteriores, pulse el
botón MEM:
●Una vez para mostrar los valores máximos de temperatura y humedad.
●Dos veces para sembrar los valores mínimos de temperatura y humedad.
●Tres veces para volver a los niveles actuales de temperatura y humedad.
Para restablecer la temperatura máxima y mínima y la humedad, presione y mantenga
presionado el botón MEM aproximadamente 2 segundos.
Table of contents
Languages:
Other ThinkGizmos Weather Station manuals
Popular Weather Station manuals by other brands

TFA
TFA 47.3004 instruction manual

Oregon Scientific
Oregon Scientific BAR338PA user manual

Oregon Scientific
Oregon Scientific BBW213 user manual

Oregon Scientific
Oregon Scientific BHB613 user manual

Brandani
Brandani 56434 instruction manual

La Crosse Technology
La Crosse Technology 328-2314 Instructional manual

smart home
smart home Wireless Weather Station instruction manual

Oregon Scientific
Oregon Scientific Weather@Home BAR218HG user manual

Davis Instruments
Davis Instruments EnvrioMonitor install guide

ECOWITT
ECOWITT WN190 Operation manual

La Crosse Technology
La Crosse Technology WS-7213U instruction manual

Hobo
Hobo U30/NRC quick start guide