7500112&1'&'PROfine'drink'kit'instructions'19&6&13.doc' 7'
Disposal!of!exhausted!cartridges!and!
batteries!
The'disposal'of'exhausted'materials'(cartridges,'batteries)'shall'be'borne'
by'the'user,'and'it'must'be'executed'according'to'the'law'dispositions.''
The'exhausted'cartridge'is'comparable'to'urban'solid'waste.''
COLLECTION'OF'ELECTRICAL'/'ELECTRONIC'WASTE'MATERIAL
According'to'article'no.'13'of'the'Legislative'Decree'of'25th'July'2005,'No.'
151'"Implementation'of'Directives'2002/95/CE,'2002/96/CE'and'
2003/108/CE,'concerning'the'reduction'of'hazardous'substances'in'
electrical'and'electronic'equipments,'further'to'the'waste'disposal'and'
Legislative'Decree'20th'November'2008,'No'188'Implementation'of'
Directive'2006/66/CE'concerning'batteries,'accumulators'and'relevant'
waste'and'repealing'Directive'91/157/CEE.'
The'crossed'rubbish'skip'symbol'as'shown'on'the'
equipment'or'on'its'packaging'indicates'that'the'product,'
at'the'end'of'its'life,'will'need'to'be'collected'separately'
from'other'waste.'The'user,'therefore,'will'have'to'confer'
the'equipment'OR'ITS'EXHAUSTED'COMPONENTS'to'the'
suitable'collection'centres'for'electronic'and'electrical'waste,'or'return'it'
to'the'dealer'when'purchasing'a'new'equipment'of'equivalent'type,'in'a'
ratio'of'one'to'one. The'proper'waste'collection'for'the'following'sending'
of'the'cast&off'equipment'to'recycling,'treatment'and'environmentally'
compatible'disposal'contributes'in'preventing'possible'negative'effects'on'
the'environmental'and'on'the'public'well&being'and'benefits'the'reuse'and'
/'or'recycling'of'materials'of'which'the'equipment'is'made.
We'recalled'that'the'disposal'shall'be'borne'by'the'user'and'that'the'illegal'
disposal'of'the'product'by'the'user'implies'the'application'of'
administrative'sanctions'provided'by'law,'releasing'the'seller'and'the'
manufacturer'from'any'liability.
Search!for!failures!
In! case! you! experience! an! anomaly,! before! calling! for! service! please!
make!the!following!functional!tests:!
1_Difficulty!in!the!placing!of!cartridge!
Only!use!original!replacement!cartridges.!
The!compatibility!with!non_original!cartridges!is!not!
guarantee,!even!if!!aesthetically!similar.!
1. Check'the'originality'of'the'cartridge.'
2. Make'sure'you'removed'the'safety'cap.'
3. Make'sure'you'correctly'fit'the'fixing'fins'
4. Lightly'grease'the'seals'on'the'cartridge'with'water'or'edible'oil.'
2_!Loss!of!water!after!replacing!the!cartridge!!
1. Remove' and' position' again' the' cartridge,' taking' care' to' insert' it'
correctly.'
2. After' having' lightly' lubricated' seals' on' the' cartridge,' remove' and'
position'it'again.'
3_There!is!no!supply!from!the!tap!or!the!supply!is!poor!
A)!If'this'comes'immediately'after'the'cartridge’s'replacement:'
1. Check' the' correct' positioning' of' the' cartridge,' eventually' by'
removing'and'repositioning'it.'
2. Make'sure'that'the'inlet'tap'in'completely'turned'on.'
3. Make'sure'that'the'flexible'pipes''aren’t'flattened'in'any'point.'
4. Make'sure'that'the'pipes'are'properly'connected'
B)!If'this'came'during'normal'operation:'
1. Make'sure'that'the'inlet'tap'in'completely'turned'on.'
2. Make'sure'that'the'flexible'pipes''aren’t'flattened'in'any'point.'
3. Make'sure'that'the'pressure'inside'of'the'net'is'at'least'1.5'Bar.'
4. Replace'the' cartridge'and' check'the'quality'of'affluent'water,' that'
might'be'out'of'limits'or'of'inconstant'quality.'
4_No!light!signal!at!the!turning!on!of!the!tap!
1. Replace'the'CR2032'battery.'
2. CR2032'battery'inserted'incorrectly.'
3. Battery'installed'not'complying'with'standard'CR2032.'
'
5_Bright!red!led!signal!at!the!turning!on!of!the!tap!!
1. Replace'the'filter'cartridge'and'the'battery'simultaneously.'
System’s!disinfection!
The!operation!must!be!performed!by!qualified!personnel.!
The! described! steps! include! the! use! of! strong! oxidizing!
products,!so!it’s!necessary!to!proceed!with!due!caution,!by!
wearing!appropriate!protections!(gloves,!glasses!....)!!
Immediately!close,!carefully,!all!packages!of!the!chemicals!
products! and! make! sure! that! nobody,! especially! children!
or!elderly!people!can!have!access!in!any!way!to!the!supply!
tap.! When! finished! the! operation,! rinse! thoroughly! tools!
and!protections!under!running!water!before!storing.''
The! system’s! disinfection! is! recommended! at! every!
periodic! cartridge! replacement! and! in! case! of! disuse!!
exceeding!10!days.!!
'
WE! RECOMMEND! USING! AMUCHINA! WITH! A! MINIMUM! TITRATION! OF!
1%! BY! RESPECTION! THE! ! PRECAUTIONS! FOR! USE! AS! OUTLINED! BY! THE!
SUPPLIER!OF!THE!SAME.!!
1. Turn'off'the'water'plug'valve'and'turn' on'the'water'supply'tap' to'
release'the'pressure'from'the'system.'
2. If' carried' out' with' a' new' cartridge,' inject' approximately' 5cc'
Amuchina' in' the' cartridge,' both' in' the' alimentation' side' (SMALL'
CENTRAL' HOLE)' and' the' outlet' side' (SIDE' HOLES).' In' the' case' of'
used' cartridge' it' is' recommended' to' partially' unload' the' water'
contained'in'the'cartridge'after'removal.''
3. Install' the' cartridge' in' the' head' and' turn' on' again' the'water' plug'
valve.'
4. Supply'2'glasses'of'water,'then'turn'off'the'tap'and'wait'one'hour'
so'that'the'solution'can'act'on'the'system’s'components.'
5. Turn' on' the' tap' and' supply' water' for' 5' minutes' in' order' to' rinse'
completely'the'disinfectant'from'the'system.'!
!
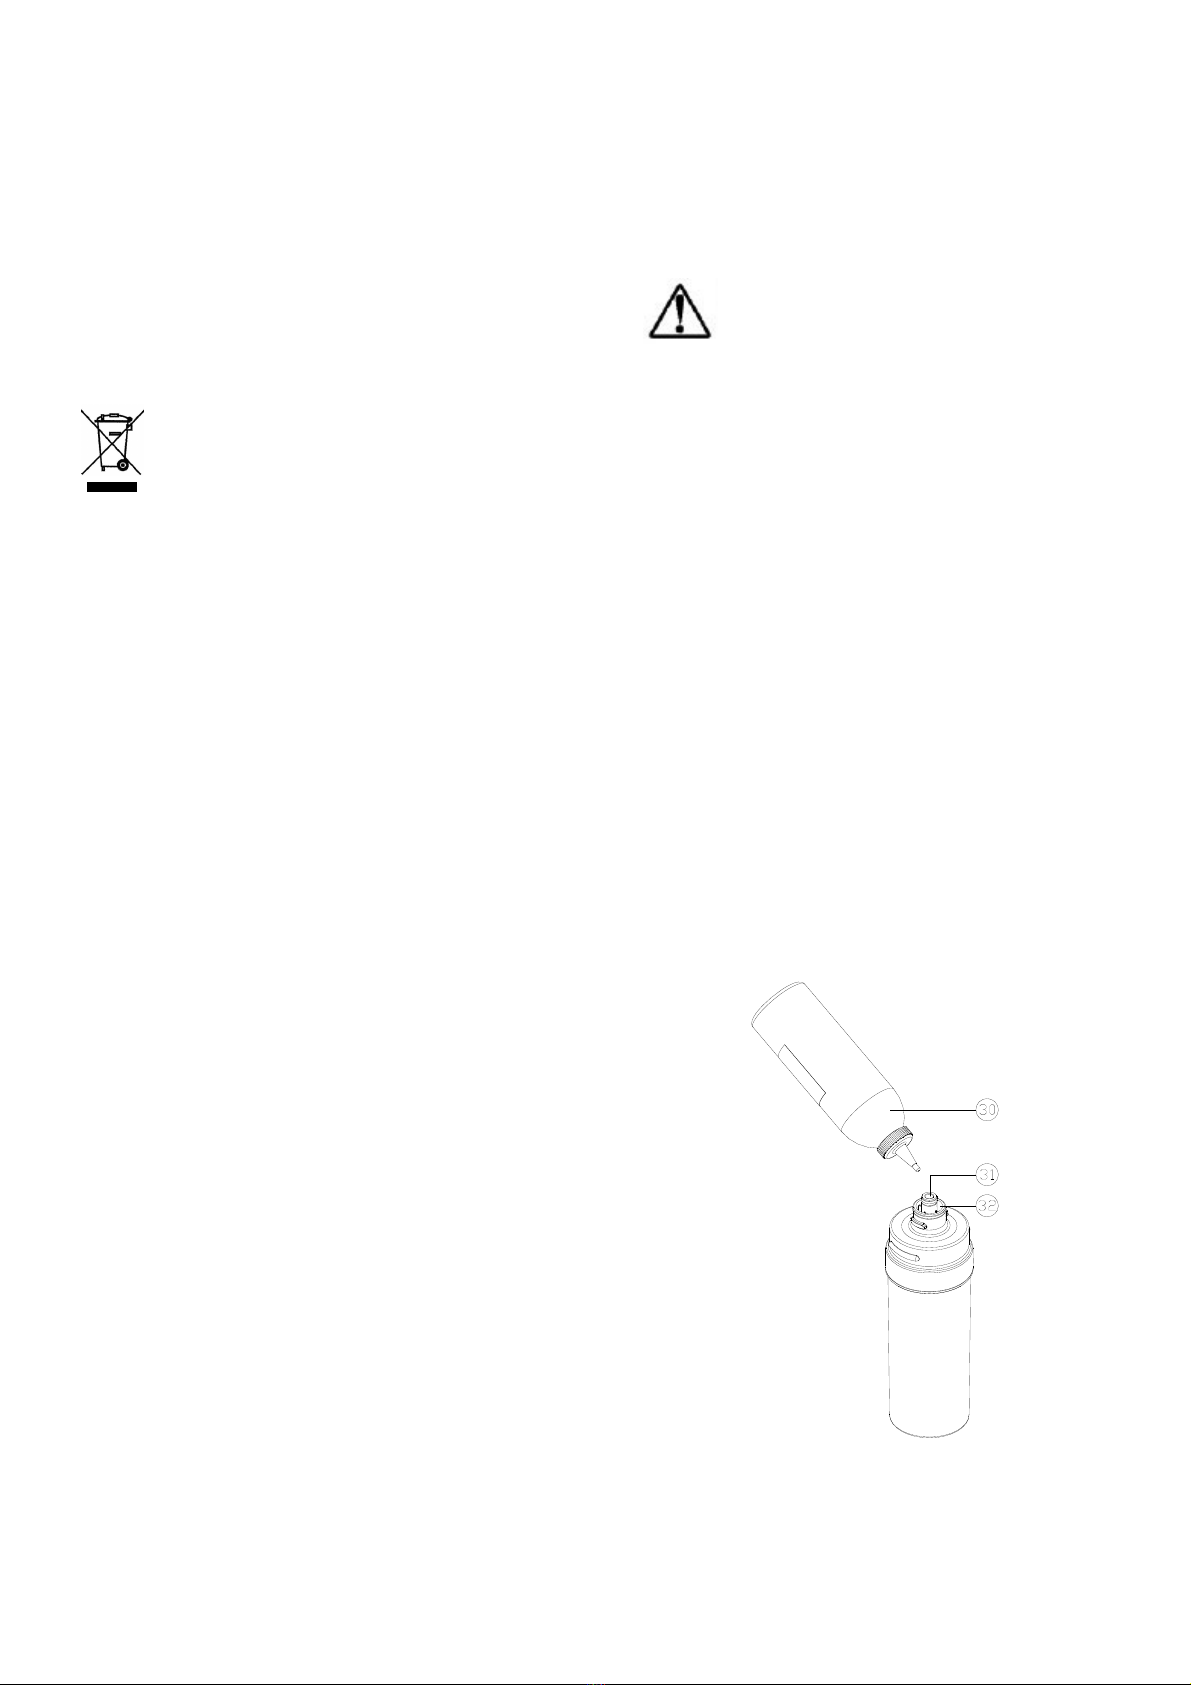
Key!
30.'Liquid'chlorine'1%'bottle'
31.'Cartridge'entrance'
32.'Cartridge'exit'