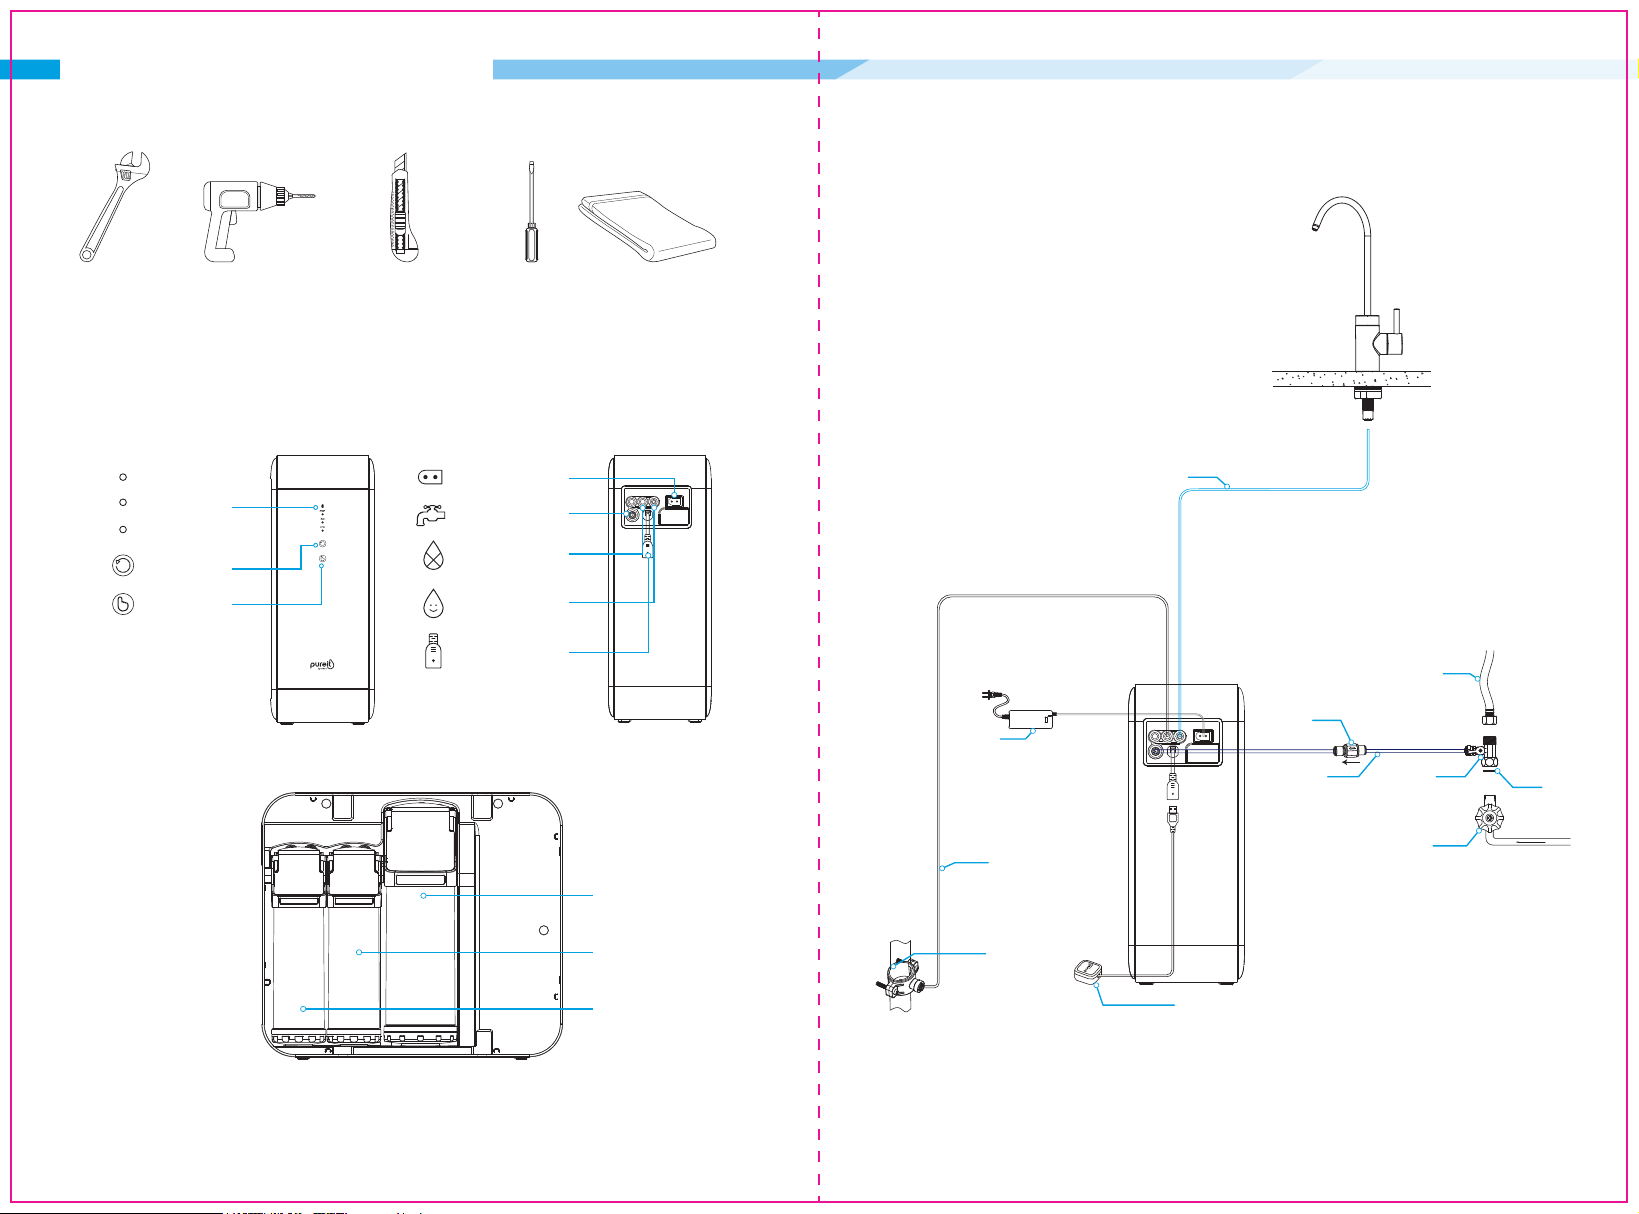
Step 6: Connect the Power Adapter
Connect the power adapter into the power port before connecting to the power outlet.
14 15
RO
PGP
CTO
Filter life indicator light
• When functioning normally, the filter life indicator light will be blue.
• When the filter life is about to expire, the filter life indicator light will flash red
every 2 seconds.
• When a filter has expired, the filter life will flash red quickly every second.
• When the blue lights are flashing in sequence, it indicates that the device is
in flushing mode.
• When the red lights are flashing in sequence, it indicates that the device is
in protection mode. Please turn off the device and restart it, the system will
resume normally.
Reset button
To reset the selected filter, press and hold the reset button for 3 seconds.
Select button
After replacing the filter, press the select button to reset the new filter. The
corresponding light indicator will be lit next to the filter name.
PGP = composite filter
RO = reverse osmosis membrane filter
CTO = carbon block filter
User Interface Display
INSTALLATION INSTRUCTIONS OPERATION INSTRUCTIONS
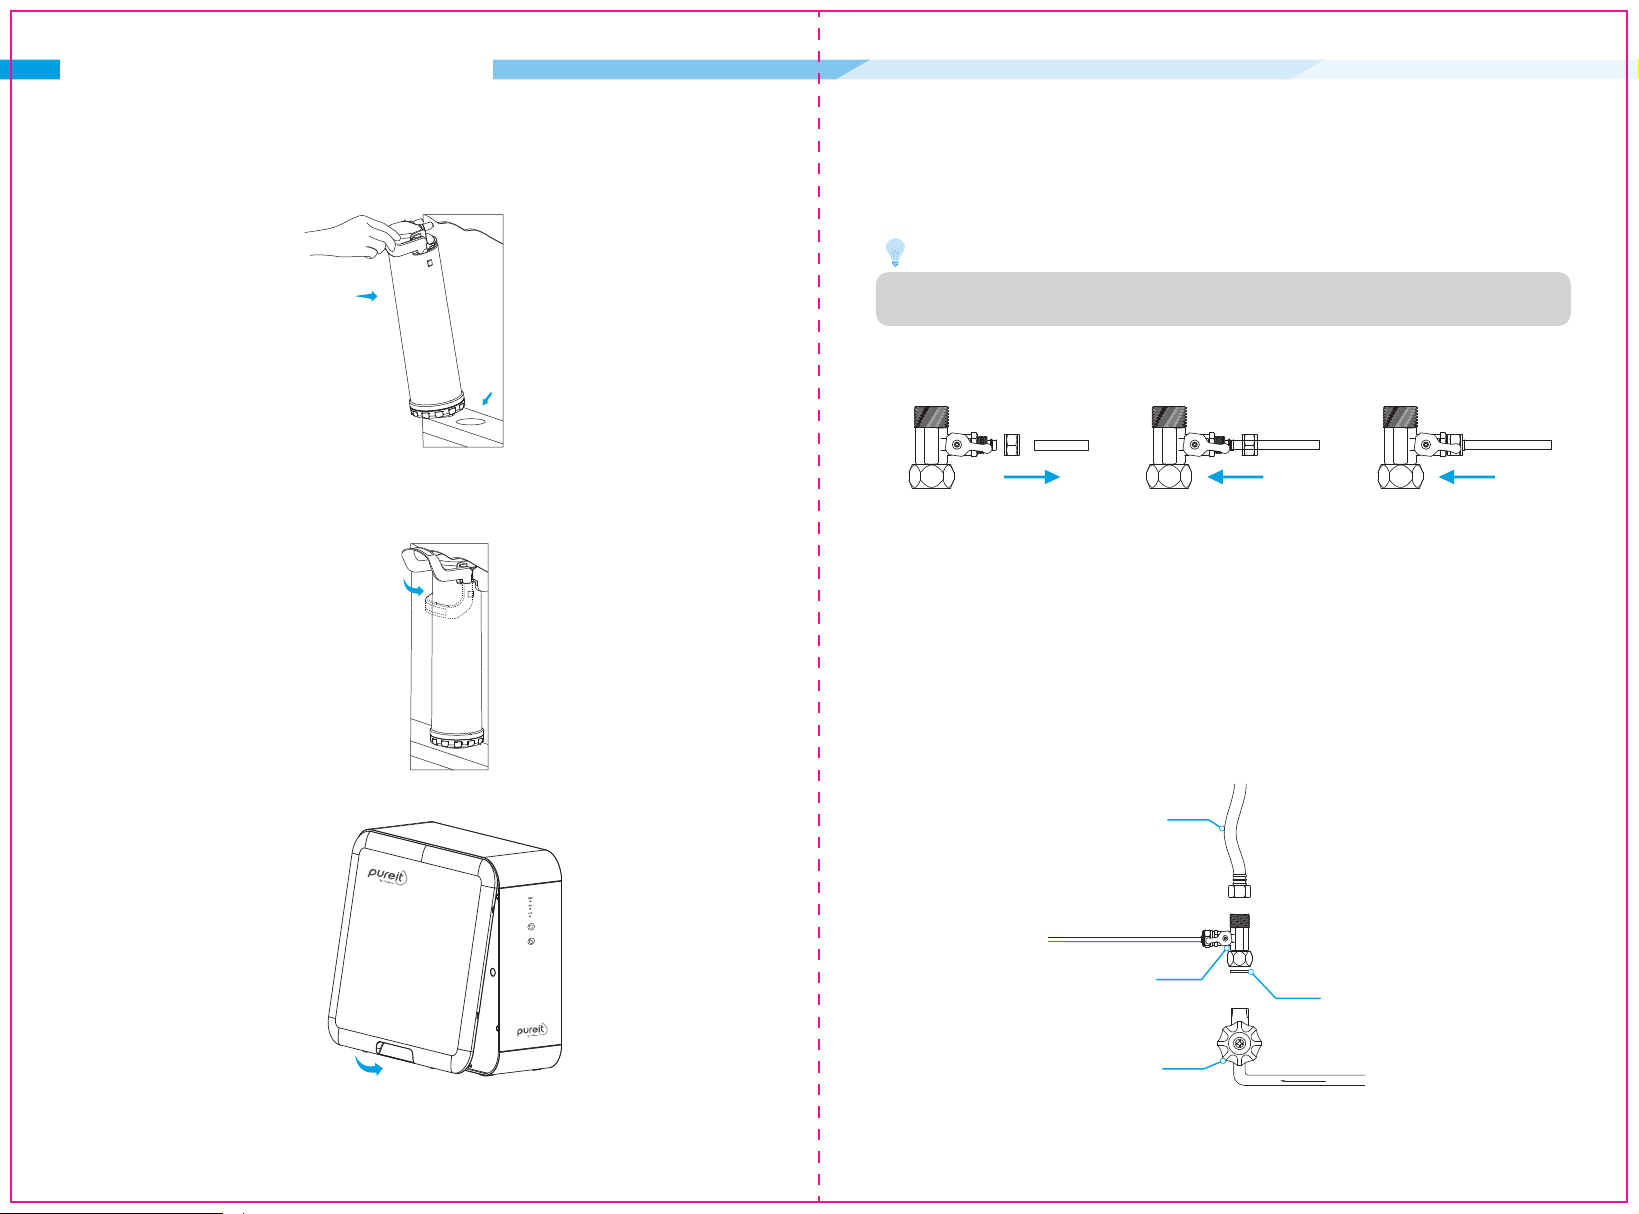
2. Turn on the Pureit faucet and run the purifier device for 2 hours to flush the system. This
should be done each time when the reverse osmosis filter is changed.
3. Then turn off the Pureit faucet to let the purifier stand for 24 hours.
4. Turn on the Pureit faucet and flush the device for 2 hours again. The system is now ready
use and filtered water can be consumed directly.
Step 8: Starting the System for the First Time
1. Plug in the power adapter into a power outlet. Turn on the cold water supply valve, feed
water adapter and the Pureit faucet. Check for leaks.
NOTE:
Filter life indicators should turn blue at this point. Slight vibrations can be expected as
the pump starts.
Inspect the system for any water leakage especially at the joints, fittings, valves and
tubing connections. If any water leakage is found, turn off the cold water supply
immediately and reinforce all tubing connections. If the issue persists please contact
Pureit customer service.
NOTE:
Please do not consume water during the flushing process. The water can be reused
and conserved for other purposes such as watering plants.
When the device is running for 30 minutes continuously, a protection mode will kick in
to stop the device from over-working. A red indicator light will flash repeatedly. Please
turn off the device and then restart it to resume operation.
Step 7: Connect the Water Leakage Alarm Indicator
Connect the water leakage alarm indicator to the USB port and place it in a flat place near
the device.
NOTE:
Please place the Pureit logo side upwards and the other probe side downwards.
A constant beeping will indicate if there is a leakage so please turn off the purifier
device immediately and visit https://us.pureitwater.com/support.html for trouble
shooting instructions.
Power Adapter