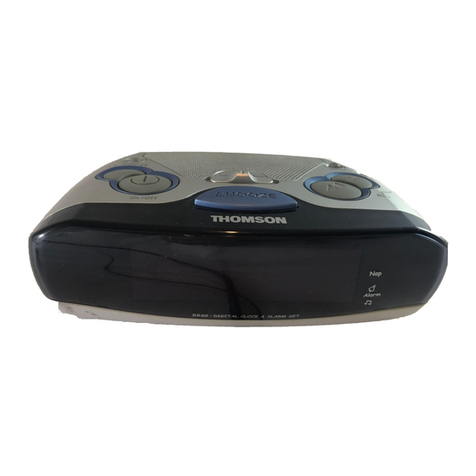
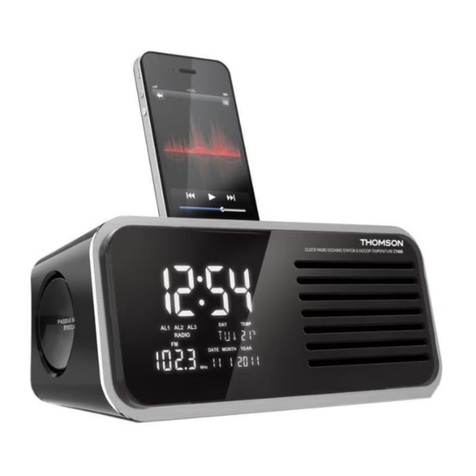
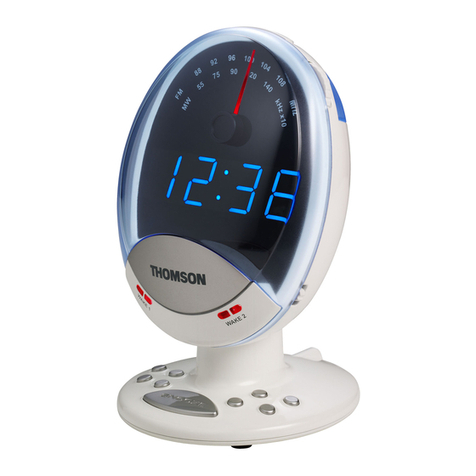
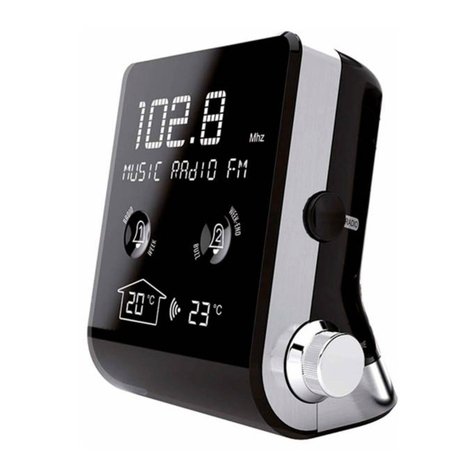
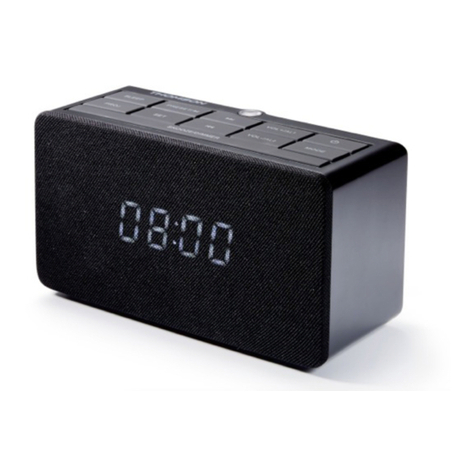
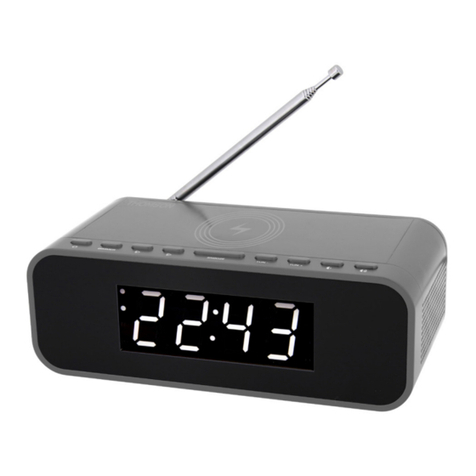
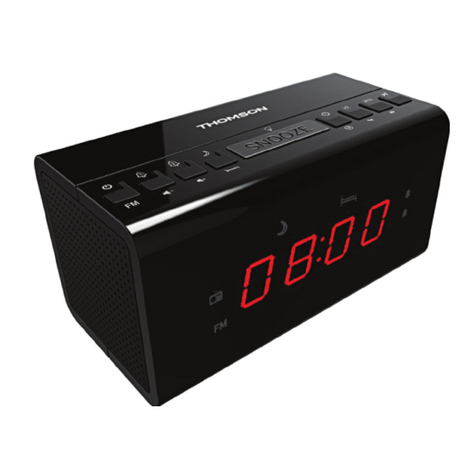
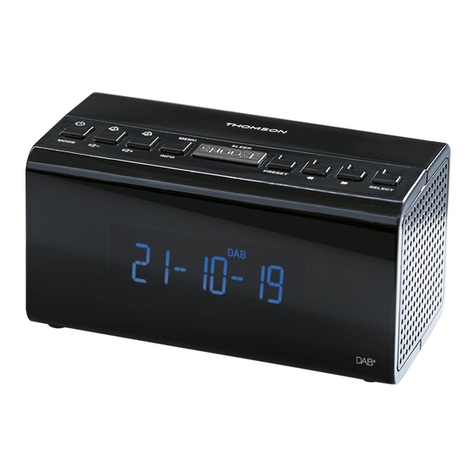
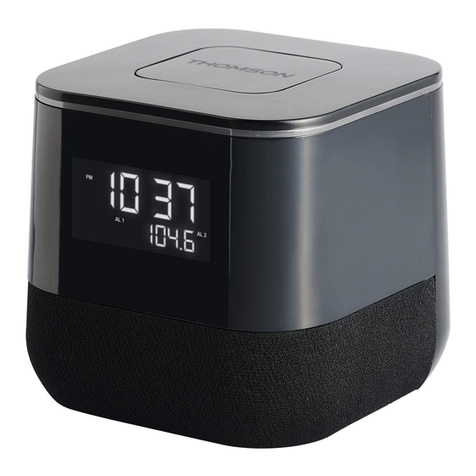
THOMSON CP284DAB User manual

RÉVEIL AVEC RADIO DAB
CP284DAB
MODE D’EMPLOI
LISEZ COMPLÈTEMENT CE MANUEL D’UTILISATION AVANT
D’UTILISER CET APPAREIL ET CONSERVEZ CE LIVRET POUR
VOUS Y RÉFÉRER ULTÉRIEUREMENT
FR

- FR 1 -
Démarrage
• Enlevez l’appareil du carton d’emballage.
• Enlevez tous les matériaux d’emballage du produit.
• Placez les matériaux d’emballage dans le carton puis rangez-le ou jetez-le dans un endroit approprié.
Consignes et avertissements de sécurité
• Lisez et comprenez toutes les instructions avant d’utiliser ce produit. Si un dommage est causé par
un non-respect des instructions, la garantie ne couvrira pas un tel dommage.
• Ne retirez jamais le boîtier de cet appareil.
• Ne placez jamais cet appareil sur un autre appareil électrique.
• Disposez le câble de manière à ce qu’il ne puisse pas être piétiné ou écrasé, notamment au niveau
de la che, de la prise de courant et du connecteur de branchement sur l’appareil. Vériez que la
tension du secteur correspond à la tension indiquée sur la plaque signalétique de l’appareil. Pour
débrancher le câble secteur, tirez toujours sur la che de l’adaptateur. Ne tirez jamais sur le câble.
Avant de brancher le câble d’alimentation secteur, vériez que tous les autres branchements ont
été effectués.
• Utilisez uniquement les pièces de rechange/accessoires spéciés par le fabricant.
• Toute réparation doit être conée à un réparateur qualié. Une réparation est nécessaire lorsque
l’appareil a subi des dommages, de quelque manière que ce soit, comme par exemple :
- un câble d’alimentation endommagé ;
- un liquide renversé sur l’appareil ou des objets insérés dans l’appareil ;
- une exposition de l’appareil à la pluie ou à l’humidité ;
- un dysfonctionnement de l’appareil ;
- une chute de l’appareil.
• La plaque signalétique se trouve sous l’appareil.
• Assurez-vous qu’il y a assez d’espace libre autour du produit pour la ventilation.
• Cet appareil doit être utilisé dans un environnement tempéré, à l’abri de la lumière directe du soleil,
de ammes nues et de la chaleur. Ne placez pas l’appareil à proximité de sources de chaleur.
• Les piles (ou bloc de piles ou batterie) ne doivent pas être exposées à une chaleur excessive,
comme la lumière du soleil, le feu, etc.
• Débranchez l’appareil avant de le nettoyer. Ne lubriez aucune pièce de cet appareil. Nettoyez
l’appareil avec un chiffon doux. N’utilisez pas de produit nettoyant agressif ou abrasif.
Veillez à ce que le câble d’alimentation, la che ou l’adaptateur soient toujours accessibles pour
pouvoir à tout moment débrancher l’appareil de la prise si nécessaire.
• N’utilisez pas cet appareil à proximité d’un point d’eau. L’appareil ne doit pas être aspergé ni mouillé.
N’utilisez pas cet appareil dans un environnement humide ou mouillé.
• Débranchez l’appareil durant les orages et avant toute période d’inutilisation prolongée.
Démarrage 1
Avertissements et précautions de sécurité 1
Entretien du produit 2
Respect de l’environnement 2
Contenu de l’emballage 3
Description des éléments 3
Alimentation électrique 3
Alimentation 4
Utilisation de la radio numérique terrestre (DAB) 4
Utilisation de la radio FM 6
Réglage de l’heure et de la date 7
Paramètres système 9
Remarques:11
11
Table des matières

- FR 2 -
PRODUIT DE CLASSE II
ALIMENTATION EN COURANT
CONTINU
COURANT ALTERNATIF
POUR USAGE INTÉRIEUR
UNIQUEMENT
Le symbole de l’éclair à pointe de èche inscrit au sein d’un triangle équilatéral
constitue une mise en garde destinée à alerter l’utilisateur quant à la présence de
tensions électriques secteur à l’intérieur du produit, qui peuvent engendrer un risque
d’électrocution.
Le point d’exclamation dans un triangle indique la présence, dans la documentation qui
accompagne l’appareil, de consignes d’utilisation et d’entretien (réparation) importantes.
Positionnez l’appareil à l’endroit désiré et déroulez le câble d’alimentation.
Branchez le câble dans la prise d’alimentation et mettez l’appareil en marche.
Sécurité Avertissement
Veuillez tenir compte des informations suivantes :Utilisez uniquement les
sources d’alimentation énumérées ci-dessous.
• L’adaptateur secteur est utilisé en tant que dispositif de coupure.
L’adaptateur secteur de l’appareil ne doit pas être obstrué OU doit être
facilement accessible pendant l’usage prévu.
Pour couper complètement l’alimentation de l’appareil, l’adaptateur secteur
doit être débranché de la prise électrique.
• Ce produit doit être exclusivement utilisé avec l’adaptateur fourni.
Fabricant : OBELIEVE
Modèle : OBL-0501000E
• La plaque signalétique se trouve sur le panneau inférieur de l’appareil.
Contenu de l’emballage
Vériez et identiez le contenu de l’emballage :
• Unité principale
• Manuel d’utilisation
• Adaptateur secteur

- FR 3 -
Description des éléments
1) TOUCHE PRÉRÉGLAGE (PRESET)
2) TOUCHE RÉGLAGE DE FRÉQUENCE - (TUNE-)
3) TOUCHE ALARME/SOMMEIL (ALARM/SLEEP)
4) TOUCHE SÉLECTION/BALAYAGE (SELECT/
SCAN)
5) TOUCHE MENU/INFO
6) TOUCHE RÉGLAGE DE FRÉQUENCE+
(TUNE+)
7) TOUCHE VEILLE/MODE (STANDBY/MODE)
8) TOUCHE D’AFFICHAGE PAR PROJECTION
9) TOUCHE D’INVERSION DE LA PROJECTION
10) MOLETTE DE ROTATION DE LA PROJECTION
11) PROJECTEUR
12) ÉCRAN LCD
13) ENCEINTE
14) TOUCHE VOLUME +/-
15) ANTENNE FILAIRE
16) PRISE D’ALIMENTATION
17) RÉPÉTITION D’ALARME
Alimentation
Utilisation de l’appareil sur secteur
Insérez une des extrémités du cordon d'alimentation fourni dans la prise d’alimentation DC 5 V IN au
dos de l’appareil, puis branchez l'autre extrémité à une prise murale.
Lors de la première utilisation, il faut fermement insérer le cordon d'alimentation dans la prise. Si
l'appareil ne fonctionne pas après avoir été branché à une prise secteur, rebranchez-le pour garantir
qu'il est correctement connecté.
Fonctionnement
Appuyez sur la touche VEILLE/MODE pour allumer l'appareil. Appuyez sur cette touche pendant 2
secondes pour éteindre l’appareil.
Réglage du volume
Appuyez longuement sur la touche VOLUME- pour baisser le volume.
Appuyez sur la touche VOLUME+ pour augmenter le volume. Lors du réglage du volume, vériez à
l'écran le niveau de volume indiqué.

- FR 4 -
Utilisation de la radio numérique terrestre (DAB)
Antenne laire
Vériez que l’antenne est complètement déployée avant d’essayer de régler une fréquence de station
radio DAB. Cela garantit une force de signal maximale au début du balayage. Le déploiement de
l’antenne laire garantit également la meilleure qualité de son possible.
Mode radio DAB
Vériez que la radio est en mode DAB. Si ce n’est pas le cas, appuyez brièvement sur la touche
VEILLE/MODE an d’activer le mode DAB (vériez sur l’écran).
Lorsque vous utilisez la radio pour la première fois, ou si la liste des stations est vide, la radio commencera
automatiquement le balayage à la recherche de stations de radio DAB. Une barre de progression
indiquera alors l’avancement du balayage et le nombre de stations trouvées sera également afché.
SI vous écoutiez une station de radio DAB lors de l’arrêt de l’appareil, cette station sera automatiquement
sélectionnée une fois la radio remise en marche.
Changement de station de radio DAB
En mode DAB :
1) Appuyez sur la touche RÉGLAGE DE FRÉQUENCE +/- sur le haut de la radio pour passer d’une
station disponible à l’autre.
2) Lorsque la station de radio que vous désirez écouter s’afche, appuyez sur la touche SÉLECTION/
BALAYAGE pour conrmer. Après un court laps de temps, la radio se réglera sur la fréquence de
la station choisie.
Balayage des stations de radio DAB
Avec la radio DAB, ou radio numérique terrestre, des stations et des services supplémentaires font
régulièrement leur apparition. Il est donc judicieux d’effectuer un balayage manuel de temps à autre an
de s’assurer que la liste des stations stockées dans la mémoire de la radio est à jour. Si vous avez déplacé
votre radio, en partant en vacances, par exemple, il est également conseillé d’effectuer un balayage manuel.
Si vous n’êtes pas en mode DAB, appuyez brièvement sur la touche VEILLE/MODE an d’activer le
mode DAB.
1) Appuyez sur la touche MENU/INFO jusqu’à ce que l’écran afche <Digital Radio> (Radio numérique).
Utilisez la touche RÉGLAGE DE FRÉQUENCE +/- jusqu’à afcher <Full Scan> (Balayage complet).
2) Appuyez sur la touche SÉLECTION/BALAYAGE pour lancer une recherche de stations.
Sélection de stations DAB
Vous pouvez retirer des stations DAB qui ne sont pas reçues dans votre région de la liste des stations.
Ces stations sont précédées d’un « ? » dans la liste.
1) Appuyez sur la touche MENU/INFO jusqu’à ce que l’écran indique <Digital Radio> (Radio
numérique) et utilisez la touche RÉGLAGE DE FRÉQUENCE +/- pour afcher « Prune Invalid ».
Appuyez sur la touche SÉLECTION/BALAYAGE pour choisir cette option.
2) Vous pouvez alors effacer les stations invalides. « <NO> Yes »(Non Oui) s’afche. Utilisez la touche
RÉGLAGE DE FRÉQUENCE +/- jusqu’à afcher « Oui ». Appuyez sur la touche SÉLECTION/
BALAYAGE pour sélectionner et afcher la liste des stations. Les noms de stations précédés d’un
« ? » ne seront plus afchés.
Enregistrement d’une station DAB préréglée
La radio peut enregistrer jusqu’à 10 stations DAB préréglées an de vous permettre d’accéder
instantanément à vos stations de radio préférées.
Remarque : Lorsque vous enregistrez des stations de radio DAB préréglées, celles-ci n’écrasent pas
vos stations FM préréglées.
1) Réglez la radio sur la fréquence de la station que vous souhaitez prérégler.
2) Maintenez la touche PRÉRÉGLAGE, sur le haut de la radio, appuyée. Ensuite, appuyez sur la
touche RÉGLAGE DE FRÉQUENCE +/- jusqu’à l’emplacement de station préréglée où vous
souhaitez enregistrer la station de radio (1-10).
3) Appuyez sur la touche SÉLECTION/BALAYAGE pour sélectionner l’emplacement. L’écran
afchera alors « ENREGISTRÉ » (SAVED).
Remarque : S’il y a déjà une station DAB préréglée à cet emplacement, elle sera écrasée lorsque la
nouvelle station sera enregistrée.

- FR 5 -
Sélection d’une station DAB préréglée
En mode DAB
1) Appuyez sur la touche PRÉRÉGLAGE.
2) Ensuite, appuyez sur la touche RÉGLAGE DE FRÉQUENCE +/- jusqu’à l’emplacement et la station
préréglée que vous souhaitez écouter (1-10). Appuyez brièvement sur la touche SÉLECTION/
BALAYAGE pour faire votre choix. La radio se réglera sur la fréquence de cette station.
Remarque : Si aucune station DAB n’a été enregistrée dans la liste des stations préréglées, l’écran afchera
« Emplacement vide » (Preset Empty) et la radio se réglera sur la dernière station de radio sélectionnée.
Informations DAB afchées à l’écran
Pendant l’écoute d’une station DAB, vous pouvez modier les informations qui s’afchent à l’écran.
Plusieurs types d’informations variés sont envoyés par les diffuseurs.
Radiotexte (DLS) - Il s’agit d’informations textuelles délantes fournies par le diffuseur. Ces informations
peuvent être le nom d’un artiste ou le titre d’un morceau, le nom d’un DJ, les coordonnées de la station
de radio, etc.
Force du signal - L’écran sera vide pour indiquer la force du signal minimum pour une qualité d’écoute
acceptable. La rangée de rectangles pleins indique la force réelle du signal reçu. Plus le signal est fort,
plus la rangée de rectangles s’étend vers la droite.
Type de programme (PTY) - Par exemple « Rock », « Pop », « Talk » ou « News ».
Nom multiplexe - Afche la zone de diffusion et les stations radio sur cette fréquence, par exemple :
BBC National DAB, Digital 1 Network.
Canal et fréquence - Par exemple : 12B 225.648 MHz
Erreur de signal - S’afche sous la forme d’un nombre compris entre 0 et 99. Lorsque le taux d’erreur
de signal est de 30 ou plus, il n’est pas possible d’écouter une station de radio de façon satisfaisante.
Essayez alors de régler l’antenne ou de déplacer la radio pour améliorer la réception.
Informations du signal - Le débit de données auquel le signal est transmis.
Heure et date - Fournies par le diffuseur.
1) Appuyez de façon répétée sur le bouton Menu/Info sur le haut de la radio pour faire déler les
différentes options d’informations.
Contrôle de gamme dynamique (DRC)
En mode DAB :
La gamme dynamique de chaque programme de radio est dénie par le diffuseur pour chaque station
de radio et peut varier selon le type de programme diffusé, comme un programme pop, de musique
classique ou un talk show. Le signal de contrôle de gamme dynamique est transmis parallèlement au
signal audio pour chaque programme, et, avec votre radio, vous pouvez utiliser ce signal de contrôle
pour étendre ou compresser la gamme dynamique (la différence entre les sons les plus forts et les
sons les plus faibles) du signal audio reproduit. En changeant la gamme dynamique, vous pouvez
inuer sur le volume ou la qualité sonore du programme que vous écoutez, an qu’ils soient plus
adaptés à vos conditions d’écoute et vos besoins personnels. Par exemple, dans un environnement
bruyant où les sons faibles peuvent être étouffés, régler la compression au maximum renforcera les
sons faibles tout en maintenant les sons les plus bruyants à leur niveau d’origine.
Il existe 3 niveaux de compression :
• DRC Off (désactivé) : pas de compression. C'est le réglage par défaut.
• DRC Low (bas) : compression moyenne.
• DRC High (élevé) : compression maximale.
1) Maintenez la touche Menu/Info appuyée pendant 2 secondes.
2) Utilisez la touche RÉGLAGE DE FRÉQUENCE +/- jusqu’à atteindre l’option « DRC », puis
appuyez sur la touche SÉLECTION/BALAYAGE pour conrmer.
3) Utilisez la touche RÉGLAGE DE FRÉQUENCE +/- pour faire déler les 3 niveaux de compression
disponibles et appuyez sur la touche SÉLECTION/BALAYAGE pour faire votre choix.

- FR 6 -
Utilisation de la radio FM
Mode radio FM
Si vous n’êtes pas en mode FM, appuyez brièvement sur la touche VEILLE/MODE an d’activer le
mode FM (vériez sur l’écran).
SI vous écoutiez une station de radio FM lors de l’arrêt de l’appareil, cette station sera automatiquement
sélectionnée une fois la radio remise en marche.
Sélection d’une station FM
Maintenez la touche RÉGLAGE DE FRÉQUENCE +/-, sur le haut de la radio, appuyée an de lancer
un balayage de la bande de fréquences.
Appuyez sur la touche RÉGLAGE DE FRÉQUENCE +/- pour régler avec précision chaque fréquence,
par intervalles de 0,05 MHz.
Remarque : Si la réception reste médiocre, changez la position de l’antenne ou essayez de placer la
radio à un autre endroit.
Stations préréglées
La radio peut enregistrer jusqu’à 10 stations FM préréglées an de vous permettre d’accéder
instantanément à vos stations de radio préférées.
Remarque : Lorsque vous enregistrez des stations de radio FM préréglées, celles-ci n’écrasent pas
vos stations DAB préréglées.
1) Réglez la radio sur la fréquence de la station que vous souhaitez prérégler.
2) Maintenez la touche PRÉRÉGLAGE, sur le haut de la radio, appuyée.
3) Ensuite, appuyez sur la touche RÉGLAGE DE FRÉQUENCE +/- jusqu’à l’emplacement de station
préréglée où vous souhaitez enregistrer la station de radio (1-10).
4) Appuyez sur la touche SÉLECTION/BALAYAGE pour sélectionner l’emplacement. L’écran
afchera alors « ENREGISTRÉ » (SAVED).
Remarque : S’il y a déjà une station FM préréglée à cet emplacement, elle sera écrasée lorsque la
nouvelle station sera enregistrée.
Sélection d’une station FM préréglée
En mode FM :
1) Appuyez sur la touche PRÉRÉGLAGE.
2) Ensuite, appuyez sur la touche RÉGLAGE DE FRÉQUENCE +/- jusqu’à l’emplacement et la station
préréglée que vous souhaitez écouter (1-10). Appuyez brièvement sur la touche SÉLECTION/
BALAYAGE pour faire votre choix. La radio se réglera sur la fréquence de cette station.
Remarque : Si aucune station FM n’a été enregistrée dans la liste des stations préréglées, l’écran afchera
« Emplacement vide » (Preset Empty) et la radio se réglera sur la dernière station de radio sélectionnée.
Informations FM afchées à l’écran
Pendant l’écoute d’une station FM, vous pouvez modier les informations qui s’afchent à l’écran.
• Radiotexte (RT)
Il s’agit d’informations textuelles délantes fournies par le diffuseur. Ces informations peuvent être le
nom d’un artiste ou le titre d’un morceau, le nom d’un DJ, les coordonnées de la station de radio, etc.
• Type de programme (PTY), par exemple « Rock », « Pop », « Talk » ou « News ».
• Nom ou fréquence de la station, comme BBC R4 ou 93.30 MHz.
Mode Audio---Stéréo ou Mono
Heure et date----Fournies par le diffuseur.
1) Appuyez de façon répétée sur le bouton Menu/Info sur le haut de la radio pour faire déler les
différentes options d’informations.
Réglage de l’heure et de la date
Régler l’heure et la date
La première fois que vous écoutez la radio DAB, l’heure et la date données par l’appareil se synchroniseront
automatiquement avec celles fournies par le service DAB, au format 24 heures et tenant compte des
changements d’heure d’été et d’hiver. Cela dit, vous pouvez aussi régler l’heure et la date manuellement.

- FR 7 -
En mode DAB :
1) Maintenez la touche Menu/Info appuyée pendant 2 secondes.
2) Utilisez la touche RÉGLAGE DE FRÉQUENCE +/- jusqu’à afcher <System Settings> (Paramètres
système). Appuyez sur la touche SÉLECTION/BALAYAGE pour choisir.
3) Utilisez la touche RÉGLAGE DE FRÉQUENCE +/- jusqu’à afcher <Time/Date> (Date/Heure).
Appuyez sur la touche SÉLECTION/BALAYAGE pour choisir. Utilisez la touche RÉGLAGE DE
FRÉQUENCE +/- jusqu’à afcher <Set Time/Date> (Régler Date/Heure). Appuyez sur la touche
SÉLECTION/BALAYAGE pour choisir.
4) Le jour se mettra à clignoter. Utilisez la touche RÉGLAGE DE FRÉQUENCE +/- pour régler, puis
appuyez sur la touche SÉLECTION/BALAYAGE pour conrmer.
5) Le mois se mettra à clignoter. Utilisez la touche RÉGLAGE DE FRÉQUENCE +/- pour régler, puis
appuyez sur la touche SÉLECTION/BALAYAGE pour conrmer.
6) L’année se mettra à clignoter. Utilisez la touche RÉGLAGE DE FRÉQUENCE +/- pour régler, puis
appuyez sur la touche SÉLECTION/BALAYAGE pour conrmer.
7) Les chiffres des heures se mettront à clignoter. Utilisez la touche RÉGLAGE DE FRÉQUENCE
+/- jusqu’à afcher l’heure correcte. Appuyez sur la touche SÉLECTION/BALAYAGE pour choisir.
8) Les chiffres des minutes se mettront à clignoter. Utilisez la touche RÉGLAGE DE FRÉQUENCE +/-
jusqu’à afcher les minutes correctes. Appuyez sur la touche SÉLECTION/BALAYAGE pour choisir.
Une fois l’heure et la date correctes conrmées, l’écran afche « Time SAVED » (Date et heure
enregistrées), puis l’option <TIME/Date> (Date/Heure) est de nouveau afchée.
Vous pouvez alors utiliser la touche RÉGLAGE DE FRÉQUENCE +/- pour faire déler les options et, à
l’aide de la même méthode que pour le réglage de la date et de l’heure, choisir les paramètres suivants :
• Afchage de l'heure sur 12/24 h
• Format de la date : JJ-MM-AAAA ou MM-JJ-AAAA
• Mise à jour de l’heure à jour automatique via le signal DAB, le signal FM, le signal DAB ou FM, ou
aucune mise à jour.
• Style d’horloge
Réglage de l’alarme
Remarque : Vériez que l'heure et la date sont correctes sur l'appareil avant de régler une alarme de réveil.
Lorsque la radio est allumée (pas en mode veille)
1) Appuyez sur la touche ALARME/SOMMEIL jusqu’à afcher le menu de l’alarme.
2) Utilisez la touche RÉGLAGE DE FRÉQUENCE +/- jusqu’à afcher <Alarm 1> ou <Alarm 2>.
Appuyez brièvement sur la touche SÉLECTION/BALAYAGE.
3) L’information « Alarm 1 » (ou 2) s’afchera. Utilisez alors la touche RÉGLAGE DE FRÉQUENCE
+/- jusqu’à afcher <Alarm>. Appuyez brièvement sur la touche SÉLECTION/BALAYAGE de façon
répétée pour sélectionner Activée (<ON>).
4) Utilisez la touche RÉGLAGE DE FRÉQUENCE +/- jusqu’à afcher <wake up time> (Heure de
réveil). Appuyez brièvement sur la touche SÉLECTION/BALAYAGE. Les chiffres des heures
correspondant à l’heure du réveil clignoteront.
5) Utilisez la touche RÉGLAGE DE FRÉQUENCE +/- pour régler l’heure, puis appuyez sur la touche
SÉLECTION/BALAYAGE pour conrmer.
6) Les chiffres des minutes se mettront à clignoter. Utilisez la touche RÉGLAGE DE FRÉQUENCE
+/- pour régler les minutes, puis appuyez sur la touche SÉLECTION/BALAYAGE pour conrmer.
7) Utilisez la touche RÉGLAGE DE FRÉQUENCE +/- jusqu’à afcher <Duration> (Durée). Appuyez
sur la touche SÉLECTION/BALAYAGE. Vous pouvez choisir entre 15, 30, 45, 60, 90 et 120
minutes en appuyant sur la touche RÉGLAGE DE FRÉQUENCE +/-. Appuyez brièvement sur la
touche SÉLECTION/BALAYAGE.
8) Utilisez la touche RÉGLAGE DE FRÉQUENCE +/- jusqu’à afcher <Source>. Appuyez sur la
touche SÉLECTION/BALAYAGE. Appuyez sur la touche RÉGLAGE DE FRÉQUENCE +/- jusqu’à
afcher la source du son de l’alarme. Vous pouvez choisir entre Sonnette (Buzzer), Gazouillis
(Chirp), Ruissellement (Stream), Coassement (Croak), Vague (Wave), DAB ou FM. Appuyez
brièvement sur la touche SÉLECTION/BALAYAGE.
9) Utilisez la touche RÉGLAGE DE FRÉQUENCE +/- jusqu’à afcher <Frequency> (Fréquence).
Appuyez brièvement sur la touche SÉLECTION/BALAYAGE.

- FR 8 -
10) Utilisez la touche RÉGLAGE DE FRÉQUENCE +/- jusqu’à afcher la fréquence voulue pour l’alarme.
Vous pouvez choisir entre une alarme quotidienne (Daily), unique (Once), pour les week-ends ou
pour les jours de semaine (Weekdays). Appuyez brièvement sur la touche SÉLECTION/BALAYAGE.
Remarque : Si vous choisissez une alarme unique (« Once »), vous devrez ensuite régler la date de l’alarme.
Remarque : Un symbole d’alarme, en bas de l’écran de la radio, accompagné du chiffre « I » ou « II »
conrmera qu’une alarme a bien été réglée.
Remarque : Si l’heure n’est pas dénie ou n’a pas été mise à jour à partir du signal radio, <Time is not
set> (Heure non dénie) s’afchera à l’écran lorsque vous essayez de régler l’alarme. La radio vous
invitera alors à dénir l’heure. Il n’est possible de régler une alarme qu’une fois l’heure dénie.
Arrêt de l’alarme
Lorsque l’alarme retentit, appuyez brièvement sur la touche VEILLE/MODE. Vous pouvez aussi
appuyer brièvement sur la touche RÉPÉTITION D’ALARME (reportez-vous à la section sur la fonction
de répétition d’alarme plus bas).
Remarque: si vous appuyez sur la touche VEILLE/MODE pour arrêter l’alarme, le symbole de l’alarme
restera afché à l’écran et l’alarme retentira de nouveau à la même heure le lendemain, à moins que
l’option d’alarme unique n’ait été choisie.
Répétition d’alarme
Si vous souhaitez arrêter une alarme pendant quelques minutes lorsqu’elle retentit, appuyez sur la
touche RÉPÉTITION D’ALARME. L’alarme sonnera à nouveau 9 minutes plus tard. Appuyez sur la
touche VEILLE/MODE pour désactiver la répétition d’alarme.
Minuterie sommeil
Vous pouvez régler la radio de manière à ce qu’elle s’arrête automatiquement à l’aide de la minuterie
sommeil. Vous pouvez choisir une de ces options : Sleep (Sommeil), Off (Désactivée), 15, 30, 45, 60
et 90 minutes, en appuyant de façon répétée sur la touche ALARME/SOMMEIL.
En mode DAB ou FM :
maintenez la touche ALARME/SOMMEIL appuyée pour faire déler les différentes options de la
minuterie sommeil : Sleep (Sommeil), Off (Désactivée), 15, 30, 45, 60 et 90 minutes.
Remarque : Pour annuler la minuterie sommeil, suivez les étapes de réglage de la minuterie sommeil
en vous arrêtant lorsque « Sleep Timer off » (minuterie sommeil désactivée) s’afche à l’écran.
Paramètres système
La radio doit être allumée (pas en mode veille) pour modier les paramètres système.
Arrêt du rétroéclairage de l’écran
Vous pouvez régler la durée après laquelle le rétroéclairage de l’écran s’arrête. Les options disponibles
sont les suivantes : Permanently On (Toujours activé), 10, 20, 30, 45, 60, 90, 120, et 180 secondes.
En mode DAB ou FM :
1) Maintenez la touche Menu/Info appuyée pour accéder aux options du menu.
2) Utilisez la touche RÉGLAGE DE FRÉQUENCE +/- jusqu’à afcher <System Settings> (Paramètres
système). Appuyez sur la touche SÉLECTION/BALAYAGE pour choisir.
3) Utilisez la touche RÉGLAGE DE FRÉQUENCE +/- jusqu’à afcher <Backlight> (Rétroéclairage).
Appuyez sur la touche SÉLECTION/BALAYAGE pour choisir.
4) <Timeout> (Délai avant arrêt) s’afche à l’écran. Appuyez sur la touche SÉLECTION/BALAYAGE
pour choisir. Utilisez la touche RÉGLAGE DE FRÉQUENCE +/- pour faire déler les options de
délai avant arrêt du rétroéclairage : On (Toujours activé), 10, 20, 30, 45, 60, 90, 120 ou 180
secondes. Appuyez brièvement sur la touche SÉLECTION/BALAYAGE pour choisir une option, de
la même manière que pour le délai avant l’arrêt du rétroéclairage, et modier les paramètres de
luminosité du rétroéclairage pour le niveau tamisé (<Dim level>) ou le niveau Luminosité activée
(<On level>). 3 options s’offrent à vous : élevé, moyen et bas.
Langue de l’afchage
Vous pouvez changer la langue de l’afchage de la radio. 4 options sont disponibles : anglais, français,
allemand et italien.
Lorsque la radio est allumée (pas en mode veille) :
- FR 9 -
1) Maintenez la touche Menu/Info appuyée pour accéder aux options du menu.
2) Utilisez la touche RÉGLAGE DE FRÉQUENCE +/- jusqu’à afcher <System Settings> (Paramètres
système). Appuyez brièvement sur la touche SÉLECTION/BALAYAGE.
3) Utilisez la touche RÉGLAGE DE FRÉQUENCE +/- jusqu’à afcher <Language> (Langue).
Appuyez brièvement sur la touche SÉLECTION/BALAYAGE.
4) Utilisez la touche RÉGLAGE DE FRÉQUENCE +/- jusqu’à afcher la langue désirée. Appuyez
brièvement sur la touche SÉLECTION/BALAYAGE pour conrmer.
Version du logiciel
Vous pouvez vérier la version du logiciel de la radio.
En mode DAB ou FM :
1) Maintenez la touche Menu/Info appuyée pour accéder aux options du menu.
2) Utilisez la touche RÉGLAGE DE FRÉQUENCE +/- jusqu’à afcher <System Settings> (Paramètres
système). Appuyez sur la touche SÉLECTION/BALAYAGE pour choisir.
3) Utilisez la touche RÉGLAGE DE FRÉQUENCE +/- jusqu’à afcher <Software Version> (version
du logiciel). Appuyez sur la touche SÉLECTION/BALAYAGE pour choisir. La version du logiciel
sera alors afchée.
Réinitialisation
Vous pouvez réinitialiser la radio et restaurer l’ensemble des paramètres d’usine d’origine.
Remarque : Si vous réinitialisez la radio, toutes vos stations préréglées enregistrées seront supprimées.
En mode DAB ou FM :
1) Maintenez la touche Menu/Info appuyée pour accéder aux options du menu.
2) Utilisez la touche RÉGLAGE DE FRÉQUENCE +/- jusqu’à afcher <System Settings> (Paramètres
système). Appuyez sur la touche SÉLECTION/BALAYAGE pour choisir.
3) Utilisez la touche RÉGLAGE DE FRÉQUENCE +/- jusqu’à afcher <Factory reset> (Réinitialisation).
Appuyez sur la touche SÉLECTION/BALAYAGE pour choisir.
4) « Factory Reset? <No> Yes » (Réinitialisation ? Non Oui) s’afchera alors. Utilisez la touche
RÉGLAGE DE FRÉQUENCE +/- jusqu’à afcher <Yes> (Oui). Appuyez sur la touche SÉLECTION/
BALAYAGE pour choisir.
5) L’écran afchera alors « Restarting » (Redémarrage). Au bout de quelques secondes, l’écran
repassera en mode veille.
Projection de l’heure
Étape 1 : Appuyez sur la touche DISPLAY (ÉCRAN) sur le côté de l’appareil.
Étape 2 : Appuyez sur la touche INVERSION ou faites pivoter l’élément de projection jusqu’à obtenir un
angle adéquat, puis réglez la molette de focus pour vous assurer que l’image de l’heure est nette.
(Vous pouvez projeter l’image de l’heure sur un écran, comme un mur blanc ou d’autres
surfaces pour obtenir un effet optimal.)
Spécications de l’adaptateur
Entrée de l’adaptateur : 220-240 V~50/60 Hz 15 A MAX.
Sortie : secteur 5 V 1 A
Bandes de fréquences : FM : 88.8 – 108 Mhz / DAB : 174 – 239MHz
Dans un environnement avec décharges électrostatiques, l’appareil pourrait s’éteindre. (MAIS il pourrait
aussi ne pas fonctionner correctement). L’utilisateur doit alors réinitialiser l’appareil en l’allumant puis
en choisissant le mode adéquat et en réglant à nouveau l’heure.
Respect de l’environnement
Votre produit est conçu et fabriqué avec des matériaux et composants de haute
qualité qui peuvent être recyclés et réutilisés.
Veillez au respect de l’environnement lors de la mise au rebut des piles.

- FR 10 -
Fabriqué en Chine
Fabriqué par BIGBEN INTERACTIVE SA
396, Rue de la Voyette
CRT2 - FRETIN
CS 90414
59814 LESQUIN Cedex - France
www.bigben.eu
Lorsque le symbole d’une poubelle barrée sur roues se trouve sur un produit, cela signie
que le produit est couvert par la Directive Européenne 2002/96/CE. Veuillez vous informer
du système local de collecte séparée pour les produits électriques et électroniques.
Veuillez agir selon les règles locales et ne jetez pas vos anciens produits avec les ordures
ménagères. En assurant l’élimination de ce produit, vous aidez également à prévenir les
conséquences potentiellement négatives pour l’environnement et la santé humaine.
• THOMSON est une marque déposée de TECHNICOLOR SA ou de ses liales utilisée sous licence
par Bigben Interactive.
• Vous pouvez trouver les informations sur la plaque située à l’arrière de l’unité.
DECLARATION DE CONFORMITE SIMPLIFIEE
Par la présente Bigben Interactive déclare que l’équipement radioélectrique du type CP284DAB /
CP280DAB est conforme à la directive 2014/53/UE.
Le texte complet de la déclaration UE de conformité est disponible à l’adresse internet suivante:
www.bigben.fr/support

ALARM CLOCK DAB RADIO
CP284DAB
OPERATING INSTRUCTIONS
PLEASE READ THIS USER MANUAL CAREFULLY BEFORE
OPERATING THIS UNIT AND RETAIN FOR
FUTURE REFERENCE
EN

- EN 1 -
Getting Started
• Remove the appliance from the box.
• Remove any packaging from the product.
• Place the packaging inside the box and either or dispose of safely.
Safety Warning and Notice
• Read and understand all instructions before you use this product. If damage is caused by failure to
follow the instructions, the warranty does not apply.
• Never remove the casing of this device.
• Never place this device on other electrical equipment.
• Protect the power cord from being walked on or pinched, particularly at plugs, convenience
receptacles, and the point where they exit from the device. Make sure that the power voltage
corresponds to the voltage printed on the back label. When you unplug the AC power cord always
pull the plug from the socket. Never pull the cord. Before connecting the AC power cord, ensure you
have completed all other connections
• Only use attachments/accessories specied by the manufacturer.
• Refer all servicing to qualied service personnel. Servicing is required when the device has been
damaged in any way, such as :
- damaged power-supply cord,
- spilled liquid or objects have inserted into the device,
- the device has been exposed to rain or moisture,
- the device does not operate normally,
- or the device has been dropped.
• The rating label is placed on the bottom side of apparatus.
• Make sure there is enough space around the product for ventilation.
• The use of this device must be done in moderate climates, away from direct sunlight, naked ames
or heat. Do not install near any heat sources.
• Batteries (battery pack or batteries installed) shall not be exposed to excessive heat such as
sunshine, re, etc.
• Unplug before cleaning. Never lubricate any part of this device. Clean the appliance with a soft cloth.
Do not use abrasives or harsh cleaners.
Ensure that you always have easy access to the power cord, plug or adaptor to disconnect this
device from the power if necessary.
• Do not use this apparatus near water. It must not be in contact with dripping or splashing. Do not use
this unit in wet or damp conditions.
• Unplug this device during lightning storms or when unused for long periods of time.
Getting Started 1
Safety and Notice 1
Care for your product 2
Care of the environment 2
What’s in the box 3
Description of Part 3
Power 3
Power supply 4
Using the DAB radio 4
Using the FM radio 6
Set the time and date 7
System settings 8
Remarks:10
10
Contents

- EN 2 -
CLASS II MATERIAL
DC POWER SUPPLY
ALTERNATING CURRENT
FOR INDOOR USE ONLY
The lightning symbol inside an equilateral triangle warns the user of the presence inside
the product of uninsulated hazardous electric voltages powerful enough to represent an
electrocution risk.
The exclamation point within a triangle indicates the presence of important operating and
maintenance (servicing) instructions in the literature accompanying the unit.
Place the unit in the desired position and unravel the mains cable. Insert the cable
into the supply socket and switch on if applicable.
Safety Warning
Note the following information: Only use the power supplies listed below.
• The AC/DC adaptor is used as disconnect device.
The AC/DC adaptor of apparatus should not be obstructed OR should be
easily accessed during intended used.
To be completely disconnect the power input, the AC/DC adaptor of apparatus
shall be disconnected from the mains.
• This product is intended for use only with the adaptor provided:
Manufacturer: OBELIEVE
Model: OBL-0501000E
• The rating label has marked on the bottom panel of the apparatus.
What’s in the box
Check and identify the contents of your package:
• Main unit
• User manual
• AC Adaptor

- EN 3 -
Description of Part
1) PRESET BUTTON
2) TUNE- BUTTON
3) ALARM/SLEEP BUTTON
4) SELECT/SCAN BUTTON
5) MENU/INFO BUTTON
6) TUNE+ BUTTON
7) STANDBY/MODE BUTTON
8) PROJECTION DISPLAY BUTTON
9) PROJECTION REVERSE BUTTON
10) PROJECTION ROTATE KNOB
11) PROJECTOR
12) LCD DISPLAY
13) SPEAKER
14) VOLUME+/- BUTTON
15) WIRE ANTENNA
16) DC JACK
17) SNOOZE
Power supply
Operating the unit on ac power
Insert one end of the supplied power cord to the 5V DC-IN Jack located at the rear of the unit and the
other end into the wall socket.
When used for the rst time the cord has to be rmly pushed into the socket. If it does not work on AC,
try again to be sure of a positive connection
Operation
Press the STANDBY/MODE button to turn ON the unit. Press and hold it for 2 seconds to turn OFF
the unit.
Adjusting the volume
Press the VOLUME- button to decrease the volume
Press the VOLUME+ button to increase the volume. When you adjust the volume, please check the
display which will conrm the volume setting.

- EN 4 -
Using the DAB radio
Wire aerial
Please make sure that the antenna is fully extended before you attempt to tune into a DAB station. This
will ensure that the maximum signal strength is available when the radio begins to scan. Extending the
wire antenna also ensures the best possible sound quality.
DAB Radio mode
Check that your radio is in DAB mode. If you are not already in DAB mode, press and release the
‘STANDBY/MODE’ button to go into DAB mode (check the display).
The rst time you use the radio or if the station list is empty, your radio will automatically begin to scan
for DAB radio stations. A progress bar will show the progress of the scan and the number of stations
found during the scan will also be displayed.
If you were listening to a DAB station when you switched the radio off then this station will be
automatically selected when you switch the radio back on.
Changing DAB stations
In DAB mode:
1) Press the TUNE+/TUNE- button on the top of the radio to scroll through the available stations.
2) When the station that you would like to listen to is displayed press the SELECT/SCAN button to
conrm. There will be a short delay whilst your radio tunes into your selected station.
Scanning for DAB stations
With DAB radio, additional stations and services regularly become available so it’s a good idea to
carry out a manual scan every now and then to make sure that you have the most up to date station
listing stored in your radio’s memory. If you have moved your radio to another location, e.g. if you go
on holiday, then it’s also a good idea to carry out a manual scan.
If you are not already in DAB mode, press and release the ‘STANDBY/MODE’ button to go to DAB mode.
1) Press and hold the MENU/INFO button until the display changes to <Digital Radio>. And use the
TUNE+/TUNE- button to scroll to <Full Scan>.
2) Press the SELECT/SCAN button to begin a search for stations.
Prune DAB stations
You can remove the DAB stations in the station list that cannot be received in your area. These are
listed with a ‘?’ prex.
1) Press and hold the Menu/Info button until the display changes to <Digital Radio> and use the
TUNE+/TUNE- button to scroll to ‘Prune Invalid’. Press the SELECT/SCAN button to select.
2) Proceed to prune the invalid stations. <NO> Yes’ is displayed. Use TUNE+/TUNE- button to scroll
to ‘Yes’. Press the SELECT/SCAN button to select and prune the station list. Stations with a ‘?’
prex will now no longer be displayed.
Storing a DAB station preset
Your radio can store up to 10 DAB stations in its preset memories for instant access to your favourite
stations.
Note: When you store preset DAB radio stations, these do not overwrite your pre-set FM stations.
1) Tune your radio to the station that you wish to preset.
2) Press and hold the PRESET button on the top of your radio. Then press the TUNE+/TUNE- button
to scroll to the preset location where you would like to store the radio station (1-10).
3) Press the SELECT/SCAN button to select and the display will conrm ‘SAVED’.
Note: If there is already an existing preset DAB station, it will be overwritten when you store the new
station.
Tune in to a preset DAB station
In DAB mode
1) Press the PRESET button.
2) Use the TUNE+/TUNE- button to scroll to the Preset location and station that you would like to
listen to (1-10). Press and release the SELECT/SCAN button to select. The radio will tune in to
that station and begin to play.

- EN 5 -
Note: If no DAB station has been stored under the preset button, ‘Preset Empty’ will be displayed and
the radio will revert to the previously selected radio station.
DAB display information
When listening to a DAB station you can change the information that will appear on the display. There
are several different types of information that are sent by the broadcaster.
Dynamic Label Segment (DLS) - this is scrolling text information supplied by the broadcaster. The information
could be the name of an artist or music title, the DJ’s name, the contact details for the radio station, etc.
Signal Strength - the display will appear empty to indicate the minimum signal strength for acceptable
listening. The row of solid rectangles indicates the actual signal strength that you are receiving. The
stronger the signal, the further to the right the row of solid rectangles will be.
Programme Type (PTY) - such as ‘Rock’, ‘Pop‘, Talk’ or ‘News’
Multiplex Name - displays the broadcasting area and collection of radio stations on this frequency e.g.:
BBC National DAB, Digital 1 Network.
Channel and Frequency - e.g.: 12B 225.648 MHz
Signal error - This is displayed as a number between 0-99. It would not be possible to satisfactorily
listen to a radio station with a signal error rate of 30 or above. Try adjusting the aerial or relocating your
radio to improve reception.
Signal information - The data rate at which the signal is being transmitted.
Time and date - supplied by the broadcaster.
1) Repeatedly press and release the Menu/Info button on the top of the radio to cycle through the
different information options.
Dynamic range control (DRC)
In DAB mode:
The dynamic range for each radio programme is set by the broadcaster for each radio station and may
be different for the types of programme broadcast, such as pop or classical music or a chat show. The
dynamic range control signal is transmitted in parallel with the audio signal for each programme and
with your radio you can use this control signal to expand or compress the dynamic range (the difference
between the loudest and quietest sounds) of the reproduced audio signal. Changing the dynamic
range can affect the ‘loudness’ and/or ‘quality of sound’ of the programme that you hear so that it will be
more suited to your listening conditions and your own personal listening requirements. E.g. in a noisy
environment, where quiet sounds might be swamped, setting the compression to maximum will ‘boost’
the quiet sounds, whilst keeping the loudest sounds at their original level.
There are 3 levels of compression:
• DRC Off: no compression. This is the default setting.
• DRC Low: medium compression.
• DRC High: maximum compression.
1) Press and hold the Menu/Info button for 2 seconds.
2) Use the TUNE+/TUNE- button to scroll to ‘DRC’ and press the SELECT/SCAN button to select.
3) Use the TUNE+/TUNE- button to scroll through the 3 compression level options available and
press the SELECT/SCAN button to select.
Using the FM radio
FM Radio mode
If you are not already in FM mode, briey press and release the ‘STANDBY/MODE’ button to go to FM
mode (check the display).
If you were listening to an FM station when you switched the radio off then this station will be
automatically selected when you switch the radio back on.
Tuning in to an FM station
Press and hold the TUNE+/TUNE- button on the top of your radio to scan up the frequency band.
Press the TUNE+/TUNE- button to ne tune each frequency in 0.05 MHz steps.
Note: If the reception is still poor adjust the position of the antenna or try moving the radio to another
location.

- EN 6 -
Preset stations
Your radio can store up to 10 FM stations in its preset memories for instant access to your favourite
stations.
Note: When you store preset FM radio stations, these do not overwrite your preset DAB stations.
1) Tune your radio to the station that you wish to preset.
2) Press and hold the PRESET button on the top of your radio.
3) Then press the TUNE+/TUNE- button to scroll to the Preset location where you would like to store
the radio station (1-10).
4) Press the SELECT/SCAN button to select and the display will conrm with ‘SAVED’.
Note: If there is already an existing preset FM station , it will be overwritten when you store the new
station.
Tune in to a preset FM station
In FM mode:
1) Press the PRESET button.
2) Use the TUNE+/TUNE- button to scroll to the Preset location and station that you would like to
listen to (1-10). Press and release the SELECT/SCAN button to select. The radio will tune to that
station and begin to play.
Note: If no FM station has been stored under the preset button, ‘Preset Empty’ will be displayed and
the radio will revert to the previously selected radio station.
FM display information
When listening to an FM station you can change the information that will appear on the display.
• Radiotext (RT)
This is scrolling text information supplied by the broadcaster. The information could be the name of an
artist or music title, the DJ’s name, the contact details for the radio station etc.
• Programme Type (PTY), such as ‘Rock’, ‘Pop‘, Talk’ or ‘News’.
• Station name or frequency such as BBC R4 or 93.30MHz
Audio mode---Stereo or Mono
Time and Date----Supplied by the broadcaster
1) Repeatedly press and release the Menu/Info button on the top of the radio to cycle through the
different information options.
Set the time and date
Setting the time and date
The rst time you listen to the DAB radio, the time and date of your product will be synchronised
automatically to that broadcast by the DAB service, in 24 hour clock mode, in line with daylight saving.
However, you can set the time and date manually.
In DAB mode:
1) Press and hold the ‘Menu/Info’ button for 2 seconds.
2) Use the TUNE+/TUNE- button to scroll to ‘<System Settings>’. Press the SELECT/SCAN button
to select.
3) Use the TUNE+/TUNE- button to scroll to ‘<Time/Date>’. Press the SELECT/SCAN button to select.
Use the TUNE+/TUNE- button to scroll to ‘<Set Time/Date>’. Press the SELECT/SCAN button to select.
4) The day will ash. Use the TUNE+/TUNE- button to adjust and press the SELECT/SCAN button
to select.
5) The month will ash. Use the TUNE+/TUNE- button to adjust and press the SELECT/SCAN button
to select.
6) The year will ash. Use the TUNE+/TUNE- button to adjust and press the SELECT/SCAN button
to select.
7) The hour digits will ash. Use the TUNE+/TUNE- button to scroll to the correct hour. Press the
SELECT/SCAN button to select.
8) The minutes will now ash. Use the TUNE+/TUNE- button to scroll to the correct minutes. Press
the SELECT/SCAN button to select.

- EN 7 -
When you conrm the correct Time and Date, ‘Time SAVED’ is displayed and the display returns to
<TIME/Date>’.
You can now use the TUNE+/TUNE- button to scroll and the same method as you did to set the time
and date to change the settings for:
• 12/24 hour clock display
• The date format, DD-MM-YYYY or MM-DD-YYYY
• To auto update the time from the DAB signal, FM signal, DAB or FM signal or no update.
• Clock Style
Setting the alarm
Note: Check that the radio has the correct time and date before you set an alarm.
With your radio switched on (not in standby mode)
1) Press the ALARM/SLEEP button until the Alarm menu is shown.
2) Use the TUNE+/TUNE- button to scroll to <Alarm 1> or <Alarm 2> as required. Press and release
the SELECT/SCAN button.
3) Alarm 1 (or 2) info is displayed then use the TUNE+/TUNE- button to scroll to <Alarm>. Press and
release the SELECT/SCAN button repeatedly to select <ON>.
4) Use the TUNE+/TUNE- button to scroll to <wake up time>. Press and release the SELECT/SCAN
button. The hour digits for the alarm will ash.
5) Use the TUNE+/TUNE- button to adjust and press the SELECT/SCAN button to conrm.
6) The minutes will now ash. Use the TUNE+/TUNE- button to adjust and press SELECT/SCAN
button to conrm.
7) Use the TUNE+/TUNE- button to scroll to <Duration>. Press the SELECT/SCAN button . You can
choose from 15, 30, 45, 60, 90 and 120 minutes by pressing the TUNE+/TUNE- button. Press and
release the SELECT/SCAN button.
8) Use the TUNE+/TUNE- button to scroll to <Source>. Press the SELECT/SCAN button. Press the
TUNE+/TUNE- button to scroll to the sound source for the alarm. You can choose from Buzzer,
Chirp, Stream, Croak, Wave, DAB or FM. Press and release the SELECT/SCAN button.
9) Use the TUNE+/TUNE- button to scroll to <Frequency>. Press and release the SELECT/SCAN
button.
10) Use the TUNE+/TUNE- button to scroll to the frequency for the alarm. You can choose from Daily,
Once, Weekends or Weekdays. Press and release the SELECT/SCAN button.
Note: If you select “Once”, you will then be prompted to set the date for your alarm
Note: An alarm symbol in the bottom of the radio display together with the digit “I” or “II” will conrm
that an alarm has been set.
Note: If the time is not set or has failed to update from the radio signal, <Time is not set> will be
displayed when you try to set the alarm. The radio will then prompt you to set the time. An alarm can
only be set after the time has been set.
Stop the Alarm
When the alarm sounds, press and release the STANDBY/MODE button, alternatively, you can press
and release the Snooze button (see Snooze function below).
Note: if you press the STANDBY/MODE button to stop the alarm, the alarm symbol will remain in the
display and the alarm will sound again at the same time the next day, unless it was set for “Once”.
Snooze function
If you want to snooze for a few more minutes when an alarm sounds, press the SNOOZE BUTTON
while it is happening. The alarm will sound again after 9 minutes. Press the STANDBY/MODE button
to turn the Snooze function off.
Sleep timer
You can set your radio to turn off automatically using the sleep timer. You can choose from Sleep, Off
15, 30, 45, 60 and 90 minutes by pressing the ALARM/SLEEP button repeatedly.
In DAB or FM mode:
press and hold the ‘ALARM/SLEEP’ button to cycle through the different sleep timer options such as
Sleep, Off, 15, 30, 45, 60 and 90 minutes.

- EN 8 -
Note: To cancel the sleep timer, follow the steps to set the sleep timer but stop when ‘Sleep Timer off’
is displayed.
System settings
Your Radio must be switched on (not in Standby mode), to change the system settings.
Display backlight timeout
You can adjust the display backlight timeout. Options of Permanently On, 10, 20, 30, 45, 60, 90, 120,
and 180 seconds are available.
In DAB or FM mode:
1) Press and hold the ‘Menu/Info’ button to enter the menu options.
2) Use the TUNE+/TUNE- button to scroll to ‘<System Settings>’. Press the SELECT/SCAN button
to select.
3) Use the TUNE+/TUNE- button to scroll to ‘<Backlight>’. Press the SELECT/SCAN button to select.
4) ‘<Timeout>’ is displayed. Press SELECT/SCAN button to select. Use the TUNE+/TUNE- button
to scroll through the available backlight timeout options of On, 10, 20, 30, 45, 60, 90, 120 or 180
seconds. Press and release the SELECT/SCAN button to select as you did to set the Backlight
timeout, to change the settings for the backlight brightness for the <Dim level> and for the <On
level>. There are 3 options available: High, Medium and Low.
Display language
You can change the display language of your radio, there are 4 options available; English, French,
German and Italian.
With your radio switched on (not in Standby mode):
1) Press and hold the Menu/Info button to enter the menu options.
2) Use the TUNE+/TUNE- button to scroll to <System Settings>. Press and release the SELECT/
SCAN button.
3) Use the TUNE+/TUNE- button to scroll to <Language>. Press and release the SELECT/SCAN
button.
4) Use the TUNE+/TUNE- button to scroll to the language you would like. Press and release the
SELECT/SCAN button to conrm.
Software version
You can check the software version of your radio.
In DAB or FM mode:
1) Press and hold the Menu/Info button to enter the menu options
2) Use the TUNE+/TUNE- button to scroll to ‘<System Settings>’. Press the SELECT/SCAN button
to select.
3) Use the TUNE+/TUNE- button to scroll to ‘<Software Version>’. Press the SELECT/SCAN button
to select. The software version will be displayed.
Table of contents
Languages:
Other THOMSON Clock Radio manuals

THOMSON
THOMSON RT304 User manual

THOMSON
THOMSON RR200PLL User manual

THOMSON
THOMSON RR96L User manual

THOMSON
THOMSON RR550CD User manual

THOMSON
THOMSON CL300P User manual

THOMSON
THOMSON RR640CD User manual

THOMSON
THOMSON CR400iBT User manual

THOMSON
THOMSON CR50 User manual

THOMSON
THOMSON RR520U User manual

THOMSON
THOMSON CR80 User manual

THOMSON
THOMSON RR60 User manual

THOMSON
THOMSON RT554 - annexe 1 User manual

THOMSON
THOMSON CR50DAB User manual

THOMSON
THOMSON CT390 User manual

THOMSON
THOMSON RR540CD User manual

THOMSON
THOMSON CP280 User manual

THOMSON
THOMSON RR95 User manual

THOMSON
THOMSON CT400i User manual

THOMSON
THOMSON CR221I User manual

THOMSON
THOMSON RR420CD User manual