THOMSON RT554 - annexe 1 User manual

EN

EN
1
Main Connections (For UK only)
CAUTION:
For UK Only
CONNECT THE AC/DC ADAPTOR INTO AC MAINS POWER SOCKET
Power supply for AC/DC adaptor 230V~50Hz.
Note: The AC/DC adaptor is fitted with a moulded plug. The moulded plug
cannot be rewired and if removed must be disposed of safely.
DO NOT under any circumstances plug the severed plug of adaptor into any
mains socket as this could result in electric shock.
MAINS OUTLET POWER SUPPLY: 230V ~50Hz
Note:
If the unit is powered by the AC/DC adaptor supplied with the unit,
power is fed to the unit even when it is not functioning. To cut the
power supply off, the AC/DC adaptor must be unplugged from power
socket.

EN
Safety Information
Do not place the system near wet areas such as
bathrooms and pool side.
Do not expose this appliance to rain or moisture
Avoid storing the system at humid places or near
abnormally heated areas.
Power is continuously supplied to the system. To
disconnect power completely, unplug the adaptor
from the power outlet.
Do not expose this appliance to dripping and
splashing.
WARNING:TO PREVENT FIRE OR ELECTRICAL
SHOCK HAZARD, DO NOT EXPOSETHIS PRODUCT
TO RAIN OR MOISTURE.
SEE MARKING ON BOTTOM / BACK OF PRODUCT
CAUTION
RISK OF ELECTRIC SHOCK
DO NOT OPEN
THE EXCLAMATION
POINT WITHIN THE
TRIANGLE IS A
WARNING SIGN
ALERTING YOU OF
IMPORTANT
INSTRUCTIONS
ACCOMPANYING
THE PRODUCT.
THE LIGHTNING
FLASH AND ARROW-
HEAD WITHIN THE
TRIANGLE IS A
WARNING SIGN
ALERTING YOU OF
"DANGEROUS
VOLTAGE" INSIDE
THE PRODUCT.
CAUTION: TO REDUCE THE
RISK OF ELECTRIC SHOCK,
DO NOT REMOVE COVER
(OR BACK). NO USER-
SERVICEABLE PARTS IN-
SIDE. REFER SERVICING
TO QUALIFIED SERVICE
PERSONNEL.
Please respect the environment. Before
throwing any batteries away, consult your
distributor who may be able to take them
back for specific recycling.
TECHNICAL SPECIFICATIONS:
Power supply: 6V 4 X “AA”
6V AC/DC adaptor (Input rated
power: 3.5W)
Power consumption: 3W
2

EN
3
Power Supply
Connecting AC/DC adaptor
1. Plug the supplied AC/DC adaptor into
230V-50Hz AC outlet.
2. Plug the other end of the AC/DC
adaptor into the DC jack of the unit.
This clock radio is equipped with a memory
holding system that can be powered with
4 “AA” batteries (not included).
When normal household power is inter-
rupted, or the DC adaptor is unplugged,
the batteries will power the clock radio to
keep track of time and alarm settings pro-
grammed into memory.
When the battery backup functions, the
unit can operate as usual, but we advise
you to use household power when using
indoor.
Installing batteries
1. Remove the battery compartment
door by applying thumb pressure to
area indicated on battery door and
then push it in the direction of the
engraved arrow.
2. Before inserting the batteries,
observe the polarities (+ and -) of the
battery, then relate the polarities to
the engraved diagram inside the
battery compartment, then insert the
batteries.
3. Replace the compartment door.
TipTip
TipTip
Tip:
When the AC power is
unplugged, the unit can
maintain the time and alarm
settings for about one minute when you
change the batteries.
CautionCaution
CautionCaution
Caution:
When the AC/DC adator is not
powered, do not plug it to your
unit, as it will cut off the power
supply from the batteries (if available)
to prevent accidental charging.

EN
Setting Clock Time
Your digital clock operates on a 24-hour
standard mechanism.
1. When in clock mode, press MEM/TIME
once, the time will flash on the display.
2. Press UP repeatedly to set the hour, then
press DOWN repeatedly to set the
minute. When you press and hold UP
or DOWN, the time increments will fol-
low by a faster rate.
3. When the time is set, press MEM/TIME
again or wait 5 seconds, the time will
stop flashing.
Operating the Clock
Setting Clock Time 2
Your digital clock is equipped with “dual-
time” feature, to let you keep track of time
in a different zone.
1. When in clock mode, press DUAL TIME
once and “TIME 2” shows on the dis-
play.
2. Press MEM/TIME, the time will flash on
display.
3. Press UP repeatedly to set the hour, then
press DOWN repeatedly to set the
minute. When you press and hold UP
or DOWN, the time increments will fol-
low by a faster rate.
4. When the time is set, press MEM/TIME
again or wait 5 seconds, the time will
stop flashing.
TipTip
TipTip
Tip:
When you change the minute
setting of one time zone, the
other will change accordingly.
4
MULTIBAND LCD ALARM/RADIO DISPLAY
RT554
TIMER
TIMER
MEM
MEM
TIME
TIME
ENTER
ENTER
TUNING UP
TUNING UP
DO
DO
WN
WN
hour
hour
min.
min.
LIGHT
SLEEP
DUAL
TIME
ALARM
1
2
3
4
5
6
7
8
9
0
P
R
E
S
E
T
/
D
I
R
E
C
T
E
N
T
R
Y
POWER
DX
LOC
SENS
FM
MW
LW
SW
BAND

EN
5
Operating the Alarm
Setting the Wake Time
1. Press ALARM once to set the wake
time, the current wake time will flash
on display.
2. Press UP repeatedly to set the hour,
then press DOWN repeatedly to set the
minute. When you press and hold UP
or DOWN, the time increments will fol-
low by a faster rate. No adjustment can
be made when LOCK mode is selected.
3. When the wake time is set, the unit
will return to clock mode if no button
is pressed within 5 seconds.
Waking by Selected Source
Programme
You may be woken up by radio or
alarm .
1. Select an FM/MW/LW/SW station. (re-
fer to “Tuning the Stations”)
2. Set wake time (see above direction).
3. Press ALARM repeatedly to select wak-
ing up by radio or alarm. An indicator
is up next to the selected setting.
4. Adjust the volume by turning VOLUME
(radio only).
Turning off Alarm
Silence the alarm momentarily
Press SNOOZE. The alarm will sound again
when the snooze period (9 minutes) is
over.
Stop the alarm
Press any button. Then the alarm will be
on the following day at the same time.
Disable the alarm permanently
Press ALARM repeatedly until and
disappear from the display, the
alarm function is disabled.
NoteNote
NoteNote
Note:
The last radio station you
listen to will be the wake up
radio station.

EN
Sleep Mode
In sleep mode, the radio will turn off au-
tomatically. Simply:
1. Press SLEEP then the time display will
exhibit “10” and the radio will turn on.
2. Press SLEEP repeatedly to set the sleep
time. The time range is from 10 min-
utes to 90 minutes.
3. You may select the station as usual, the
radio will turn off automatically once
the sleep timer is reached.
4. To turn off the radio earlier, press
POWER.
Snooze Alarm Operation
This operation allows extra sleep time af-
ter the alarm is on. The alarm will be off
by pressing SNOOZE.
The default snooze period is 9 minutes.
Alarm timer
Alarm timer is an instant alarm which can
wake you after a specific period of time.
1. Press TIMER repeatedly to set the alarm
timer in 10 minutes step.
2. Press DOWN repeatedly to set the alarm
timer in 1 minutes step.
3. When the alarm timer (1 to 99 minutes)
is set, the unit will return to the mode
you are in before after 5 seconds.
4. The alarm will sound after the alarm
timer you set is reached.
5. To cancel the alarm timer earlier, press
TIMER or DOWN repeatedly until the
display reads “00”.
Operating the Alarm
6

EN
7
Operating the Radio
Selecting the Radio Band
1. Press POWER to turn on the radio.
2. Slide BAND to select between FM, MW,
LW and SW.
3. Rotate VOLUME to adjust the volume
level.
Tuning the Radio Stations
1. Press POWER to turn on the radio.
2. Press UP or DOWN to tune to your de-
sired radio station.
3. Rotate VOLUME to adjust the volume
level.
Direct Entry
1. Press POWER to turn on the radio.
2. Slide BAND to select between FM, MW,
LW and SW.
3. Press ENTER once, then use the NUM-
BER buttons (0-9) to enter the radio fre-
quency directly.
4. Press ENTER again to confirm within 5
seconds.
5. Rotate VOLUME to adjust the volume.
NoteNote
NoteNote
Note:
You can store up to 40 preset
radio stations (10 FM, 10 MW,
10 LW and 10 SW.)
TipTip
TipTip
Tip:
You can replace a stored radio
station by storing a different
station into its location.
TipTip
TipTip
Tip:
For FM and SW, lift and fully
extend the antenna to enhance
the radio reception quality.
For MW and LW, change the position
and orientation to get better reception.
TIMER
MEM
TIME ENTER
TUNING UP
DOWN
hour
min.
MULTIBAND LCD ALARM/RADIO DISPLAY
RT554
TIMER
TIMER
MEM
MEM
TIME
TIME
ENTER
ENTER
TUNING UP
TUNING UP
DO
DO
WN
WN
hour
hour
min.
min.
LIGHT
SLEEP
DUAL
TIME
ALARM
1
2
3
4
5
6
7
8
9
0
P
R
E
S
E
T
/
D
I
R
E
C
T
E
N
T
R
Y
POWER
DX
LOC
SENS
FM
MW
LW
SW
BAND

EN
Automatic station search
1. Press POWER to turn on the radio.
2. Press and hold UP or DOWN for 2 sec-
onds, it will automatically search a sta-
tion for you.
3. Rotate VOLUME to adjust the volume
level.
Storing the Radio Stations
1. Press POWER to turn on the radio.
2. Slide BAND to select between FM,
MW, LW and SW.
3. Press UP or DOWN to tune to a radio
station.
4. If you want to memorize this radio
station, press MEM/TIME once,
“MEMO” will flash on display, press
the corresponding number button to
choose the radio station number you
want to record in, once you choose a
number, press MEM/TIME again to
confirm.
5. If you do not store a radio station
within 5 seconds, “MEMO” will
disappear, repeat step 3-4.
Sensitivity (FM/SW only)
Slide SENS to select DX or LOC.
DX (distant) - To receive weak signals.
LOC (Local) - To receive strong signals.
The descriptions and characteristics in this owner’s manual are for the purpose of
general reference only and not as a guarantee. In order to provide you with the
highest quality product, we may make changes or modifications without prior notice.
The English version serves as the final reference on all product and operational
details should any discrepancies arise in other languages.
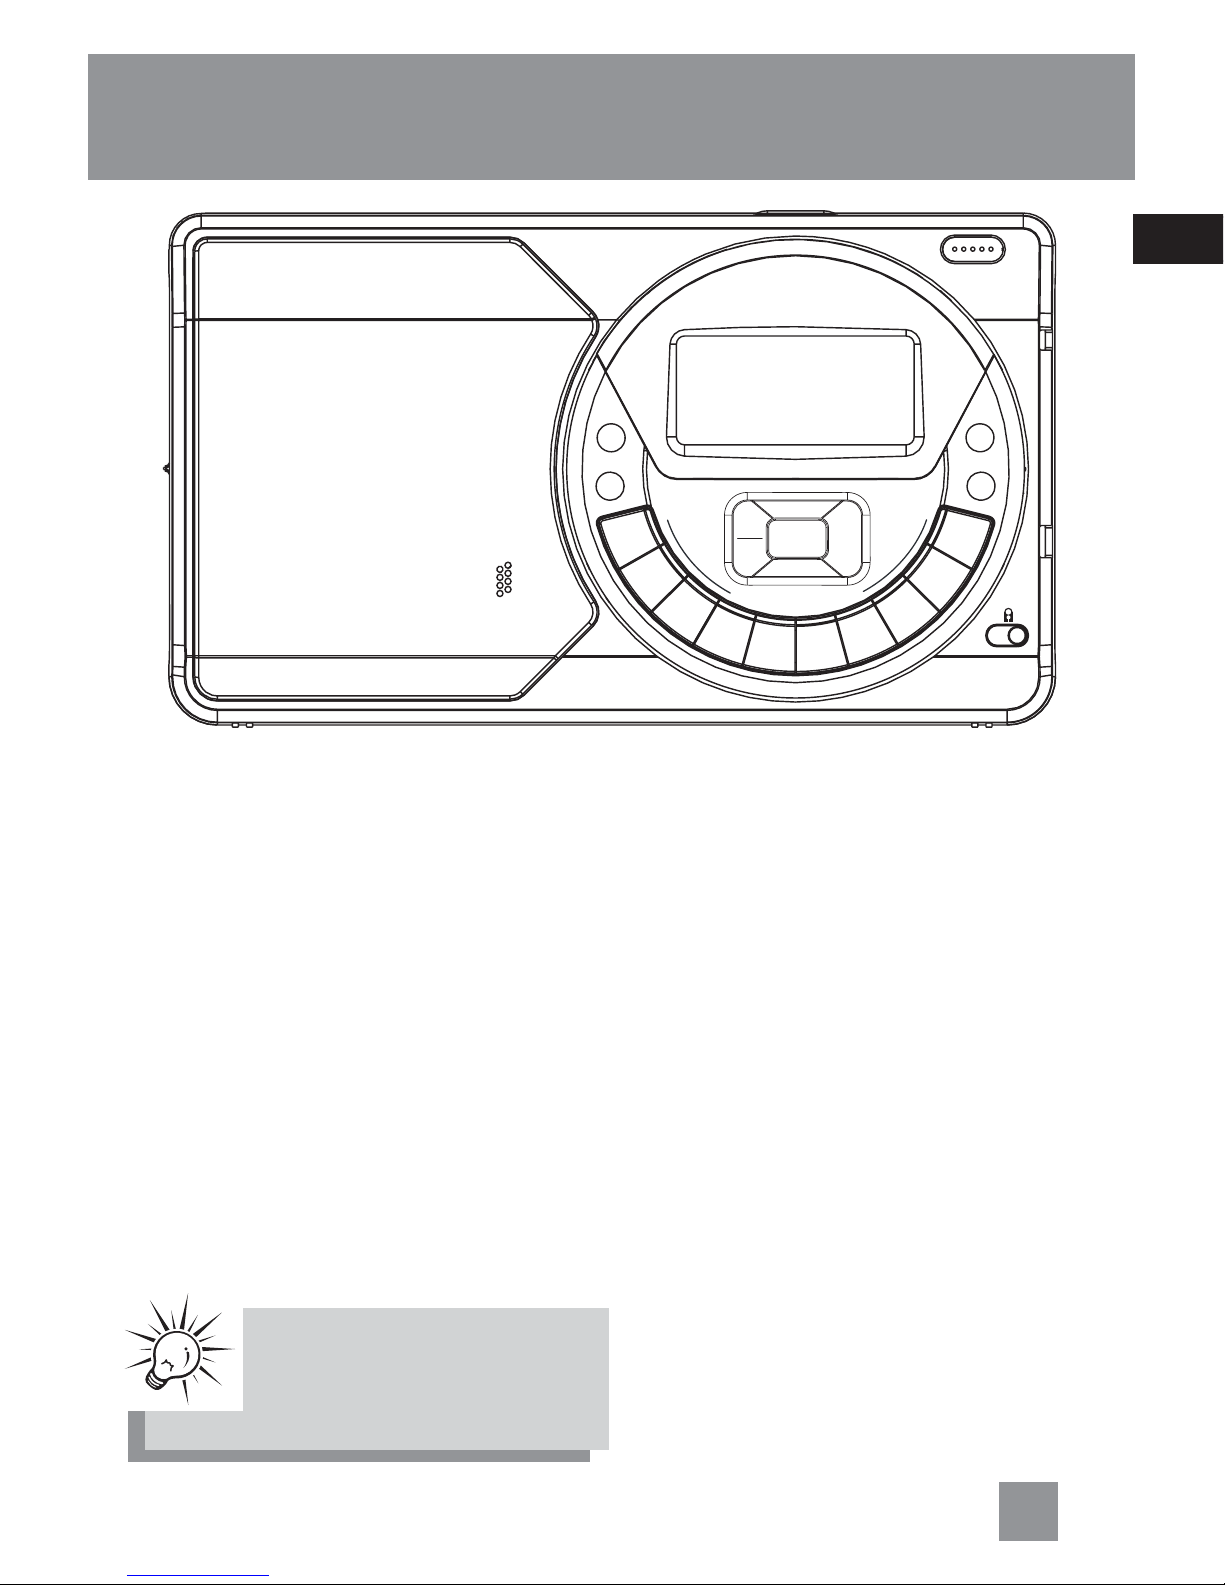
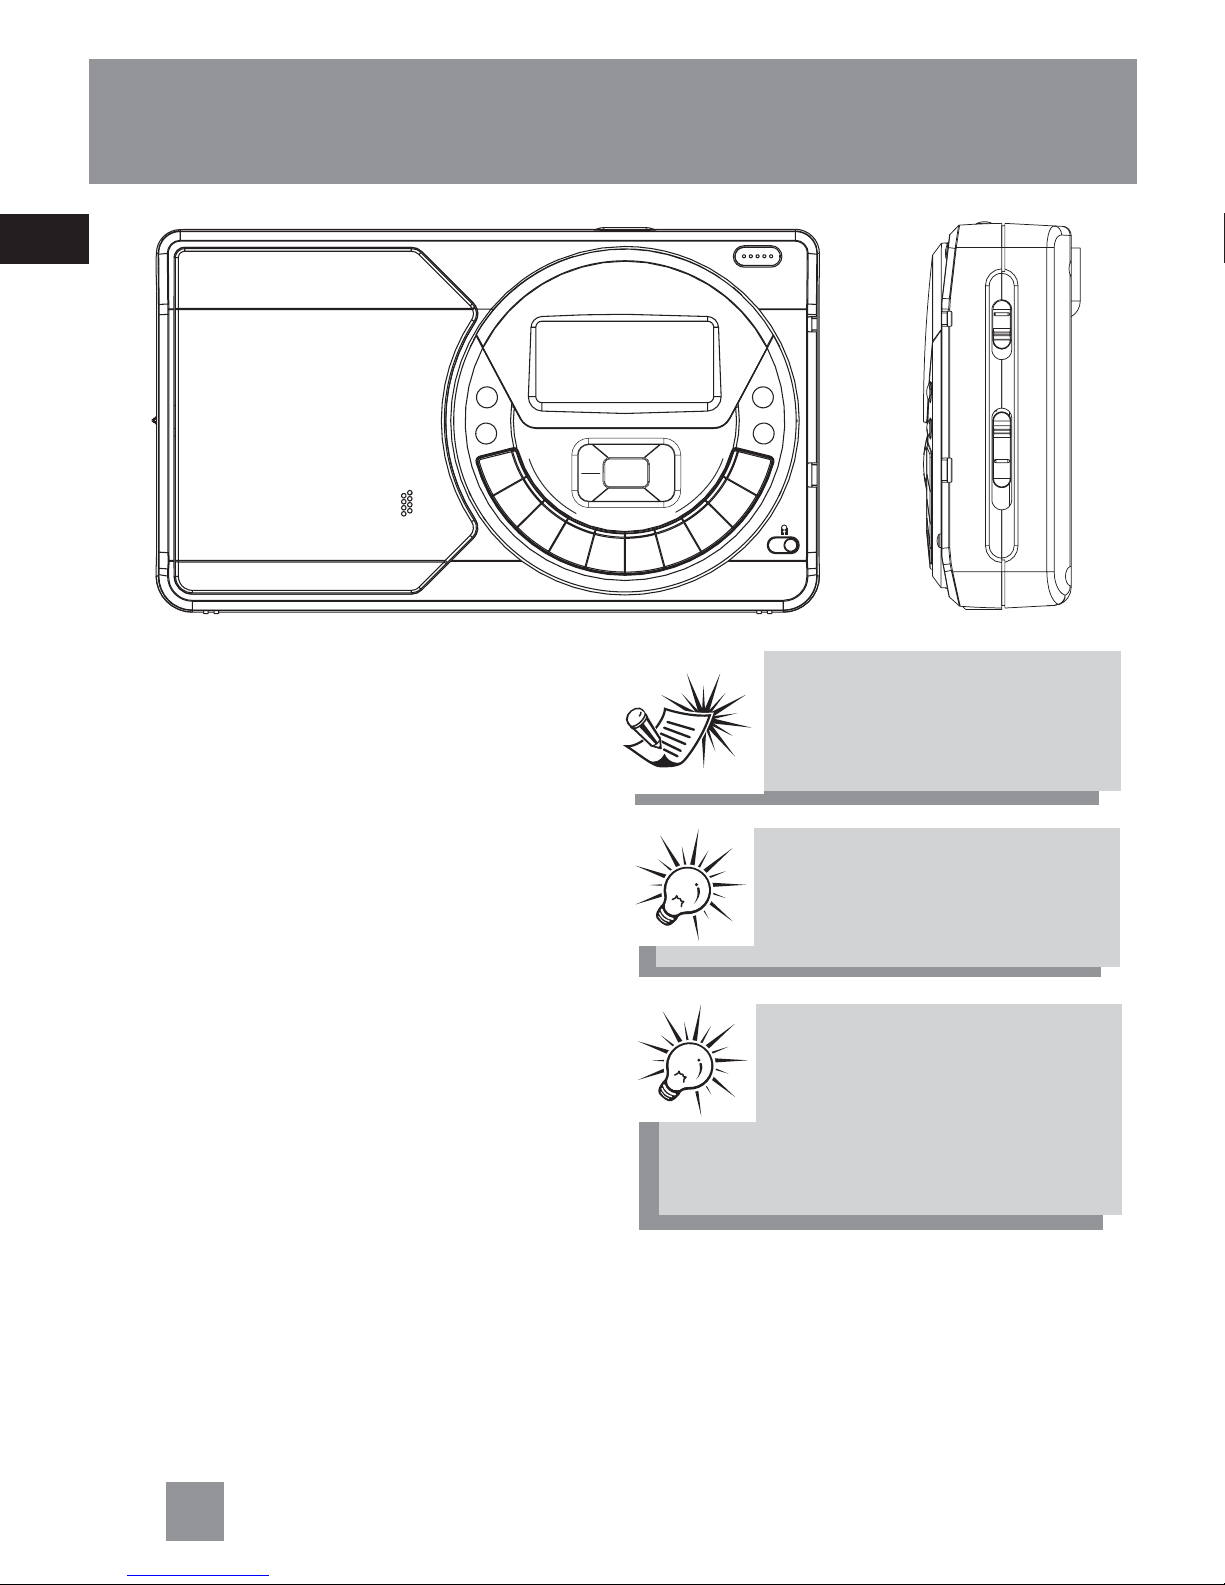
Operating the Radio
Tone
Slide TONE to select HIGH or
LOW to suit your listening preference.
Backlight
Press LIGHT to turn on the backlight.
Keylock
Slide LOCK to enable or disable the keylock
function.
Using Headphones
Plug in the headphones (not supplied) into
the headphones jack at the side of the unit.
Using the Stand
Lift the stand away from the back of the
unit, so you can see the display more easily.
8
Table of contents
Other THOMSON Clock Radio manuals

THOMSON
THOMSON RR640CD User manual

THOMSON
THOMSON CR400iBT User manual

THOMSON
THOMSON CT390 User manual

THOMSON
THOMSON CR50DAB User manual

THOMSON
THOMSON RR420CD User manual

THOMSON
THOMSON RR60 User manual

THOMSON
THOMSON CL300P User manual

THOMSON
THOMSON CP280 User manual

THOMSON
THOMSON CR50 User manual

THOMSON
THOMSON RT304 User manual

THOMSON
THOMSON CR221I User manual

THOMSON
THOMSON RR550CD User manual

THOMSON
THOMSON RR540CD User manual

THOMSON
THOMSON RR520U User manual

THOMSON
THOMSON RR95 User manual

THOMSON
THOMSON CP284DAB User manual

THOMSON
THOMSON RR300 User manual

THOMSON
THOMSON CT400i User manual

THOMSON
THOMSON RR200PLL User manual

THOMSON
THOMSON CR80 User manual