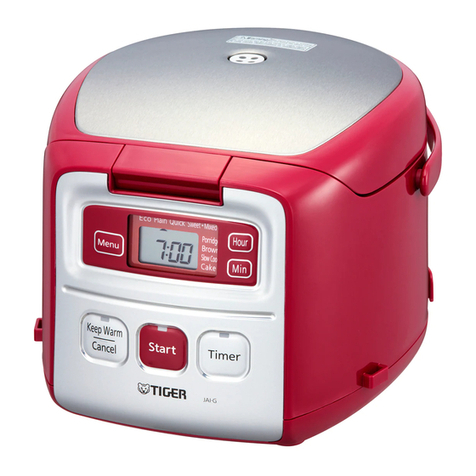
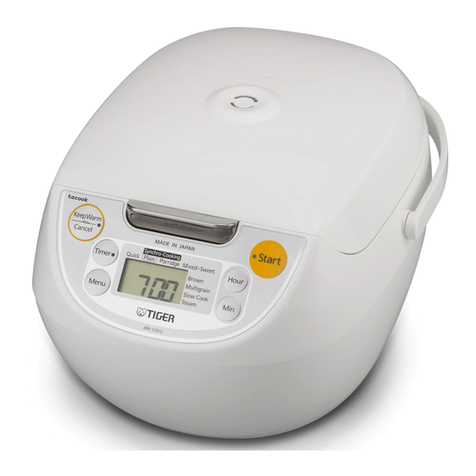
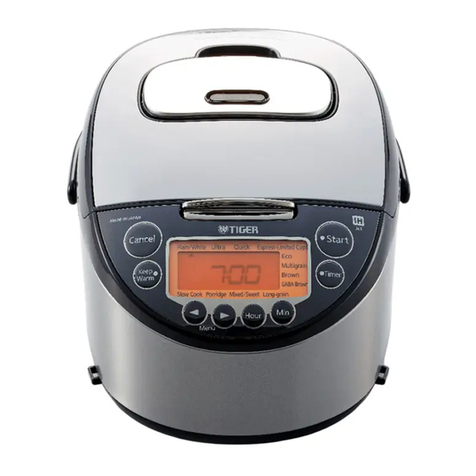
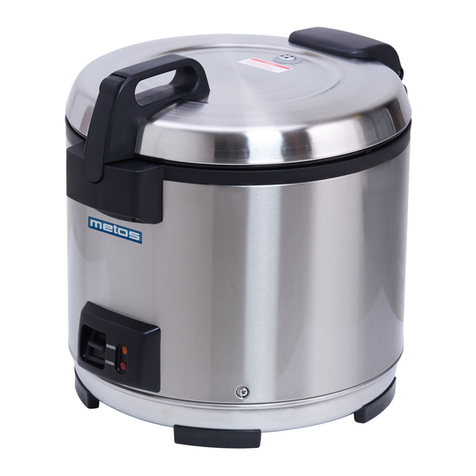
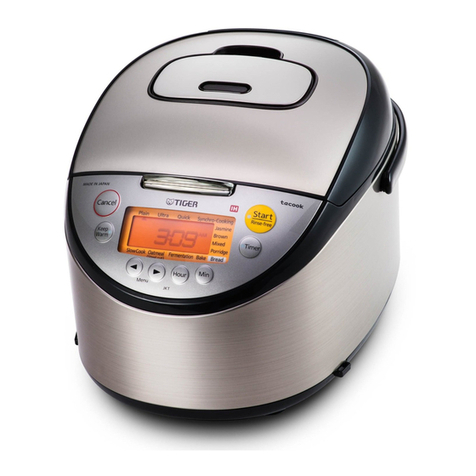
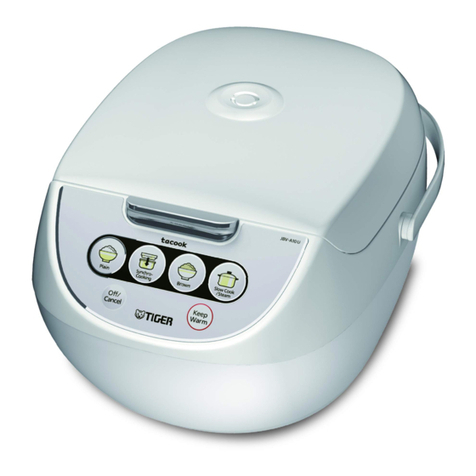
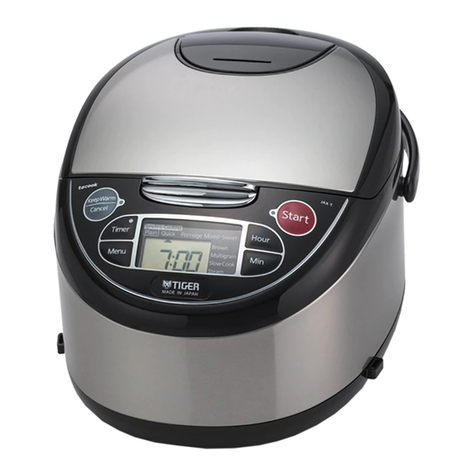
Tiger JNP-1000 User manual

JNP-1000
JNP-1800
JNP-1803 Rice Cooker/Warmer
OPERATING INSTRUCTIONS
Thank you for purchasing this TIGER rice cooker/warmer.
Please read these instructions carefully before use and observe them during use.
For household use
电饭煲
使用说明书
非常感谢您购买本公司的彦品。
在您使用之前,请仔細阅读完本说明书,并妥善保存,以便随时参阅。
家庭用
Sử dụng trong gia đình
Nồi cơm điện
HƯỚNG DẪN SỬ DỤNG
Cảm ơn bạn đã mua nồi nấu/hâm cơm TIGER.
Xin hãy đọc và tuân thủ những hướng dẫn này một cách cẩn thận trước khi sử dụng.
W

2
IMPORTANT SAFEGUARDS
When using the appliance, basic safety precautions should always be followed including the
following:
1. Read all instructions.
2. Do not touch hot surfaces. Use handles or knobs.
3. To protect against electrical shock, do not immerse cord or plug in water or other liquid.
4. Close supervision is necessary when the appliance is used by or near children.
5. Unplug from outlet when not in use and before cleaning. Allow to cool before putting on or
taking off parts.
6. Do not operate the appliance with a damaged cord or plug or after the appliance
malfunctions or has been damaged in any manner. Return appliance to the nearest
authorized service facility for examination, repair, or adjustment.
7. The use of accessory attachments not recommended by the appliance manufacturer may
cause injuries.
8. Do not use outdoors.
9. Do not let cord hang over edge of table or counter, or touch hot surfaces.
10. Do not place the appliance on or near a hot gas or electric burner, or in a heated oven.
11. Extreme caution must be used when moving the appliance containing hot oil or other hot
liquids.
12.Alwaysattachplugtotheappliancerst,thenplugcordintothewalloutlet.
To disconnect, turn any control to “off”, then remove plug from wall outlet.
13. Do not use the appliance for other than intended use.
14. Risk of electric shock, cook only in removable container.
SAVE THESE INSTRUCTIONS
Servicing should be performed by an authorized service representative.
This appliance is intended for household use.
1. A short power cord (or detachable power cord) is provided to reduce the risks of becoming
entangled in or tripping over a longer cord.
2. Longer detachable power cords or extension cords are available and may be used if care
is exercised in their use.
3. If a longer detachable power cord or extension cord is used:
a. The marked electrical rating of the extension cord should be at least as great as the
electrical rating of the appliance.
b. The extension cord should be arranged so that it will not drape over the countertop or
tabletop where it can be pulled by children or tripped over unintentionally.
The appliance is not intended for use by persons (including children) with reduced physical,
sensory or mental capabilities, or lack of experience and knowledge, unless they have been
given supervision or instruction concerning use of the appliance by a person responsible for
their safety.
Children should be supervised to ensure that they do not play with the appliance.
The following instructions are applicable to 120V only:
This appliance has a polarized plug (one blade is wider than the other). To reduce the risk
of electrical shock, this plug is intended to fit into a polarized outlet in only one way. If the
plugdoesnottfullyintotheoutlet,reversetheplug.Ifitstilldoesnott,contactaqualied
electrician. Do not attempt to defeat this safety feature.

3
English
Contents
1 Important Safeguards................................................................................................ 4
2 Names and Functions of Component Parts ............................................................ 8
3 How to Cook Rice ...................................................................................................... 9
4 How to USE (Porridge Cooking) ..............................................................................11
5 How to USE (Steaming) ........................................................................................... 12
6 For Keeping Cooked Rice Warm And Tasty .......................................................... 13
7 Cleaning and Maintenance...................................................................................... 14
Specications........................................................................................................... 16

5
4
English
Environment for use
Do not use the rice cooker on a
sliding tabletop that can not easily
bear its weight.
Falling from the tabletop may result in
injury, burns, or malfunction of the unit
itself.
Beforeusingthericecooker,conrm
thattheslidingtabletopissufciently
able to bear its weight.
Who should use the rice cooker
This appliance is not intended for use
by persons with physical difculties
or lack of experience and knowledge-
unless they have been given
supervision or instruction concerning
to the use of the appliance by a
person responsible for his/her safety.
Unsupervised use may result in burn,
electric shock, or injury.
Do not allow children to use the
appliance by themselves and do
not put within reach of infants or
toddlers.
Failing to do so may result in burns,
electric shock, or injury.
Using the rice cooker
Do not use this product in anyway
not described in the operating
instructions.
Steam or contents may spray out
causing burns or other injuries.
(Examples)
• Heating ingredients inside of plastic
cooking bags, etc.
• Using parchment paper to cover food
in the rice cooker.
Power supply
Use only rated voltage power.
Use of any other power source may
resultinreorelectricshock.
Use an electrical outlet rated 7A
or higher and do not plug in other
devices at the same time.
Connecting other devices in the same
outlet may cause the outlet to overheat
orresultinre.
Power cord and plug
Do not damage or use a damaged
power cord. Do not forcefully bend,
twist, fold, or modify the cord.
Do not place near high temperature
surfaces or under/between heavy objects.
Adamagedpowercordcancausereor
electric shock.
Wipe the plug thoroughly in the case
dust or other foreign objects are
collected.
Thisistoavoidre.
Firmly insert the plug into the outlet
to avoid electric shock, shorting,
smoke, or re.
Do not use the product if the power
cord or plug is damaged or the plug
is loose in the outlet.
This is to avoid electric shock shorting,
orre.
If the supply cord is damaged, it must
be replaced by the manufacturer,
its service agent or similarly qualied
persons in order to avoid a hazard.
Do not touch
the unit with
wet hands
Do not plug in or unplug with wet
hands.
This is to avoid electric shock or injury.
Do not expose the plug to steam.
Doing so may result in electric shock
orre.Whenusingtheproductona
sliding table, be careful not to expose
the product to steam.
Warning
General safety precautions
Disassembly
is prohibited
Do not attempt to disassemble, repair,
or modify the product. Repairs should
only be performed by a qualied service
representative.
Doingsomayresultinre,electric
shock, or injury.
Stop using the appliance immediately if
you incur any malfunction or trouble.
Notdoingsomayresultinre,electric
shock, or injury.
Examples of trouble:
• The power cord and/or plug become
abnormally hot.
• Smoke is emitted from the rice cooker or
a burning odor is detected.
• The rice cooker is cracked or there are
loose or rattling parts.
• The inner pot is deformed.
• There are other problems or
abnormalities.
Immediately unplug the power cord from the
outlet and contact the place of purchase for
servicing.
Read and follow all safety instructions before using the rice cooker.
• The WARNINGS and CAUTIONS described below are intended to protect the user and other individuals from
physical harm and household damage. To ensure safety, please follow carefully.
• Do not remove the caution/warning seal attached to the appliance.
Safetyinstructionsareclassiedanddescribedaccordingtothe
level of harm and damage caused by improper use, as shown
below.
Warning
This symbol indicates there
is a possibility of death or
serious injury*1 when the unit is
improperly handled.
Caution
This symbol indicates there is a
possibility of injury*2 or damage
to property*3 when the unit is
improperly handled.
*1 "Seriouslyinjury"isdenedhereaslossofsight,burns(high
and low temperature), electric shock, broken bones, poisoning,
or other injuries severe enough to require hospitalization or
extended outpatient care.
*2 "Minorormoderateinjury"isdenedhereasaphysicalinjury,
burn, or electric shock which will not require hospital stay or
extended outpatient care.
*3 "Damagetoproperty"isdenedhereasdamagetowardsa
building, furniture, or pets.
Description of Symbols
The symbol indicates
a warning or caution. The
specicdetailsofthewarning
or caution are indicated inside
the symbol or in an illustration
or text near the symbol.
The symbol indicates a
prohibitedaction.Thespecic
details of the prohibited
action are indicated inside the
symbol or in an illustration or
text near the symbol.
The symbol indicates an
action that must be taken or an
instruction that must be followed.
Thespecicdetailsoftheaction
or instruction are indicated inside
the symbol or in an illustration or
text near the symbol.
Warning
1 Important Safeguards

7
6
English
Caution
Be careful of the escaping steam
when opening the lid.
Exposure to steam may result in burns.
Unplug the
power cord
Unplug power cord when not in use.
This is to avoid injury, scalds, electric
shock,orrecausedbyashort-circuit.
Do not touch
Do not touch the hook button while
carrying the rice cooker.
Doing so may cause the lid to open,
resulting in injury or burns.
During and after cooking
Do not touch
Do not touch hot parts during or
immediately after cooking.
Doing so may result in burns.
Do not move the rice cooker while it
is still cooking.
Doing so may cause the contents to spill
and cause burns.
Cleaning the rice cooker
Wait until the appliance has
cooled down before performing
maintenance; this is to avoid burns
from hot surfaces.
Failure to do so may result in burns.
Do not wash the entire appliance.
Do not pour water into the appliance or
into the base of the appliance; this is to
avoid short circuits and electric shocks.
Handling the rice cooker
Never immerse
the unit in water
or other liquid
Do not immerse the appliance
in water, or pour water into the
appliance; this is to avoid short
circuits, electric shocks, and
malfunctions.
Do not insert any metal objects into
any gaps between the parts.
Doing so may result in electric shock or
malfunction.
During and after cooking
Never open the lid during cooking.
Doing so may result in burns.
Do not touch
Do not place your face or hands near
the steam cap or steam vent.
Doing so may result in burns. Be
especially careful to keep out of reach of
infants and children.
Warning
Caution
General safety precautions
Handle the rice cooker with care.
Dropping the rice cooker or exposing it
to a strong impact may result in injury or
malfunction of the unit itself.
Household use only.
This appliance is intended to be used
in household and similar applications
such as:
• staffkitchenareasinshops,ofces
and other working environments;
• farm houses;
• by clients in hotels, motels and other
residential type environments;
• bed and breakfast type environments.
Environment for use
Do not use on an unstable surface, or
on a table or rug that is vulnerable to
heat.
Doingsomayresultinreordamageto
the table or mat.
Do not use near the wall or furniture.
Steam and heat may cause damage,
discoloration and/or deformation. Use
the rice cooker at least 30cm away from
walls or furniture.
Do not use the rice cooker near a heat
source or where it may be splashed
with water.
Doing so may result in electric shock,
short-circuiting,re,ordeformationor
malfunction of the rice cooker.
Do not use the rice cooker on an IH
cooking heater.
Doing so may result in malfunction.
Power cord and plug
Be sure to rmly hold the plug when
removing from an outlet; this is to
avoid electric shock, shorting, or re.
Do not use multiple outlet
receptacles; this is to avoid re.
Handling the rice cooker
Use only the inner pot made
exclusively for this rice cooker.
Using any other pot may result in
overheating or malfunction.
Do not cook with the inner pot empty.
Doing so may result in overheating or
malfunction.
Following these safety instructions
will allow the appliance to be used
for many years.
●Remove any burnt rice or remaining grains of rice.
Failure to do so may cause steam to leak or contents to
boil over. This may result in malfunction or improperly
cooked rice.
●Do not cover the rice cooker with a cloth or other
object during cooking.
Doing so may cause the rice cooker or the lid to
become deformed or discolored.
●The holes on the rice cooker are designed to
maintain its functions and performance. In
extremely rare cases, dust or even insects
may enter these holes and cause malfunction.
To prevent this, a commercially available insect
prevention sheet, etc., is recommended. If a
malfunction does occur due to this problem, it will
not be covered by warranty. Contact the place of
purchase.
● Theinnerpot'suorocarbonresincoatingmay
wear and peel with extended use. This material is
harmless to humans and this situation presents no
hindrance to actual cooking or to the rice cooker’s
heat insulating capability.
In the case you would like to purchase a new
inner pot, you can do so by contacting the place of
purchase.
●Strictly observe the following instructions
tokeeptheuorocarbonresincoatingfrom
scratching or peeling.
• Do not place the inner pot directly over gas,
electric, or IH stove top. Do not place in the
microwave or oven.
• Use the Keep Warm function for white rice
only. Do not use for mixed or seasoned rice,
etc.
• Do not use vinegar inside the inner pot.
• Use only the supplied spatula or a wooden
spatula.
• Do not use hard utensils such as metal
ladles, spoons, or whisks.
• Do not place a basket inside the inner pot.
• Do not place tableware and other hard
utensils or objects inside the inner pot.
• Do not clean the inner pot with hard materials
such as metal spatulas or nylon scouring
sponges.
• Do not use a dishwasher/dryer to clean the
inner pot.
• Wash the rice in a separate bowl. Using
the inner pot for washing rice may damage
theuorocarbonresincoatingordeform
the bottom side of the inner pot, resulting in
improperly cooked rice.
• If the inner pot becomes deformed, contact
the place of purchase.
9
89
English
2
Names and Functions of Component Parts
Accessories
Measuring cup
About 1 cup (0.18
L), about 150 g
Spatula holder
Spatula
Ladle
Steaming
plate
Porridge
pot
Only included with the JNP-1803 model
Lid latch
Inner lid gasket
Steam vent
Inner lid shaft
Hook button
Outer lid
Carrying handle
Dew collector
Keep Warm lamp
Power cord
Power plug
Inner lid
Inner pot
Lid catch
Body
Start lamp
Switch button
1 Measure the rice.
Always use the measuring cup supplied with
the rice cooker.
Alevelllingofriceinthesuppliedmeasuring
cup equals about 0.18 L.
●Fill the measuring cup as shown below.
Correct
measurement
Incorrect
measurement
2 Wash the rice.
Note
●Wash the rice in a separate bowl. Using the inner
potforwashingricemaydamagetheuorocarbon
resin coating or deform the bottom side of the
inner pot, resulting in improperly cooked rice.
3 Put the rice and water into the
inner pot.
Place the inner pot on a level surface and
adjust the water level to the appropriate line
of the corresponding scale on the inside of
the pot.
2
4
5
3
1
5.5
When cooking 3 cups
of white rice, adjust
the water level to line
“3” of the scale.
Note
●Inappropriate amount of water may cause the rice
to boil over or result in improperly cooked rice.
4 Place the inner pot in the rice
cooker.
Turn the inner pot slightly from right to left to
set the pot properly.
Inner pot
Body
Caution
●If the outer surface of the inner pot is wet, this
may cause a crackling sound during cooking.
Moisture on the outer surface of the inner pot may
also cause damage. Be sure to wipe any water
completely before use.
5 Install the inner lid to the outer
lid by pressing the inner lid over
the inner lid shaft.
After installing the inner lid, the smaaler side
of inner lid seal should face you with the
outer lid open.
Note
●If the inner lid is inserted improperly, the outer lid
will not close.
3 How to Cook Rice

11
10 11
10
English
6 Close the outer lid.
To close thw outer lid, simply lower it until the
lid latch engages with the lid catch with click.
Outer lid
Note
●If the outer lid is not closed properly, the cooking
efciencywillbebadlyaffected.
7 Connect the power plug to an
outlet.
Note
●Do not plug the AC cord in until actual cooking
starts. Anytime this rice cooker is plugged in and
the switch is not immediately set for cooking, the
warming circuit is operating.
●Unplug power cord when not in use.
8 Press the switch button.
Press the switch button on and a click will be
heard.
The start lamp will turn on indicating the rice
is starting to cook.
Start lamp
Switch button
9 Steam the rice for 15 to 20 minutes.
When the switch button is turned off and the
Keep Warm function engages, the actual
cooking proceeds to steaming. Therefore,
keep the lid closed for about 15 minutes.
Start lamp Keep Warm
lamp
Note
●Do not press the switch button for cooking while
the Keep Warm function is on.
10
Stir and loosen the cooked rice.
Spatula
Note
●Do not forget to loosen the cooked rice with the
spatula.
11
The Keep Warm function
continues.
Note
● Whileserving,becarefultokeeptheangedrim
of the inner pot free of rice. Failure to do so may
prevent the lid from closing properly and cause
the Keep Warm function not to work properly.
12
Disconnect the power plug from
the outlet.
4 How to USE (Porridge Cooking)
ThisfunctionisonlyavailablefortheJNP-1803.
1 Measure the rice.
Always use the measuring cup supplied with
the rice cooker.
Alevelllingofriceinthesuppliedmeasuring
cup equals about 0.18 L.
2 Wash the rice.
3 Put the desired amount of rice
and water into the porridge pot.
CUP
MAX
1
2
If 1 cup of rice are put
into the porridge pot,
then water should be
poured until the water line
reaches approximately
the number "1" level of
the scale stamped on
the inside of the pot.
MAX. LEVEL
Do not attempt to cook
more than the amount.
Porrigde pot
4 Put 2 cups of water with the
measuring cup accessory into
the rice cooker. And install the
porridge pot into the inner pot.
Inner pot
Porridge pot
Water
Note
●Two cups of water between inner and outer pot
can be adjustable to your taste.
●Volume of water between inner and outer pot
will be also adjustable to grade of rice and water
temperature.
●If you prefer more soft porridge, add more water
between inner and outer pot and cook agian.
5 Place the inner pot in the rice
cooker.
Make sure that the pan has direct contact
with the heating plate by turning it slightly
from right to left until it sits properly.
6 Install the inner lid to the outer
lid by pressing the inner lid over
the inner lid shaft.
7 Close the outer lid.
To close thw outer lid, simply lower it until the
lid latch engages with the lid catch with click.
8 Connect the power plug to an
outlet.
9 Press the switch button.
Press the switch button on and a click will be
heard.
The start lamp will turn on indicating the rice
is starting to cook.
10
When the porridge has nished
cooking, the switch button will
pop up and a click will be heard.
At the sametime the strat lamp will go out and
keep warm lamp will go on, which means the
keep warm feature is working.
Note
●Remove and empty dew collector after every use.
●During keeping porridge warm for a long time,
porridge may become sticky.
●Please note that the steam vent on top of the
outer lid is very hot and steam will come out
during cooking.
● Duringporridgecooking,pop-upalittlesteam
(dew) from steam vent, if dew does spill out, open
the outer lid immediately and continue cooking.
Porridge cooking capacity
Cookingcapacity:0.09-0.36
Using180mlmeasuringcup:0.5-2cup

13
12 13
12
English
5 How to USE (Steaming)
ThisfunctionisonlyavailablefortheJNP-1803.
1 Put 3 cups water with the
measuring cup accessory in to
the rice ccoker.
• The amount of water varies according to the
food and quantity.
2 Install the steaming plate into
the inner pot and place foods
on the plate.
Steaming plate
Inner pot
Water
3 Place the inner pot in the rice
cooker.
Make sure that the pot has direct contact with
the heater plate by turning it slightly from right
to left until it sits properly.
4 Install the inner lid to the outer
lid by pressing the inner lid over
the inner lid shaft.
5 Close the outer lid.
To close thw outer lid, simply lower it until the
lid latch engages with the lid catch with click.
6 Connect the power plug to an
outlet.
7 Press the switch button.
Press the switch button on and a click will be
heard.
The start lamp will turn on and steaming will
start.
6
For Keeping Cooked Rice Warm And Tasty
Wash the rice quickly.
Stir the rice around with your hand in a generous
amount of water, pour out the water, and repeat
until the water remains clear.
Close the lid securely.
• If the lid is not closed securely, it may result in
dryness, discoloration, and unusual odors of the
rice.
• Be sure to remove any grains of rice that adhere
to the brim of the inner pot.
Connect the power plug to
an outlet immediately if it is
disconnected.
• Failure to do so may lower the temperature of the
rice and result in unusual odors and discoloration
of the rice.
Do not use the Keep Warm
function under the following
conditions:
Avoid the following, as they may result in unusual
odors, dryness, discoloration, and spoiling of the
rice, or corrosion of the inner pot.
• Using the Keep Warm function with cold rice
• Adding cold rice to rice that is being kept warm
• Leaving a spatula in the inner pot while the
Keep Warm function is on
• Using the Keep Warm function with the power
plug disconnected
• Using the Keep Warm function for longer than
12 hours
• Keeping less than the minimum required
amount of rice warm
Minimum required amount of rice
JNP-1000:1cup
JNP-1800/1803:3cups
• Using the Keep Warm function for anything
otherthanwhiterice(includingrinse-freerice)
• Keeping warm a lump of rice with a hole in the
middle.
Amount of rice to be “kept warm”
Be sure that the amount of rice to be kept warm is
not too small.
If the amount of rice to be kept warm is too small, it
will gradually dry and the taste will be affected. It is
then advisable to serve it as soon as possible.
Inner Lid and Pot
Be careful not to deform them: avoid rough
handling. Deforming of the lid and pot will adversely
affect the cooking and keep warm performance of
the cooker.

15
14
14
English
7
Cleaning and Maintenance
How to remove the dew
collector
Each time after using the cooker, the dew collector
should be removed, emptied and washed clean.
To remove it:
1 Grasp the dew collector and pull it in the
arrow direction.
Dew collector
How to install spatula
Place the spatula holder in the right position
hooking it to the lid catch.
• Be sure to keep the spatula holder clean.
Spatula holder
Lid catch
How to remove the steam
vent
Each time after using the cooker, the steam vent
should be removed and washed clean.
To remove it:
1 Slide the steam vent in the direction
indicated by the arrow.
2 Take the steam vent up to the upright
position.
Make sure to insatll the steam vent after cleaning.
How to clean
Any other servicing should be performed by an authorized service representative.
Perform cleaning and maintenance procedures as described on the following p.15, 16.
Clean all parts by hand. Do not use a dishwasher/dryer.
To maintain cleanliness, always clean the rice cooker on the same day it is used. Also clean the rice cooker at
regular intervals as well.
The rice cooker should also be cleaned on the day that it is used in order to remove any odors that remain
from cooking.
Note
●Be sure to disconnect the power plug and allow the rice cooker, inner pot, inner lid, and steam cap to cool
down before cleaning.
●Clean with a soft sponge and cloth.
●When cleaning the rice cooker with a detergent, use only standard kitchen detergent (for tableware and
kitchen utensils).
●Rinse the parts thoroughly since detergent remaining on them may result in deterioration and discoloration
of part’s materials such as resin.
Body
Wet a towel or cloth, wring out excess water, and wipe.
Note
●Do not allow water to get inside the rice cooker unit.
●Do not immerse the power cord in or splash it with water.
Doingsomayresultinshort-circuitingorelectricshock.
Inner pot, Inner lid
Wet a towel or cloth, wring out excess water, and wipe.
• Do not wash dishes, etc., inside the inner pot.
Dew collector·Spatula
Clean with a soft sponge and with tap or lukewarm water.
Wipe off water with a dry cloth and completely dry all parts.
Heater plate
Remove any adhering grains of rice, etc.
If adhering objects are hard to remove, use commercially available sandpaper (around #320), then wet a
towel or cloth, wring out excess water, and wipe.
Removing odors
The following procedure should be performed each time after cooking.
1 Fill the inner pot to about 70 to 80% with hot water, keep warm for 2 to 3 hours.
2 Wash the inner pot and the inner lid with a standard kitchen detergent, and then rinse
sufciently with water.
3 Allow the rice cooker and all parts to dry in a well-ventilated location.
Inner pot
Foreign matter
Dew
collector
Main body
Heater plate

16
Inner pot with Teon lining (to avoid damaging the Teon lining)
• Be sure to use the spatula included when serving the rice.
• Do not use a metal spatula and spoon. Do not place spoons, forks, or bowls inside the inner pot.
• Do not use harsh or abrasive cleaners when washing the inner pot. Use a sponge or soft cloth.
• OvertimetheTeonliningoftheinnerpotmaybecomediscoloredorthecolormaybecomeuneven.
• This is due to the effect of water and steam. It is not a problem, as it does not affect the functionality of the
lining or the safety of food.
Specications
Model JNP-1000 JNP-1800 JNP-1803
Rating 220V 50/60Hz
Rated power (W) 518 667 667
Cooking capacity (L) 0.18 to 1.0
(1 to 5.5 cups)
0.54 to 1.8
(3 to 10 cups)
0.54 to 1.8
(3 to 10 cups)
Outside dimensions
(cm)
Width 27.3 29.9 29.9
Depth 25.6 27.9 27.9
Height 26.2 29.7 29.7
Weight 2.9 kg 3.7 kg 3.7 kg
Note
●One cup of white rice is about 150 g.

17
Tiếng Việt
Nội dung
1 Các biện pháp bảo vệ quan trọng .......................................................................... 18
2 Tên và chức năng các bộ phận cấu thành ............................................................ 22
3 Cách nấu cơm .......................................................................................................... 23
4 Cách SỬ DỤNG (Nấu cháo)..................................................................................... 25
5 Cách SỬ DỤNG (Hâm) ............................................................................................. 26
6 Để cơm được giữ ấm và ngon................................................................................ 27
7 Vệ sinh và bảo dưỡng ............................................................................................. 28
Thông số kỹ thuật .................................................................................................... 30

19
18
Tiếng Việt
Các biện pháp an toàn chung
Cấm tháo rời
Không thử tháo rời, sửa chữa hay điều
chỉnh sản phẩm. Việc sửa chữa chỉ
được thực hiện bởi đại diện bảo hành đủ
tiêu chuẩn.
Làmvậycóthểgâycháy,giậtđiệnhoặc
thươngtích.
Dừng sử dụng thiết bị ngay lập tức khi
có trục trặc hay sự cố.
Khônglàmnhưvậycóthểgâycháy,giật
điệnhoặcthươngtích.
Vídụvềsựcố:
• Dâyđiệnvà/hoặcphíchcắmnóngbấtthường.
• Khóiphátratừnồicơmđiệnhoặcphát
hiệncómùicháykhét.
• Nồicơmđiệnbịnứthoặccóbộphầnbị
lỏnghoặclunglay.
• Nồibêntrongbịbiếndạng.
• Cócácsựcốhoặctìnhtrạngbấtthườngkhác.
Rútphíchcắmdâyđiệnngaylậptứcvàliên
lạcvớinơibánđểđượcbảodưỡng.
Môi trường sử dụng
Không sử dụng nồi cơm điện trên
mặt bàn xoay không chịu được trọng
lượng của nồi.
Nồirơikhỏimặtbàncóthểgâythương
tích,bỏnghoặchỏnghócchothiếtbị.
Trướckhisửdụngnồicơmđiện,hãy
xácnhậnmặtbànxoaycóđủkhảnăng
chịuđượctrọnglượngcủanồi.
Những ai được sử dụng nồi cơm điện
Thiết bị này không được thiết kế để
được sử dụng bởi những người gặp
trở ngại về thể chất hoặc thiếu kinh
nghiệm và kiến thức trừ khi họ được
giám sát hoặc chỉ dẫn liên quan đến
việc sử dụng thiết bị bởi người chịu
trách nhiệm về sự an toàn của họ.
Khinhữngngườinàysửdụngmàthiếu
sựgiámsátcóthểgâycháy,giậtđiện
hoặcthươngtích.
Đọcvàtuânthủtấtcảcáchướngdẫnantoàntrướckhisửdụngnồicơmđiện.
• CácmụcCẢNHBÁOvàTHẬNTRỌNGmôtảbêndướinhằmđểbảovệngườidùngvàcáccánhânkhác
khỏinhữngtổnthươngthểchấtvàhưhỏngtrongnhà.Đểđảmbảoantoàn,xinđọckỹ.
• Khôngtháonhãnthậntrọng/chúýdántrênthiếtbị.
Cáchướngdẫnantoànđượcsắpxếpvàmôtảtheomứcđộ
tổnthươngvàhưhạigâyrabởiviệcsửdụngkhôngđúngcách,
nhưphầnbêndưới.
Cảnh báo
Kýhiệunàychobiếtcókhảnăng
tửvonghoặcthươngtíchnặng*1
khitháotáctrênthiếtbịkhông
đúngcách.
Thận trọng
Kýhiệunàychobiếtcókhả
nănggặpthươngtích*2hoặclàm
hỏngtàisản*3khithaotácthiếtbị
khôngđúngcách.
*1 "Thươngtíchnặng"ởđâyđượcđịnhnghĩalàmùloà,bỏng
(nhiệtđộcaovàthấp),giậtđiện,gãyxương,ngộđộc,hoặc
thươngtíchkhácnghiêmtrọngđếnmứcphảinhậpviệnhoặc
điềutrịngoạitrútrongthờigiandài.
*2 "Thươngtíchnhỏhoặcvừa"ởđâyđượcđịnhnghĩalàthương
tíchthểchất,bỏng,hoặcgiậtđiệnmàkhôngyêucầuphải
nằmviệnhoặcđiềutrịngoạitrúdàingày.
*3 "Thiệthạivềtàisản"ởđâyđượcđịnhnghĩalàthiệthạiđốivới
nhàcửa,đồđạcnộithất,hoặcvậtnuôi.
Môtảcácbiểutượng
Kýhiệu chỉcảnhbáohoặc
phòngngừa.Chitiếtcụthểcủa
cảnhbáohoặcphòngngừađược
hiểnthịtrênkýhiệuhoặctrênhình
ảnhhoặcvănbảngầnkýhiệu.
Kýhiệu chỉhànhđộngcấm
thựchiện.Chitiếtcụthểcủahành
độngcấmthựchiệnđượchiểnthị
trênkýhiệuhoặctrênhìnhảnh
hoặcvănbảngầnkýhiệu.
Kýhiệu chỉhànhđộngphải
thựchiệnhoặcmộthướngdẫn
phảituânthủ.Chitiếtcụthể
củahànhđộnghoặchướng
dẫnnàyđượchiểnthịtrênký
hiệuhoặctrênhìnhảnhhoặc
vănbảngầnkýhiệu.
Cảnh báo
1 Các biện pháp bảo vệ quan trọng
Không cho phép trẻ em sử dụng thiết
bị một mình và đặt ngoài tầm tay của
trẻ sơ sinh hoặc trẻ mới biết đi.
Cóthểgâybỏng,giậtđiệnhoặcthương
tích.
Sử dụng nồi cơm điện
Không sử dụng sản phẩm này theo
bất kỳ cách nào không được mô tả
trong hướng dẫn vận hành này.
Hơinướchoặcđồnấucóthểphunra
gâybỏnghoặccáctổnthươngkhác.
(Vídụ)
• Cácnguyênliệunấunóngbêntrong
túinấunhựav.v.
• Sửdụnggiấynướngđểbọcthực
phẩmtrongnồicơmđiện.
Nguồn điện
Chỉ sử dụng nguồn điện áp định danh.
Việcsửdụngbấtkỳnguồnđiệnnào
kháccóthểgâycháyhoặcgiậtđiện.
Sử dụng ổ cấp điện có điện áp 7A
trở lên và không đồng thời cắm điện
những thiết bị khác.
Việccắmđồngthờinhữngthiếtbịkhác
trongcùngmộtổcắmđiệncóthểkhiến
ổcắmđiệnbịquánhiệthoặcgâycháy.
Dây điện và phích cắm
Không làm hỏng hoặc sử dụng dây
điện bị hỏng. Không dùng lực uốn
cong, xoắn, gấp hoặc chỉnh sửa dây
điện.
Khôngđặtgầnnhữngbềmặtcónhiệtđộ
caohoặcbêndưới/giữacácvậtnặng.
Dâyđiệnbịhỏngcóthểgâycháyhoặc
giậtđiện.
Lau toàn bộ phích cắm trong trường
hợp có bụi hoặc vật lạ bám vào.
Điềunàygiúptránhgâycháy.
Cắm chắc chắn phích cắm vào ổ cắm
điện nhằm tránh gây giật điện, chập
mạch, xì khói hoặc cháy.
Không sử dụng sản phẩm này nếu
dây điện hoặc phích cắm bị hư hỏng
hoặc phích cắm bị lỏng khi cắm vào
ổ cắm điện.
Điềunàylàđểtránhgâygiậtđiện,chập
mạchhoặccháy.
Nếu dây cấp điện bị hỏng, dây phải
được thay bởi nhà sản xuất,
đại lý bảo hành của sản phẩm hoặc
người có trình độ tương tự nhằm
tránh gây nguy hiểm.
Không chạm
thiết bị bằng
tay ướt
Không dùng tay ướt cắm và rút phích
cắm.
Điềunàylàđểtránhgâygiậtđiệnhoặc
thươngtích.
Không để phích cắm dính hơi nước.
Làmvậycóthểgâygiậtđiệnhoặccháy.
Khisửdụngsảnphẩmtrênbànxoay,
hãycẩnthậnkhôngđểsảnphẩmdính
hơinước.
Thao tác với nồi cơm điện
Không bao giờ
để thiết bị ngập
nước hoặc dung
dịch nào khác
Không ngâm thiết bị trong nước,
hoặc đổ nước lên thiết bị; điều này là
để thiết bị không bị chập mạch, gây
giật điện và hư hỏng.
Không bỏ bất kỳ vật bằng kim loại
nào vào bất kỳ khoảng trống nào
giữa các bộ phận.
Làmvậycóthểgâygiậtđiệnhoặclỗi
chứcnăng.
Trong và sau khi nấu
Không mở nắp trong khi nấu.
Làmnhưvậycóthểgâybỏng.
Không chạm
Không để mặt hoặc tay gần nắp thoát
hơi hoặc ống thoát hơi.
Làmnhưvậycóthểgâybỏng.Phảiđặc
biệtcẩnthậngiữthiếtbịcáchxatầmtay
củatrẻsơsinhvàtrẻem.
Cảnh báo

21
20
Tiếng Việt
Các biện pháp an toàn chung
Thao tác cẩn thận với nồi cơm điện.
Thảnồicơmđiệnhoặctácđộngmột
lựcmạnh lênnồicóthểgâythươngtích
hoặclỗichothiếtbị.
Chỉ sử dụng trong gia đình.
Thiết bị này được thiết kế để được
sử dụng trong gia đình và trong các
ứng dụng tương tự như:
• khuvựcbếpnhânviêntạicáccửa
hàng,vănphòngvàcácmôitrường
làmviệckhác;
• nhànôngtrại;
• sửdụngbởikháchhàngtạikhách
sạn,nhànghỉvàcácmôitrườnglưu
trúkhác;
• cácmôitrườngthuộcloạitrêngiường
vàănsáng.
Môi trường sử dụng
Không sử dụng trên bề mặt không ổn
định, hoặc trên bàn hoặc thảm không
chịu được nhiệt.
Làmnhưvậycóthểgâycháyhoặclàm
hỏngbànhoặcthảm.
Không sử dụng gần tường hoặc đồ
nội thất.
Hơinướcvànhiệtcóthểlàmhỏng,mất
màuvà/hoặcbiếndạng.Sửdụngnồi
cơmđiệncáchtườnghayđồnộithấtít
nhấtlà30cm.
Không sử dụng nồi cơm điện gần
nguồn nhiệt hoặc nơi có thể bị bắn
nước.
Làmnhưvậycóthểgâygiậtđiện,chập
mạch,cháy,hoặcbiếndạnghoặchư
hỏngnồicơmđiện.
Không sử dụng nồi cơm điện trên
bếp từ IH.
Làmnhưvậycóthểlàmhỏngnồi.
Dây điện và phích cắm
Đảm bảo cầm chắc phích cắm khi rút
khỏi ổ cắm điện; điều này là để tránh
gây giật điện, chập mạch hoặc cháy.
Không sử dụng nhiều ổ nhận ổ cắm
điện; điều này là để tránh hoả hoạn.
Thao tác với nồi cơm điện
Chỉ sử dụng nồi trong được sản xuất
dành riêng cho nồi cơm điện này.
Sửdụngbấtkỳloạinồitrongnàokháccó
thểkhiếnnồibịquánhiệthoặchưhỏng.
Không nấu với nồi trong trống không.
Làmnhưvậycóthểgâyquánhiệthoặc
hưhỏng.
Cẩn thận với phần hơi nước thoát ra
khi mở vung.
Tiếpxúcvớihơinướccóthểgâybỏng.
Rút dây
nguồn điện
Rút dây điện khi không sử dụng.
Điềunàylàđểtránhthươngtích,bỏng,
giậtđiệnhoặccháygâyrabởihiện
tượngngắnmạch.
Không chạm
Không chạm vào nút mở trong khi
đang cầm nồi cơm điện.
Làmnhưvậycóthểlàmmởvung,
gâythươngtíchhoặcbỏng.
Trong và sau khi nấu
Không chạm
Không chạm vào các bộ phận nóng
trong hoặc ngay sau khi nấu xong.
Làmnhưvậycóthểgâybỏng.
Không dịch chuyển nồi cơm điện
trong khi đang nấu.
Làmnhưvậycóthểkhiếnđồnấubên
trongđổtrànvàgâybỏng.
Thận trọng Thận trọng
Vệ sinh nồi cơm điện
Chờ đến khi thiết bị đã nguội hẳn
trước khi tiến hành bảo dưỡng; điều
này là để tránh bị bỏng bởi các bề
mặt nóng.
Khônglàmnhưvậycóthểgâybỏng.
Không rửa toàn bộ thiết bị.
Khôngđổnướcvàothiếtbịhoặcvào
đáythiếtbị;điềunàylàđểthiếtbịkhông
bịngắnmạchvàgâygiậtđiện.
Tuân thủ các hướng dẫn an toàn
này sẽ giúp bạn sử dụng thiết bị
này trong nhiều năm.
● Loạibỏcơmcháyhoặcgạocònsótlại.
Khônglàmnhưvậycóthểkhiếnhơinướcròrỉ
hoặcđồnấubịđunsôiquámức.Điềunàycóthể
làmhỏngnồihoặccơmkhôngchínđúng.
● Khôngbọcnồicơmđiệnbằngvảihoặcvậtkhác
trongkhinấu.
Làmnhưvậycóthểkhiếnnồicơmđiệnhoặcnắp
bịbiếndạnghoặcmấtmàu.
● Cáclỗtrênnồicơmđiệnđượcthiếtkếđểduy
trìcácchứcnăngvàhoạtđộngcủanồi.Trong
trườnghợpcựckỳhiếmgặp,bụihoặcthậmchí
làcôntrùngcóthểxâmnhậpvàonhữnglỗvà
làmhỏngnồi.Đểngănchặnđiềunày,chúngtôi
khuyếncáonêndùngmộttấmngăncôntrùng
hiệnđãđượcbántrênthịtrườngv.v.Nếunồibị
hỏngdosựcốnày,nồisẽkhôngđượcbảohành.
Hãyliênhệnơibánhàng.
● Lớpphủuorocarboncủanồitrongcóthểbịmòn
vàbongtróckhisửdụngtrongmộtthờigiandài.
Chấtnàyvôhạivớiconngườivàtrườnghợpnày
khôngảnhhưởngđếnchứcnăngnấuhaykhả
năngcáchnhiệtcủanồi.
Trongtrườnghợpbạnmuốnmuanồitrongmới,
bạncóthểliênhệvớinơibánhàng.
● Tuânthủđúngcáchướngdẫnsauđểgiữcho
lớpphủuorocarbonkhôngbịtrầyhoặcbong
tróc.
• Khôngđặtnồitrongtrựctiếptrênbếpgas,
điệnhoặcbếptừIH.Khôngđặttronglòvi
sónghoặclònướng.
• ChỉsửdụngchứcnăngGiữấmchogạo
trắng.Khôngsửdụngchogạotrộnhoặcgạo
đãnêmgiavịv.v.
• Khôngsửdụnggiấmtrongnồitrong.
• Chỉsửdụngmuỗngđượccungcấpkèm
theohoặcmôigỗ.
• Khôngsửdụngđồdùngcứngnhưmuỗng
kimloại,thìahoặcqueđánhtrứng.
• Khôngđặtrổtrongnồitrong.
• Khôngđặtbộđồănvàcácđồdùnghoặcđồ
vậtcứngkhácbêntrongnồitrong.
• Khônglauchùinồitrongbằngcácvậtliệu
cứngnhưmôibằngkimloạihoặcbọtbiển
tẩyrửabằngni-lon.
• Khôngsửdụngmáyrửabát/máysấyđểvệ
sinhnồitrong.
• Vogạotrongmộtđồchứariêng.Sửdụng
nồitrongđểvogạocóthểlàmhỏnglớpphủ
uorocarbonhoặclàmbiếndạngđáynồi
trong,khiếncơmkhôngchínđúng.
• Nếunồitrongbịbiếndạng,hãyliênhệvới
nơimuahàng.

23
22 23
Tiếng Việt
2
Tên và chức năng các bộ phận cấu thành
Phụ kiện
Cốcđong
Khoảng1cốc(0,18L),
khoảng150g
Ngănđựng
muỗng
Muỗngmúc
cơm
Muỗngmúccháo
Khayhấp
Nồicháo
Chỉ bao gồm với JNP-1803 mẫu máy
Khớp gài nắp
Vòng đệm nắp trong
Ống thoát hơi
Trục nắp trong
Nút mở
Nắp ngoài
Quai xách
Hộp thu hơi
Đèn Giữ ấm
Dây điện
Phích cắm điện
Nắp trong
Nồi trong
Khớp gài
Thân nồi
Đèn khởi động
Nút công tắc
1 Tính lượng gạo.
Luôndùngcốcđongđượccungcấpkèm
theonồicơmđiện.
Mỗivạchđonggạotrêncốcđonggạocung
cấpkèmtheotươngđươngkhoảng0,18L.
● Lấygạovàocốcđongnhưhìnhbêndưới.
Đonggạochính
xác
Đonggạokhông
chínhxác
2 Vo gạo.
Lưu ý
● Vogạotrongmộtđồchứariêng.Sửdụng
nồitrongđểvogạocóthểlàmhỏnglớpphủ
uorocarbonhoặclàmbiếndạngđáynồitrong,
khiếncơmkhôngchínđúng.
3 Bỏ gạo và nước vào nồi trong.
Đặtnồitronglênmộtmặtphẳngcânbằngvà
điềuchỉnhlượngnướctheovạchchiatương
ứngởbêntrongnồi.
2
4
5
3
1
5.5
Khinấu3cốcgạo
trắng,hãyđiềuchỉnh
mựcnướcđếnvạch
“3”.
Lưu ý
● Lượngnướckhôngphùhợpcóthểkhiếngạo
đượcđunsôiquámứchoặckhiếncơmkhông
chínđúng.
4 Đặt nồi trong vào nồi cơm điện.
Xoaynhẹnồitrongtừphảisangtráiđểđặt
nồiđúngcách.
Nồitrong
Thân
nồi
Thận trọng
● Nếubềmặtngoàicủanồitrongbịướt,điềunày
cóthểgâynênâmthanhtanhtáchtrongkhinấu.
Độẩmtrênbềmặtngoàicủanồitrongcũngcó
thểlàmhỏngnồi.Đảmbảolausạchnướctrước
khisửdụng.
5 Gắn nắp trong vào nắp ngoài
bằng cách nhấn nắp trong lên
trên trục nắp trong.
Saukhigắnxongnắptrong,mặtnhỏhơn
củanắptrongphảihướngvềphíabạnkhi
nắpngoàimở.
Lưu ý
● Nếugắnnắptrongkhôngđúng,sẽkhôngđóng
đượcnắpngoài.
3 Cách nấu cơm

25
24 25
24
Tiếng Việt
6 Đóng nắp ngoài.
Đểđóngnắpngoài,đơngiảnchỉcầngập
lạiđếnkhikhớpănvàokhớpnắpvàphátra
tiếngcách.
Nắpngoài
Lưu ý
● Nếunắpngoàikhôngđóngđượcđúngcách,thì
hiệusuấtnấusẽbịảnhhưởngrấtnhiều.
7 Cắm phích cắm điện vào ổ cắm
điện.
Lưu ý
● Khôngcắmdâyđiệnxoaychiềuvàochođếnkhi
quátrìnhnấuthựcsựbắtđầu.Bấtcứkhinào
nồicơmđiệnđượccắmđiệnvàcôngtắckhông
đượcthiếtlậpnấungaylậptức,thìmạchđiện
kíchhoạtchứcnănghâmsẽhoạtđộng.
● Rútdâyđiệnkhikhôngsửdụng.
8 Nhấn nút công tắc.
Nhấnbậtnútcôngtắcvàbạnsẽnghethấy
tiếngcách.
Đènkhởiđộngsẽbậtchobiếtsẽbắtđầunấu
cơm.
Đènkhởiđộng
Nútcôngtắc
9 Hấp cơm từ 15 đến 20 phút.
Khinútcôngtắcđượctắtvànồichuyểnsang
chứcnăngGiữấm,thìquátrìnhnấucơmsẽ
chuyểnsanggiaiđoạnhấp.Dođó,cứđểnắp
đóngtrongkhoảng15phút.
Đènkhởi
động
ĐènGiữ
ấm
Lưu ý
● Khôngnhấnnútcôngtắcđểnấutrongkhichức
năngGiữấmđangbật.
10
Xới, trộn đều cơm đã nấu.
Muỗng
Lưu ý
● Đừngquênxớicơmbằngmuỗngmúccơmđính
kèm.
11
Chức năng Giữ ấm tiếp tục hoạt
động.
Lưu ý
● Trongkhiăn,cẩnthậnkhôngđểcơmdínhlên
thànhmépnồitrong.Nếukhônglàmnhưvậycó
thểkhiếnnắpkhôngđónglạiđượcvàlàmchức
năngGiữấmkhônghoạtđộng.
12
Rút phích cắm điện khỏi ổ cắm
điện.
4 Cách SỬ DỤNG (Nấu cháo)
ChứcnăngnàychỉcósẵnchomẫuJNP-1803.
1 Tính lượng gạo.
Luôndùngcốcđongđượccungkèmtheonồi
cơmđiện.
Mỗivạchđonggạotrêncốcđonggạocung
cấpkèmtheotươngđươngkhoảng0,18L.
2 Vo gạo.
3 Cho lượng gạo mong muốn và
nước vào nồi cháo.
CUP
MAX
1
2
Nếuchovàonồicháo1
cốcgạo,thìcầnđổnước
chođếnkhinướclên
đếnxấpxỉvạchsố“1”
củathangchiainnổibên
trongnồicháo.
TỐIĐAMỨC
Khôngcốnấunhiềuhơn
lượngnày.
Nồicháo
4 Dùng cốc đong nước đổ 2 cốc
nước vào nồi cháo. Và lắp nồi
cháo vào nồi trong.
Nồitrong
Nồicháo
Nước
Lưu ý
● Cóthểđiềuchỉnhhaicốcnướcgiữanồitrongvà
ngoàitheokhẩuvịcủabạn.
● Ngoàiracũngcóthểđiềuchỉnhlượngnướcgiữa
nồitrongvàngoàitheolượnggạovànhiệtđộ
nước.
● Nếubạnmuốndùngcháomềm,thêmnhiều
nướcvàogiữanồitrongvàngoàivànấulại.
5 Đặt nồi trong vào nồi cơm điện.
Đảmbảorằngnồitrongtiếpxúctrựctiếpvới
mâmnhiệtbằngcáchxoaynhẹnhàngnồitừ
phảisangtráichođếnkhinồinằmđúngchỗ.
6 Gắn nắp trong vào nắp ngoài
bằng cách nhấn nắp trong lên
trên trục nắp trong.
7 Đóng nắp ngoài.
Đểđóngnắpngoài,đơngiảnchỉcầngậplại
đếnkhilẫynắpănvàokhớpnắpvàphátra
tiếngcách.
8 Cắm phích cắm điện vào ổ cắm
điện.
9 Nhấn nút công tắc.
Nhấnbậtnútcôngtắcvàbạnsẽnghethấy
tiếngcách.
Đènkhởiđộngsẽbậtchobiếtsẽbắtđầunấu
cháo.
10
Khi cháo đã chín, nút công tắc
sẽ nhảy lên và phát ra tiếng
cách.
Cùnglúcđó,đènkhởiđầusẽtắtvàđèngiữ
ấmsẽbật,điềunàycónghĩalàtínhnănggiữ
ấmđanghoạtđộng.
Lưu ý
● Tháohộpthuhơivàđổsạchnướcsaumỗilần
sửdụng.
● Khigiữấmcháotrongthờigiandài,cháocóthể
bịđặcdính.
● Xinlưuýrằngốngthoáthơiởtrênvungngoàirất
nóngvàhơisẽbốcrangoàitrongkhiđangnấu.
● Trongkhinấucháo,hãylàmbốchơimộtíthơi
nước(nước)từốngthoáthơi,nếunướcđổtràn
rangoài,mởvungngoàingaylậptứcvàtiếptục
nấu.
Dungtíchnấucháo
Dungtíchnấu:0,09-0,36
Sửdụngcốcđong180mL:Cốc0,5-2

27
26 27
26
Tiếng Việt
5 Cách SỬ DỤNG (Hâm)
ChứcnăngnàychỉcósẵnchomẫuJNP-1803.
1 Dùng cốc đong nước đổ 3 cốc
nước vào nồi cơm điện.
• Lượngnướckhácnhautùytheoloạithực
phẩmvàsốlượng.
2 Cho khay hấp vào nồi trong và
đặt thực phẩm lên khay.
Đĩahấp
Nồitrong
Nước
3 Đặt nồi trong vào nồi cơm điện.
Đảmbảorằngnồitrongtiếpxúctrựctiếpvới
mâmnhiệtbằngcáchxoaynhẹnhàngnồitừ
phảisangtráichođếnkhinồinằmđúngchỗ.
4 Gắn nắp trong vào nắp ngoài
bằng cách nhấn nắp trong lên
trên trục nắp trong.
5 Đóng nắp ngoài.
Đểđóngnắpngoài,đơngiảnchỉcầngậplại
đếnkhilẫynắpănvàokhớpnắpvàphátra
tiếngcách.
6 Cắm phích cắm điện vào ổ cắm
điện.
7 Nhấn nút công tắc.
Nhấnbậtnútcôngtắcvàbạnsẽnghethấy
tiếngcách.
Đènkhởiđộngsẽbậtvàquytrìnhhấpsẽbắt
đầu.
6
Để cơm được giữ ấm và ngon
Vo nhanh gạo.
Khuấygạoquanhbàntaytrongnhiềunước,đổ
nướcravàlặplạiđếnkhinướctrongnồitrong
suốt.
Đóng chặt nắp.
• Nếunắpkhôngđượcđóngchặt,cơmcóthểbị
khô,mấtmàuvàbốcmùilạ.
• Đảmbảoloạibỏmọihạtgạodínhtrênmiệngnồi
trong.
Cắm phích cắm điện vào ổ cắm
điện ngay lập tức nếu phích cắm
bị rút ra.
• Khônglàmnhưvậycóthểlàmgiảmnhiệtđộcủa
cơmvàkhiếncơmbốcmùilạvàmấtmàu.
Không sử dụng chức năng Giữ
ấm trong các điều kiện sau:
Tránhlàmviệcsau,vìcóthểlàmcơmcómùi,bị
khô,mấtmàuvàhưcơmmộtcáchbấtthường
hoặclàmmònnồitrong.
• SửdụngchứcnăngGiữấmchocơmnguội
• Trộncơmnguộivàocơmđangđượcgiữấm
• BỏmôilạitrongnồitrongkhichứcnăngGiữ
ấmđangbật
• SửdụngchứcnăngGiữấmkhiđãrútphích
cắmđiện
• SửdụngchứcnăngGiữấmtrongthờigiandài
hơn12tiếng
• Giữtrongthờigianngắnhơnlượngcơmấmtối
thiểuyêucầu
Lượngcơmyêucầutốithiểu
JNP-1000:0,5cốc
JNP-1800/1803:3cốc
• SửdụngchứcnăngGiữấmchobấtkỳđồdùng
nàongoàigạotrắng(baogồmcảgạokhông
cầnvo)
• Giữấmtảngcơmcólỗởgiữa.
Lượng cơm được “giữ ấm”
Đảmbảorằnglượngcơmđượcgiữấmkhôngquá
ít.
Nếulượngcơmđượcgiữấmquáít,thìdầndần
cơmsẽkhôvàmấtđimùivị.Nêndùngcơmcàng
sớmcàngtốt.
Nắp và Nồi trong
Cẩnthậnkhônglàmbiếndạngchúng:tránhva
chạmmạnh.Sựbiếndạngcủanắpvànồisẽảnh
hưởngxấuđếnkhảnăngnấucơmvàgiữấmcủa
nồicơmđiện.

29
28
28
Tiếng Việt
7
Vệ sinh và bảo dưỡng
Cách tháo hộp thu hơi
Mỗilầnsửdụngxongnồicơmđiện,cầntháohộp
thuhơi,đổhếtnướcvàlausạch.
Cách tháo:
1 Cầm hộp thu hơi và kéo theo hướng mũi
tên.
Hộpthuhơi
Cách lắp muỗng
Đặthộpđựngmuỗngvàođúngvịtrímóchộpvào
khớpvung.
• Đảmbảovệsinhsạchsẽhộpđựngmuỗng.
Ngănđựngmuỗng
Khớpnắp
Cách tháo ống thoát hơi
Mỗilầnsửdụngxongnồicơmđiện,cầntháoống
thoáthơivàrửasạch.
Cách tháo:
1 Trượt ống thoát hơi theo hướng chỉ của
mũi tên.
2 Kéo ống thoát hơi lên theo vị trí thẳng
đứng.
Đảmbảolắplạiốngthoáthơisaukhivệsinh.
Cách vệ sinh
Bấtkỳhoạtđộngbảodưỡngnàokhácđềucầnđượcthựchiệnbởiđạidiệnbảohành
đượcủyquyền.
Tiếnhànhcácquytrìnhvệsinhvàbảodưỡngnhưmôtảởtrang29đến30bêndưới.
Vệsinhtấtcảcácbộphậnbằngtay.Khôngdùngmáyrửabát/máysấy.
Đểduytrìvệsinh,luônvệsinhnồicơmđiệnvàocùngngàysửdụng.Ngoàirahãyvệsinhnồicơmđiện
thườngxuyên.
Ngoàiracầnvệsinhnồicơmđiệnvàongàysửdụngnhằmloạibỏmọimùicònlạisaukhinấu.
Lưu ý
● Đảmbảorútphíchcắmđiệnvàđểnồicơmđiện,nồitrong,nắptrongvànắpthoáthơinguộihẳntrướckhi
tiếnhànhvệsinh.
● Vệsinhbằngmiếngbọtbiểnvàvảimềm.
● Khivệsinhnồicơmđiệnbằngchấttẩyrửa,chỉsửdụngchấttẩyrửanhàbếptiêuchuẩn(dànhchobộđồ
ănvàđồdùngnhàbếp).
● Rửakỹtoànbộcácbộphậnvìchấttẩyrửacònsótlạitrêncácbộphậnnàycóthểlàmhỏngvàmấtmàu
cácvậtchấttrênbộphậnđónhưlớpphủnhựa.
Thân nồi
Tẩmướtkhănhoặcvải,vắtkhônướcvàlauchùi.
Lưu ý
● Khôngđểnướcchảyvàobêntrongnồicơmđiện.
● Khôngngâmdâyđiệnvàonướchoặchắtnướcvàodây
điện.Làmvậycóthểgâyngắnmạchhoặcgiậtđiện.
Nồi trong, vung trong
Tẩmướtkhănhoặcvải,vắtkhônướcvàlauchùi.
• Khôngrửabátđĩa...bêntrongnồitrong.
Hộp thu hơi · Muỗng
Vệsinhbằngmiếngbọtbiểnmềmvàbằngnướcmáyhoặc
nướcấm.Lausạchnướcbằngvảikhôvàlaukhôtoànbộtất
cảcácbộphận.
Mâm nhiệt
Loạibỏmọihạtgạocòndínhlạiv.v.
Nếukhóloạibỏcácvậtdínhchặt,hãysửdụnggiấynhámcóbántrênthịtrường(khoảng#320),sauđólau
sạchbằngkhănướtvắtkhô.
Nồitrong
Vậtlạ Hộpthu
hơi
Thânnồi
Mâmnhiệt

30
Khử mùi
Cầnthựchiệnquytrìnhsaumỗikhinấuxong.
1 Đổ nước nóng vào khoảng 70 đến 80% nồi trong, giữ ấm trong 2 đến 3 tiếng.
2 Rửa nồi trong và nắp trong bằng chất tẩy rửa nhà bếp tiêu chuẩn và sau đó rửa sạch
bằng nước.
3 Phơi khô nồi cơm điện và tất cả các bộ phận ở nơi thoáng gió.
Nồi trong sơn phủ chống dính Teon (để tránh làm hỏng lớp phủ Teon)
• Hãychắcchắnsửdụngmuỗngmúccơmđikèmkhixớicơm.
• Khôngsửdụngmuỗngmúccơmvàmôikimloại.Khôngđểthìa,nĩa,hoặcbátbêntrongnồitrong.
• Khôngsửdụngcácchấttẩyrửamạnhhoặcănmònkhirửanồitrong.Sửdụngmộtmiếngbọtbiểnhoặc
vảimềm.
• LớpphủTeoncủanồitrongsửdụnglâucóthểbịđổimàuhoặcngảmàukhôngđồngđều.
Điềunàylàdoảnhhưởngcủanướcvàhơinước.Đókhôngphảilàvấnđề,bởivìnókhôngảnhhưởng
đếnchứcnăngcủalớplóthoặcsựantoàncủathựcphẩm.
Thông số kỹ thuật
Mẫumáy JNP-1000 JNP-1800 JNP-1803
Côngsuấtđịnhmức 220V 50/60Hz
Nguồnđiệnđịnhmức(W) 518 667 667
Dungtíchnấu(L) 0,18đến1,0
(1đến5,5cốc)
0,54đến1,8
(3đến10cốc)
0,54đến1,8
(3đến10cốc)
Kíchcỡbênngoài
(cm)
Rộng 27,3 29,9 29,9
Sâu 25,6 27,9 27,9
Cao 26,2 29,7 29,7
Trọnglượng 2,9 kg 3,7 kg 3,7 kg
Lưu ý
● Mộtcốcđầygạotrắngtươngđươngkhoảng150g.

31
中 文
目录
1 安全注意事项.............................................................................................................................................32
2 各部件名称和附件.....................................................................................................................................35
3 煮饭方法......................................................................................................................................................36
4 使用方法( 煮粥 ).......................................................................................................................................38
5 使用方法( 蒸 )...........................................................................................................................................39
6 保温..............................................................................................................................................................40
7 清洁保养方法.............................................................................................................................................41
产品规格......................................................................................................................................................43

33
32
中 文
请单独使用额定电流 7A 以上的插座。
以免因与其它电器同时使用,造成多头
插座异常发热或起火。
关于电源线及插头
请勿使用已破损的电源线及损坏电源线
(如加工·强行弯曲·接近高温部·拉
扯·扭曲·捆扎·压在重物下、夹在物
中等行为。)
以免造成火灾、触电。
如果电源插头上有灰尘,请及时擦拭干
净。
以免造成火灾。
请将电源插头完全插到底。
以免造成触电、短路、起火。
电源线或电源插头破损或插座松动时,
请勿使用。
以免造成触电、短路、起火。
如果电源软线损坏,为了避免危险,必
须由制造商,其维修部或类似部门的专
业人员更换。
禁止用湿手
请勿用湿手插入或拔出电源插头。
以免造成触电或受伤。
请勿让电源插头接触蒸汽。
以免造成火灾、触电或起火。在滑动式
桌子上使用时,应放置在电源插头接触
不到蒸汽的地方使用。
使用本产品时
禁止弄湿
请勿将产品浸于水中或向其泼水。
以免造成短路 ˙触电。
请勿将针、铁丝等金属物等异物放入缝
隙内。
以免因触电及其它异常动作而受伤。
烹调中及烹调结束后
煮饭中,请勿打开上盖。
以免造成烫伤。
禁止触摸
请勿将脸或手靠近调压阀或蒸汽孔。
以免造成烫伤。特别注意勿让婴幼儿触
摸。
警告
一般安全注意事项
请小心使用。
请勿摔落或加以强烈撞击。
以免造成受伤或故障。
本产品为一般家庭用电器。
该产品在家庭内或在以下场所都可以使
用,但需要注意。
• 商店,办公室等的茶水间
• 农场
• 在酒店等住宿的客房
• 在民宿等简易住宿的客房
关于使用环境
请勿在不稳定的场所,耐热性差的桌子
及毛毯等上面使用。
请勿在墙壁或家具的附近使用。
请勿在墙壁或家具的附近使用。
因蒸汽和热量会导致墙壁及家具受损、
变形、变色,因此使用时请保持与墙壁
和家具的距离在 30cm以上。
请勿在会淋到水或靠近烟火的场所使用。
以免造成触电或漏电、本体变形或引起
火灾或故障。
请勿在电磁炉上使用本产品。
会导致故障。
注意
一般安全注意事项
禁止分解
请勿改装。除维修技术人员以外,不可
拆卸修理。
以免造成火灾、触电、受伤。
发生异常或故障时,立即停止使用。
若继续使用,可能会造成火灾、触电及
受伤。
异常·故障事例
• 使用中,电源线或电源插头异常发热。
• 从电饭煲中冒出烟雾,或有烧焦的异
味。
• 电饭煲某部分有裂开,松动或摇晃。
• 内锅变形
• 有其它异常或故障。
请立即拔下电源插头,联系使用说明书
上记载的服务热线
关于使用环境
请勿将电饭煲放在负重强度不足的抽出
式桌子上使用。
产品掉落会导致人员受伤、烫伤和产品
故障。
因此,请在使用前确认桌子具备足够的
负重强度。
致使用本产品的用户
请勿让身体行动不便或没有充分理解使
用方法的人单独使用本产品。
如需使用时务必要有充分理解使用方法
的人在旁指导确认。
以免造成烫伤、触电或受伤。
请勿让儿童独自使用,或在婴幼儿可以
触碰到的地方使用。
以免造成烫伤、触电或受伤。
本产品用途
请勿用于使用说明书(附属的菜谱)记载
内容以外的用途。
以免因蒸汽喷出或食物溢出造成烫伤或
受伤。
〈不可烹调的事例〉
• 将食材、调料等放入塑料袋中加热。
• 用烹调专用纸等代替上盖使用。
关于电源
不可使用额定电压以外的电源。
以免造成火灾、触电。
使用前请仔细阅读,并务必遵守。
• 此处标识的注意事项是为防止对使用者及他人造成危害及财产损失。此注意事项为安全相关的重要内容,请
务必遵守。
• 请勿撕下贴在本体上的注意事项贴纸。
因忽视标识的内容,操作错误产生的危害及损害程度,按以下表
示来区分说明。
警告
表示如果用户操作不当,可能会造成
使用者死亡或重伤 *1 的内容。
注意 表示如果用户操作不当,可能会造成
使用者伤害 *2 或物品损坏 *3 的内容。
*1重伤是指因失明、受伤、烫伤(高温·低温)、触电、骨折、中
毒等留下的后遗症及需要住院治疗或长期看门诊的。
*2伤害是指无需住院治疗·长期看门诊的受伤、烫伤或触电等。
*3物品损坏是指损害扩大到房屋,家产及家畜、宠物等。
图标记号的说明
记号表示警告、注意。具体
的注意内容用图或文章标注在
图标记号的中间或附近。
记号表示禁止的行为。具体
的禁止内容用图或文章标注在
图标记号的中间或附近。
记号表示强制行为或指示的
内容。具体的指示内容用图或
文章标注在图标记号的中间或
附近。
警告
1 安全注意事项
This manual suits for next models
2
Table of contents
Languages:
Other Tiger Rice Cooker manuals

Tiger
Tiger JPB-W Series User manual

Tiger
Tiger JBV-S10S User manual

Tiger
Tiger JBV-A10U User manual

Tiger
Tiger JPB-G18S User manual

Tiger
Tiger JKT-S10A User manual

Tiger
Tiger JAJ-A55S User manual

Tiger
Tiger JPC-W10W User manual

Tiger
Tiger JNO-B36W User manual

Tiger
Tiger JPD-A Series User manual

Tiger
Tiger JKH-G10U User manual

Tiger
Tiger JPT-H10S User manual

Tiger
Tiger JKT-D10S User manual

Tiger
Tiger JKT-D10A User manual

Tiger
Tiger JNO-B360 User manual

Tiger
Tiger JNP-S55U User manual

Tiger
Tiger JPB-G10S User manual

Tiger
Tiger JAG-S10U User manual

Tiger
Tiger JAH-A10A User manual

Tiger
Tiger JBV-S10U User manual

Tiger
Tiger JAY-A55U User manual