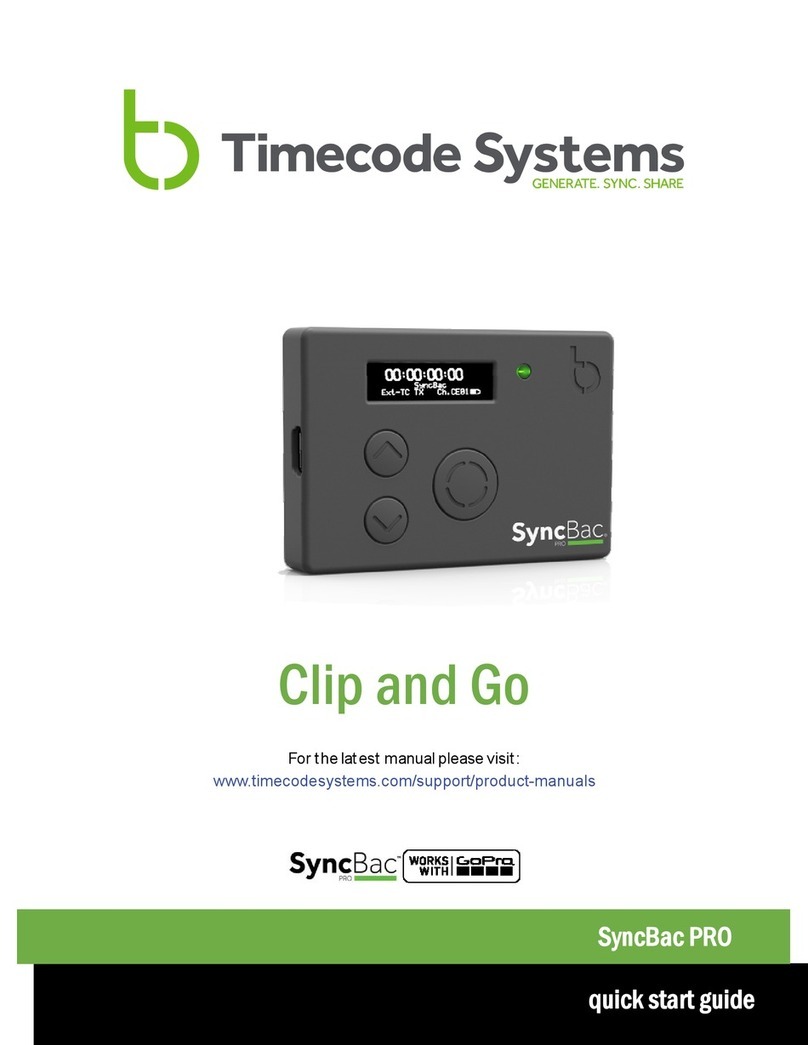
timecode systems SyncBac PRO User manual

Clip and Go
For the latest user guide, please visit:
www.timecodesystems.com/support/product-manuals
SyncBac PRO
User Guide

SyncBac PRO User Guide
Copyright Notice - Timecode Systems Limited
All rights reserved. No part of this publication may be reproduced without the
expressed written permission of Timecode Systems Ltd.
Timecode Systems Ltd shall not be liable to the purchaser of this product or third
parties for damages, losses, costs, or expenses incurred by the purchaser or third
parties as a result of accident, misuse or abuse of this product or unauthorised
modifications, repairs, or alterations to this product, or failure to strictly comply
with Timecode Systems Ltd operating and installation instructions.

Contents
Welcome to SyncBac PRO 7
Display and Controls 8
OLED Display 8
LED 9
Up and Down 10
Select 10
Ports 11
Charging your SyncBac PRO 12
Technical Specification 13
Quick Setup: SyncBac PRO 14
Quick Setup: SyncBac PRO as Slave 14
Quick Setup: SyncBac PRO as Master 15
Connect SyncBac PRO to a GoPro HERO4™ 16
Switch SyncBac PRO On and Off 17
Set the RF Country/Area 19
Set the Timecode Mode 20
Master and Slave Relationship 22
Clock Synchronisation - Master and Slaves 23
How Can I Tell if a Slave is Communicating with a Master? 24
What if a Slave Can't Find a Master? 25
What if there are Multiple Masters in the Same BLINK Network? 26
Remote Control with :pulse and BLINK Hub 27
Set the RF Channel 28
Set the Timecode for the Master 32
Set the Frame Rate Per Second for the Master 33
SyncBac PRO User Guide iii

Change the LED Brightness 34
Change the Screen Brightness 35
Change the Screen Light Time 36
Flip the Display 37
Button Lock 38
Status Information 39
Main Screen 39
Version Number and Serial Number 40
Power and Battery 40
GoPro Status 41
Synchronisation Status 42
Remote Control and Monitoring with :pulse 44
Troubleshooting 45
SyncBac PRO Slave not Connecting to Master 46
SyncBac PRO Slave is Connecting to Wrong Master 46
GoPro HERO4™ Not Detected by Slave SyncBac PRO 47
SyncBac PRO not Responding to Select button 47
SyncBac PRO Battery not Charging 47
Restore Factory Settings 48
Hard Reset 49
FAQs 50
iv SyncBac PRO User Guide

Can you Genlock the GoPros? 50
Is the SyncBac PRO the Right Solution for my VR Rig? 50
Can SyncBac PRO be used as a Master Unit? 51
Can a Master Device use Drop-Frame Timecode? 51
Do I Need a SyncBac PRO on Each GoPro?/Do I need a TCS Unit
on Each Device? 51
How Long Does it Take for SyncBac PRO to Re-Sync? 51
Does SyncBac PRO Record Timecode on the Audio Track? 52
Will using SyncBac PROs Affect How I Mount my GoPros? 52
Does using SyncBac PRO Affect the GoPro HERO4™ Battery Life? 52
Warranty 53
Quality Declarations 54
Use of External Antenna(s) 54
RF Exposure Warning Statement: 54
FCC Warning Statement: 54
Industry Canada Statements: 55
EC Declaration of Conformity 56
Index 59
SyncBac PRO User Guide v

vi SyncBac PRO User Guide

Welcome to SyncBac PRO
Thank you for choosing Timecode Systems' SyncBac PRO as your embedded timecode
solution for GoPro™ HERO4™ Silver and Black.
In this user guide, you will find everything you need to know about using your
SyncBac PRO.
SyncBac PRO for Synchronisation
SyncBac PRO is a highly accurate timecode generator and multichannel digital
timecode transceiver. It can be used:
lWith other SyncBac PROs for multi camera synchronisation.
lWith Timecode Systems :pulse mini-base stations, as a complete 'on-set'
solution for synchronising GoPro HERO4™ cameras with other professional
cameras and audio recorders.
Tip: If you use SyncBac PRO with a :pulse, you have free access to BLINK
Hub app, which provides remote control and remote monitoring of your
SyncBac PRO and HERO4™. For more details, see Remote Control and
Monitoring with :pulse on page 44.
Your Timecode Revolution Starts Here...
SyncBac PRO User Guide 7

Display and Controls
OLED Display
The OLED display is a blue 128 × 32 pixels screen. When you switch on the SyncBac
PRO, all status information, messages, and menus and options are shown on this
screen.
To learn about the various status displays, including the 'Main' screen shown above,
see Status Information on page 39.
8 SyncBac PRO User Guide

LED
The LED to the right of the OLED display acts as a colour-coded status indicator.
Colour Description
Green If the SyncBac PRO is switched on and set to run as an RF slave, a green
light indicates that the SyncBac PRO is communicating with a master
device. Its clock is synchronised with the clock in a master device.
If the SyncBac PRO is switched off, the green light indicates that the
battery is fully charged.
Blue A blue light indicates that the SyncBac PRO has been synchronised with a
master device but is currently 'free running'. It has lost its connection
with the master and is using its own highly accurate internal clock. When
the master is back in range, the SyncBac PRO will attempt to reconnect
and re-synchronise.
A flashing blue light means that the SyncBac PRO is in the process of
synchronising with a master.
Red If the SyncBac PRO is switched on, a red light indicates a warning
message is displayed on screen or that the battery power is low.
If you are unfamiliar with master and slave devices, you can learn more in the
following sections:
lSet the Timecode Mode on page 20
lMaster and Slave Relationship on page 22
SyncBac PRO User Guide 9

Up and Down
Use the Up and Down buttons to scroll through the menus and menu options, and
also to scroll through the status displays.
Select
Use the Select button to choose a menu or option. You will also use Select to switch
your SyncBac PRO on and off.
To make a selection, use the Up and Down buttons to scroll to a menu or option
and then press the Select button once.
To switch your SyncBac PRO on or off, press and hold the Select button (see Switch
SyncBac PRO On and Off on page 17, for more details).
10 SyncBac PRO User Guide

Ports
Your SyncBac PRO has a variety of ports for connecting with other devices and
chargers.
On the left edge of the SyncBac PRO, you will see
the mini USB 2.0 port, which is used for:
lCharging the SyncBac PRO (and HERO4™ when
attached). The port is 5v power IN.
lConnecting the SyncBac PRO to a PC or Mac for
downloading firmware updates.
The HEROBus connector that protrudes from the
rear of the SyncBac PRO is for connecting the
SyncBac PRO to the Go Pro HERO4™. It fits into
the battery pack slot on the back of the HERO4™.
On the right edge of the SyncBac PRO is
an MMCX connector, which is for
connecting an external aerial.
By using an external aerial, you can
increase the range of the SyncBac PRO
(see Technical Specification on page 13).
SyncBac PRO User Guide 11

Charging your SyncBac PRO
SyncBac PRO has a built-in Li-Polymer 3.7V battery and it should last around 10-12
hours from a full charge.
Note: Battery life may be reduced if your SyncBac PRO is used in extreme
temperatures. Both very hot and very cold conditions can affect battery
performance.
If the battery in your SyncBac PRO is running out of power, the LED flashes red and
the following message is displayed on screen:
The low battery power is also indicated on the battery icon in the bottom-right of
the main screen, next to the channel number. The amount of white in the inner of
the battery icon represents the amount of charge left in the battery. In the image
below, the inner of the battery icon is black, which means there is no charge in the
battery.
It is also shown on the battery status screen (see Status Information on page 39).
To recharge the battery, you will need the mini USB cable that is supplied with your
SyncBac PRO and a mini USB compatible charger socket (not supplied). The mini USB
cable connects to the SyncBac PRO via the mini USB port on the left-hand edge (see
Ports on page 11).
Note: You do not have to disconnect your SyncBac PRO from the HERO4™
when charging.
12 SyncBac PRO User Guide

Technical Specification
Category Specification
OLED Display Blue 128 × 32 Pixels
Timecode Generator
Accuracy
TCX0 0.5ppm when free running. In practice,
approximately 1 frame drift in 24 hours. Zero ppm
when RF locked to a master.
Supported FPS Modes 23.976
25
29.97
External Power Mini USB (5V DC)
Internal Power Built-in Li-Polymer (3.7V battery)
T/C Input Provided via a GoPro Master SyncBac PRO or
Timecode Systems :pulse base station.
T/C Outputs HEROBus connector
Embedded timecode metadata in MP4 camera
media
Multi-Channel Digital
Receiver
865.050MHz to 923.200MHz
Range* If your SyncBac PRO is using its internal aerial only,
the typical range for synchronisation with a master
is approximately 200m (256 feet, 219 yards).
If your SyncBac PRO has an external aerial
attached, the typical range is 500-600m (1640-
1968 feet, 546-656 yards).
*Typical range. The range can vary.
SyncBac PRO User Guide 13

Quick Setup: SyncBac PRO
If you are familiar with SyncBac PRO settings, you can quickly set up your SyncBac
PRO by following the procedures below.
lQuick Setup: SyncBac PRO as Slave (see page 14)
lQuick Setup: SyncBac PRO as Master (see page 15) .
If you are new to SyncBac PRO, you should follow the same steps, but refer to the
more detailed sections for more information.
Quick Setup: SyncBac PRO as Slave
If you want your SyncBac PRO to have its clock set by another device, such as
another SyncBac PRO or a :pulse, set it to run as an RF Slave.
1. Connect SyncBac PRO to a GoPro HERO4™ (see page 16) .
2. Switch your SyncBac PRO on (see Switch SyncBac PRO On and Off on page 17.
3. Set the RF Country/Area (see page 19) .
This is important as your SyncBac PRO has to be set to use the appropriate
frequency range for your country.
4. Set the Timecode Mode to RF Slave (see Set the Timecode Mode on page 20).
This is important as it defines how your SyncBac PRO synchronises with other
devices.
Timecode devices use a master-slave relationship for synchronisation. If this
concept is new to you, you can find explanations in Master and Slave
Relationship (see page 22) .
5. Set the RF Channel (see page 28) .
The RF Channel defines which BLINK network your SyncBac PRO will be a
member of, and therefore, which master or slaves it can communicate with.
When you have completed these steps, you have applied the minimum required
settings for your SyncBac PRO in RF Slave mode. But to work with its attached
GoPro HERO4™, the SyncBac PRO must first synchronise with a master device. If
there is no master device in your BLINK network, you will need to set one up and
make sure your SyncBac PRO is in range so that it can synchronise for the first time.
14 SyncBac PRO User Guide

Quick Setup: SyncBac PRO as Master
If you want your SyncBac PRO to be the master clock, set it to run as a GP Master
TX. As the master, the SyncBac PRO will send its clock settings to slave SyncBac
PROs in the same BLINK network and the slaves will synchronise with the master
SyncBac PRO.
1. Connect SyncBac PRO to a GoPro HERO4™ (see page 16) .
2. Switch your SyncBac PRO on (see Switch SyncBac PRO On and Off on page 17.
3. Set the RF Country/Area (see page 19) .
This is important as your SyncBac PRO has to be set to use the appropriate
frequency range for your country.
4. Set the Timecode Mode to GP Master TX (see Set the Timecode Mode on
page 20).
This is important as it defines how your SyncBac PRO synchronises with other
devices.
Timecode devices use a master-slave relationship for synchronisation. If this
concept is new to you, you can find explanations in Master and Slave
Relationship (see page 22) .
5. Set the RF Channel (see page 28) .
The RF Channel defines which BLINK network your SyncBac PRO will be a
member of, and therefore, which master or slaves it can communicate with.
6. Set the SyncBac PRO's FPS rate to the appropriate value (see Set the Frame
Rate Per Second for the Master on page 33).
Note: The FPS for the SyncBac PRO is not an exact match of the
HERO4™'s FPS setting. The SyncBac PRO uses more precise values
than the HERO4™.
7. Set the SyncBac PRO's timecode or 'T/C' (see Set the Timecode for the Master
on page 32). This sets the SyncBac PRO master's clock. The clock settings will
be sent to any slaves in the same BLINK network.
When you have completed these steps, you have applied the minimum required
settings for your SyncBac PRO in GPS Master TX mode. It should now be able to time
stamp your HERO4™ recordings and use appropriate clock settings (it will use its
own clock settings and these settings will also be used by slave SyncBac PROs in the
same BLINK network).
SyncBac PRO User Guide 15

Connect SyncBac PRO to a GoPro HERO4™
Your SyncBac PRO connects to the battery pack connection on the rear of the Go
Pro HERO4™:
1. Hold the SyncBac PRO so that its screen is facing you. At the back of the
SyncBac PRO, on the right-hand edge, you will see the curved hinge.
2. Slide the curved hinge of the SyncBac PRO into the grooved edge on the rear-
right of the HERO4™.
3. Gently press the rear of the SyncBac PRO so that its HEROBus connector slots
into the connection slot on the rear of the HERO4™.
You have now physically connected your GoPro HERO4™ to your SyncBac PRO. But
the two will not work together until you have set up your SyncBac PRO.
16 SyncBac PRO User Guide

Switch SyncBac PRO On and Off
To switch your SyncBac PRO on:
1. Press and hold the Select button. Keep the button pressed down.
The SyncBac PRO screen lights up and displays the message:
Push Up/Dn twice to switch on
2. Press the up or down button twice to turn on the SyncBac PRO. This extra
step is designed to prevent you from accidentally turning the SyncBac PRO on.
If you do not press the up or down button twice within a 5 second period, the
SyncBac PRO stays off.
When the SyncBac PRO comes on, it shows the main screen by default (see Display
and Controls on page 8).
Note: If your SyncBac PRO does not come on when you press and hold the
Select button, the battery may need to be charged (see Charging your
SyncBac PRO on page 12). The LED lights red when the battery charge is
running out.
SyncBac PRO User Guide 17

To switch your SyncBac PRO off:
1. Press and hold the Select button. Keep the button pressed down. A
countdown appears on the screen:
Shutting down in 3
2. Keep the button pressed down until the countdown is finished and the
following message is displayed:
Push Up/Dn twice to switch off
3. Press the Up or Down button twice to turn off the SyncBac PRO. This extra
step is designed to prevent you from accidentally turning the SyncBac PRO off.
If you do not press the up or down button twice within a 5 second period, the
SyncBac PRO stays on and the screen reverts to showing the main display.
Tip: If your SyncBac PRO is connected to a HERO4™ and is a slave of a
:pulse, you can use the BLINK Hub app to turn the HERO4™ on and off
remotely. This is a great way to save battery power.
18 SyncBac PRO User Guide

Set the RF Country/Area
Your SyncBac PRO can communicate with other devices via radio. Before you use
your SyncBac PRO, you need to set it to use the correct radio frequencies for the
country you are in. This is because the regulations for the use of radio frequencies
vary in different countries.
Note: The RF Country/Area setting does not apply to SyncBac PRO units
sold in North America and Canada. If you purchased your SyncBac PRO in
the US or Canada and wish to use it in another country, please contact
Timecode Systems. We can provide you with a free updater application
that will allow you to set the country/area.
To set the RF country/area:
1. If your SyncBac PRO is currently off, switch it on (see Switch SyncBac PRO On
and Off on page 17).
2. Press the Select button.
3. Use the Up and Down buttons to scroll to the System Settings option.
4. Press the Select button.
5. Use the Up and Down buttons to scroll to the Set RF Country/Area option.
6. Press the Select button.
7. Use the Up and Down buttons to select the appropriate area:
lEurope/UK
lJapan/China
lUS/CA/AU/NZ (for USA, Canada, Australia, or New Zealand).
Note: If you want to use your SyncBac PRO in another region, please
contact Timecode Systems for advice.
8. Press the Select button to confirm. Your SyncBac PRO will now communicate
using radio frequencies that are appropriate for the region you selected.
SyncBac PRO User Guide 19

Set the Timecode Mode
SyncBac PRO has two different Timecode modes: RF Slave and GP Master TX. These
modes define how your SyncBac PRO's clock is synchronised with other devices, and
so it is important that you choose the appropriate setting.
Note: If you are unfamiliar with the concept of master and slave devices,
please read Master and Slave Relationship on page 22.
To set the Timecode Mode:
1. Connect your SyncBac PRO to a HERO4™ (if it is not connected already). For
further details, see Connect SyncBac PRO to a GoPro HERO4™ on page 16.
2. If your SyncBac PRO is currently off, switch it on (see Switch SyncBac PRO On
and Off on page 17).
3. Press the Select button.
4. Use the Up and Down buttons to scroll to the Timecode Mode option.
5. Press the Select button.
6. Use the Up and Down buttons to scroll to the appropriate mode:
Operation Timecode
Mode
SyncBac PRO is master and sets the clock of:
lIts own HERO4™ camera (the HERO4™ camera that is
connected to the master SyncBac PRO)
lOther SyncBac PROs in the same BLINK network.
GP Master
TX
SyncBac PRO is slave and has its clock set by another device in
the same BLINK network
RF Slave
*When a SyncBac PRO is free running and in RF Slave mode, it uses its own
clock settings but continues to search for a master on the same BLINK
network. If it finds a master, the master will set the clock.
Note: A SyncBac PRO can only be the master to SyncBac PRO slaves -
it cannot be a master to :wave, :pulse, or minitrx+.
20 SyncBac PRO User Guide
Other manuals for SyncBac PRO
1
Table of contents
Other timecode systems Camera Accessories manuals
