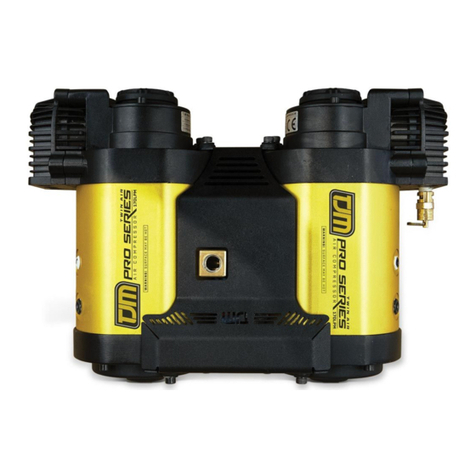
TJM 013COMPVHD User manual

Installation and User Manual
Product:
TJM Vehicle Mount Compressor
Vehicle:
Generic
Part No.
013COMPVHD
For product warranty please refer to our website www.tjm.com.au
File: F-17800.docx
Page 1 of 12
29/05/2019
TJM Vehicle Mount Compressor
•Before commencing fitment read instructions and ensure all listed components are supplied.
•It is a condition of the warranty that the product has been correctly installed by suitably qualified
personnel and is used in accordance with accompanying instructions where provided. For product
warranty please refer to our website www.tjm.com.au
•Estimated Fitting Time: 2 hrs
•Treat any holes drilled into the vehicle body with rust preventative paint.
•Always place the product on a soft workspace to prevent damage prior to installation.
•Do not mount compressor below the water-wading line of the vehicle. Refer to the vehicle manufacturer
for this specification.
•Compressor surface becomes very hot during operation. Mount away from flammable materials and
avoid locations where it may be accidently touched while operating.
•Rated for 12 V DC systems only.

TJM Vehicle Mount Compressor Installation and User Manual
For product warranty please refer to our website www.tjm.com.au
File: F-17800.docx
Page 2 of 12
29/05/2019
Table of Contents
TJM Vehicle Mount Compressor ...........................................................................................................1
1.0 Compressor Specifications..........................................................................................................2
2.0 Compressor Assembly ................................................................................................................3
3.0 Vehicle Mounting........................................................................................................................5
4.0 Wiring the Compressor System ..................................................................................................7
5.0 Post- Installation Examination....................................................................................................9
6.0 Operating Instructions................................................................................................................9
7.0 Maintenance.............................................................................................................................11
1.0 Compressor Specifications
1.1 Bill of Material
Item No.
QTY
Part Number
Description
1
1
F-17615
Compressor
2
1
013COMPVPS120-90
Pressure Switch
3
1
F-14002
Wiring Harness –Cabin
4
1
F-17799
Wiring Harness –Engine Bay
5
1
013COMPVACTSWITCH
Compressor Activation Switch Kit
1.2 Electrical Specification
Voltage
12 V DC
Current Draw (0 Bar / 0 PSI)
26 A
Current Draw (200 kPa / 29 PSI)
33 A
Fuse Type and Rating
Maxi 40 A
IP Rating
54
Motor thermal cut-off
105°C

TJM Vehicle Mount Compressor Installation and User Manual
For product warranty please refer to our website www.tjm.com.au
File: F-17800.docx
Page 3 of 12
29/05/2019
1.3 Performance
Air flow (0 Bar / 0 PSI)
86 LPM / 3.0 CFM
Air Flow (200 kPa / 29 PSI)
66 LPM / 2.3 CFM
Duty Cycle (80 PSI, 60 minutes @ 23°C)
100 %
Pressure Switch Operation
Off @ 120 PSI / On @ 90 PSI
Safety Relief Valve Opening Pressure
1070 kPa / 155 PSI
1.4 Hardware and Fittings
Pro Locker Solenoid / Pressure Switch ports
6 x ⅛” BSPT ports (3 each side of air tank)
Tyre Inflation / Accessory ports
2 x ¼” BSPT ports (1 each side of air tank)
Safety Relief Valve
Factory-set 155 PSI, ⅛” NPT male thread
Compressor to Bracket Bolts (Included)
6 x M5 x 15 Socket-head Cap screw
Base-plate to Vehicle Bolts (Not Included)
4 x M6 or M8 bolts and nuts
1.5 Recommended Fastener Torque Settings
M5
9.5 Nm
M6
16 Nm
⅛” BSPT
15 Nm
¼” BSPT
20 Nm
2.0 Compressor Assembly
2.1 Accessory Installation
Installation Conditions:
The 12 V solenoid shown is supplied with the TJM Pro Locker.
The ¼” BSPT hose fitting shown is supplied with the TJM Airline Kit
3 x ⅛” and 1 x ¼” ports shown.
Additional ports on opposite side of air tank.
oDetermine the desired mounting
configuration for the compressor and select
the desired outlet ports for the accessories –
there are 8 available outlet ports in total.
oTo fit the Pressure Switch and Pro-Locker
solenoids, remove one of the ⅛” BSPT plugs in
the air tank using a 5mm hex key.
oTo fit the TJM Airline Kit, remove one of the
¼” BSPT plugs in the air tank using a 6 mm
hex key.
If necessary, remove the safety relief valve to
provide space for the accessory fitment.

TJM Vehicle Mount Compressor Installation and User Manual
For product warranty please refer to our website www.tjm.com.au
File: F-17800.docx
Page 4 of 12
29/05/2019
oApply sealant paste (e.g. Loctite 567) or
sealant tape to one end of the threaded
fitting of the accessory.
oInsert accessory into the air tank port and
tighten.
oRecommended installation positions are
shown in the figure.
If the safety relief valve was removed, apply
sealant paste or sealant tape and re-install the
valve to the same port.
Notes:
DO NOT over-tighten, may cause damage to thread.
If using a thread sealant allow curing time according to the manufacturer specification.
2.2 Air Filter Installation
Installation Conditions:
Ensure filter is assembled in a dry working environment.
oEach compressor has a two-stage air filter
supplied loose which must be installed prior to
operation.
oRemove the protective plug from the
compressor inlet port.
oScrew the filter housing into the port.
Hand tighten only.

TJM Vehicle Mount Compressor Installation and User Manual
For product warranty please refer to our website www.tjm.com.au
File: F-17800.docx
Page 5 of 12
29/05/2019
oTo replace the filter elements, pull the outer
cover from the air filter assembly.
oRemove the foam and felt elements and
replace.
oPress the outer cover back into place, ensure
that the clips on the housing are aligned to
make a secure fit.
Notes:
Check the Air Filter elements at frequent intervals. If Air Filters become damaged, wet, or dirty,
DO NOT use the compressor until air filters are replaced. Contact a TJM Distributor for service.
3.0 Vehicle Mounting
3.1 Mounting Location
When deciding an appropriate place to mount the compressor within the vehicle, consider the following:
oAvoid proximity to heat sources;
oAvoid exposure to direct sunlight;
oAvoid mounting in areas which are submerged during a water crossing;
oEnsure that the air filter inlet has access to cool, dry air;
oCompressor will become hot when used, ensure it is out of reach of children or pets, and away from
flammable materials.
3.2 Compressor Mounting
Compressor Configurations
The compressor can be mounted at 5 angles to suit the available space:
Vertical (as-supplied), at 30° from vertical, or horizontal.
This adjustment can be made before or after installation in the vehicle.

TJM Vehicle Mount Compressor Installation and User Manual
For product warranty please refer to our website www.tjm.com.au
File: F-17800.docx
Page 6 of 12
29/05/2019
oUsing a 4 mm hex key, remove the 6 x
M5 x 15 mm mounting screws and washers
between the compressor and base plate
(3 x front and 3 x rear).
oRemove the compressor from the base plate
oRemove 2 x M5 x 10 mm screws from the fan
cover on the desired mounting side and
fasten them into the threaded holes
previously used for the base plate.
oReposition the compressor and fasten the
M5 x 15 mm screws –for horizontal
installation the centre rubber isolators do not
take screws.
oEnsure the washers are fitted between the
screw and rubber isolator.
oIt is possible to undo the screws on one side
of the compressor and rotate the body of the
compressor to give better access to the base-
plate.
oAfter securing the base-plate the screws must
be re-installed.
Securely Mounting the Compressor
oPlace the bracket on the desired mount location and mark the position of 4 holes for mounting
fasteners.
oDrill 4 x 6.5 mm (for M6 bolts) or 8.5mm (for M8 bolts) holes on the marked locations.
Do not drill greater than 9 mm.
oFit the backing plates (supplied loose in the compressor box), if required to support the
underside of the mounting surface.
oSecure the base-plate and backing plates to the vehicle using M6 or M8 bolts, spring washers
and nuts (not included with the compressor).
If using M6 bolts, ensure the washers adequately cover the base-plate surface.

TJM Vehicle Mount Compressor Installation and User Manual
For product warranty please refer to our website www.tjm.com.au
File: F-17800.docx
Page 7 of 12
29/05/2019
3.3 Mounting Actuator Switches
Compressor and Actuator switches should be mounted in a position best suited to the driver, consider the
following:
oSwitches must be hard mounted and never hanging from the wiring alone;
oSwitches should be easily seen and accessible to the driver;
oEnsure that the switches are out of the way of accidental activation by passengers or driver;
oSwitches should be mounted away from potential exposure to water; and
oEnough room should be left behind the mounting face to fit the switch and wiring.
Installation Conditions:
The Pro Locker actuator switches are supplied with the Pro Locker.
oCreate 21 mm x 41 mm rectangular cut-out
for each switch.
oSecurely snap switches into position.
oWhen wired according to Figure 1, the switch
will illuminate Green when the dash lights are
ON, and Red when the compressor is ON.
4.0 Wiring the Compressor System
4.1 Connecting Wiring System
Installation Conditions:
Installation following this diagram requires the Rear Locker to be active to select the Front Locker.
This prevents unexpected handling changes from accidental Front Locker activation.
TJM recommends wiring the Red/Yellow +12 V wire to the Ignition circuit to reduce likelihood of
compressor draining the battery. It is possible to wire to the Accessory circuit instead.
oUsing the wiring diagram depicted in Figure 1, plug the correct coloured female terminals to the
appropriate switch terminal.
oLocate an accessory outlet or power outlet that supplies 12 V DC and is powered when the vehicle
ignition key in the “ACC” or “ON” position.
oUsing an automotive quality connectors or soldering iron, splice the Red/Yellow wire to the
positive (+) wire on the chosen source. Insulate the connection to prevent possible short circuit.
oLocate an active dash light 12 V supply wire.
oUsing an automotive quality connectors or soldering iron, splice the Blue/White wire to the active
dash light supply wire. Insulate the connection prevent possible short circuit.
oRoute the remainder of the wiring loom to the compressor.
oPlug the 2, singular female flag-connectors to the pressure switch (the order of the connectors does
not affect operation).

TJM Vehicle Mount Compressor Installation and User Manual
For product warranty please refer to our website www.tjm.com.au
File: F-17800.docx
Page 8 of 12
29/05/2019
oPlug the dual solenoid connectors into the loom; the yellow and black connector to the Rear Locker
Solenoid, and the green and black connector to the Front Locker Solenoid.
oPlug the compressor motor connector into the Red/White and Black loom connector.
oFit ring terminals the ends of the Red and Black 10 AWG wires.
oConnect the red wire to the battery positive terminal, and the black wire to the battery negative
terminal.
oSecure the loom to the vehicle at regular intervals to prevent wear.
Notes:
If additional wire is required to reach the battery, use 10 AWG wire or larger.
4.2 Electrical Diagram
Figure 1: TJM Vehicle Mount Compressor Recommended Wiring Diagram

TJM Vehicle Mount Compressor Installation and User Manual
For product warranty please refer to our website www.tjm.com.au
File: F-17800.docx
Page 9 of 12
29/05/2019
5.0 Post- Installation Examination
5.1 System Testing
Leak Testing
Complete the following test with the vehicle in park and the engine off.
oTurn on the compressor on.
oThe compressor air tank will fill to reach operating pressure.
oWait for the Pressure Switch to turn off the compressor at 120 PSI.
oMonitor the time. The compressor should not reactivate within a period of 10 minutes.
NOTE: If the compressor refills in this time frame, there is a leak in the system. Complete the
following to determine and control the source of the leak.
oWhile the compressor is pressurised, spray soapy water on all the air fittings.
oBubbles will appear at the source of the leak.
oDe-pressurise the system.
oRe-tighten the leaking fitting/s and repeat leak test.
oIf leaking continues, remove fittings, reapply sealant, and then re-assemble.
5.2 Post installation checklist
□Compressor operational check completed.
□Leak Test completed.
□Compressor safely mounted using appropriate hardware.
□Wiring Loom installed according to the TJM Diagram.
□Air lines securely installed.
□Switches hard-mounted to dash and out of reach of accidental activation.
□Switches function and illuminate correctly.
6.0 Operating Instructions
6.1 Pro Locker activation
oSwitch on the compressor from the actuator switch.
oThe compressor will pressurise to 120 PSI and then automatically switch off.
oUse the Pro Locker actuation switches to engage and disengage the Lockers as needed.
oWhen system pressure drops below 90 PSI the compressor will automatically switch on.
oAfter use switch off both the Locker switches and the compressor switch.
Checked By:
Date:

TJM Vehicle Mount Compressor Installation and User Manual
For product warranty please refer to our website www.tjm.com.au
File: F-17800.docx
Page 10 of 12
29/05/2019
6.2 Tyre inflation
oConnect the hose for tyre inflation to the compressor using the ¼” BSPT port with a quick-connect
fitting (supplied in TJM Airline Kit).
oSwitch on the compressor from the actuator switch.
oThe compressor will pressurize to 120 PSI and then automatically switch off.
oConnect the tyre chuck to the tyre valve to inflate. The compressor with automatically restart to
supply air once the tyre is connected.
oCheck desired pressure is reached using a tyre pressure gauge. Note: measure the pressure with no
air-flow to the tyre for accurate reading.
oAfter use switch off the compressor.
6.3 Safety information
oThe compressor will become very hot during use. Do not touch the working end of the compressor
during or immediately after use. Wear gloves when changing the hose connection.
oAlways ensure air pressure in the compressor is discharged before installing hoses and fittings or
undertaking maintenance.
oDo not operate the unit without the safety relief valve installed.
oNever blow compressed air directly at people or pets. Compressed air can blow dirt particles into
the atmosphere which can irritate the skin, eyes and/or respiratory system.
oDo not use the compressor without mounting to a solid surface.
6.4 Operation Guide
oThe compressor is designed for individual use, not for commercial or industrial applications.
oThe compressor is fitted with a thermal cut-off switch. This switch protects the motor from
overheating. If the compressor cuts-out, turn off the power switch and allow the compressor to
cool for at least 45 minutes before attempting to restart.
oThe compressor duty cycle is rated at 23°C. Higher ambient temperature will reduce the duty cycle.
oThe duty cycle is rated over a 60-minute operating period. The compressor is not rated to run
continuously beyond the specified duty cycle.
oTJM recommends using the compressor while the vehicle engine is running.
oDischarged air will contain moisture due to air humidity. When using the compressor in conjunction
with an on-board air tank, TJM recommends installing a moisture trap before the air tank inlet
and/or fitting the air tank with a drain valve.
oThe compressor is fitted with a safety relief valve, set at factory to 155 PSI. The valve can also be
manually opened to discharge air pressure by pulling on the ring at the top of the valve.

TJM Vehicle Mount Compressor Installation and User Manual
For product warranty please refer to our website www.tjm.com.au
File: F-17800.docx
Page 11 of 12
29/05/2019
Safety Relief Valve
oThe safety relief valve can be manually actuated
by pulling on the ring at the top of the valve.
oValve may be hot –use gloves while operating
valve.
oDO NOT operate the compressor without the
relieve valve installed.
7.0 Maintenance
Always ensure that the pressure in the compressor has been discharged before commencing.
7.1 Routine Maintenance
oPeriodically inspect and replace the air filter. Blocked air filters significantly reduce compressor
performance. Never run the compressor without a filter –this will reduce the life of the
compressor.
oPeriodically check fittings and airlines for leaks.
oPeriodically inspect mount bolts to ensure that they remain tight.
oPeriodically check the safety relief valve –ensure air is released when the manual override is pulled.
Note: The compressor does not use oil lubrication –there is no requirement to check / fill oil.
7.2 Replacement Parts
The major components of the compressor are designed to be maintenance-free for the life of the unit.
The following parts are available for servicing requirements:
o013COMPVFILTER01 - Filter housing and element combined kit
o013COMPVFILTER02 - Filter housing kit to replace housing only
o013COMPVFILTER03 - Filter element kit
o013COMPVACTSWITCH - Replacement activation switch kit
o013COMPVMOUNTKIT –Replacement rubber isolator and bolt kit
o013COMPVSRV155-18N –Safety relieve valve 155 PSI, male ⅛” NPT
o013COMPVPS120-90 –Pressure switch OFF 120 PSI / ON 90 PSI

TJM Vehicle Mount Compressor Installation and User Manual
For product warranty please refer to our website www.tjm.com.au
File: F-17800.docx
Page 12 of 12
29/05/2019
7.3 Troubleshooting Guide
Problem
Possible Cause
Resolution
Compressor does not run
Thermal cut-off
switch active
Switch off power, wait 45 minutes for
compressor to cool, restart.
Wiring Fault
Check that wiring has been connected
according to diagram. Check power
switch illuminates green with dash lights
and red when switched on.
Fuse blown
Replace 40 A Maxi blade fuse.
Relay blown
Test with another relay and replace if
required
Faulty pressure
switch
Check for voltage at relay terminal 86.
Replace switch if required.
Compressor switches on and off
frequently
Air leakage
Check all air lines and fittings for leaks.
Compressor does not switch off at
120 PSI (observe relief valve opens
while running)
Faulty pressure
switch
Replace pressure switch.
Compressor air flow lower than normal
Blocked air filter
Inspect air filter and replace if dirty.
Unusual noise or vibration
Worn isolators
Replace isolators.
Loose mounts
Tighten all mount bolts.
This is a basic guide for field troubleshooting only. If the compressor does not operate after taking these
steps, refer to a TJM distributor.
Table of contents
Other TJM Air Compressor manuals
Popular Air Compressor manuals by other brands

ABAC
ABAC RevolutionAIR Boxy Instructions for use manual
Gardner Denver
Gardner Denver L07 Original Operating and Service Manual

EKOM
EKOM DK50 4VR/50/M user manual

California Air Tools
California Air Tools 10020C-22060 owner's manual
California Air Tools
California Air Tools 30020dCAdC-22060 owner's manual
Danfoss
Danfoss VLZ065 Application guidelines

CAMPAGNOLA
CAMPAGNOLA TIGER 640 manual

John Bunn
John Bunn Neb-u-Tyke Speedster user manual

Denyo
Denyo DIS-390ES instruction manual

Daikin
Daikin DWSC 050 Installation, operation and maintenance manual
Elektra Beckum
Elektra Beckum Compressor Pump Basic 265 null
Vmac
Vmac G300004 Installation, owners and service manual
