TM Electron TMHC105 User manual

INSTRUCCION MANUAL
Thanks for choosing to buy our Hair Clipper.
Read all instructions of the manual thoroughly before use, even if you are familiar with
this type of product. The safety precautions enclosed herein reduce the risk of re, electric
shock and injury when correctly adhered to. Keep the manual in a safe place for future
reference. If applicable, pass the instructions on to the next owner of the appliance.
PROFESIONAL CORDER CLIPPER
TMHC105

5
INDEX
Hair clipper parts.........................................................................................6
Important safety instructions.....................................................................8
Before using your hair clipper ...................................................................8
Before cutting hair.......................................................................................9
How to give a haircut ..................................................................................9
Suggested hair cuts ..................................................................................10
PROFESIONAL CORDER CLIPPER
TMHC105

INGLÉS
6
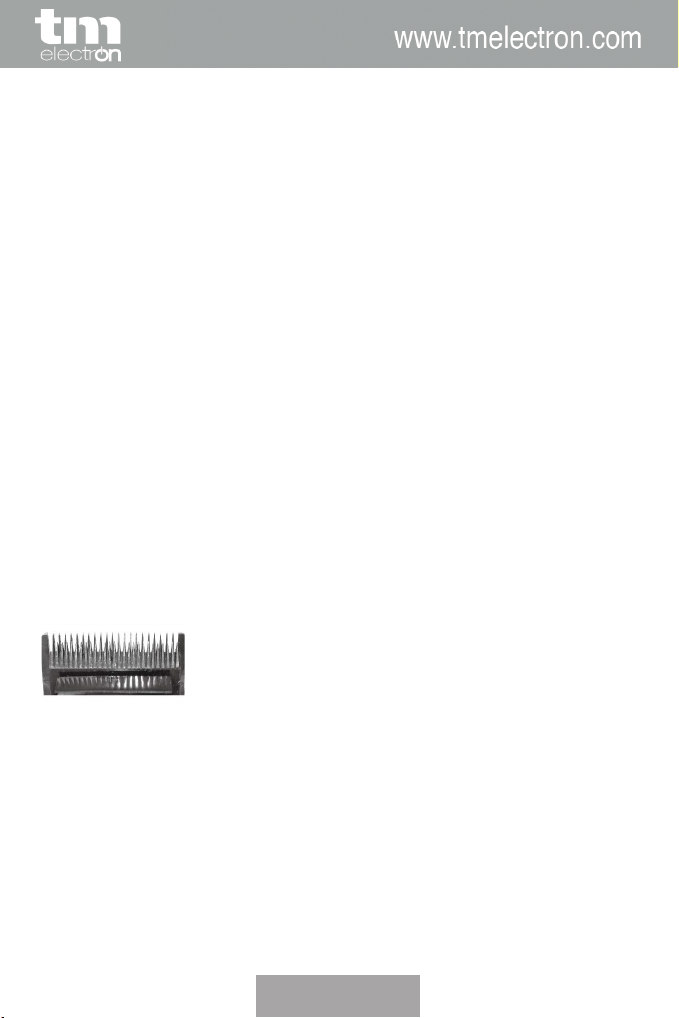
HAIR CLIPPER PARTS
1. Blade Oil
2. Taper Lever
3. Switch on/off
4. 13mm Trimming Guide
5. 10mm Trimming Guide
6. 6mm Trimming Guide
7. 3mm Trimming Guide
8. Cleaning Brush
9. Barber comb
8
9
4
5
7
2
6
1

INGLÉS
IMPORTANT SAFETY INSTRUCTIONS
When using your hair clipper kit, basic precautions should always be observed,
including the following.
• Before plugging in the clipper, make sure your outlet voltage and circuit frequency
correspond to the voltage stated on the rating label, and the household power outlet
socket is properly earthed.
• Make sure the clipper; cord and plug do not come in contact with water or any
other liquid. Ensure your hands are completely dry before handling the supply cord
plug and the hair clipper.
• Do not place or store the clipper where it can fall or be knocked into a sink or tub.
Do not place in or drop into water or any other liquid.
• Do not use the clipper while bathing or in the shower.
• Do not knot, squash or tug the power cord, protect it from sharp edges and heat.
Do not wrap it around the appliance, and never pull or lift the product by the power
cord, carry or unplug the clipper by pulling on the supply cord.
• Do not use if the power supply cord is damaged. If the cord is damaged, it must
be replaced by the manufacturer, its service agent or similarly qualied persons in
order to avoid a hazard.
• Unplug from electrical outlet immediately after use. Do not clean the clipper while
it is still connected to mains power. Do not place the clipper on any surface while it
is switched ON. Do not use the clipper if it has been dropped on the ground or into
water.
• Only use clipper with accessories sold together with product.
• Never drop or insert any object into any opening of this clipper.
• Check the clipper and all its parts carefully and regularly. Do not use this clipper
with damaged or broken parts and clipper guide.
• The clipper is intended for home use only, and only uses it as described in this
manual.
Important safety instructions
• The clipper is not intended for use by persons (including children) with reduced
physical, sensory or mental capabilities, or lack of experience and knowledge, un-
less they have been given supervision or instruction concerning use of the product
by a person responsible for their safety.
• Supervise children to ensure they do not play with the clipper. Closely supervision
is necessary when any appliance is used by, on or near children.
• Do not use on people who are asleep.
7

8INGLÉS
Caution
Do not use the hair clipper continuously for more than 10 minutes.
The hair clipper is tted with high quality T10 carbon steel blade that is permanently
lubricated. To ensure long-term performance of your clipper, clean the blades and unit
regularly. Always keep the blade guard on the clipper trimming blade when not in use.
After Each Use:
• Ensure that the clipper is switched OFF and disconnected from mains power.
• Clean the hair from blade with the cleaning brush provided. Do not use water to
clean.
• To clean the clipper, wipe with a damp cloth and dry immediately.
• Do not use liquid cleaners on the blades or harsh or corrosive chemicals on the
clipper.
• To prevent damage to the blade, do not apply pressure or hard objects to the
clipper blades.
BEFORE USING YOUR HAIR CLIPPPER
Your clipper was carefully examined to make sure the blades were oiled and aligned
before leaving our factory.
The blade position is showed with the picture below. If the blades are out of
alignment they can be easily adjusted.
To align the blades, use a screwdriver to loosen the 2 screws retaining the xed bla-
de. Ensure to adjust the taper lever to the lowest position and align the blades so that
the cutting edges are parallel to one another. Then tighten the 2 screws.
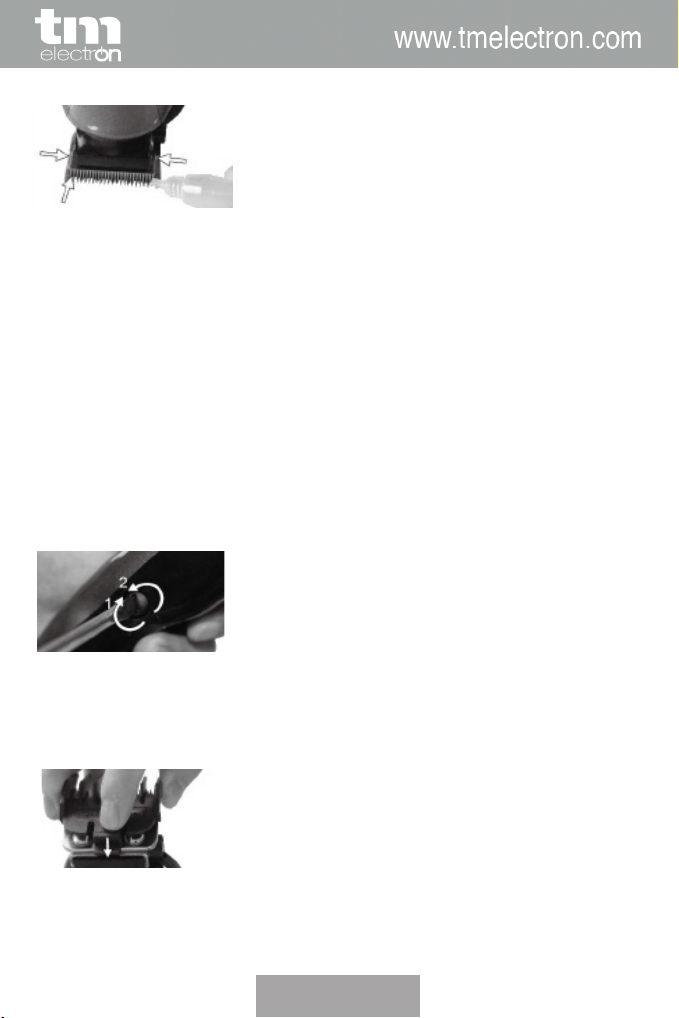
To keep your clipper in good working condition, make sure the blades are oiled as
shown in the picture below. Simply spread 1-2 drops of the supplied lubricating oil on
the four positions shown.

9
INGLÉS
To adjust the clipper for good performance, switch the clipper ON and use a screw
driver, or a thin coin, to turn the power screw on the opposite side of ON/OFF switch
in clockwise direction until you hear a loud clattering noise, refer to below photo. Then
slowly turn the power screw anticlockwise until the noise stops. Switch the clipper ON
and OFF a few times to ensure the clattering has stopped. If it continues when the
clipper is switched ON, turn the screw a little further anticlockwise. This is the optimal
setting for the hair clipper blades.
To ATTACH TRIMMING GUIDES
The hair clipper comes with nine clipper guides, which are marked with a number.
Clipper Guide No. 1 leaves a 3mm hair length.
Clipper Guide No. 2 leaves a 6mm hair length.
Clipper Guide No. 3 leaves a 10mm hair length.
Clipper Guide No. 4 leaves a 13mm hair length.
How to use the clipper
To attach a clipper guide, hold it with its teeth upward and slide it onto and along the
clipper blades, then press down gently until it clicks into place, refer to below photo.
Pull the comb upward and away from the clipper blade to remove the guide.
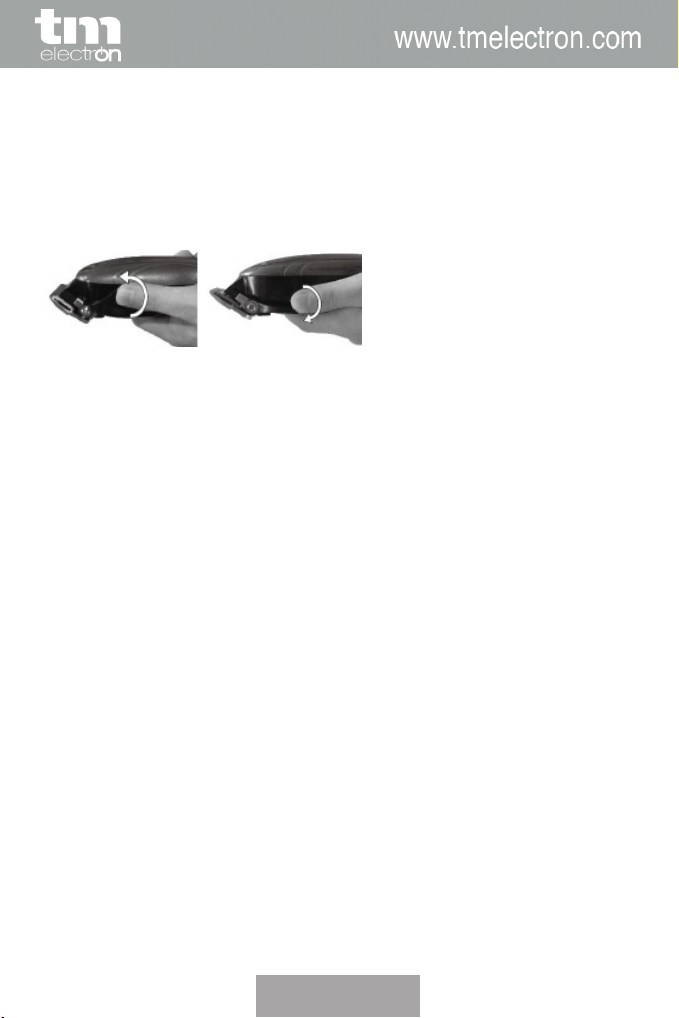
The hair clipper has a taper lever located at the left side of the clipper, near the blade.
The lever adds versatility to your clipper by allowing you to gradually change the clo-
seness of your cut without need for a clipper guide and also to improve the effective-
ness of the trimming guide attachments.
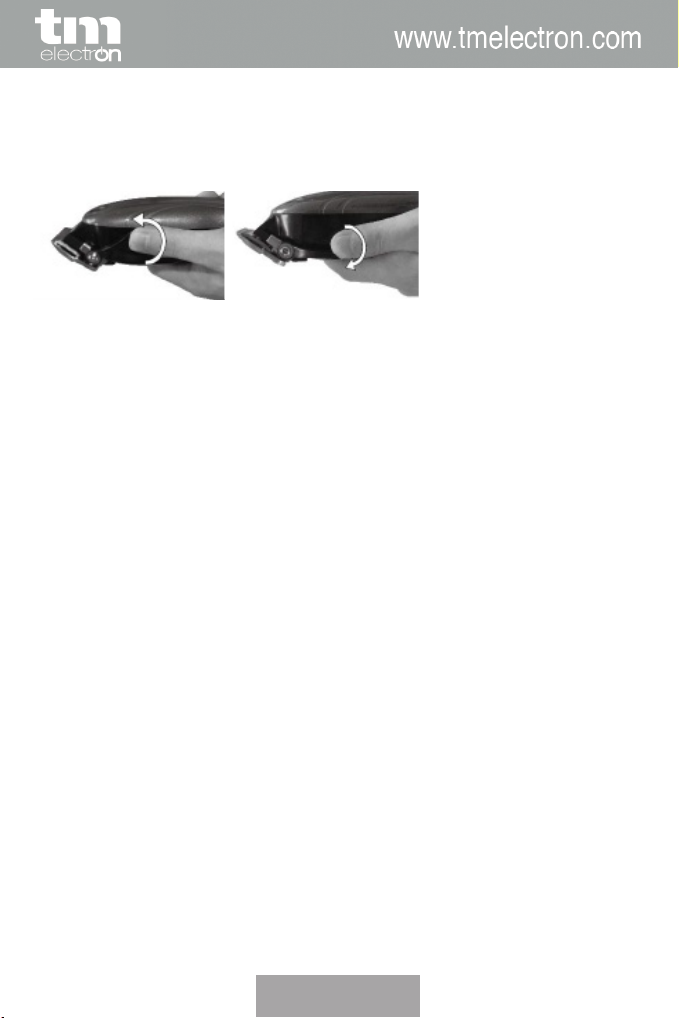
When the level is in the uppermost position (Picture 1), the blades will give you the
10 INGLÉS
closest cut and leave the hair very short. Pushing the lever downward gradually in-
creases the cutting length. In the lowest position (Picture 2), the lever will cut the hair
approximately the same length as the NO 1 clipper guide.
Picture 1 Picture 2
BEFORE CUTTING HAIR
• Inspect the clipper and make sure there is no excessive oil on the cutting blades
prior to use. Any excessive oil should be wiped off to prevent it from getting on your
skin.
• Place a cape or cleaning cloth around the neck of the person whose hair is being
trimmed or cut.
• Seat the persons whose head is approximately at your eye level.
• Ensure the hair is dry. Hair clippers perform best with dry hair, making it easier to
see how much hair is being cut.
• Comb the hair as it is normally styled.
• Comb out all knots and tangles.
Select an appropriate length trimming guide to match the desired length of hair to
remain after the cut. There are 3mm, 6mm, 10mm, 13mm trimming guide to choose.
HOW TO GIVE A HAIRCUT
• Let the clipper cut through the hair slowly without forcing it at a fast rate, as this
may create a pulling sensation.
• Use short strokes when cutting and initially use the longest trimming guide. You
can always use a shorter trimming guide later if you want a closer cut.
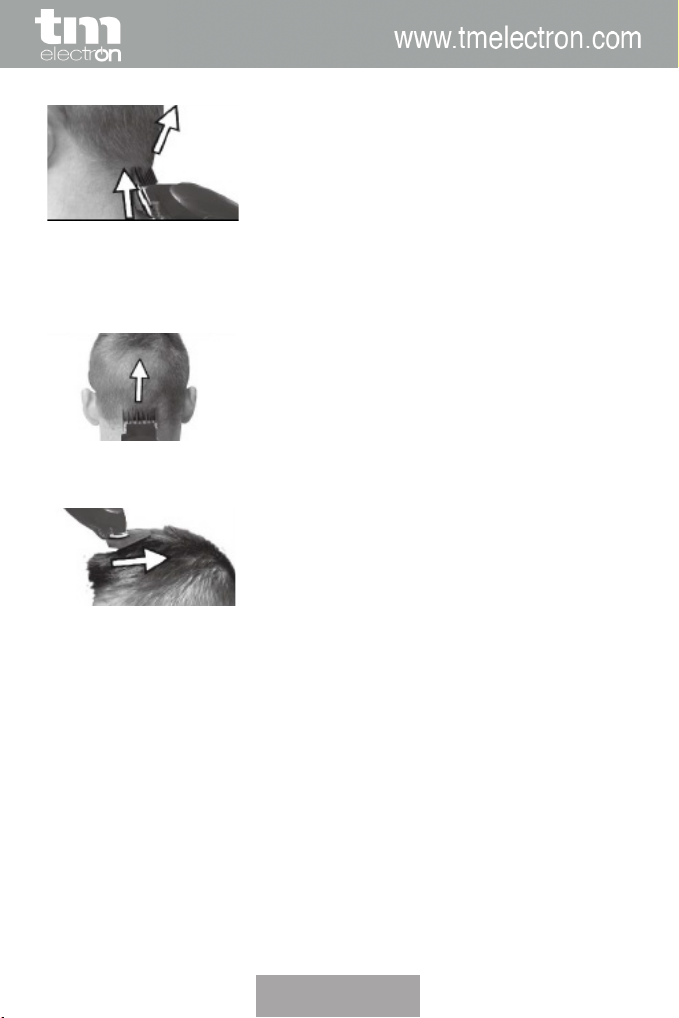
• Start at the center and base of the back, to attach the No. 1 (3mm) or No. 2 (6mm)
clipper guide to the clipper. Hold the clipper comfortably in you hand, then lightly
and gradually lift the clipper, working upwards and outwards, through the hair,
trimming just a little at a time.
11
INGLÉS
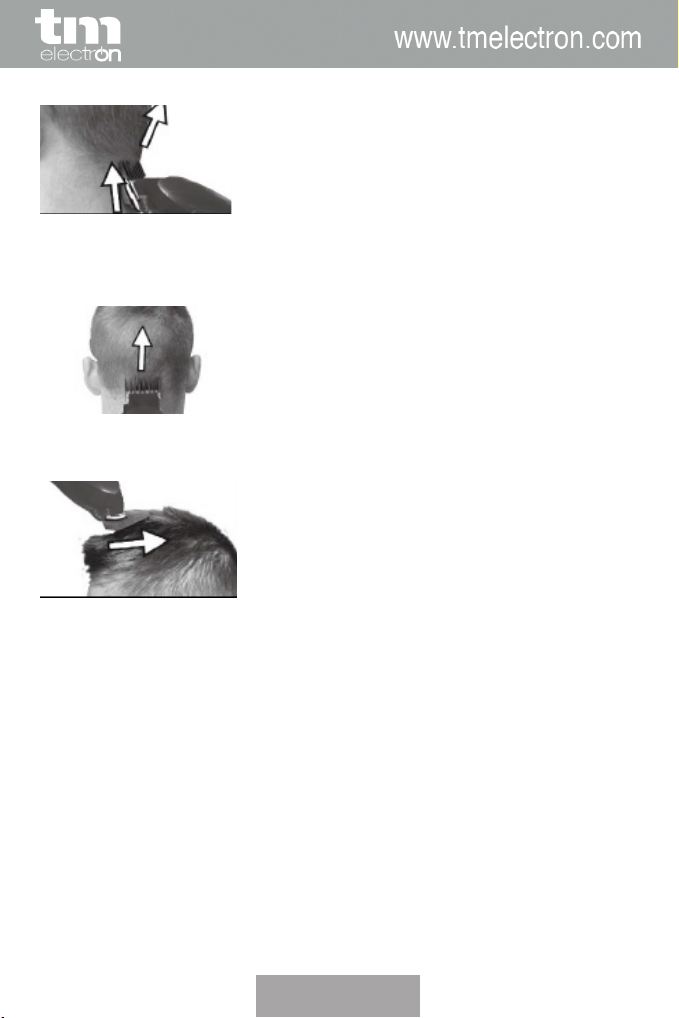
• As you cut, gradually lift the hair clipper head towards you. Continue to cut the
back area from the bottom of the neck upwards to the top of the ears.
• Change to the other longer clipper guide (like No. 3, No. 4) to cut the back of the
head
• To cut the top of the head, you can change to the other longer guides (No 3, No.
4), hold the hair between your ngers and cut a small amount at a time. Cut from
the front to the back.
• Final trim can be made with the hair clipper. Make sure to check over the entire
head for any uneven areas. For styled hair or giving quick trims, you may prefer
using your hair clipper without the trimming guide.
BEST CUTTING PERFORMANCE
1.Ensure the clipper head is free from hair and other debris.
2.Use on clean,dry hair that has been combed until tangle-free.
3.Place a cape around the neck of the person whose hair is be trimmed or cut.
4.This person should be seated so that the top of their head is at your eye level.
5.Attach the appropriate comb guide attachment as required.If using more than one
grade,start with longer rst.
6.Switch the clipper on
7.Hold the clipper against the hair,with the teeth of the clipper pointing upwards,yet
at against the head.

12 INGLÉS
8.Move the clipper upwards and outwards through the hair,a little at a time clip-
ping against the direction of the hair growth.
9.The clipper will work most efciently when cutting through the hair at its own
speed.Never force the clipper.
10.Never swtich the clipper off whilst in the hair.
SUGGESTED HAIR CUTS
FOR LONGER HAIR ON TOP OF THE HEAD
Use the barber comb to lift the hair on top of the head and use the clipper to cut
across the top of the comb.Alternatively,hold the hair between the ngers and cut
to desired length, always working from the front.to the back of the head.Gradua-
lly cut the hair shorter by reducing the space between the comb or ngers and
the head.Comb often to check for uneven strands and to get rid of trimmerd hair.
OUTLINING THE HAIR
Outlining requires no attachments.
Comb hair into the desired style.Position the clipper between the sideburns and
ear,making sure the corner edge of the blade is against the hairline.With the
outline of the hair as your guide,slowly move the Clipper over,around and behind
the ear.For the back of the neck and the sideburns,hold the clipper upside
down,holding it against the skin on the length desired,move the clipper down-
wards.
CREW CUT
Always cut from the back of the neck to the crown,using the longest comb
setting.Hold the comb attachment at against the head and slowly move the
Clipper up through the hair.Use the same technique for the sides,cutting from the
bottom to the upper side of the head.For the front crown,cut the hair against the
direction in which it grows.Then even it up with the sides.
FLAT TOP
Use the barber comb,not the attachment comb and simply cut the hair on top of
the head by running the clipper over the barber comb.To taper the hair down to
the neckline,use the 3mm attachment comb.Comb the hair to remove any loose
cut hair and check for uneven spots.Then outline the sideburns and the neck
area(see ‘Outlining’)

13
USEFUL INFORMATION
At regular intervals the blade set should be removed and cleaned.
With a screwdriver remove the 2 screws retaining the xed blade. Re-t the
blade after cleaning as described below:
Brush our any hair stuck between the blades with a soft cleaning brush. Do not
use water or any other chemical to remove the lubricating grease from the bla-
des. It is not necessary to remove the top moving blade for cleaning.
Before fully tightening the 2 screws, adjust the taper lever to the lowest position
and align the blades so that the cutting edges are parallel to one another.
Tighten the 2 screws.
Note: If the blades are not correctly aligned, the cutting efciency will be impai-
red. When not in use, unplug the clipper and store it out of reach of children in a
safe dry place. Never wrap the cord around the clipper as it will cause the cord to
wear prematurely and break.
DO not dispose of electrical appliances as unsorted municipal waste, use
separate collection facilities. Contact you local government for information
regarding the collection systems available. If electrical appliances are
disposed of in landlls or dumps, hazardous substances can leak into the
groundwater and get into the food chain, damaging your health and well-being,
When replacing old appliances with new ones,the retailer is legally obligated to take
back your old appliance for disposals at least free of charge. We reserve the right to
make amendments.
INGLÉS

CASTELLANO
14
MANUAL DE INSTRUCCIONES
Muchas gracias por conar en nuestros productos. Para una correcta puesta en
marcha y funcionamiento del producto lea atentamente el manual antes de usar el
aparato.
Es muy importante que conserve este manual de instrucciones para encontrar res-
puesta a futuras consultas.
CORTAPELOS PROFESIONAL RED
TMHC105

CASTELLANO 15
INDICE
Accesorios .................................................................................................18
Medidas de seguridad...............................................................................19
Antes de usar.............................................................................................20
Antes de cortar ..........................................................................................22
Corte de pelo..............................................................................................23
CORTAPELOS PROFESIONAL RED
TMHC105

CASTELLANO
16
PARTES
1. Aceite de cuchilla
2. Ajuste cuchilla
3. Interruptor on/off
4. Guía de recorte de 13 mm
5. Guía de ajuste de 10 mm
6. Guía de recorte de 6 mm
7. Guía de recorte de 3 mm
8. Cepillo de limpieza
9. Peine barbero
8
9
4
5
7
2
6
1

CASTELLANO 17
INSTRUCCIONES DE SEGURIDAD IMPORTANTES
Con su cortapelos siempre deben observarse las precauciones básicas, inclui-
das las siguientes:
• Antes de enchufar el cortapelos, asegúrese de que la tensión de salida y la
frecuencia del circuito correspondan al voltaje indicado y que la toma de corriente
doméstica esté correctamente conectada a tierra.
• Asegúrese de que el cortapelos, el cable y el enchufe no entran en contacto con
agua o cualquier otro líquido, y de que sus manos estén completamente secas
antes de manipular el cable de alimentación y el cortapelos.
• No coloque ni guarde el cortapelos donde pueda caerse o ser golpeado contra
un fregadero o bañera. No lo coloque ni lo deje caer en el agua ni en ningún otro
líquido.
• No use el cortapelos mientras se baña o en la ducha.
• No anude, aplaste o tire del cable de alimentación, protéjalo de bordes losos y
calor. No lo enrolle alrededor del electrodoméstico, y nunca lo levante ni lo lleve o
desenchufe tirando del cable de alimentación.
• No use si el cable de alimentación está dañado. Debe ser reemplazado por el
fabricante, su agente de servicio o personas cualicadas para evitar un peligro
descarga eléctrica.
• Desenchufe de la toma de corriente inmediatamente después del uso. No limpie
el cortapelos mientras todavía esté conectada a la red eléctrica. No coloque el
recortapelos en ninguna supercie mientras esté encendido. No use el cortapelos
si se ha caído al suelo o al agua.
• Use el cortapelos solo con accesorios vendidos junto con el producto.
• Nunca deje caer ni inserte ningún objeto en ninguna abertura de este cortapelos.
• Verique el cortapelos y todas sus partes con cuidado y regularmente. No use
este cortapelos con partes dañadas, rotas o mojadas.
• El cortapelos está diseñado solo para uso doméstico y solo lo debe usar como se
describe en este manual.
• El cortapelos no está diseñado para ser utilizado por personas (incluidos niños)
con capacidades físicas, sensoriales o mentales reducidas, o por falta de experien-
cia y conocimiento, a menos que se les haya supervisado o instruido sobre el uso
del producto por una persona responsable de su seguridad .
• Supervise a los niños para asegurarse de que no jueguen con el cortapelos. Es
necesaria una supervisión estricta.
• No lo use en personas que están dormidas.
CASTELLANO
18
Precaución
No use el cortapelos continuamente por más de 10 minutos.
El cortapelos está equipado con una cuchilla de acero al carbono T10 de alta calidad
que debe estár permanentemente lubricada. Para garantizar el rendimiento a largo
plazo de su cortapelos, limpie y lubrique las cuchillas con regularidad. Mantenga
siempre la protección de la cuchilla de corte del cortapelos cuando no esté en uso.
Después de cada uso:
• Asegúrese de que el cortapelos esté apagado y desconectado de la corriente de
la red.
• Limpie los resto de pelos de la cuchilla con el cepillo de limpieza provisto. No use
agua para limpiar.
• Para limpiar el cortapelos, limpie con un paño húmedo y seque inmediatamente.
• No use limpiadores líquidos en las cuchillas ni productos químicos abrasivos o
corrosivos en el cortapelos.
• Para evitar daños a la cuchilla, no aplique presión u objetos duros a las cuchillas
del cortapelos.
ANTES DE USAR TU CORTAPELOS
Su cortapelos fue cuidadosamente examinado para asegurarse de que las cuchillas
estaban engrasadas y alineadas antes de salir de nuestra fábrica.
La posición de la cuchilla se muestra con la imagen a continuación. Si las cuchillas
están fuera de alineación, se pueden ajustar fácilmente.
Para alinear las cuchillas, use un destornillador para aojar los 2 tornillos que retie-
nen la cuchilla ja. Asegúrese de ajustar la palanca cónica en la posición más baja y
alinee las cuchillas para que los bordes cortantes queden paralelos entre sí. Luego
apretar los 2 tornillos.
Para mantener su cortapelos en buenas condiciones de funcionamiento, asegúrese
de que las cuchillas estén engrasadas como se muestra en la siguiente imagen.
Simplemente distribuya 1-2 gotas del aceite lubricante suministrado en las cuatro
posiciones que se muestran.
CASTELLANO 19
Para ajustar el cortapelos para un buen rendimiento, enciendalo y use un destornilla-
dor, o una moneda na, para girar el tornillo de alimentación en el lado opuesto del
interruptor de ENCENDIDO / APAGADO en el sentido de las agujas del reloj hasta
que escuche un fuerte ruido, reérase a foto debajo. Luego gire lentamente el tornillo
de alimentación en sentido antihorario hasta que el ruido se detenga. Encienda y
apague el cortapelos varias veces para asegurarse de que el traqueteo se haya
detenido. Si continúa cuando está encendido, gire el tornillo un poco más en sentido
antihorario. Esta es la conguración óptima para las cuchillas.
GUÍAS DE CORTE
El cortapelos viene con nueve guías que están marcadas con un número.
- Cortapelos Guide No. 1 deja una longitud de cabello de 3 mm.
- Cortapelos Guide No. 2 deja una longitud de cabello de 6 mm.
- Cortapelos Guide No. 3 deja una longitud de cabello de 10 mm.
- Cortapelos Guide No. 4 deja una longitud de cabello de 13 mm.
Cómo usar el cortapelos
Para colocar una guía de cortapelos, sujétela con sus dientes hacia arriba y deslícela
sobre y a lo largo de las cuchillas, luego presione hacia abajo suavemente hasta que
encaje en su lugar, consulte la foto de abajo. Tire del peine hacia arriba y lejos de la
cuchilla para quitar la guía.
El cortapelos tiene una palanca cónica ubicada en el lado izquierdo del cortapelos,
cerca de la cuchilla. La palanca agrega versatilidad a su cortapelos al permitirle cam-
CASTELLANO
20
biar gradualmente la cercanía de su corte sin necesidad de una guía de cortapelos y
también mejorar la efectividad de los accesorios de la guía de corte.
Cuando el nivel está en la posición más alta (Imagen 1), las cuchillas le darán el
corte más cercano y le dejarán el cabello muy corto. Empujar la palanca hacia abajo
aumenta gradualmente la longitud de corte. En la posición más baja (Imagen 2), la
palanca cortará el cabello aproximadamente de la misma longitud que la guía de clip
NO1. 3mm.
ANTES DE CORTAR EL PELO
• Inspeccione el cortapelos y asegúrese de que no haya aceite excesivo en las
cuchillas de corte antes de su uso. Cualquier exceso de aceite se debe limpiar para
evitar que se pegue a su piel.
• Coloque una capa o paño de limpieza alrededor del cuello de la persona cuyo
cabello está siendo recortado o cortado.
• Coloque la cabeza de la persona a la que se va a cortar el pelo aproximadamente
a su nivel de ojo.
• Asegúrese de que el cabello esté seco. El corte es mas fácil con el cabello seco,
ya que se ve mejor la cantidad de cabello que se corta.
• Peine el cabello como lo lleve normalmente.
• Peine todos los nudos y enredos.
Seleccione una guía de corte de longitud apropiada para que coincida con la longitud
de cabello deseada para que quede después del corte. Hay una guía de recorte de
3 mm, 6 mm, 10 mm, 13 mm para elegir.
CORTE DE PELO
• Empiece cortando lentamente sin forzarlo a gran velocidad, ya que esto puede
crear una sensación de tirón.
• Inicialmente, empieze por supercies pequeñas y use la guía de corte más larga.
Siempre puede usar una guía de corte más corta más adelante si desea un corte
más cerrado.
• Comience por el centro y la base de la parte posterior, para acoplar la guía de clip
N ° 1 (3 mm) o N ° 2 (6 mm) al cortapelos. Sostenga la tijera cómodamente en su
mano, luego levante ligeramente y gradualmente la cortapelos, hacia arriba y hacia
afuera, a través del cabello, recortando poco a poco.
21
CASTELLANO
• Cuando corte, levante gradualmente la cabeza del cortapelos hacia usted. Conti-
núe cortando el área posterior desde la parte inferior del cuello hacia arriba hasta
la parte superior de las orejas.
• Cambie a la otra guía de cortapelos más larga (como No. 3, No. 4) para cortar la
parte posterior de la cabeza
• Para cortar la parte superior de la cabeza, puede cambiar a las otras guías más
largas (n. ° 3, n. ° 4), sujete el cabello entre los dedos y corte una pequeña canti-
dad a la vez. Corte de adelante hacia atrás.
• El ajuste nal se puede hacer con el cortapelos. Asegúrese de revisar toda la cabe-
za en busca de áreas desiguales. Para cabellos con estilo o con ribetes rápidos, es
posible que preera usar su cortapelos sin la guía de corte.
MEJOR RENDIMIENTO DE CORTE
1.Asegúrese de que el cabezal esté libre de pelos y otros residuos.
2. Use cabello limpio y seco que haya sido peinado hasta que esté libre de enredos.
3. Coloque una capa alrededor del cuello de la persona cuyo cabello está recortado
o cortado.
4. Esta persona debe estar sentada de modo que la parte superior de su cabeza esté
al nivel de su ojo.
5. Fije el accesorio apropiado de la guía del peine según sea necesario. Si usa más
de un grado, empiece por uno más largo primero.
6. Encienda el cortapelos.
7. Sujete el cortapelos contra el cabello, con los dientes del cortapelos apuntando
hacia arriba, pero planos contra la cabeza.
Table of contents
Languages:


