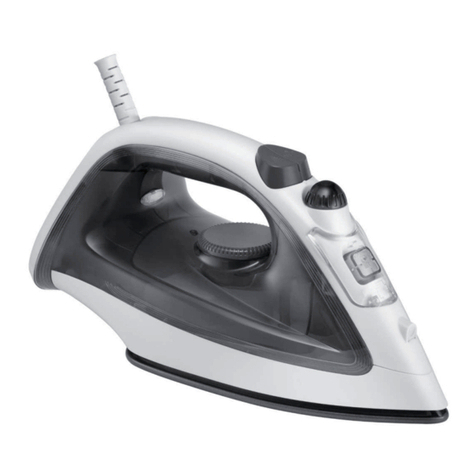
TM Electron TMPPL012 User manual

TMPPL012
S
TEAM IRON
PLANCHA A VAPOR
For
f
aster and easier ironin
g
2
400W
T
anqu
e
400m
l
A
ut
o
li
mp
i
ez
a

2ESPAÑOL

3
MANUAL DE INSTRUCCIONES
Muchas gracias por conar en nuestros productos. Para una correcta puesta
en marcha y funcionamiento del producto lea atentamente el manual antes
de usar el aparato.
Es muy importante que conserve este manual de instrucciones para encon-
trar respuesta a futuras consultas.
PLANCHA A VAPOR
TMPPL012
ESPAÑOL

ESPAÑOL
4
CONSEJOS DE SEGURIDAD
Antes de usar el aparato eléctrico, siempre deben seguirse las siguientes
precauciones básicas:
1. Lea todas las instrucciones y guárdelas para futuras consultas.
2. Antes de utilizar, compruebe que el voltaje de la toma de corriente co-
rresponde al indicado.
3. Las quemaduras pueden ocurrir al tocar partes metálicas calientes, agua
caliente o vapor. Tenga cuidado cuando gire la plancha boca abajo, ya
que puede haber agua caliente en el tanque.
4. Si alguna pieza está dañada, debe ser reemplazada por el fabricante o
un servicio técnico autorizado.
5. No utilize la plancha si el cable y/o enchufe se encuentran dañados, o
si aparato funcional mal. Devuelva el aparato al centro de servicio au-
torizado más cercano para su examen, reparación o ajuste eléctrico o
mecánico.
6. Evite que el cordón esté en contacto con supercies calientes.
7. El tanque de agua de la plancha se debe llenar con el aparato desen-
chufado de la red.
8. Desconecte de la toma de corriente cuando no esté en uso, y antes de
llenar de agua o limpiar.
9. No utilice la plancha para otro uso que no sea el previsto.
10. Para protegerlo de un riesgo de descarga eléctrica, no sumerja la plan-
cha en agua u otros líquidos.
11. Es necesaria una supervisión estricta para cualquier aparato que esté
utilizando cerca de niños.
12. No deje el aparato desatendido cuando está conectado en la fuente de
alimentación o en una tabla que plancha.
13. No lo use al aire libre.
14. Precaución, supercie caliente.
15. Este aparato puede ser utilizado por niños mayores de 8 años y perso-
nas con capacidades físicas, sensoriales o mentales reducidas o por
falta de experiencia y conocimiento si se les ha dado supervisión o ins-
trucciones sobre el uso del aparato de forma segura y entienden los
peligros involucrados.

ESPAÑOL 5
16. El lavado y el mantenimiento del aparato no deben ser realizados por
niños sin supervisión.
17. La plancha no debe dejarse desatendida mientras está conectada a la
red de alimentación.
18. El enchufe debe retirarse de la toma de corriente antes de llenar el de-
pósito de agua.
19. La plancha debe utilizarse y apoyarse sobre una supercie estable.
20. Al colocar la plancha en su soporte, asegúrese de que la supercie sobre
la que se coloca el soporte es estable.
21. La plancha no debe utilizarse si se ha caído, si hay signos visibles de
daños o si hay fugas.
22. Mantenga la plancha y su cable fuera del alcance de los niños menores
de 8 años de edad cuando se esté calentando o enfriando.
IMPORTANTE
• Los niños deben ser supervisados para asegurarse de que no jueguen con el
aparato y lo utilicen como un juguete.
• Deje que el aparato se enfríe completamente antes de limpiarlo y guardarlo.
• El cable de alimentación nunca debe estar doblado o en contacto con partes
calientes del aparato o apoyado sobre bordes alados.
• Almacene el aparato en un lugar seguro.
• Nunca coloque el aparato cerca de objetos fácilmente inamables (por ejem-
plo, cortinas, etc.)
• Si parte del aparato se incendia, no intente nunca apagar las llamas con agua.
Desconecte el aparato y apague las llamas con un paño húmedo.

ESPAÑOL
6
Partes:
1. Suela
2. Base plancha
3. Boquilla de pulverización
4. Cuerpo plancha.
5. Tanque de agua
6. Tapa de entrada de
relleno de agua.
7. Cubierta del mango
8. Tapa del botón de vapor.
9. Botón vapor
10. Botón vapor y rociar.
11. Adorno asa
12. Protege cable
13. Cable de alimentación.
14. Control de temperatura
15. Base plancha
USO DE SU PLANCHA DE VAPOR
Antes del primer uso
1. Retire cualquier adhesivo, lámina protectora o cubierta de la suela.
2. Calentar la plancha a temperatura máxima y planchar sobre un paño hú-
medo durante varios minutos con el n de eliminar cualquier residuo de
la suela.
Nota: Es normal que salga un olor extraño de la unidad durante el primer uso.
Selección de la temperatura
1. Consulte las instrucciones de planchado de la prenda a planchar.

ESPAÑOL 7
2. Si la prenda no tiene instrucciones de planchado pero conoce el tipo
de tela en cuestión, utilice la tabla a continuación:
Simbolos Tejido Temp. Vapor
variable Tiro de vapor Pulverización
agua
Fibra
sintética
Lana
Algodón
Lino
0
max
Note: este simbolo significa “Este artículo no se puede planchar”
“ “se puede utlizar”
“ “ no se puede utilizar”
Note:
3. Los tejidos que tengan algún tipo de acabado (pulido, arrugas, con-
trastes….) se pueden planchar a las temperaturas más bajas.
4. Si el tejido contiene varios tipos de bras, por ejemplo si contiene
60% poliéster y 40% algodón, debe elegir siempre la temperatura
correspondiente al poliéster y sin vapor.
5. Primero clasique las prendas a planchar según la temperatura de
planchado más adecuada: lana con lana, algodón con algodón, etc.
ya que la plancha se calienta tan rápido como se enfría, empiece
por planchar las prendas que requieran la temperatura más baja
como las bras sintéticas. Avance hacia aquellos que requieren las
temperaturas más altas.
6. Gire el control de temperatura hasta que esté frente a la señal apro-
piada de acuerdo a lo siguiente:
· posición para nylon y sintética.
·· posición para lana, seda o mezclas
··· posición para algodón o lino (vapor).

8ESPAÑOL
Cómo llenar el tanque de agua.
1. Desenchufe la plancha.
2. Congure el botón de vapor para planchar en seco.
3. Sostenga la plancha en una posición inclinada, abra la tapa de la en-
trada de llenado de agua y luego llene el tanque de agua con una taza
medidora, es mejor que use agua puricada con menos partículas de
calcio y asegúrese de no exceder el nivel máximo en el tanque.
4. Presione hacia abajo la tapa de entrada de llenado de agua y escucha-
rá un clic si está en la posición correcta.
5. No guarde la plancha con agua en el depósito.
Planchado a vapor
1. Llene la plancha como se describe en la sección “cómo llenar el de-
pósito de agua”.
2. Conecte el enchufe a la fuente de alimentación.
3. El planchado con vapor solo es posible cuando se seleccionan las
temperaturas más altas que se muestran en el control de temperatura.
De lo contrario, el agua puede escaparse a través de la suela.

9
ESPAÑOL
4. Esperar hasta que se apague el piloto, lo que indica que se ha alcanzado
la temperatura seleccionada.
5. Gire el botón de vapor a la posición requerida.
6. Cuando termine de planchar y durante las pausas en el planchado, colo-
que la plancha en posición vertical.
7. Desconecte la plancha de la fuente de alimentación. Tire el agua restante
y deje que la plancha se enfríe.
Rociar
Presione el botón de rociado de agua un par de veces para humedecer la
ropa si es necesario, antes de rociar asegúrese de que haya suciente agua
en el tanque de agua.
Tiro de vapor
La inyección de vapor brinda vapor adicional para eliminar las arrugas per-
sistentes.
1. Coloque el selector de temperatura en la posición “máxima” y espere
hasta que se apague la luz piloto.
2. Espere unos segundos a que el vapor penetre en la bra antes de volver
a presionar.
Nota: Para obtener la mejor calidad de vapor, no use más de tres ráfagas
sucesivas cada vez. Se necesitan varias acciones de bombeo para iniciar
esta función.
Anti goteo
La plancha tiene una función antigoteo: esto evita que el agua se escape de
la suela cuando la plancha está demasiado fría.
Apagado automático
Si la plancha no se mueve, se apagará después de unos 30 segundos con la
suela hacia abajo, o unos 8 minutos si está en posición vertical.

10 ESPAÑOL
RECICLAJE:
NO deseche los artefactos eléctricos como desechos municipales
sin clasicar, use instalaciones de recolección separadas.
Póngase en contacto con su gobierno local para obtener
información sobre los sistemas de recolección disponibles. Si se arrojan los
artefactos eléctricos a vertederos o vertederos, las sustancias peligrosas
pueden ltrarse al agua subterránea e ingresar a la cadena alimenticia, lo
que dañará su salud y bienestar. Al reemplazar electrodomésticos viejos
por otros nuevos, el minorista está legalmente obligado a retirar su antiguo
electrodoméstico para disposiciones, al menos, sin cargo. Nos reservamos
el derecho de hacer enmiendas.
Antical
El agente antical incorporado en la plancha ayuda a prevenir la acumula-
ción de incrustaciones. No utilice una solución desincrustante o destruirá
el agente antical.
Función de autolimpieza
Tire de la cubierta del botón de vapor verticalmente hasta que aparezca
el extremo del resorte y luego escuche un clic. No debe quitarse por com-
pleto.
Mueva la plancha sobre el fregadero. Saldrá agua caliente y vapor de la
suela junto con las partículas de cal de la cámara de vapor.

11
INGLÉS
INSTRUCCION MANUAL
Thank you very much for trusting our products. For a correct start-up and
operation of the product, read the manual carefully before using the device.
It is very important that you keep this instruction manual to nd answers for
future inquiries.
STEAM IRON
TMPPL012

ESPAÑOL
12
IMPORTANT SAFEGARDS
Before using the electrical appliance, the following basic precautions should
always be followed including the following:
1. Read all instructions and save it for future reference.
2. Before using check that the voltage of wall outlet corresponds to the one
shown on the rating plate.
3. Burns may occur from touching hot metal parts, hot water, or steam. Use
caution when you turn a steam iron upside down as there may be hot
water in water tank.
4. If any part is damaged it must be replaced by the manufacturer or an
authorized service agent or a qualied technician in order to avoid a
hazard.
5. Don’t operate any appliance with a damaged cord or plug or after the
appliance malfunctions, or is dropped or damaged in any manner, Re-
turn the appliance to the nearest authorized service facility for examina-
tion, repair or electrical or mechanical adjustment.
6. Do not let cord hang over edge of table or hot surface.
7. The plug of power cord must be removed from outlet before water tank is
lled with water.
8. Unplug from outlet when not in use, before lling water or cleaning.
9. Do not operate the iron for other than its intended use.
10. To protect against a risk of electric shock, do not immerse the iron in
water or other liquids.
11. Close supervision is necessary for any appliance being used by or near
children.
12. Do not leave iron unattended when connected into power supply or on
an ironing board.
13. Do not use outdoors.
14. Caution, hot surface
15.This appliance can be used by children aged from 8 years and above
and persons with reduced physical,sensory or mental capabilities or
lack of experience and knowledge if they have been given supervision
or instruction concerning use of the appliance in a safe way and unders-
tand the hazards involved. Children shall not play with the appliance.
INGLÉS

ESPAÑOL 13
16. Cleaning and user maintenance shall not be made by children without
supervision.
• The iron must not be left unattended while it is connected to the supply
mains.
• The plug must be removed from the socket-outlet before the water reser-
voir is lled with water.
• The iron must be used and rested on a stable surface.
• When placing the iron on its stand, ensure that the surface on which the
stand is placed is stable.
• The iron is not to be used if it has been dropped, if there are visible signs
of damage or if it is leaking.
• Keep the iron and its cord out of reach of children less than 8 years of age
when it is energized or cooling down.
IMPORTANT
• Children should be supervised to ensure that they do not play with the
appliance and use it as a toy.
• Let the appliance cool down completely before cleaning and storing it.
• The power cord must never be bent or in contact with hot parts of the applian-
ce or resting on sharp edges.
• Store the device in a safe place.
• Never place the appliance near easily ammable objects (eg curtains, etc.)
• If part of the appliance catches re, never try to extinguish the ames with
water. Unplug the appliance and extinguish the ames with a damp cloth.
INGLÉS

INGLÉS
14
USING YOUR STEAM IRON
Before rst use
1. Remove any sticker, protective foil or storage cover from the soleplate.
2. Heat up the iron to maximum temperature and iron over a piece of damp
cloth for several minutes on the purpose of removing any residue on the
soleplate.
Note: It is normal that strange odor comes out from the unit for the rst use.
Selecting the temperature
1. Check the ironing instructions on the garment to be ironed.
2. If the garment does not have any ironing instructions but you know the
kind of fabric in question, use the chart below.
Parts:
1. Soleplate
2. Skirt
3. Spray nozzle
4. Watertank ornament
5. Watertank
6. Fill cover
7. Handle cover
8. Steam button cover.
9. Setam button.
10. Spray&brust button.
11. Handlecover ornament
12. Protect power.
13. Power cord.
14. Temperature knob
15. Back cover
Note: “ “ stands for being able to use
“ “ stands for being NOT able to use

INGLÉS 15
Symbol Fabric Temp. Variable
steam Steam shot Spraying
water
Synthetic
bres/Silk
Wool
Cotton
Linen
0
max
Note: the symbol means: “Ths article cannot be irened”
Note: “ “ stands for being able to use
“ “ stands for being NOT able to use
3. Fabrics that have some kind of nish(polishing . wrinkles , con-
trasts….)can be ironed at the lowest temperatures.
4. If the fabric contains several kinds of bres ,always select the tem-
perature applicable ,if an article contains 60% polyester and 40%
cotton ,you must always choose the temperature corresponding to
polyester and without steam.
5. First classify the articles to be ironed according to the most suitable
ironing temperature : wool with wool, cotton with cotton, etc. as the
iron heats up as fast as it cools , start by ironing the articles requi-
ring the lowest temperature such as those made of synthetic bres .
Progress towards those that require the highest temperatures.
6. Turn the temperature control until it is in front of the appropriate
signal according to the following:
· position for nylon and acetate
·· position for wool ,silk or mixures
··· position for cotton or linen (steam).

16 INGLÉS
How to ll the water tank.
1. Unplug the iron.
2. Set the steam button to dry ironing .
3. Hold the iron in a tilted position,open the water lling inlet cover then
ll proper water into water tank by measuring cup, you had better use
puried water with less calcium particles and make sure not to exceed
Max level on the tank.
4. Press down water ll inlet cover and you will hear a click if it is in the
correct position.
5. Do not store the iron with water in the tank.
Steam ironing
1. Fill the iron as described in the section “how to ll the water tank”.
2. Connect plug to power supply.

17
INGLÉS
3. Steam ironing is only possible when the highest temperatures shown
on the temperature control are selected .Otherwise ,water may escape
through the soleplate.
4. Wait until the pilot light goes out, which indicates that the selected tem-
perature has been reached.
5. Turn the steam button to the required position.
6. When the ironing is nished and during breaks in ironing , place the iron
in its upright position.
7. Disconnect the iron from the power supply . Pour of any remaining water
and leave the iron to cool off.
Spray
Press spraying water button a couple of times to moisten the laundry if
necessary, before spraying make sure that there is enough water in water
tank.
Shot of steam
Shot of steam give extra steam for removing persistent wrinkles.
1. Place the temperature selector at the “max”position and wait until the
pilot light goes out
2. Wait for a few seconds for the steam to penetrate the bre before pres-
sing again.
Note: For the best steam quality, do not use more than three successi-
ve bursts each time. Several pumping actions are needed to start this
function.
Anti drip
The iron has an anti-drip function: this prevents water escaping from the
soleplate when the iron is too cold.
Auto shut-off
If the iron is motionless,it will switch off after about 30 seconds with the
soleplate down,or about 8 minutes if it’s upright.

18 INGLÉS
DO not dispose of electrical appliances as unsorted municipal
waste, use separate collection facilities. Contact you local
government for information regarding the collection systems
available. If electrical appliances are disposed of in landlls or dumps,
hazardous substances can leak into the groundwater and get into the food
chain, damaging your health and well-being, When replacing old appliances
with new ones,the retailer is legally obligated to take back your old appliance
for disposals at least free of charge. We reserve the right to make amendments.
Anti-scale
The anti-scale agent incorporated in the iron helps prevent the build-up of
scale.Don’t use a descaling solution,or you’ll destroy the anti-scale agent.
Self-clean function
Pull the steam button cover vertically until the end of the spring appears
and then you hear a click .It must not be removed completely.
Move the iron over the sink.Hot water and steam will come out from the
soleplate along with the calc particles from the steam chamber.
Table of contents
Languages:
Other TM Electron Iron manuals

