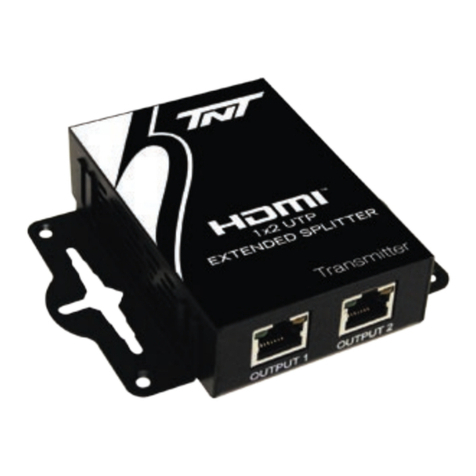
TNT R05-SPL-35A-102 User manual

1
Owner’s Manual
DVI Single Link
with Audio Splitter
DVI 1X2 AND DVI 1X4
201004020 93-2998.indb 1 4/29/2010 4:43:01 PM
How to install,set up and use your new product.

2
Package Contents
• DVI 1X2 or DVI 1X4 Splitter
• External Power Supply (Input: 100-240V, 50/60Hz, 0.5A Output: 5V, 2A)
• Owner’s Manual
Product Features
• Transmits a DVI-D Single Link and 3.5 mm Audio signal to up to four
monitors and speakers.
• For DVI 1x4 splitter, expands the number of connected device to up to 64
(DVI 1x4) splitters by cascading.
•
Includes a built-in signal booster to expand the distance between the splitter
and connected monitors past the recommended 16 ft. (5 m.) distance
limitation.
• Supports computer resolutions up to 1920 x 1200 @ 60Hz.
• HDCP compatible.
• No software or drivers required.
Optional Accessories
• DVI Dual Link Extender
• 3.5 mm Stereo Audio Cables
• DVI-D Dual Link with 3.5 mm Audio Cable
• DVI-D Single Link Cables
* DVI extender will only extend the DVI video signal, and not the 3.5 mm audio.
* The DVI 1X2 and DVI 1X4 splitters only support DVI-D single link signals. DVI dual link cables
and extenders can be used, but they will only transmit a DVI-D signal link signal when used with
1X2 and 1X4 splitters.
1. Introduction
201004020 93-2998.indb 2 4/29/2010 4:43:01 PM

3
2. Standard Installation
In a standard installation only one splitter is used to connect to two (DVI 1X2)
or up to four (DVI 1X4) sets of monitors and speakers.
The following rules apply to a standard installation:
•The distance between the source and the splitter must not exceed 16 ft.
•For source video resolutions anywhere from 1600 x 1200 @ 60Hz to
1920 x 1200 @ 60Hz, the distance between the splitter and the connected
monitor and speakers must not exceed 49 ft. (15 m.). The video distance
can be extended by using a DVI extender. The DVI extender can be located
up to 65 ft. (20 m.) from the splitter, and 16 ft. (5 m.) from the
connected monitor.
•For source video resolutions lower than 1600 x 1200 @ 60Hz.The distance
between the splitter and the connected monitor and speakers must not
exceed 65 ft.(20 m.).The video distance can be extended by using a DVI
extender. The DVI extender can be located up to 114 ft.(35 m.) from the
splitter, and 16 ft. (5 m.) from the connected monitor.
•The DVI 1X2 and DVI 1X4 are designed for monitor refresh rates of 60Hz.
DVI/Audio Source
201004020 93-2998.indb 3 4/29/2010 4:43:01 PM

4
2. Standard Installation continued
3. Cascade Installation
1. Make sure the DVI and Audio source is powered OFF.
2. Connect the DVI and Audio source to the input ports on the splitter
using a DVI with 3.5 mm Audio Cable or a DVI Single Link Cable and
3.5 mm Audio cable.
3. Connect a monitor and speakers to a set of available output ports
on the splitter using a DVI with 3.5 mm Audio Cable or, a DVI Single
Link Cable and 3.5 mm Audio cable.
4.
Repeat step 3 for each additional set of monitor and speakers that are being
connected to the splitter.
5.
Connect the included external power supply to the splitter and plug
it into a Surge Suppressor, Power Distribution Unit (PDU) or Uninterruptible
Power Supply (UPS). The red Power LED will illuminate to indicate the unit
is receiving power.
6.
Turn on the power to all connected monitors and speakers, and then
turn on the power to the DVI and Audio source. The green Port LEDs
will illuminate to indicate that the corresponding port is connected
to a monitor and speakers,and is receiving a signal from the source.
The number of connected monitors and speakers can be expanded by cascading
up to three levels of splitters together. By cascading a DVI 1X4 from each
port in a three level installation, you can connect up to 64 sets of monitors and
speakers. The following rules apply to a cascade installation:
•The distance between the source and the splitter must not exceed 16 ft.
•For source video resolutions anywhere from 1600 x 1200 @ 60Hz to
1920 x 1200 @ 60Hz, the distance between the first level splitter and any
last level splitter must not exceed 65 ft. The video distance can be extended
by using a DVI Extender in between each level of splitters.
Each Extender can be located up to 32 ft. (10 m.) from a splitter, and 16
ft. (5 m.) from the next level splitter or connected monitor.
201004020 93-2998.indb 4 4/29/2010 4:43:02 PM

5
3. Cascade Installation continued
•For source video resolutions lower than 1600 x 1200 @ 60Hz, the distance
between the first level splitter and any last level splitter must not exceed 98 ft. (30 m.).
The video distance can be extended by using a DVI Extender in between each
level of splitters. Each Extender can be located up to 98 ft. (30 m.)
from a splitter, and 16 ft. (5 m.) from the next level splitter or connected monitor.
•The DVI 1X2 and DVI 1X4 are designed for monitor refresh rates of 60Hz.
1. Make sure the DVI and Audio source are powered OFF.
2.
using a DVI with 3.5 mm Audio Cable or a DVI Single Link Cable and 3.5 mm Audio
cable .
3. Connect a set of available output ports on the first level splitter to the input
ports on a second level splitter using a DVI with 3.5 mm Audio Cable or a
DVI Single Link Cable and 3.5 mm Audio cable.
DVI/Audio Source
201004020 93-2998.indb 5 4/29/2010 4:43:08 PM
Connect the DVI and Audio source to the input ports on the first level splitter.

6
4. Repeat step 3 for any additional splitters you wish to connect. Once
you have connected a splitter to each set of ports on the first level splitter,
you can connect a third level of splitters to each set of ports on the second
level. No more than 3 levels of splitters can be connected in a cascade
installation.
5. Connect a monitor and speakers to a set of available output ports using a
DVI with 3.5 mm Audio Cable or, a DVI Single Link Cable and 3.5 mm Audio
cable.
6. Repeat step 5 for each additional set of monitor and speakers you are
connecting.
7.
into a Surge Suppressor, Power Distribution Unit (PDU) or Uninterruptible
Power Supply (UPS). The red Power LED will illuminate to indicate the unit
is receiving power.
Connect the included external power supply to the first level splitter and plug it
8. Repeat step 7 for each second-level splitter, and then for each
third-level splitter.
9. Turn on the power to all connected monitors and speakers, and then turn on
the power to the DVI and Audio source. The green Port LEDs will illuminate
to indicate that the corresponding port is connected to a monitor and speakers.
and is receiving a signal from the source.
3. Cascade Installation continued
201004020 93-2998.indb 6 4/29/2010 4:43:08 PM

7
4. Troubleshooting
If you are experiencing an issue with your splitter, trying the troubleshooting
tips below may help to resolve the problem:
•If the video image is not being received or displayed correctly, press the
RESET button. This will reset the unit and resend the signal to the
connected monitors.
•
power supply is receiving power by plugging something else into the same
Confirm that the Power LED is illuminated. If not, check if the external
power source. If it is receiving power, make sure the power supply is
securely connected to the splitter. If the LED is still not illuminated, use a
volt meter to ensure the power source is providing enough power for the
external power supply.
•Make sure that the cables you are using are functioning properly
by connecting them directly between the source and display/speakers.
Test all cables in the installation to make sure they are functioning properly.
•If the cables you are using are functioning properly, test each port on the
splitter to make sure it is working. Using the cables you just tested, connect
the source to the splitter, and then a set of output ports to a monitor and
speakers. Test each port to make sure it is functioning properly.
201004020 93-2998.indb 7 4/29/2010 4:43:08 PM

WARRANTY
A. To reduce the risk of electric shock, do not expose this product to rain
or moisture.
B. Operate this product using only the included external power supply. Use
of other power supplies could impair performance, damage the product,
or cause fire.
C. Use only recommended accessories to avoid fire, shock or other hazards.
D. Unplug this product before cleaning. Use a damp cloth for cleaning. Do
not use cleaning fluids or aerosols, which could enter the unit and cause
damage, fire or electrical shock.
E. Do not attempt to service this unit. Instead, disconnect it and contact your
Authorized Reseller or technician.
1 year for parts and 90 days for labor.
8
201004020 93-2998.indb 8 4/29/2010 4:43:09 PM
SAFETY INFORMATION
The equipment it manufactures to be free from defects in material and
workmanship for the following limited warranty period:
At its option, repair or replace the equipment, provided that the equipment
has not been subjected to mechanical, electrical, or other abuse or
modification, if equipment fails and company being notified within the 6
months of the first purchase.
This warranty is in lieu of all other warranties expressed or implied, including
without limitation, any implied warranty or merchantability or fitness for any
particular purpose, all of which are expressly disclaimed.
The information in this manual has been carefully checked and is believed to
be accurate, however, it assumes no responsibility for any inaccuracies that
may be contained in this manual. In no event will be liable for direct, indirect,
special, incidental, or consequential damages resulting from any defect or
omission in this manual, even if advised of the possibility of such damages.
The technical information contained herein regarding DVI Single Link with
Audio splitter features and specifications is subject to change without notice.
This manual suits for next models
1
Table of contents
Other TNT Cables And Connectors manuals
Popular Cables And Connectors manuals by other brands
Crouse-Hinds
Crouse-Hinds cam-lok E1016 Series Assembly instructions

Philips
Philips SWA3528 Specifications
3M
3M ECAM-27MM-D instructions
Smiths
Smiths M12 Assembly instructions
Extron electronics
Extron electronics Two Conductor MHR - Mini High Resolution S-Video Cable MHR-2... Specification sheet
hager
hager XEVA260 installation manual
