Tobii X1 Light Eye Tracker User manual
www.tobii.com
User Manual
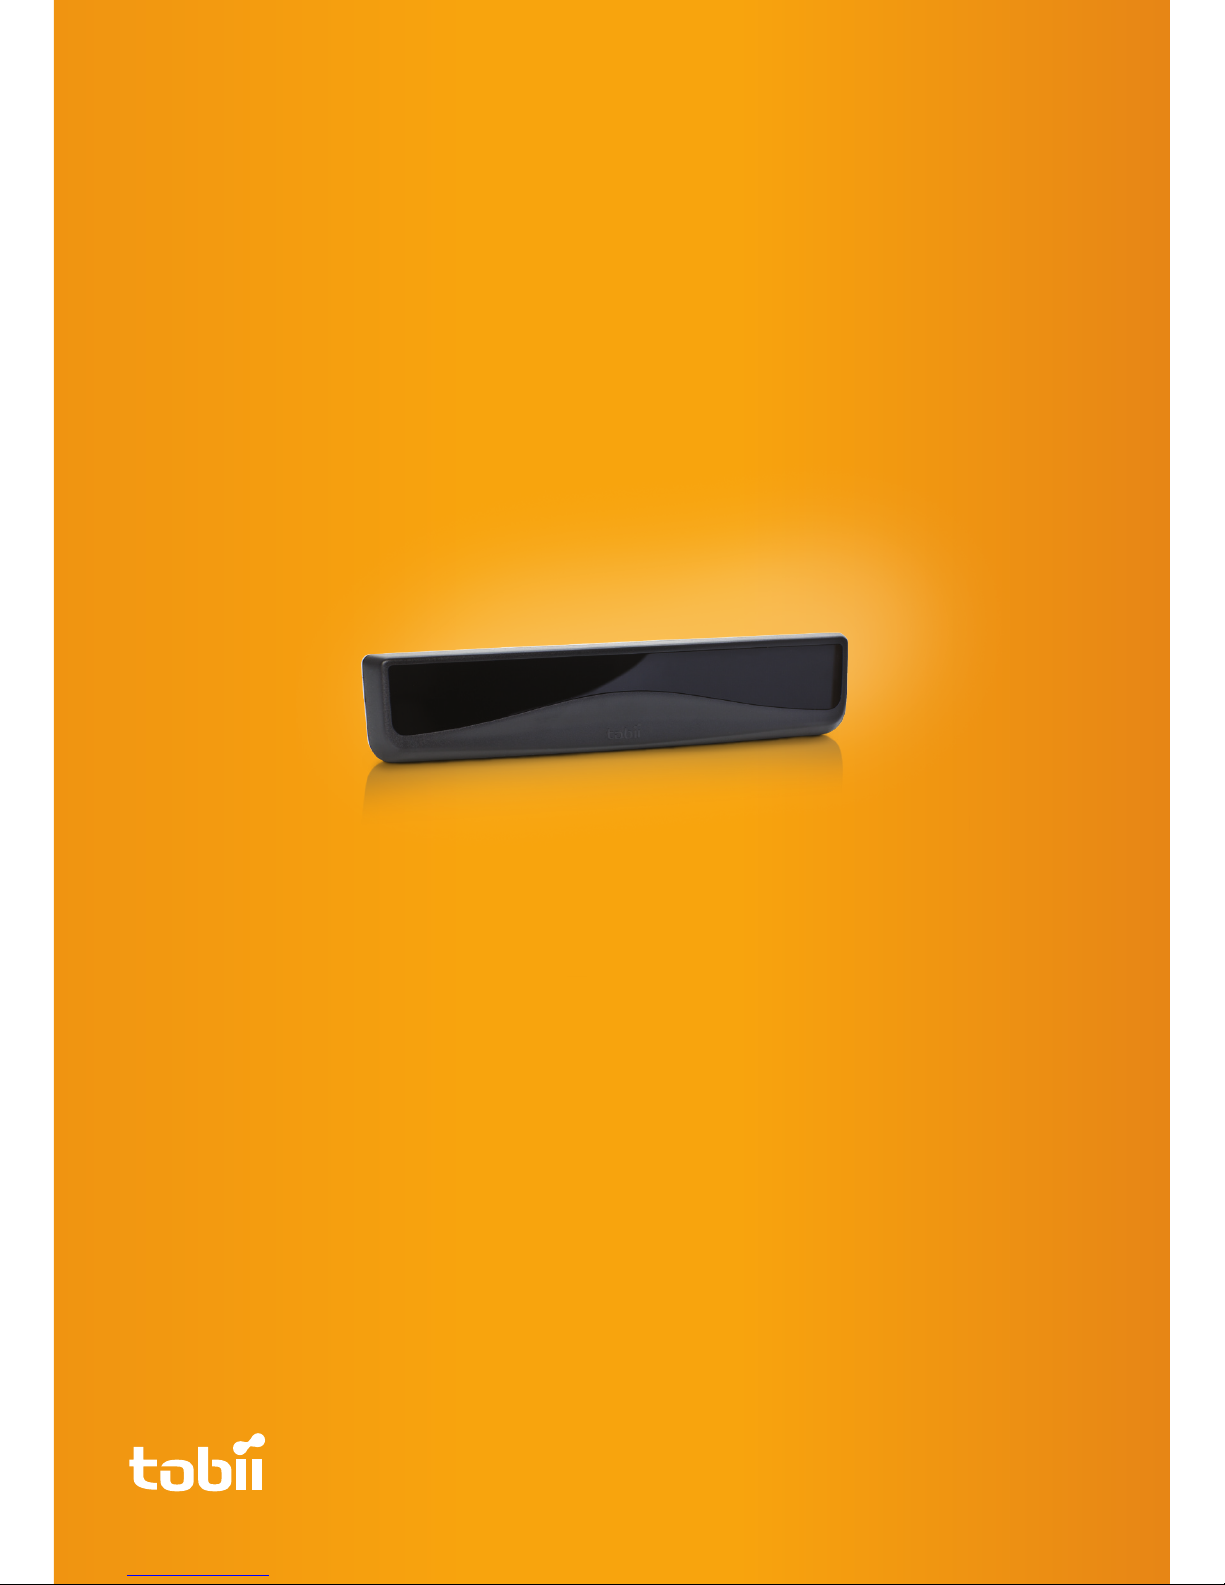
Tobii X1 Light Eye Tracker

Tobii X1 Light User Manual
Read this manual carefully before connecting and
using the eye
tracker
Do not open the eye tracker
Non-compliance will result in loss of Warranty! There are no user serviceable components
inside and the risk of electric shock is high due to the presence of Dangerous High
Voltages. Contact Tobii support if your eye tracker is not working properly.
Epilepsy warning
Some people are susceptible to epileptic seizures or loss of consciousness when
exposed to certain flashing lights or light patterns in everyday life. Such people may have
a seizure while watching certain images or patterns on a monitor. This may happen even if
the person has no medical history of epilepsy or has never had any epileptic seizures.
Magnetic field warning
The Tobii X1 Light Eye Tracker Mounting Bracket contains magnets. Magnetic fields
may interfere with the function of cardiac pacemakers and implantable cardioverter-
defibrillators. As a general rule, maintain a minimum distance of 6 inches (15
centimeters) between any item with magnets and your heart device.
Declaration of Conformity
NOTE: This equipment has been tested and found to comply with the limits for a Class B digital
device, pursuant to part 15 of the FCC Rules. These limits are designed to provide reasonable
protection against harmful interference in a residential installation.
This equipment generates, uses and can radiate radio frequency energy and, if not installed
and used in accordance with the instructions, may cause harmful interference to radio
communications. However, there is no guarantee that interference will not occur in a particular
installation. If this equipment does cause harmful interference to radio or television reception,
which can be determined by turning the equipment off and on, the user is encouraged to try to
correct the interference by one or more of the following measures:
• Reorient or relocate the receiving antenna.
• Increase the separation between the equipment and receiver.
• Connect the equipment into an outlet on a circuit different from that to which the receiver
is connected.
• Consult the dealer or an experienced radio/ TV technician for help
All Tobii Eye Trackers are CE-marked, indicating compliance with the essential
health and safety requirements set out in European Directives.

Legal information
Tobii X1 Light Eye Tracker User Manual
This document contains information proprietary to Tobii Technology AB . The contents
are confidential and any disclosure to persons other than officers, employees, agents
or subcontractors of the owner or licensee of this document, without the prior written
consent of Tobii Technology AB, is strictly prohibited. No part of this publication may be
reproduced, stored in a retrieval system, or transmitted in any form or by any means,
electronic or mechanical, including photocopying and recording, without the prior consent
of the copyright holder.
Manual release 1.2, February 2012
Tobii Technology AB reserves the right to change the content of this manual without
any prior notice. Changes due to typographical errors, innacuracies or modifications in
programs and/or equipment may be implemented at any time. Please check the Tobii web
site www.tobii.com for updated versions of this document.
All rights reserved.
© Tobii Technology AB

Contents
1 Parts and Brackets 7
1.1 The Tobii X1 Light Eye Tracker 7
1.2 Cables 7
1.3 Battery pack 8
1.4 Mounting brackets 8
1.4.1 VESA Mounting Bracket 8
1.4.2 Adhesive Mounting Bracket 8
1.4.3 Laptop Mounting Bracket 9
1.4.4 Desk Stand 9
2 Quick Start 10
2.1 VESA mounting bracket setup 10
2.1.1 Component checklist 11
2.2 Adhesive mounting bracket setup 11
2.2.1 Component checklist 12
2.3 Laptop mounting bracket setup 12
2.3.1 Component checklist 13
2.4 Desk stand or tripod setup 13
2.4.1 Component checklist 14
3 Product Care 15
3.1 Temperature & Humidity 15
3.1.1 General use 15
3.1.2 Transportation and storage 15
3.2 Cleaning 15
3.3 Transporting the Tobii X1 Light Eye Tracker 15
3.4 Disposing of the Tobii X1 Light Eye Tracker 16
4 Assembling the Tobii X1 Light Eye Tracker 17
4.1 The Tobii X1 Light Installation Guide 18
4.2 The Power supply and the battery pack 19
4.2.1 Assembling the power adaptor 19
4.2.2 Assembling the battery pack 20
4.3 Positioning 22

4.3.1 Track Box 23
4.4 Mounting the Tobii X1 Light using a VESA mounting bracket 24
4.4.1 The mounting process 25
4.5 Mounting the Tobii X1 Light using an adhesive mounting bracket 27
4.5.1 The mounting process 27
4.6 Mounting the Tobii X1 Light using a desk stand 29
4.6.1 The mounting process 29
4.7 Mounting the Tobii X1 Light using the laptop mounting bracket 30
4.7.1 The mounting process 30
5 The Configuration Guide 32
6 The X Configuration Tool 36
6.1 Accessing the X Configuration Tool 36
6.2 Setting parameters in the X Configuration Tool 37
6.3 Measuring the Active Display Area (D) 38
6.4 Reference point on the Tobii X1 Light 38
6.5 Measuring the distance to the display or calibration grid (B) 39
6.6 Measuring the vertical angle of the eye tracker (A) 39
6.7 Measuring the vertical angle of the display or calibration grid (C) 39
6.8 Measuring the height distance between the display and eye tracker
(E) 39
6.9 Using a setup with side offset 40
6.10 Using a setup with angle offset 40
6.11 Saving the configuration 40
7 Appendices 41
7.1 Appendix A: Eye tracking specifications 41
7.2 Appendix B: Technical specifications 43
7.3 Appendix C: Glossary 44
7.4 Appendix D: Software installed with the installation CD 46
7.5 Appendix E: Recommended display sizes 47

Tobii X1 Light User Manual
7
1 Parts and Brackets
1.1 The Tobii X1 Light Eye Tracker
1.2 Cables
Tobii X1 Light Front
Micro USB
Input
Power Adapter Input
IR Camera Cover
Tobii X1 Light Back
Magnetic
Mounting Points
Screw Holes for
Mounting Fixation
USB to Micro USB Cable
Power adaptor
Chapter 1 Parts and Brackets

Tobii X1 Light User Manual
8
1.3 Battery pack
1.4 Mounting brackets
1.4.1 VESA Mounting Bracket
The VESA Mounting Bracket is used to
attach the Tobii X1 Light Eye Tracker to a
monitor with a VESA mount. This solution
can be removed and adjusted for different
monitor sizes.
1.4.2 Adhesive Mounting Bracket
The Adhesive Mounting Bracket is used
to attach the Tobii X1 Light Eye Tracker to
a monitor. This solution is designed to be
permantently attached to one monitor.
Battery charger
Battery
N
E
F
TEST
Lithium
OR
Power Supply
MODEL: MDA08131482000US
INPUT: 100-240V ~, 0.8A (MAX.)
50/60Hz
OUTPUT: 17.20V 1.7A
L
CU
®US
LISTED
E255045
I.T.EPOWER SUPPLY
RoHS
CAUTION
RISK OF ELECTRIC SHOCK
DO NOT OPEN !
MADE IN CHINA
Chapter 1 Parts and Brackets

Tobii X1 Light User Manual
9
1.4.3 Laptop Mounting Bracket
The Laptop Mounting Bracket is used to
attach the Tobii X1 Light Eye Tracker to a
laptop.
1.4.4 Desk Stand
The Desk Stand is used when using the
Tobii X1 Eye Tracker without a monitor or for
setups where the other mounting brackets
cannot be used. The Desk Stand can also
be attached to a tripod.
Chapter 1 Parts and Brackets

Tobii X1 Light User Manual
10
2 Quick Start
Please note that Tobii X1 Light Eye Tracker hardware packages do contain screws that
can be used for modifying the setup in one way or another. This means that there will be
left over screws after the setup of the eye tracker is completed.
Do NOT connect the eye tracker before running the installation program!
2.1 VESA mounting bracket setup
1. Install the eye tracker software
Insert the included CD and run the installation program. Read more on page 18.
2. Set the monitor on which the eye tracker is mounted as the Primary Display
in the Windows settings
In order for the calibration guide to work, the eye tracker needs to be attached to
the primary display. Read more on page 19.
3. Shut down the computer
4. Mount the mounting bracket on the monitor
Ensure the mounting bracket is securely fastened to the monitor before proceeding.
Read more on page 24.
5. Attach the eye tracker to the mounting bracket
The eye tracker should be mounted so the Tobii logo is the right way up. Read more
on page 26
6. Connect the eye tracker to your computer
Connect the Power adaptor or Battery pack and USB cable. Do not forget to
remove the plastic protection film from the eye tracker before first use. Read more
on page 26.
7. Turn on the computer
8. Run the Tobii X1 Light Eye Tracker Configuration Guide
Start the configuration guide and follow the instructions on screen. Read more on
page 32.
Chapter 2 Quick Start

Tobii X1 Light User Manual
11
9. Run your compatible eye tracking software
Read more in the relevant software manual.
2.1.1 Component checklist
• Tobii X1 Light eye tracking unit
• Tobii VESA Mounting Bracket with necessary screws and spacers
•
• Tobii X1 Light Eye Tracker Resources CD
• Tobii Studio or other compatible eye tracking software
• Power adaptor
• USB to micro USB cable
2.2 Adhesive mounting bracket setup
1. Install the eye tracker software
Insert the included CD and run the installation program. Read more on page 18.
2. Set the monitor on which the eye tracker is mounted as the Primary Display
in the Windows settings
In order for the calibration guide to work, the eye tracker needs to be attached to
the primary display. Read more on page 19.
3. Shut down the computer
4. Connect the eye tracker to your computer
Connect the Power adaptor or Battery pack and USB cable. Do not forget to
remove the plastic protection film from the eye tracker before first use. Read more
on page 27.
5. Turn on the computer
Run the Tobii X1 Light Eye Tracker Configuration Guide
Start the configuration guide and follow the instructions on screen. Read more on
page 32.
Chapter 2 Quick Start

Tobii X1 Light User Manual
12
6. Mount the adhesive mounting bracket on the monitor
Ensure the adhesive mounting bracket is securely fastened to the monitor before
proceeding. Read more on page 27.
7. Attach the eye tracker to the adhesive mounting bracket
The eye tracker should be mounted so the Tobii logo is the right way up. Read more
on page 28
8. Run your compatible eye tracking software
Read more in the relevant software manual.
2.2.1 Component checklist
• Tobii X1 Light eye tracking unit
• Tobii Adhesive Mounting Bracket
• Tobii X1 Light Eye Tracker Resources CD
• Tobii Studio or other compatible eye tracking software
• Power adaptor
• USB to micro USB cable
2.3 Laptop mounting bracket setup
1. Install the eye tracker software
Insert the included CD and run the installation program. Read more on page 18.
2. Shut down the computer
3. Mount the laptop mounting bracket on the monitor
Ensure the mounting bracket is securely fastened to the monitor before proceeding.
Read more on page 30
4. Connect the eye tracker to your computer
Connect the Power adaptor or Battery pack and USB cable. Do not forget to
remove the plastic protection film from the eye tracker before first use. Read more
Chapter 2 Quick Start

Tobii X1 Light User Manual
13
on page 29.
5. Turn on the computer
6. Run the X Configuration Tool
Open the Eye Tracker Browser in the folder Windows Start > All Programs >
Tobii. Select the Tobii X1 Light Eye Tracker in the list of connected eye trackers
and click the Config Tool button. Read more on page 36.
7. Make the required measurements and enter them in the configuration tool
Read more on page 37.
8. Run your compatible eye tracking software
Read more in the relevant software manual.
2.3.1 Component checklist
• Tobii X1 Light eye tracking unit
• Tobii Laptop Mounting Bracket for Tobii X1 Light Eye Tracker including the
necessary screws
• Tobii X1 Light Eye Tracker Resources CD
• Tobii Studio or other compatible eye tracking software
• Power adaptor
• USB to micro USB cable
2.4 Desk stand or tripod setup
1. Install the eye tracker software
Insert the included CD and run the installation program. Read more on page 18..
2. Set the monitor on which the eye tracker is mounted as the Primary Display
in the Windows settings
In order for the calibration guide to work, the eye tracker needs to be attached to
the primary display. Read more on page 19.
Chapter 2 Quick Start

Tobii X1 Light User Manual
14
3. Shut down the computer
4. Attach the eye tracker to the desk stand or tripod
The eye tracker should be mounted so the Tobii logo is the right way up. Read more
on page 29 about using the desk stand and a tripod.
5. Connect the eye tracker to your computer
Connect the Power adaptor or Battery pack and USB cable. Do not forget to
remove the plastic protection film from the eye tracker before first use. Read more
on page 29.
6. Turn on the computer
7. Run the X Configuration Tool
Open the Eye Tracker Browser in the folder Windows Start > All Programs >
Tobii. Select the Tobii X1 Light Eye Tracker in the list of connected eye trackers
and click the Config Tool button. Read more on page 36.
8. Do the required measurements and enter them in the configuration tool
Read more on page 37.
9. Run your compatible eye tracking software
Read more in the relevant software manual.
2.4.1 Component checklist
• Tobii X1 Light eye tracking unit
• Tobii Desk Stand for Tobii X1 Light Eye Tracker including the necessary
screws and/or a compatible tripod
• Tobii X1 Light Eye Tracker Resources CD
• Tobii Studio or other compatible eye tracking software
• Power adaptor
• USB to micro USB cable
Chapter 2 Quick Start

Tobii X1 Light User Manual
15
3 Product Care
3.1 Temperature & Humidity
3.1.1 General use
The Tobii X1 Light Eye Tracker is best kept in dry conditions at room temperature.
The recommended range for temperature and the humidity value for the device is as
follows:
• Temperature: 0°C to 40°C (32°F to 104°F)
• Humidity: Max 70% (no condensation on the device)
3.1.2 Transportation and storage
For transportation and storage, the recommended range for temperature and the
humidity value for the device is as follows:
• Temperature: -40°C to 70°C (-40°F to 158°F)
• Humidity: 20% to 70% (no condensation on the device)
The Tobii X1 Light Eye Tracker is not waterproof or water resistant. The device should
not be kept in excessively humid, damp or wet conditions. Do not submerge the
device in water or in any other liquid. Be careful not to allow liquids to be spilled upon
the device.
3.2 Cleaning
Before cleaning the Tobii X1 Light Eye Tracker device shut down the computer to
which it is attached and unplug all cables. Use a soft, slightly damp, lint-free cloth.
Avoid getting moisture in openings on the device. Don’t use window cleaners,
household cleaners, aerosol sprays, solvents, alcohol, ammonia, or abrasives to clean
the device.
3.3 Transporting the Tobii X1 Light Eye Tracker
Disconnect all the cables and use the included carrying case.
When you transport the device for repair, shipment or traveling, use the original
casing and packaging materials.
Chapter 3 Product Care

Tobii X1 Light User Manual
16
If you have attached the Tobii X1 Light Eye Tracker to a monitor using the Mounting
Bracket, do not carry the connected devices by solely gripping the Tobii X1 Light Eye
Tracker or the Mounting Bracket. The VESA mount attachment points may not hold
the weight of the computer monitor, and the devices could break apart and fall, or
topple and fall because of misbalanced weight, causing permanent damage to both.
Tobii Technology will not be held liable for the resulting damage.
3.4 Disposing of the Tobii X1 Light Eye Tracker
Do not dispose of the Tobii X1 Light Eye Tracker in general household or office waste.
Follow your local regulations for the disposal of electrical and electronic equipment.
Chapter 3 Product Care

Tobii X1 Light User Manual
17
4 Assembling the Tobii
X1 Light Eye Tracker
To be able to use the Tobii X1 Light Eye Tracker, you must first install the necessary
software and drivers from the included CD, assemble the mounting equipment for the
eye tracker and attach it properly to your Tobii X1 Light Eye Tracker.
Do NOT connect the Tobii X1 Light Eye Tracker before the installation software has
been run. Connecting the eye tracker prematurely can lead to software compability
issues as the wrong drivers may then automatically be installed by Windows.
The Tobii X1 Light Eye Tracker ONLY works with PC computers running a Windows
operating system (Windows XP and later). It is optimized for Desktop PC use with an
external monitor. If you use it without attaching it to a monitor using a VESA mounting
bracket or adhesive mounting bracket, extra care needs to be taken to perform the
setup correctly for the eye tracker to perform optimally.
Chapter 4 Assembling the Tobii X1 Light Eye Tracker
Tobii X1 Light User Manual
18
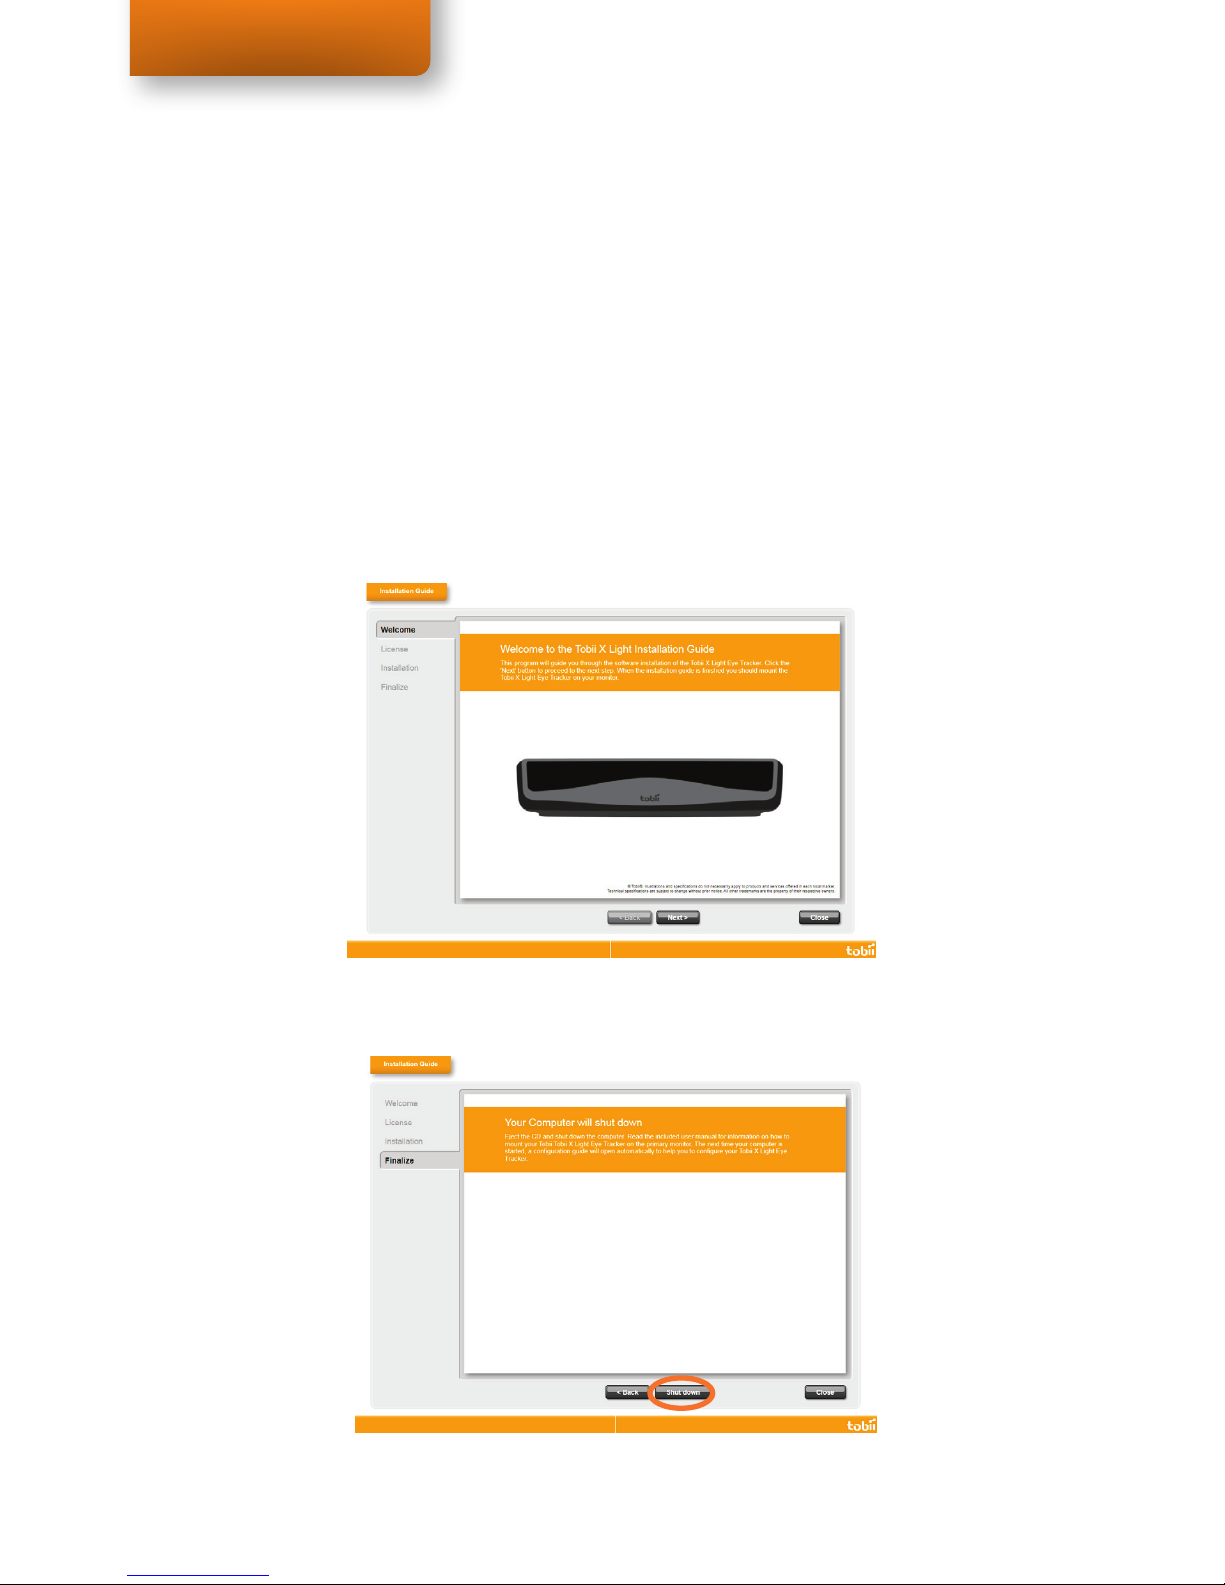
4.1 The Tobii X1 Light Installation Guide
The Tobii X1 Light Eye Tracker Installation Guide will guide you through the installation
of the necessary software and drivers for the Tobii X1 Light Eye Tracker, provide
Licensing information and show what monitor is currently set as the primary monitor
in the Windows Display settings. (To be able to use the Tobii X1 Light Eye Tracker
Configuration Guide when having it mounted using the mounting brackets, the
monitor on which the eye tracker is mounted must be the primary monitor according
to the Windows Display settings.)
1. Insert the included CD into your computer’s CD/DVD Disk Drive. The
Installation Guide will open automatically.
2. Follow the instructions within the Installation Guide, selecting Next to
proceed.
Chapter 4 Assembling the Tobii X1 Light Eye Tracker

Tobii X1 Light User Manual
19
Once the Installation Guide is finished, you need to power off your computer to
mount the Tobii X1 Light Eye Tracker on a mounting device such as the mounting
brackets or a desk stand, and to connect the cables between the Tobii X1 Light Eye
Tracker and your computer.
3. Eject the CD and power off your computer by selecting Shut down on the
Finalize page of the Installation Guide.
If the installation guide did not run on the monitor on which the eye tracker will be
mounted and you are planning to use a VESA mounting bracket or adhesive mounting
bracket, it is highly recommended that the Windows display settings are changed
before restarting the computer. If this is not done, it is not possible to use the
simplfied setup configuration available through the Tobii X1 Light Configruation guide.
Setting the primary displa is done by clicking Start -> Control Panel -> Appearance
and Personalization -> Display -> Adjust resolution, click on the monitor that the eye
tracker will be attached to, mark the tick-box labelled “Make this my main display” and
then click on the “Apply” button.
4.2 The Power supply and the battery pack
Before first time use, the power adaptor or battery pack needs to be assembled, and
if the battery pack is used, the correct voltage has to be set.
4.2.1 Assembling the power adaptor
In order for the power adaptor to be compatible with various power sockets, it is
delivered with a set of interchangeable plugs. Once the appropriate plug has been
selected, it should be attached to the power adapter by pushing the plug down and
towards the cable end of the power adapter in the hole designed for that purpose
(see image below). Once this is done, the power adaptor is ready for use.
1
2
Chapter 4 Assembling the Tobii X1 Light Eye Tracker

Tobii X1 Light User Manual
20
4.2.2 Assembling the battery pack
The battery pack consists of two parts: the battery pack and the charger/power
supply. The charger only requires the appropriate power cord to be attached (see
image below).
The battery pack first needs to be set to deliver the correct voltage. This is done by
turning the battery pack so the black, bottom side is visible. At the bottom of the
battery pack is a switch that can be set to either 9V or 12 V. This switch should be set
to 12V in order for the eye tracker to work (see image below).
OR
Power Supply
MODEL: MDA08131482000US
INPUT: 100-240V ~, 0.8A (MAX.)
50/60Hz
OUTPUT: 17.20V 1.7A
L
CU
®US
LISTED
E255045
I.T.EPOWER SUPPLY
RoHS
CAUTION
RISK OF ELECTRIC SHOCK
DO NOT OPEN !
MADE IN CHINA
PM66-DC
RECHARGEABLE LITHIUM ION BATTERY PACK
9V/12V(2.5A Max) 66Wh
CAUTION: Do not incinerated, disassemble, short
heat above 176 F. Use designated charger only.
MADE IN CHINA
12V 9V
12V 9V
Chapter 4 Assembling the Tobii X1 Light Eye Tracker
Table of contents
Other Tobii Computer Accessories manuals


Popular Computer Accessories manuals by other brands


Logitech
Logitech EasyCall installation guide

Logitech
Logitech MK700 - Wireless Desktop Keyboard user guide

Gamber Johnson
Gamber Johnson Notepad V-LT installation instructions

Genesis
Genesis Titan 800 Quick installation guide

Tecknet
Tecknet X861 User manuals

Genius
Genius Wireless 2.4G TwinTouch+ Service manual