7160-0402 Notepad™V-LT Universal Cradle w/Standard Side Clips
7160-0402-01 Notepad™V-LT Universal Cradle w/Zero Edge Side Clips
7160-0402-02 Notepad™V-LT Universal Cradle custom
7160-0402-03 Notepad™V-LT Universal Cradle with CAM clips
7160-0251 Screen Support Assembly
7160-0252 LED Light Assembly
7160-0253 Mic Clip Assembly
INSTALLATION INSTRUCTIONS
Product Revision Form
If you need assistance or have questions, call Gamber-Johnson at 1-800-456-6868
Notepad™V-LT Universal Cradle & Accessories Rev. C INST-562
Product Mounting Disclaimer
Gamber-Johnson is not liable under any theory of contract or tort law for any loss, damage, personal injury, special, incidental or consequential damages for personal injury or other damage
of any nature arising directly or indirectly as a result of the improper installation or use of its products in vehicle or any other application. In order to safely install and use Gamber-Johnson
products full consideration of vehicle occupants, vehicle systems (i.e., the location of fuel lines, brakes lines, electrical, drive train or other systems), air-bags and other safety equipment is
required. Gamber-Johnson specifically disclaims any responsibility for the improper use or installation of its products not consistent with the original vehicle manufactures specifications
and recommendations, Gamber-Johnson product instruction sheets, or workmanship standards as endorsed through the Gamber-Johnson Certified Installer Program.
© copyright 2011 Gamber-Johnson, LLC
Printing Spec: PS-001
Product Mounting Disclaimer
Gamber-Johnson is not liable under any theory of contract or tort law for any loss, damage, personal injury, special, incidental or consequential damages for personal injury or other damage
of any nature arising directly or indirectly as a result of the improper installation or use of its products in vehicle or any other application. In order to safely install and use Gamber-Johnson
products full consideration of vehicle occupants, vehicle systems (i.e., the location of fuel lines, brakes lines, electrical, drive train or other systems), air-bags and other safety equipment is
required. Gamber-Johnson specifically disclaims any responsibility for the improper use or installation of its products not consistent with the original vehicle manufactures specifications
and recommendations, Gamber-Johnson product instruction sheets, or workmanship standards as endorsed through the Gamber-Johnson Certified Installer Program.
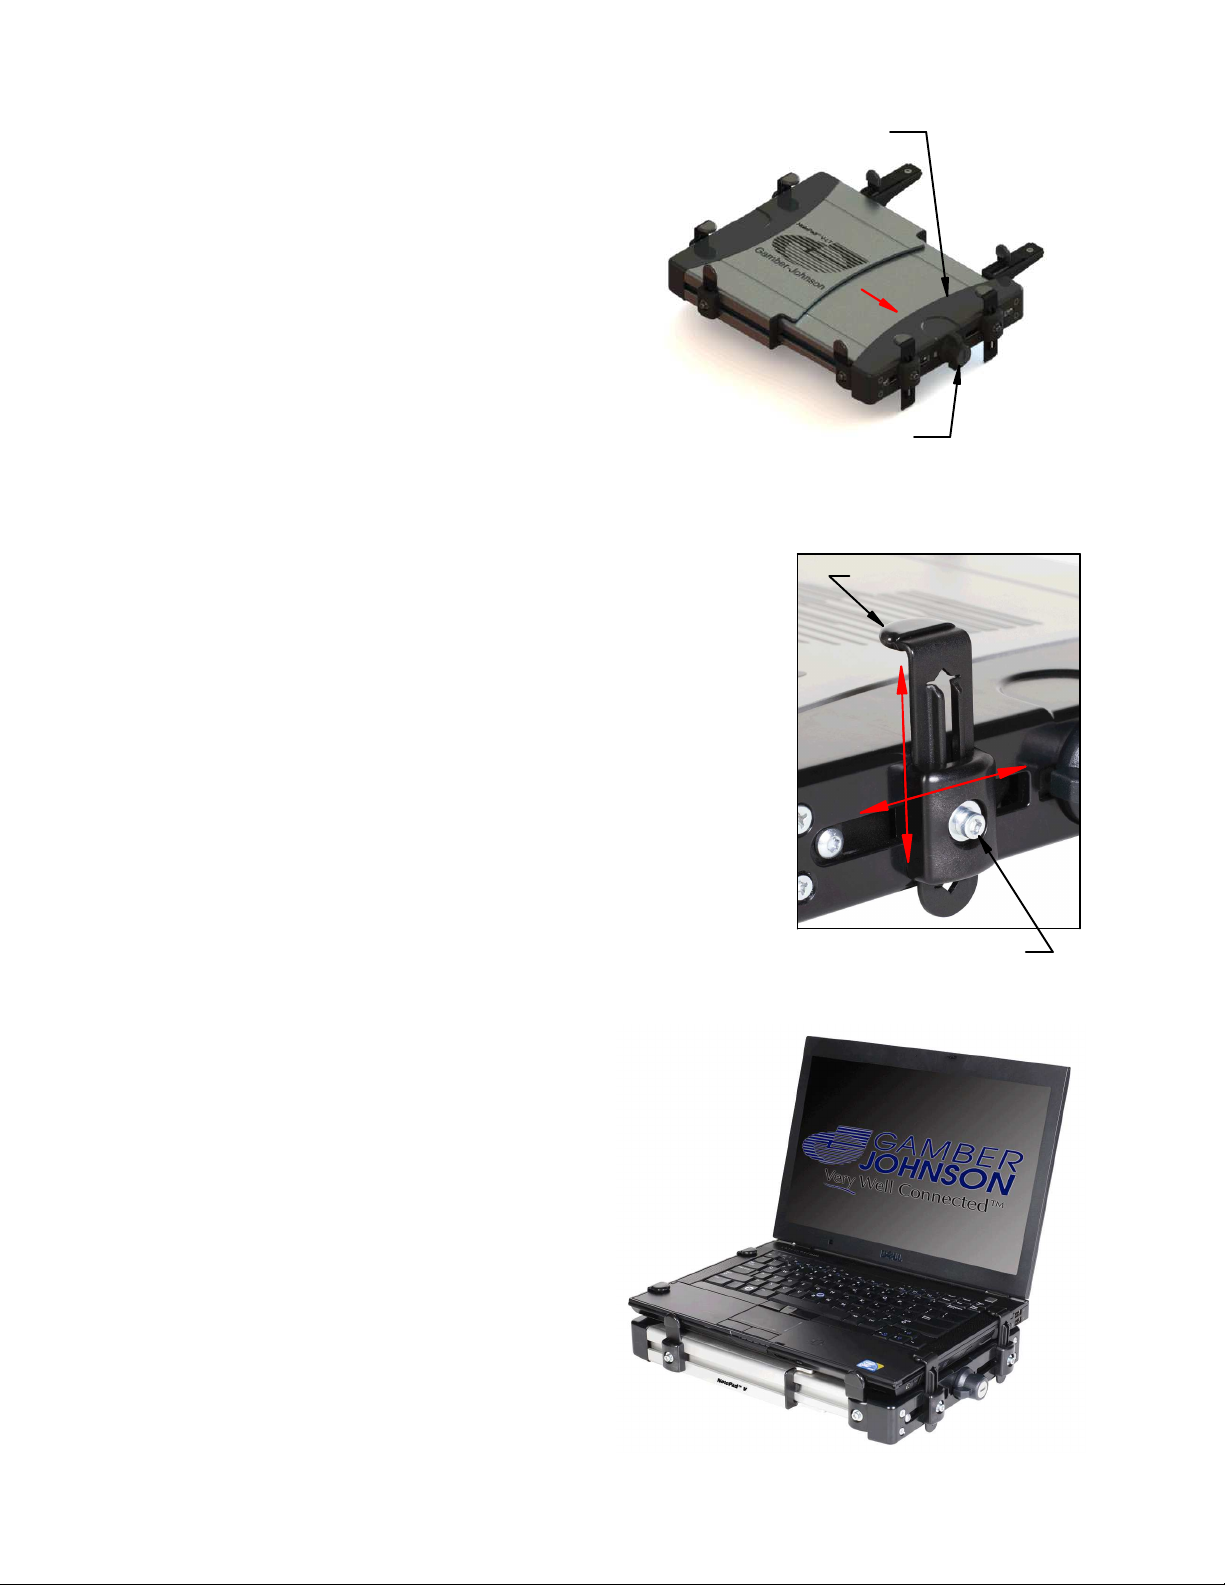
Notepad™V-LT Universal Computer Mount 7160-0402 will a omodate
omputers 8.2" to 11.8" in width, 7.58" to 9.3" in depth and up to 1.50" thi k.
9/64" Hex (Allen) wren h is needed to adjust lip lo ation and postion. 7/16" Wren h or
So ket is need to atta h Notepad™V-LT to Gamber-Johnson Motion Atta hments.
#2 Phillips s rewdriver and a 9/64" Hex (Allen) wren h are need to mount a essories.
The Notepad™V-LT hold-down lips and key lo k are designed to se urely hold the laptop
in the mount and deter theft, not prevent it.
Gamber-Johnson re ommends taking your laptop out of the vehi le when not in use.
1 / 5
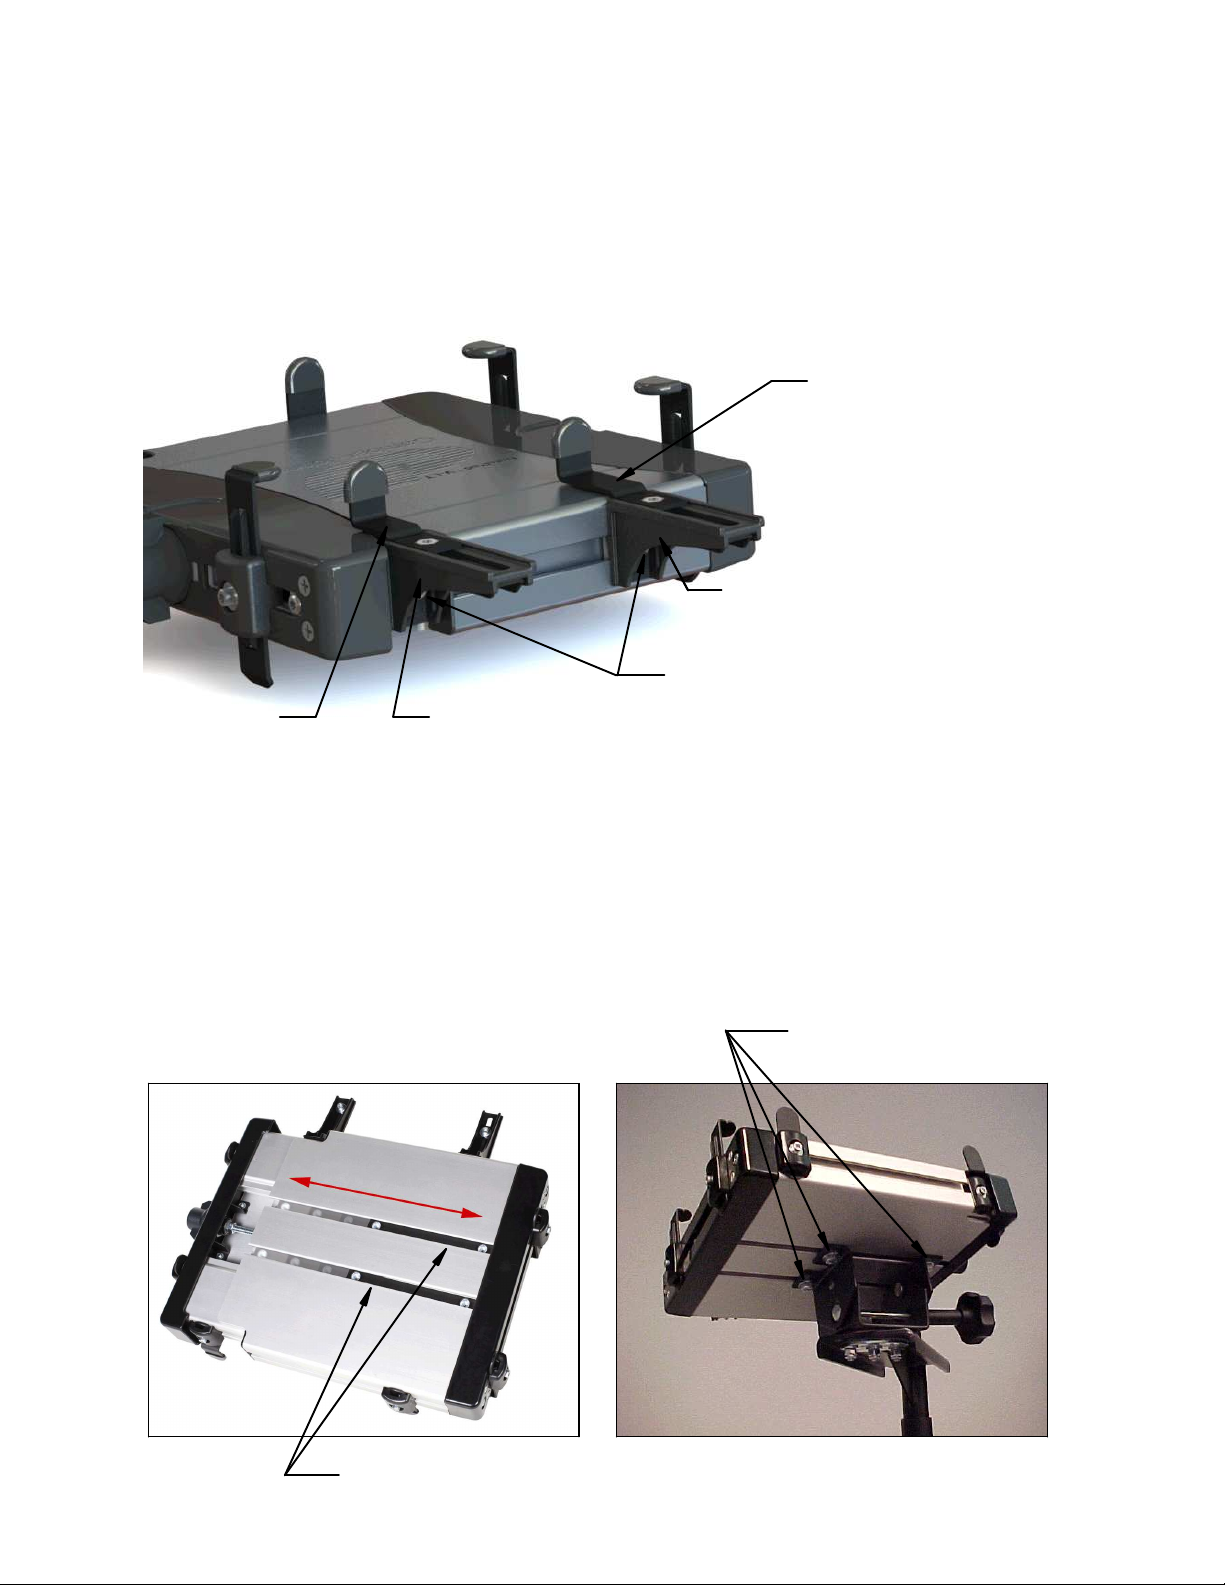
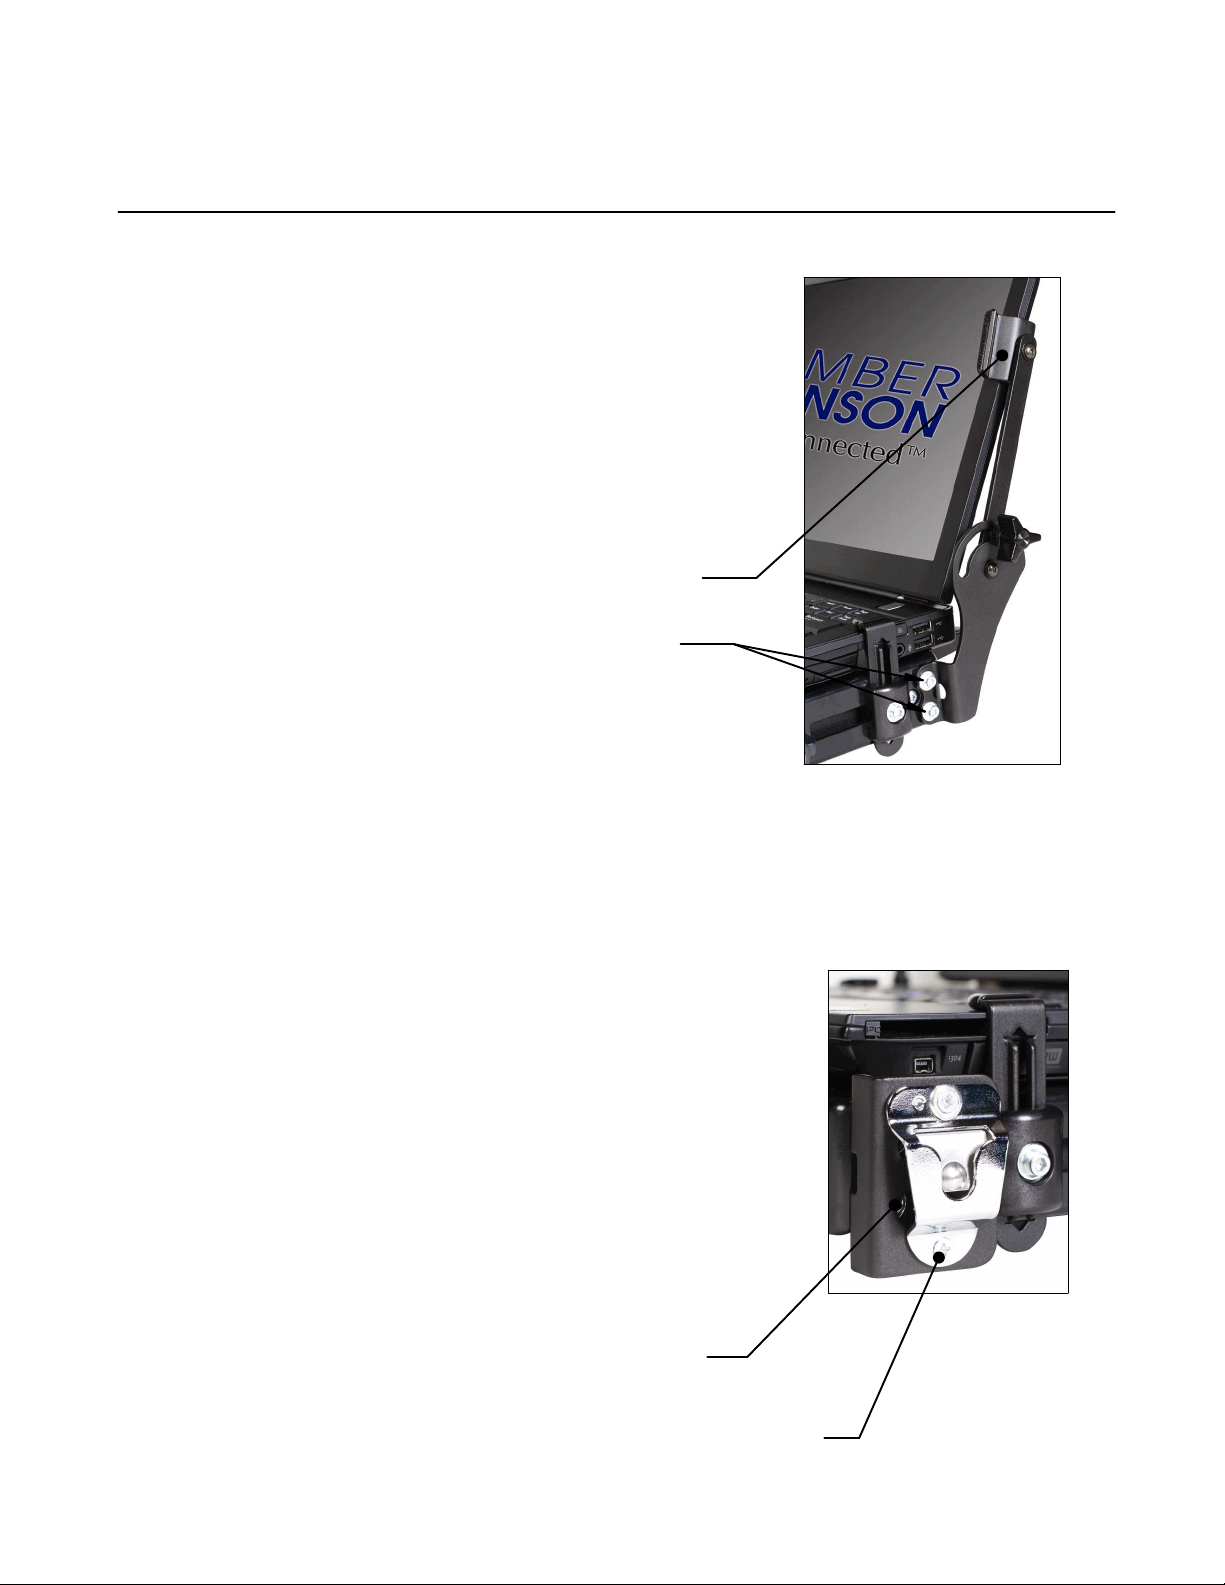
Lo kable Lat h
Short Rear Clip
Long Rear Clip
Vinyl Cap
Side Clips
Clip Guide
Tee Nut
Offset Front Clip
Flat Front Clip
De k
Rear Support & Bra e