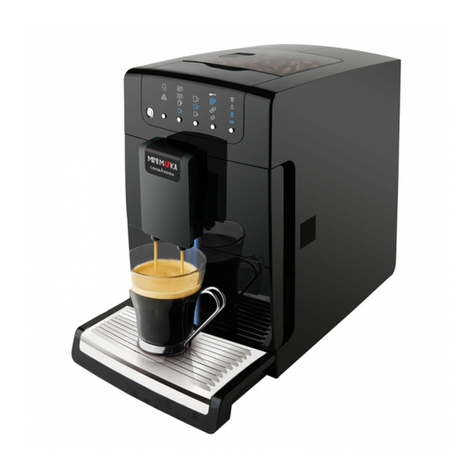
Tonino Lamborghini Espresso Maker User manual

EPS Espresso Pod System
U
Us
se
er
r’
’s
s
M
Ma
an
nu
ua
al
l

2 – T
TO
ON
NI
IN
NO
O
L
LA
AM
MB
BO
OR
RG
GH
HI
IN
NI
I
E
EP
PS
S Use and maintenance manual – Rev.01 - 07/2006
INDEX
CHAPTER 1 - GENERAL INFORMATION................................................5
1.1. CONTENTS OF THE BOX..................................................................5
1.2. DESCRIPTION OF THE MACHINE......................................................6
1.2.1. ANTI SCALE WATER FILTER ......................................................6
1.3. DESCRIPTION OF CONTROLS ..........................................................7
1.4. MARKING AND IDENTIFICATION OF THE PRODUCT ..........................8
1.5. CONDITIONS OF GUARANTEE..........................................................8
1.6 LIMITS OF THE GUARANTEE.............................................................9
1.7 CERTIFICATIONS.............................................................................9
1.8 SCRAPPING ................................................................................... 10
CHAPTER 2 – UNPACKING/ INSTALLATION ...................................... 11
2.1. INSTALLATION ............................................................................. 11
2.2. POSITION OF THE MACHINE ......................................................... 11
2.3. CONNECTING TO THE ELECTRICITY SUPPLY .................................. 11
CHAPTER 3 – IMPORTANT SAFETY NOTICES..................................... 12
3.1. GENERAL SAFETY ......................................................................... 12
3.2. ELECTRICITY................................................................................ 12
3.3. DANGER – HIGH TEMPERATURES .................................................. 13
3.4. GENERAL INFORMATIONS & IMPORTANT SAFEGUARDS .................. 13
CHAPTER 4 – USING THE MACHINE ................................................... 15
4.1. FILLING UP THE WATER RESERVOIR ............................................. 15
4.2. FILLING UP THE BOILER ............................................................... 15
4.3. MAKING A CUP OF COFFEE............................................................ 16

3 – T
TO
ON
NI
IN
NO
O
L
LA
AM
MB
BO
OR
RG
GH
HI
IN
NI
I
E
EP
PS
S Use and maintenance manual – Rev.01 - 07/2006
4.4. DISPENSING HOT WATER ............................................................. 18
4.5. DISPENSING STEAM ..................................................................... 19
4.5.1. Using steam to heat up a drink ................................................ 19
4.5.2. Using the steam to froth milk for Cappuccino. ........................... 19
CHAPTER 5 – PRECAUTIONS WHEN USING THE MACHINE .............. 21
5.1. PRECAUTIONS WHEN DISPENSING STEAM ..................................... 21
5.1.1. Refilling water in boiler............................................................ 21
CHAPTER 6 – CLEANING & MAINTENANCE........................................ 23
6.1. WATER & STEAM DRIP TRAYS ....................................................... 23
6.2. STEAM ARM ................................................................................. 23
6.3. POD HOLDER FILTER .................................................................... 23
6.4. CLEANING THE CHROMIUM-PLATED PARTS.................................... 23
6.5. CLEANING THE PAINTED SURFACES .............................................. 24
6.6. CLEANING THE WATER RESERVOIR ............................................... 24
6.7. REPLACING THE POD ASSEMBLY RUBBER SEALING RING ................ 24
6.8. DESCALING OF THE INTERNAL BOILER .......................................... 25
6.9. ANTI SCALE WATER FILTER .......................................................... 25
CHAPTER 7 - TROUBLESHOOTING ..................................................... 26
7.1. PROBLEMS DESCRIPTION AND SOLUTIONS.................................... 26
7.2. FILLING THE BOILER .................................................................... 27
CHAPTER 8 - TECHNICAL DATA ......................................................... 29

4 – T
TO
ON
NI
IN
NO
O
L
LA
AM
MB
BO
OR
RG
GH
HI
IN
NI
I
E
EP
PS
S Use and maintenance manual – Rev.01 - 07/2006
INTRODUCTION
Congratulations on choosing a Tonino
Lamborghini Espresso Pod Coffee Machine.
The design of the machine was personally
approved by Tonino Lamborghini towards the end
of 2005 and it includes some design features taken
from the early cars.
Each machine uses the highest quality
materials designed to make a delicious cup of
coffee time and time again.
This manual will guide you through setting up
the machine and how to use the machine to ensure
that it makes a perfect cup of coffee.
PLEASE CAREFULLY READ THIS MANUAL
BEFORE USE.
Please keep this manual in a safe place and
make that that any other person who uses this
machine reads the instructions for use.

5 – T
TO
ON
NI
IN
NO
O
L
LA
AM
MB
BO
OR
RG
GH
HI
IN
NI
I
E
EP
PS
S Use and maintenance manual – Rev.01 - 07/2006
CHAPTER 1 - GENERAL INFORMATION
1.1. CONTENTS OF THE BOX
1) Coffee Machine
2) 2 Spare rubber seals
3) Cleaning cloth
4) Water reservoir cover plate
5) Coffee Drip tray cover
6) Coffee Drip tray
7) Users Manual on CD Rom
Fig. 1 - Contents of the box
Carefully remove the components from the
box and keep all the packaging in the box.
2
3
4
5
6
7
1

6 – T
TO
ON
NI
IN
NO
O
L
LA
AM
MB
BO
OR
RG
GH
HI
IN
NI
I
E
EP
PS
S Use and maintenance manual – Rev.01 - 07/2006
1.2. DESCRIPTION OF THE MACHINE
Fig. 2 shows the assembled machine and
highlights the important controls and buttons.
Fig. 2 – Description of parts
1.2.1. ANTI SCALE WATER FILTER (see Par. 6.9)
Fitted at the end of the longer water pipe that
sits in the plastic water reservoir. When fitted this
filter will prevent the build of scale inside the
machine and will ensure that the machine provides
you with trouble free use.
Steam Drip tray
Water reservoir
Steam release
knob
On/Off Button
Steam Switch
Coffee Button
On/Off Led
Light
Coffee Group
Lever
Spout
Drip tray
Pod holder filte
r
Temperature
Led Li
g
ht
Steam / Water
dis
p
enser
Drip tray cover
Cup Rest

7 – T
TO
ON
NI
IN
NO
O
L
LA
AM
MB
BO
OR
RG
GH
HI
IN
NI
I
E
EP
PS
S Use and maintenance manual – Rev.01 - 07/2006
1.3. DESCRIPTION OF CONTROLS
On/ Off button: Push the button to turn the
machine on. The red LED light next to the button
will come on to indicate that the machine is on.
This LED will remain illuminated at all times when
the machine is on. Push the button again to switch
the machine off.
Hot water/ Coffee making button: Push the
button to start making a cup of coffee or to release
hot water through the spout (when there is no
coffee pod in the machine). Push the button again
to turn off the water supply.
Steam button: Push the button to prepare the
machine to make steam (boiler temperature rises
to 125°C). Push the button again to return to
coffee making (boiler temperture reduces to 95°C).
You cannot make coffee whilst the steam button is
depressed as the water temperature will be too
high. It takes a couple of minutes for the boiler to
reach the correct temperatute for steam. It takes a
couple of minutes for the temperature to drop back
down after you turn the steam button off again.
Temperature Led Light: This red LED light is
on the left hand side of the casing next to the
steam button.
1 Light on = Machine is in the process of
heating up and is not yet ready. The boiler
has not yet reached operating temperature.
2 Light off = Machine is ready to make coffee.
The boiler has reached operating
temperature.
Steam release knob: Ensure that the steam
arm is over the drip tray and slowly rotate the knob
anticlockwise for a few seconds to discharge any
residual water from the steam arm. Once the water
has been discharged turn the steam off again by
rotating the steam knob clockwise.
PLEASE NOTE: Do not use the steam supply for
longer than about 1 minute at any one time (see Par 5.1).

8 – T
TO
ON
NI
IN
NO
O
L
LA
AM
MB
BO
OR
RG
GH
HI
IN
NI
I
E
EP
PS
S Use and maintenance manual – Rev.01 - 07/2006
Gearlever handle: Located on right hand side
of machine to open and close the pod holder
assembly. Pull the lever towards you to lower the
pod holder assembly and the spout. This allows the
coffee pod to be placed on the holder. Push the
lever away from you to raise the assembly before
you make a cup of coffee. Push the lever until it
locks into position. You should encounter some
resistance as the lever locks. After you have made
a cup of coffee pull the lever towards you to allow
the pod to be taken out.
CAUTION: The pod holder will become hot
during use and care should be taken when putting
in and removing the pod to avoid getting scalded.
1.4. MARKING AND IDENTIFICATION OF THE PRODUCT
The nameplate is located on the underside of
the base and shows details of the model and the
voltage. Please check that the voltage supply
matches the voltage specified on the nameplate
before you start.
1.5. CONDITIONS OF GUARANTEE
The manufacturer provides a guarantees on
the machine according to the laws.
If during the guarantee period the machine
breaks down then it will be fixed and the broken
part replaced on the following conditions:
1 The fault is reported within the guarantee
period.
2 The problem is caused by a manufacturing
defect or faulty material.
3 The machine must be returned to the
retailer to allow the necessary repair work to
be done.
If your machine does not work properly
please look at Chapter 7 – Troubleshooting –
before contacting your retailer.
IMPORTANT: If you have to return the coffee
machine for repair please do not send back the

9 – T
TO
ON
NI
IN
NO
O
L
LA
AM
MB
BO
OR
RG
GH
HI
IN
NI
I
E
EP
PS
S Use and maintenance manual – Rev.01 - 07/2006
water reservoir cover plate, the drip tray cover or
the drip trays. The manufacturer and/or the retailer
will not accept responsibility for the damage or loss
of any of these items if they are returned with the
coffee machine. Please remember to empty the
plastic reservoir before you return the machine.
1.6 LIMITS OF THE GUARANTEE
The guarantee does not cover
1 Incorrect use of the machine which is
designed for household/domestic use.
2 Damage caused by using the machine
outside of the normal working environment.
3 Tampering with the mains cable.
4 Alterations made to the product.
5 Repairs not carried out by an authorized
service agent or centre.
6 Use of non-original spare parts or
accessories.
7 Inadequate or incorrect packing during
transportation.
IMPORTANT: Problems caused by the build of of
scale inside the machine are not covered by the
guarantee. You are advised to use either filtered
water or bottled (still) water to prevent such
problems occurring and to use a scale filter on
the water pipe. The scale filter should be
replaced every 3 months.
1.7 CERTIFICATIONS
The machine complies with the following
European standards:
Safety (Dir. 72/23/CEE) EN IEC 60335-1
EN IEC 60335-2-15
EMC (Dir. 89/336/CEE) EN IEC 55014-1
EN IEC 55014-2
EN IEC 61000-3-2
EN IEC 61000-3-3
EMF (Dir. 2004/40/EC) EN 50366
Part 15 FCC Rulement Subpart A and B
RoHs Dir. 2002/95/CE
Weee Dir. 2002/96/CE

10 – T
TO
ON
NI
IN
NO
O
L
LA
AM
MB
BO
OR
RG
GH
HI
IN
NI
I
E
EP
PS
S Use and maintenance manual – Rev.01 - 07/2006
1.8 SCRAPPING
This product complies with EU Directive
2002/96/EC.
The symbol on the product or on its
packaging indicates that this product may not be
treated as household waste. Instead it shall be
handed over to the appropriate collection point for
recycling of electrical and electronic equipments.
By ensuring this product is disposed of correctly,
you will help prevent potential damage to for the
environment and human health, which could be
caused by inappropriate waste handling of this
product. For more detailed information about
recycling of this product, please contact your local
council office, your household waste disposal
service or the shop where you purchased the
product.

11 – T
TO
ON
NI
IN
NO
O
L
LA
AM
MB
BO
OR
RG
GH
HI
IN
NI
I
E
EP
PS
S Use and maintenance manual – Rev.01 - 07/2006
CHAPTER 2 – UNPACKING / INSTALLATION
Before using the machine please carefully read these instructions.
2.1. INSTALLATION
Carefully unpack the machine and check that
all the parts are present (see Par. 1.1) and
familiarise yourself with the controls (see Fig. 2).
2.2. POSITION OF THE MACHINE
Place the machine on a flat, even surface
close to a wall socket in a well-lit environment.
Ensure that the machine cannot be knocked over
or cause injury and is out of the reach of children.
Keep the machine away from sources of heat, very
hot surfaces and open flames. Leave at least 30cm
of space on either side of the machine so that you
can operate all the controls safely (such as the
steam arm).
2.3. CONNECTING TO THE ELECTRICITY SUPPLY
Before plugging the machine into the mains
supply please check that the voltage indicated on
the nameplate on the base of the machine matches
the local power supply.
ATTENTION: The machine is intended for
domestic use only. Please ensure that you
have a suitable, earthed power supply.
If the mains cable becomes damaged or
defective you must contact the retailer to
arrange for a suitable replacement. The
machine MUST NOT be used if the mains
cable is, or appears to be, damaged.

12 – T
TO
ON
NI
IN
NO
O
L
LA
AM
MB
BO
OR
RG
GH
HI
IN
NI
I
E
EP
PS
S Use and maintenance manual – Rev.01 - 07/2006
CHAPTER 3 – IMPORTANT SAFETY NOTICES
3.1. GENERAL SAFETY
Please ensure that you read this manual and
the safety notices contained in it so that you are
aware of any potential danger.
The manufacturer cannot be held responsible
for damage/ injury to persons caused as a
result of not following the safety guidelines
and instructions in this manual.
If you are unable to resolve an issue after
studying Chapter 7 – Troubleshooting then please
contact your retailer for advice.
3.2. ELECTRICITY
Do not remove the metal machine
casing as it contains live parts that will
produce an electric shock to the user.
There are no user serviceable parts inside the
metal casing of the machine.
Do not immerse the machine in water.
The machine must be earthed.
If an extension lead is to be used please
ensure that it is of a suitable rating and that is
contains a ground/ earth cable (i.e 3 wires).
When filling the water reservoir be careful not
to spill water onto the casing of the machine. If
water does get onto the casing unplug the machine
from the electricity before wiping off the water.
Always check the voltage to make sure it
matches the voltage indicated on the nameplate of
the machine.

13 – T
TO
ON
NI
IN
NO
O
L
LA
AM
MB
BO
OR
RG
GH
HI
IN
NI
I
E
EP
PS
S Use and maintenance manual – Rev.01 - 07/2006
3.3. DANGER – HIGH TEMPERATURES
During normal operation some parts of the
machine will become extremely hot. To avoid the
risk of scalding please do not touch the following
parts when the machine is turned on as they will
be hot:
1 Coffee Spout
2 Steam Arm
3 The inside of the pod holder assembly
Take particular care when putting in or taking
out a coffee pod as the temperature of the metal
can approach 100°C.
3.4. GENERAL INFORMATIONS & IMPORTANT SAFEGUARDS
When using electrical appliances, basic safety
precautions should always be followed to reduce
the risk of fire, electric shock, and/or injury to
persons, including the following:
- Read all instructions and information in
this instruction book and any other
literature included in this packaging
referring to this product before operating
or using this appliance.
- Do not touch hot surfaces. Use handles or
knobs.
- To protect against fire, electric shock and
personal injury do not immerse cord,
plugs, or appliance in water or other
liquid.
- Close supervision is necessary when any
appliance is used by or near children.
- Unplug from outlet when not in use and
before cleaning. Allow to cool before
putting on or taking off parts and before
cleaning the appliance.

14 – T
TO
ON
NI
IN
NO
O
L
LA
AM
MB
BO
OR
RG
GH
HI
IN
NI
I
E
EP
PS
S Use and maintenance manual – Rev.01 - 07/2006
- Do not operate any appliance with a
damaged cord or plug or in the event of
appliance faults or damages. Return
appliance to the nearest authorized
service centre for examination, repair or
adjustment.
- The use of accessory attachments is not
recommended by the appliance
manufacturer and may result in fire,
electric shock or personal injury.
- Do not use outdoors.
- Do not let the cord hang over the edge of
a table or counter, or touch a hot surface.
- Do not place on or near to a hot gas or
electric burner, or in a heated oven.
- Always switch appliance "0ff", then plug
cord into the wall outlet. To disconnect,
switch "0ff" the machine, then remove
plug from wall outlet.
- Do not use appliance other than for
intended household use.
- Use extreme caution when using hot
steam.

15 – T
TO
ON
NI
IN
NO
O
L
LA
AM
MB
BO
OR
RG
GH
HI
IN
NI
I
E
EP
PS
S Use and maintenance manual – Rev.01 - 07/2006
CHAPTER 4 – USING THE MACHINE
NOTE: We would advise that you rinse the
water container before it is used for the first
time and that you discard the first coffee
that you make when the machine is brand
new.
4.1. FILLING UP THE WATER RESERVOIR
Remove the silver water reservoir cover and
carefully take out the 2 water pipes. Fit a scale
filter (supplied with the machine) to the longer of
the two pipes. Now fill the reservoir with water.
The water must be at room temperature. If you
prefer you can remove the reservoir from the
machine before filling it up with water. Be careful
not to get the water pipes trapped when refitting
the reservoir into the machine. You should hold
the 2 pipes out of the way when installing the
reservoir. When you put the 2 pipes back int the
reservoir ensure that the pipe with the scale filter
fitted can reach the bottom of the reservoir. The
capacity of the reservoir is about 2 litres. Refit the
metal reservoir cover.
NOTE: It is recommended that you use
mineral water or filtered water in the machine to
avoid the build up of scale which can cause
damage to the boiler.
The scale filter should be replaced every 3
months.
DO NOT USE FIZZY OR SPARKLING WATER,
OR ANY OTHER LIQUID IN THE WATER
RESERVOIR
4.2. FILLING UP THE BOILER
When you turn the machine on for the first
time please carry out the following procedure to
refill the boiler:
1 Ensure that the two buttons on the right

16 – T
TO
ON
NI
IN
NO
O
L
LA
AM
MB
BO
OR
RG
GH
HI
IN
NI
I
E
EP
PS
S Use and maintenance manual – Rev.01 - 07/2006
hand side of the casing and the single
button on the left hand side are NOT
depressed. Push the buttons in with your
finger to ensure that they are not
depressed.
2 Plug in the mains cable to a suitable wall
socket. Turn on the wall socket.
3 Turn on the coffee machine by pressing in
the on/off button which is located on the
right hand side of the casing above the
water button.
4 Close the pod assembly by pushing the
gearlever away from you until it locks into
position.
5 Press in the water button and you will hear
the pump running. Wait until water starts to
come out of the spout (see also note
below).
6 Press the water button again to stop the
water flow.
7 The machine is now primed and ready for
use.
NOTE: If after a few seconds the pump is
running but no water appears at the spout, switch
off the machine and retry after a few minutes or
just open the steam release knob for a few instant
and retry.
ATTENTION: If you leave the machine turned
on without any water being present in the
boiler for a period of time it will cause
irreparable damage which is not covered by
the guarantee.
4.3. MAKING A CUP OF COFFEE
To make a cup of coffee with your Tonino
Lamborghini machine proceed as outlined below:
1. Before plugging the mains cable in ensure
that the two buttons on the right hand side
of the casing and the single button on the
left hand side are NOT depressed. Push the
buttons in with your finger to ensure that
they are not depressed.
2. Plug in the mains cable to a suitable wall

17 – T
TO
ON
NI
IN
NO
O
L
LA
AM
MB
BO
OR
RG
GH
HI
IN
NI
I
E
EP
PS
S Use and maintenance manual – Rev.01 - 07/2006
socket. Turn on the wall socket.
3. Now turn on the coffee machine by pressing
in the on/off button which is located on
the right hand side of the casing above the
water button. The on/off button has a circle
with the numeral ‘1’ inside the circle. Both
red LEDs will light up. The LED light on the
right hand side indicates that the machine is
‘on’ and remains lit all the time that the
machine is on. The LED light on the left
hand side indicates that the machine is
warming up and has not reached operating
temperature. The LED on the left hand side
will go off when the boiler has warmed up.
This usually takes a few minutes.
4. Pull the gearlever on the right hand side
towards you as far as it will travel to lower
the pod holder assembly and the spout.
Remove any used pod from the pod holder.
Remove a fresh coffee pod from its wrapper
and place it carefully onto the pod holder
above the spout. Ensure that the pod is
located centrally on the holder.
5. Close the pod holder assemblying by
pushing the lever away from you until you
feel some resistance. You now need to lock
the pod assembly by pushing the lever
further away from you until it will go no
further. Please ensure that you have locked
the pod holder assembly before you make a
cup of coffee.
6. Place a coffee cup on the machine under the
spout. It is recommended that you pre-heat
the coffee cup.
7. When the red LED light on the left hand side
of the machine has gone out this indicates
that the machine is ready to make coffee.
8. Press the water button (picture of cup and
saucer on it) which is located below the
on/off button on the right hand side of the
casing. The machine will now make a cup of
coffee.
9. Press the water button once more to stop
the flow of coffee from the spout. PLEASE
NOTE the machine does NOT stop
automatically and you must operate the
water button when you have made a cup of

18 – T
TO
ON
NI
IN
NO
O
L
LA
AM
MB
BO
OR
RG
GH
HI
IN
NI
I
E
EP
PS
S Use and maintenance manual – Rev.01 - 07/2006
coffee.
10.Remove the cup of coffee which is now
ready.
11.Pull the gearlever on the right hand side
towards you to release the pod assembly
and remove the used coffee pod.
Each coffee pod makes a single cup of coffee.
Once the machine has reached its normal
operating temperature the red LED light on the left
hand side of the machine will go out. After this you
can use the machine to make coffee. The LED light
may come back on again to indicate that the boiler
is re-heating but once you have made your first
cup you can continue to use the machine and do
not need to wait for the LED to go off if you are
using the water.
NOTE: Unwrap the pods just before using them to retain maximum freshness.
4.4. DISPENSING HOT WATER
The machine can be used to dispense hot
water for tea or other drinks. To dispense hot
water proceed as follows:
1 Turn on the machine and wait for the red
LED light on the left and side to go out to
indicate that the water in the boiler has
reached operating temperature (95°C)
2 Place the cup or container under the steam
arm.
3 Carefully open the steam release knob and
press the water button (NOT the steam
button)
4 When you have sufficient hot water press
the water button again to stop the water.
5 Fully close the steam release knob.
ATTENTION: When hot water is being
dispensed from the steam arm it will be very hot.
Avoid touching the metal arm and use the plastic
lug to move it around.

19 – T
TO
ON
NI
IN
NO
O
L
LA
AM
MB
BO
OR
RG
GH
HI
IN
NI
I
E
EP
PS
S Use and maintenance manual – Rev.01 - 07/2006
4.5. DISPENSING STEAM
The steam arm can also be used to froth milk
for capuccinos and to heat other drinks. Please see
next paragraph for details.
ATTENTION: Do not make steam for longer
than 30-60 seconds continuosly.
After steam production the boiler will re-fill
with water (See recommendation in Par.
5.1).
4.5.1. Using steam to heat up a drink
CAUTION: The steam arm WILL BE
EXTREMELY hot and you should move it by
using the plastic lug located half way down
the steam arm.
1 Push in the Steam button on the left hand
side of the machine
2 The red LED light next to the button will
come on
3 Wait until the red LED light goes off which
indicated that the water temperature in the
boiler has reached 125°C
4 Position the container under the steam arm.
5 Slowly open the steam release knob.
6 Close the steam release knob once the drink
has reached the desired temperature.
7 Push in the Steam button.
8 Wait for the steam arm to cool down before
cleaning it with a damp cloth (see par. 6.2)
ATTENTION: During the production of steam
the container that the liquid is in will become very
hot. It is therefore recommended that you use a
container with a handle so your hands do not touch
the side of the container. Metal containers should
be used where possible.
4.5.2. Using the steam to froth milk for Cappuccino.
Follow the steps below:

20 – T
TO
ON
NI
IN
NO
O
L
LA
AM
MB
BO
OR
RG
GH
HI
IN
NI
I
E
EP
PS
S Use and maintenance manual – Rev.01 - 07/2006
1. Follow the steps in Par. 4.3 to make
the coffee
2. Push in the Steam button on the left
hand side of the machine
3. The red LED light next to the button
will come on
4. Wait until the red LED light goes off
which indicated that the water
temperature in the boiler has reached
125°C
5. Fill 1/3 of the receptacle you want to
use to make cappuccino with milk as
the volume of the milk will expand.
6. Position the container under the steam
arm.
7. Immerse the steam nozzle into the
milk that you wish to froth and turn
the steam knob slowly anticlockwise.
Move the receptacle slowly up and
down to achieve uniform froth.
8. When you have sufficient froth turn the
steam knob fully clockwise to shut off
the steam supply.
9. Push in the Steam button.
10.Wait for the steam arm to cool down
before cleaning it with a damp cloth
(see par. 6.2).
After you push in the Steam Button to stop
generating steam there is a built in safety
device which will prevent the machine from
dispensing water until the boiler has refilled
and the temperature of the water has
dropped from 125 degrees back to 95
degrees. This is to prevent the machine from
burning the coffee whilst the temperature of
the water is too high (see par.5.1). Don’t
forget the Steam button depressed.
This manual suits for next models
1
Table of contents
Popular Coffee Maker manuals by other brands

La Spaziale
La Spaziale S11 BRIO Instructions for use and maintenance
Silvercrest
Silvercrest SKAK 1000 A1 operating instructions
LaCimbali
LaCimbali m100 Use and installation
Quickmill
Quickmill MILANO 0980 manual
LaCimbali
LaCimbali M39 GT R2 Use and installation
Technivorm
Technivorm Moccamaster THERMOSERVE Instructions for use
