-
IMPORTANT SAFETY INFORMATION ENCLOSED.
READ THIS MANUAL BEFORE OPERATION.
IT IS THE RESPONSIBLITIY OF THE EMPLOYER TO PLACE THE INFORMATION IN THIS MANUAL INTO
THE HANDS OF THE OPERATOR.
FAILURE TO OBSERVE THE FOLLOWING WARNINGS COULD RESULT IN INJURY.
The use of other than genuine TorcUP replacement parts may result in safety hazards, decreased tool
performance, and increased maintenance, and may invalidate all warranties.
Repairs should be made only by authorized personnel. Consult your nearest TorcUP Authorized
Service Center. Refer all communications to the nearest TorcUP Office or Distributor.
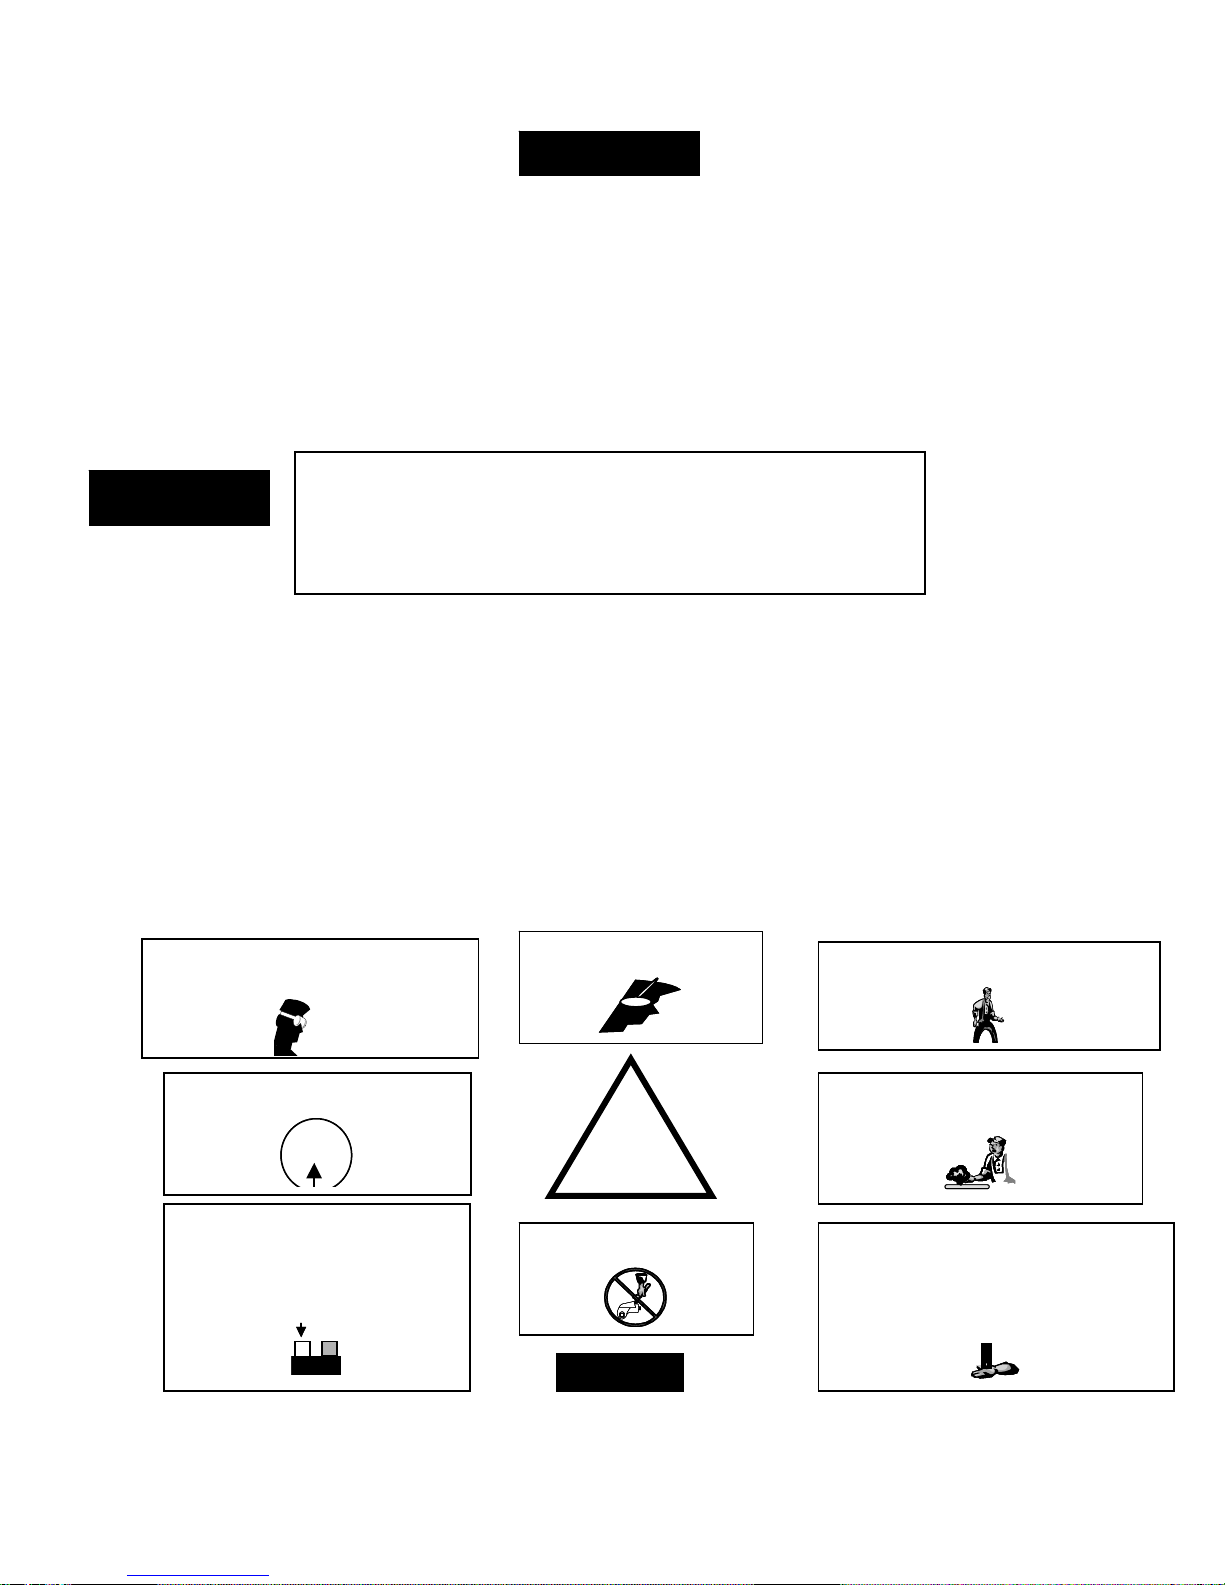
FAILURE TO OBSERVE THE FOLLOWING WARNINGS COULD RESULT IN INJURY
•Keep hands, loose clothing and long hair
away from the reaction arm and working area
during operation. Do not attempt to support the
tool with your hands during operation.
•This tool will exert a strong reaction force.
Use proper mechanical support and correct
reaction arm positioning to control these
forces. Do not position the reaction arm so that
it tilts the tool off the axis of the bolt and never
use the swivel inlets as a reaction stop.
Avoid sharp bends and kinks that will cause
severe back-up pressure in hoses and lead to
premature hose failure.
•Use accessories recommended by TorcUP.
•Use only impact sockets and accessories. Do
not use hand (chrome) sockets or accessories.
•Use only sockets and accesssories that
correctly fit the bolt or nut and function without
tilting the tool off the axis of the bolt.
•This tool is not designed for working in
explosive atmospheres
Do not use damaged, frayed or
deteriorated hydraulic hoses and
fittings.
Operate at 10,000 psig (681bar)
maximum pressure.
10,000 psig
(681 bar)
10,000 psig
(681 bar)
The Torque Reaction Arm must be
positioned against a positive stop. Do not
use the Arm as a dead handle. Take all
precautions to make certain the operator’s
hand cannot be pinched between the Arm
and a solid object.
For Technical Support and Information Contact:
TorcUP, Inc.
1025 Conroy Place, Easton, PA 18040
Toll Free: (888) TORCUP-1 Fax: (610) 250-2700
NOTICE
SAVE THESE INSTRUCTIONS. DO NOT DESTROY.
Always wear eye protection when operating
or performing maintenance on this tool.
Always wear eye protection when operating
or performing maintenance on this tool.
!
Always wear ear protection
when operating this tool. Keep body stance balanced and firm. Do
not overreach when operating this tool.
Do not carry the tool by
the hose.
Always turn off the pump and
disconnect the power before
installing, removing, or adjusting
any accessory on this tool, or
before performing any maintenance
on this tool.
POWER
OFF ON
POWER
OFF ON
WARNING
WARNING