Toro 3674 User manual

FormNo.3394-979RevA
Reelmaster®5010-HTractionUnit
ModelNo.03674—SerialNo.315000001andUp
Registeratwww.Toro.com.
OriginalInstructions(EN)*3394-979*A

ThisproductcomplieswithallrelevantEuropeandirectives,
fordetailspleaseseetheseparateproductspecicDeclaration
ofConformity(DOC)sheet.
WARNING
CALIFORNIA
Proposition65Warning
Thisproductcontainsachemicalorchemicals
knowntotheStateofCaliforniatocausecancer,
birthdefects,orreproductiveharm.
Dieselengineexhaustandsomeofits
constituentsareknowntotheStateof
Californiatocausecancer,birthdefects,
andotherreproductiveharm.
Important:Thisengineisnotequippedwithaspark
arrestermufer.ItisaviolationofCaliforniaPublic
ResourceCodeSection4442touseoroperatetheengine
onanyforest-covered,brush-covered,orgrass-covered
land.Otherstatesorfederalareasmayhavesimilarlaws.
Introduction
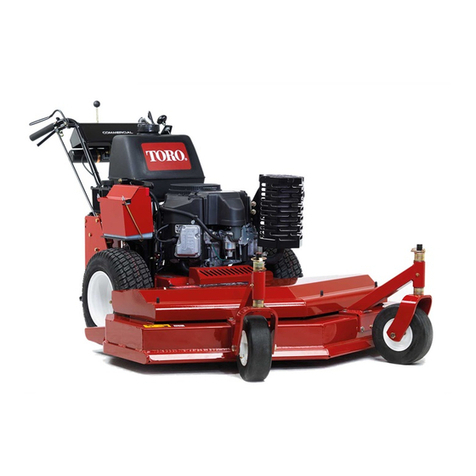
Thismachineisaride-on,reel-bladelawnmowerintended
tobeusedbyprofessional,hiredoperatorsincommercial
applications.Itisprimarilydesignedforcuttinggrasson
well-maintainedlawnsingolfcourses,parks,sportselds,
andoncommercialgrounds.Itisnotdesignedforcutting
brush,mowinggrassandothergrowthalongsidehighways,
orforagriculturaluses.
Readthisinformationcarefullytolearnhowtooperateand
maintainyourproductproperlyandtoavoidinjuryand
productdamage.Youareresponsibleforoperatingthe
productproperlyandsafely.
YoumaycontactTorodirectlyatwww.Toro.comforproduct
safetyandoperationtrainingmaterials,accessoryinformation,
helpndingadealer,ortoregisteryourproduct.
Wheneveryouneedservice,genuineToroparts,oradditional
information,contactanAuthorizedServiceDealerorToro
CustomerServiceandhavethemodelandserialnumbersof
yourproductready.Themodelandserialnumbersareona
platemountedontheleftsideoftheframeunderthefoot
rest.Writethenumbersinthespaceprovided.
ModelNo.
SerialNo.
Thismanualidentiespotentialhazardsandhassafety
messagesidentiedbythesafetyalertsymbol(Figure1),
whichsignalsahazardthatmaycauseseriousinjuryordeath
ifyoudonotfollowtherecommendedprecautions.
Figure1
1.Safetyalertsymbol
Thismanualuses2otherwordstohighlightinformation.
Importantcallsattentiontospecialmechanicalinformation
andNoteemphasizesgeneralinformationworthyofspecial
attention.
©2015—TheToro®Company
8111LyndaleAvenueSouth
Bloomington,MN554202
Contactusatwww.Toro.com.
PrintedintheUSA.
AllRightsReserved

Contents
Safety...........................................................................4
SafeOperatingPractices...........................................4
ToroRidingMowerSafety........................................6
SoundPowerLevel..................................................7
SoundPressureLevel...............................................7
VibrationLevel......................................................7
SafetyandInstructionalDecals.................................7
Setup...........................................................................11
1AdjustingtheTirePressure....................................11
2AdjustingtheStepHeight.....................................12
3AdjustingtheControlArmPosition........................12
4InstallingtheCuttingUnits....................................12
5MountingtheFinishingKits..................................14
6AdjustingtheTurfCompensationSpring.................16
7InstallingtheCEHoodLatch................................16
8UsingtheCuttingUnitKickstand...........................17
ProductOverview.........................................................18
Controls...............................................................18
Specications........................................................25
Attachments/Accessories........................................25
Operation....................................................................26
CheckingtheEngineOilLevel.................................26
CheckingtheCoolingSystem...................................27
AddingFuel...........................................................27
CheckingtheHydraulicFluid...................................28
CheckingtheReeltoBedknifeContact......................29
ChecktheTorqueoftheWheelNuts.........................29
Breaking-intheMachine..........................................29
BleedingtheFuelSystem.........................................29
StartingandStoppingtheEngine..............................30
SettingtheReelSpeed.............................................30
AdjustingtheLiftArmCounterbalance.....................31
AdjustingtheLiftArmTurnAroundPosition.............31
PushingorTowingtheMachine................................31
TieDowns............................................................32
TransportingtheMachine........................................32
LoadingtheMachine..............................................33
JackingPoints........................................................33
UnderstandingtheDiagnosticLight..........................34
CheckingtheInterlockSwitches...............................34
HydraulicValveSolenoidFunctions..........................34
OperatingTips......................................................35
Maintenance.................................................................36
RecommendedMaintenanceSchedule(s)......................36
DailyMaintenanceChecklist....................................37
ServiceIntervalChart.............................................38
Lubrication...............................................................38
GreasingtheBearingsandBushings..........................38
EngineMaintenance..................................................40
ServicingtheAirCleaner.........................................40
ServicingtheEngineOilandFilter............................40
FuelSystemMaintenance...........................................41
DrainingtheFuelTank...........................................41
CheckingtheFuelLinesandConnections..................41
ServicingtheWaterSeparator..................................41
FuelPick-upTubeScreen........................................42
BleedingAirfromtheFuelInjectors..........................42
ElectricalSystemMaintenance....................................43
ServicingtheEngineStartingBattery........................43
Fuses....................................................................43
DriveSystemMaintenance.........................................45
AdjustingtheTractionDriveforNeutral....................45
AdjustingtheRearWheelToe-in..............................45
CoolingSystemMaintenance......................................46
RemovingDebrisfromtheCoolingSystem................46
BrakeMaintenance....................................................47
AdjustingtheParkingBrakes....................................47
AdjustingtheParkingBrakeLatch............................47
BeltMaintenance......................................................48
TensioningtheAlternatorBelt.................................48
HydraulicSystemMaintenance....................................48
ChangingtheHydraulicFluid...................................48
ReplacingtheHydraulicFilter..................................49
CheckingtheHydraulicLinesandHoses....................49
HydraulicSystemTestPorts.....................................49
CuttingUnitSystemMaintenance.................................50
BacklappingtheCuttingUnits..................................50
Storage........................................................................51
PreparingtheTractionUnit.....................................51
PreparingtheEngine..............................................51
3

Safety
ThismachineisdesignedinaccordancewithENISO
5395:2013andANSIB71.4-2012specicationsineffectat
timeofproduction.
Improperuseormaintenancebytheoperatoror
ownercanresultininjury.Toreducethepotential
forinjury,complywiththesesafetyinstructionsand
alwayspayattentiontothesafetyalertsymbol,which
meansCaution,Warning,orDanger—personalsafety
instruction.Failuretocomplywiththeinstructionmay
resultinpersonalinjuryordeath.
SafeOperatingPractices
Training
•Readtheoperator'smanualandothertrainingmaterial
carefully.Befamiliarwiththecontrols,safetysigns,and
theproperuseoftheequipment.
•Neverallowchildrenorpeopleunfamiliarwiththese
instructionstouseorservicethemower.Local
regulationsmayrestricttheageoftheoperator.
•Nevermowwhilepeople,especiallychildren,orpetsare
nearby.
•Keepinmindthattheoperatororuserisresponsiblefor
accidentsorhazardsoccurringtootherpeopleortheir
property.
•Donotcarrypassengers.
•Alldriversandmechanicsshouldseekandobtain
professionalandpracticalinstruction.Theowneris
responsiblefortrainingtheusers.Suchinstructionshould
emphasize:
–theneedforcareandconcentrationwhenworking
withride-onmachines;
–controlofaride-onmachineslidingonaslopewill
notberegainedbytheapplicationofthebrake.The
mainreasonsforlossofcontrolare:
◊insufcientwheelgrip;
◊beingdriventoofast;
◊inadequatebraking;
◊thetypeofmachineisunsuitableforitstask;
◊lackofawarenessoftheeffectofground
conditions,especiallyslopes;
◊incorrecthitchingandloaddistribution.
•Theowner/usercanpreventandisresponsiblefor
accidentsorinjuriesoccurringtohimselforherself,other
people,orproperty.
Preparation
•Whilemowing,alwayswearsubstantialslip-resistant
footwear,longtrousers,hardhat,safetyglasses,andear
protection.Longhair,looseclothing,orjewelrymayget
tangledinmovingparts.Donotoperatetheequipment
whenbarefootorwearingopensandals.
•Thoroughlyinspecttheareawheretheequipmentisto
beusedandremoveallobjectswhichmaybethrownby
themachine.
•Replacefaultysilencers/mufers.
•Evaluatetheterraintodeterminewhataccessoriesand
attachmentsareneededtoproperlyandsafelyperform
thejob.Onlyuseaccessoriesandattachmentsapproved
bythemanufacturer.
•Checkthattheoperator'spresencecontrols,safety
switchesandshieldsareattachedandfunctioning
properly.Donotoperateunlesstheyarefunctioning
properly.
SafeHandlingofFuels
•Toavoidpersonalinjuryorpropertydamage,useextreme
careinhandlingfuel.Fuelisextremelyammableandthe
vaporsareexplosive.
•Extinguishallcigarettes,cigars,pipes,andothersources
ofignition.
•Useonlyanapprovedfuelcontainer.
•Neverremovefuelcaporaddfuelwiththeengine
running.
•Allowenginetocoolbeforerefueling.
•Neverrefuelthemachineindoors.
•Neverstorethemachineorfuelcontainerwherethereis
anopename,spark,orpilotlightsuchasonawater
heateroronotherappliances.
•Neverllcontainersinsideavehicleoronatruckor
trailerbedwithaplasticliner.Alwaysplacecontainerson
thegroundawayfromyourvehiclebeforelling.
•Removeequipmentfromthetruckortrailerandrefuelit
ontheground.Ifthisisnotpossible,thenrefuelsuch
equipmentwithaportablecontainer,ratherthanfroma
fueldispensernozzle.
•Keepthenozzleincontactwiththerimofthefueltank
orcontaineropeningatalltimesuntilfuelingiscomplete.
Donotuseanozzlelockopendevice.
•Iffuelisspilledonclothing,changeclothingimmediately.
•Neveroverllfueltank.Replacefuelcapandtighten
securely.
Operation
•Donotoperatetheengineinaconnedspacewhere
dangerouscarbonmonoxideandotherexhaustgasses
cancollect.
•Mowonlyindaylightoringoodarticiallight.
•Beforeattemptingtostarttheengine,disengageallblade
attachmentclutches,shiftintoneutral,andengagethe
parkingbrake.
4

•Rememberthereisnosuchthingasasafeslope.Travel
ongrassslopesrequiresparticularcare.Toguardagainst
overturning:
–donotstoporstartsuddenlywhengoingupor
downhill;
–machinespeedsshouldbekeptlowonslopesand
duringtightturns;
–stayalertforhumpsandhollowsandotherhidden
hazards;
–Donotturnsharply.Usecarewhenreversing.
–Usecounterweight(s)orwheelweightswhen
suggestedintheoperator'smanual.
•Stayalertforholesintheterrainandotherhiddenhazards.
•Watchoutfortrafcwhencrossingornearroadways.
•Stopthebladesrotatingbeforecrossingsurfacesother
thangrass.
•Whenusinganyattachments,neverdirectdischargeof
materialtowardbystandersnorallowanyonenearthe
machinewhileinoperation.
•Neveroperatethemachinewithdamagedguards,shields,
orwithoutsafetyprotectivedevicesinplace.Besureall
interlocksareattached,adjustedproperly,andfunctioning
properly.
•Donotchangetheenginegovernorsettingsorover-speed
theengine.Operatingtheengineatexcessivespeedmay
increasethehazardofpersonalinjury.
•Beforeleavingtheoperator'sposition:
–stoponlevelground;
–disengagethepowertake-offandlowerthe
attachments;
–changeintoneutralandsettheparkingbrake;
–stoptheengineandremovethekey.
•Disengagedrivetoattachmentswhentransportingornot
inuse.
•Stoptheengineanddisengagedrivetoattachment:
–beforerefuelling;
–beforeremovingthegrasscatcher/catchers;
–beforemakingheightadjustmentunlessadjustment
canbemadefromtheoperator'sposition.
–beforeclearingblockages;
–beforechecking,cleaningorworkingonthemower;
–afterstrikingaforeignobjectorifanabnormal
vibrationoccurs.Inspectthemowerfordamage
andmakerepairsbeforerestartingandoperatingthe
equipment.
•Reducethethrottlesettingduringenginerun-outand,if
theengineisprovidedwithashut-offvalve,turnthefuel
offattheconclusionofmowing.
•Keephandsandfeetawayfromthecuttingunits.
•Lookbehindanddownbeforebackinguptobesureof
aclearpath.
•Slowdownandusecautionwhenmakingturnsand
crossingroadsandsidewalks.Stopcylinders/reelsifnot
mowing.
•Donotoperatethemowerundertheinuenceofalcohol
ordrugs.
•Lightningcancausesevereinjuryordeath.Iflightning
isseenorthunderisheardinthearea,donotoperate
themachine;seekshelter.
•Usecarewhenloadingorunloadingthemachineintoa
trailerortruck.
•Usecarewhenapproachingblindcorners,shrubs,trees,
orotherobjectsthatmayobscurevision.
RolloverProtectionSystem(ROPS)-
UseandMaintenance
•TheROPSisanintegralandeffectivesafetydevice.Keep
afoldingROPSintheraisedandlockedpositionanduse
theseatbeltwhenoperatingthemachine.
•LowerafoldingROPStemporarilyonlywhenabsolutely
necessary.Donotweartheseatbeltwhenfoldeddown
•Beawarethereisnorolloverprotectionwhenafolded
ROPSisinthedownposition.
•Becertainthattheseatbeltcanbereleasedquicklyin
theeventofanemergency.
•Checktheareatobemowedandneverfolddowna
foldingROPSinareaswherethereareslopes,dropoffs
orwater
•Checkcarefullyforoverheadclearances(i.e.branches,
doorways,electricalwires)beforedrivingunderany
objectsanddonotcontactthem
•KeeptheROPSinsafeoperatingconditionby
periodicallythoroughlyinspectingfordamageand
keepingallmountingfastenerstight.
•ReplaceadamagedROPS.Donotrepairorrevise.
•DonotremovetheROPS.
•AnyalterationstoaROPSmustbeapprovedbythe
manufacturer.
MaintenanceandStorage
•Keepallnuts,boltsandscrewstighttobesurethe
equipmentisinsafeworkingcondition.
•Neverstoretheequipmentwithfuelinthetankinsidea
buildingwherefumesmayreachanopenameorspark.
•Allowtheenginetocoolbeforestoringinanyenclosure.
•Toreducetherehazard,keeptheengine,
silencer/mufer,batterycompartmentandfuelstorage
areafreeofgrass,leaves,orexcessivegrease.
•Checkthegrasscatcherfrequentlyforwearor
deterioration.
•Keepallpartsingoodworkingconditionandallhardware
andhydraulicttingstightened.Replaceallwornor
damagedpartsanddecals.
5

•Ifthefueltankhastobedrained,dothisoutdoors.
•Becarefulduringadjustmentofthemachinetoprevent
entrapmentofthengersbetweenmovingbladesand
xedpartsofthemachine.
•Onmulti-cylinder/multi-reelmachines,takecareas
rotatingonecylinder/reelcancauseothercylinders/reels
torotate.
•Disengagedrives,lowerthecuttingunits,setparking
brake,stopengineandremovekeyfromignition.Wait
forallmovementtostopbeforeadjusting,cleaningor
repairing.
•Cleangrassanddebrisfromcuttingunits,drives,
silencers/mufers,andenginetohelppreventres.Clean
upoilorfuelspillage.
•Usejackstandstosupportcomponentswhenrequired.
•Carefullyreleasepressurefromcomponentswithstored
energy.
•Disconnectbatterybeforemakinganyrepairs.Disconnect
thenegativeterminalrstandthepositivelast.Reconnect
positiverstandnegativelast.
•Usecarewhencheckingthecylinders/reels.Weargloves
andusecautionwhenservicingthem.
•Keephandsandfeetawayfrommovingparts.Ifpossible,
donotmakeadjustmentswiththeenginerunning.
•Chargebatteriesinanopenwellventilatedarea,away
fromsparkandames.Unplugchargerbeforeconnecting
ordisconnectingfrombattery.Wearprotectiveclothing
anduseinsulatedtools.
Hauling
•Usecarewhenloadingorunloadingthemachineintoa
trailerortruck.
•Usefullwidthrampsforloadingmachineintotraileror
truck.
•Tiethemachinedownsecurelyusingstraps,chains,cable,
orropes.Bothfrontandrearstrapsshouldbedirected
downandoutwardfromthemachine
ToroRidingMowerSafety
ThefollowinglistcontainssafetyinformationspecictoToro
productsorothersafetyinformationthatyoumustknowthat
isnotincludedintheCEN,ISO,orANSIstandard.
Thisproductiscapableofamputatinghandsandfeetand
throwingobjects.Alwaysfollowallsafetyinstructionsto
avoidseriousinjuryordeath.
Useofthisproductforpurposesotherthanitsintendeduse
couldprovedangeroustouserandbystanders.
WARNING
Engineexhaustcontainscarbonmonoxide,which
isanodorless,deadlypoisonthatcankillyou.
Donotrunengineindoorsorinanenclosedarea.
•Knowhowtostoptheenginequickly.
•Donotoperatethemachinewhilewearingtennisshoes
orsneakers.
•Wearingsafetyshoesandlongpantsisadvisableand
requiredbysomelocalordinancesandinsurance
regulations.
•Handlefuelcarefully.Wipeupanyspills.
•Checkthesafetyinterlockswitchesdailyforproper
operation.Ifaswitchshouldfail,replacetheswitch
beforeoperatingthemachine.
•Beforestartingtheengine,sitontheseat.
•Usingthemachinedemandsattention.Topreventloss
ofcontrol:
–Donotdriveclosetosandtraps,ditches,creeks,or
otherhazards.
–Reducespeedwhenmakingsharpturns.Avoid
suddenstopsandstarts.
–Whennearorcrossingroads,alwaysyieldthe
right-of-way.
–Applytheservicebrakeswhengoingdownhillto
keepforwardspeedslowandtomaintaincontrolof
themachine.
•Raisethecuttingunitswhendrivingfromoneworkarea
toanother.
•Donottouchtheengine,silencer/mufer,orexhaust
pipewhiletheengineisrunningorsoonafterithas
stoppedbecausetheseareascouldbehotenoughtocause
burns.
•Iftheenginestallsorlosesheadwayandcannotmakeit
tothetopofaslope,donotturnthemachinearound.
Alwaysbackslowly,straightdowntheslope.
•Whenapersonorpetappearsunexpectedlyinornearthe
mowingarea,stopmowing.Carelessoperation,combined
withterrainangles,ricochets,orimproperlypositioned
guardscanleadtothrownobjectinjuries.Donotresume
mowinguntiltheareaiscleared.
MaintenanceandStorage
•Makesureallhydrauliclineconnectorsaretightandall
hydraulichosesandlinesareingoodconditionbefore
applyingpressuretothesystem.
•Keepyourbodyandhandsawayfrompinholeleaksor
nozzlesthatejecthydraulicuidunderhighpressure.
Usepaperorcardboard,notyourhands,tosearchfor
leaks.Hydraulicuidescapingunderpressurecanhave
sufcientforcetopenetratetheskinandcauseserious
injury.Seekimmediatemedicalattentionifuidis
injectedintoskin.
6

•Beforedisconnectingorperforminganyworkonthe
hydraulicsystem,allpressureinthesystemmustbe
relievedbystoppingtheengineandloweringthecutting
unitsandattachmentstotheground.
•Checkallfuellinesfortightnessandwearonaregular
basis.Tightenorrepairthemasneeded.
•Iftheenginemustberunningtoperformamaintenance
adjustment,keephands,feet,clothing,andanypartsof
thebodyawayfromthecuttingunits,attachments,and
anymovingparts.Keepeveryoneaway.
•Toensuresafetyandaccuracy,haveanAuthorizedToro
Distributorcheckthemaximumenginespeedwitha
tachometer.Maximumgovernedenginespeedshouldbe
3300RPM.
•Ifmajorrepairsareeverneededorifassistanceisdesired,
contactanAuthorizedToroDistributor.
•UseonlyToro-approvedattachmentsandreplacement
parts.Thewarrantymaybevoidedifusedwith
unapprovedattachments.
SoundPowerLevel
Thisunithasaguaranteedsoundpowerlevelof100dBA,
whichincludesanUncertaintyValue(K)of1dBA.
Soundpowerlevelwasdeterminedaccordingtothe
proceduresoutlinedinISO11094.
SoundPressureLevel
Thisunithasasoundpressurelevelattheoperator’searof81
dBA,whichincludesanUncertaintyValue(K)of1dBA.
Soundpressurelevelwasdeterminedaccordingtothe
proceduresoutlinedinENISO5395:2013.
VibrationLevel
Hand-Arm
Measuredvibrationlevelforrighthand=.4m/s2
Measuredvibrationlevelforlefthand=.4m/s2
UncertaintyValue(K)=0.2m/s2
Measuredvaluesweredeterminedaccordingtotheprocedures
outlinedinENISO5395:2013.
WholeBody
Measuredvibrationlevel=.23m/s2
UncertaintyValue(K)=0.11m/s2
Measuredvaluesweredeterminedaccordingtotheprocedures
outlinedinENISO5395:2013.
SafetyandInstructionalDecals
Safetydecalsandinstructionsareeasilyvisibletotheoperatorandarelocatednearanyareaofpotential
danger.Replaceanydecalthatisdamagedorlost.
93-7272
1.Cutting/dismembermenthazard;fan—stayawayfrom
movingparts.
93–6696
1.Storedenergyhazard—readtheOperator'sManual.
106-6754
1.Warning—donottouchthehotsurface.
2.Cutting/dismembermenthazard,fanandentanglement
hazard,belt—stayawayfrommovingparts.
7

110-0986
1.Pressthebrakepedalandparkingbrakepedaltosetthe
parkingbrake.
2.Pressthebrakepedaltoapplythebrake.
3.Pressthetractionpedaltomovethemachineforward.
4.Reelenabledmode
5.Transportmode
110-8921
1.Tractionunitspeed
2.Slow
3.Fast
110-9642
1.Storedenergyhazard—readtheOperator'sManual.
2.Movethecotterpintotheholeclosesttotherodbracket
andthenremovetheliftarmandpivotyoke.
106-6755
1.Enginecoolantunder
pressure.
3.Warning—donottouchthe
hotsurface.
2.Explosionhazard—read
theOperator'sManual.
4.Warning—readthe
Operator'sManual.
93-6689
1.Warning—donotcarrypassengers.
117–2718
93-6688
1.Warning—readthe
instructionsbefore
servicingorperforming
maintenance.
2.Cuttinghazardofhandor
foot—stoptheengineand
waitformovingpartsto
stop.
8

BatterySymbols
Someorallofthesesymbolsareonyourbattery
1.Explosionhazard6.Keepbystandersasafe
distancefromthebattery.
2.Nore,opename,or
smoking.
7.Weareyeprotection;
explosivegasescan
causeblindnessandother
injuries
3.Causticliquid/chemical
burnhazard
8.Batteryacidcancause
blindnessorsevereburns.
4.Weareyeprotection9.Flusheyesimmediately
withwaterandgetmedical
helpfast.
5.ReadtheOperator's
Manual.
10.Containslead;donot
discard.
125–8754
1.Headlights6.Slow
2.Engage7.Lowerthecuttingunits
3.Powertake-off(PTO)8.Raisethecuttingunits
4.Disengage9.ReadtheOperator’s
Manual.
5.Fast
120–4158
1.ReadtheOperator’s
Manual.
3.Engine—preheat
2.Engine—start4.Engine—stop
117–0169
1.ReadtheOperator'sManual.
2.Powerpoint—10amp
3.Headlights—10amp
4.Power—10amp
5.Enginestart—15amp
6.Optionalairrideseatsuspension—10amp
7.EnginecomputermanagementC—10amp
8.EnginecomputermanagementB—10amp
9.EnginecomputermanagementA—10amp
127-2470
9

110-8869
1.Warning—readtheOperator'sManual,donotoperatethis
machineunlessyouaretrained.
2.Thrownobjecthazard—keepbystandersasafedistance
fromthemachine.
3.Tippinghazard—slowmachinebeforeturning,donotturn
athighspeeds;lowerthecuttingunitwhendrivingdown
slopes;usearolloverprotectionsystemandweartheseat
belt.AlwayswearaseatbeltwhenaROPSisinplace.
4.Warning—donotparkthemachineonslopes;engagethe
parkingbrake,lowerthecuttingdecks,stoptheengineand
removetheignitionkeybeforeleavingthemachine.
5.Warning—readtheOperator'sManual,donottowthe
machine.
110-8973
(Afxoverpartno.110–8869forCE*)
*Thissafetydecalincludesaslopewarningrequiredonthemachinefor
compliancetotheEuropeanLawnMowerSafetyStandardEN836:1997.The
conservativemaximumslopeanglesindicatedforoperationofthismachineare
prescribedbyandrequiredbythisstandard.
1.Warning—readtheOperator'sManual,donotoperatethis
machineunlessyouaretrained.
2.Thrownobjecthazard—keepbystandersasafedistance
fromthemachine.
3.Tippinghazard—donotoperateonslopesgreaterthan15°;
lowerthecuttingdeckswhenoperatingonslopes;wear
thesafetybelt.
4.Warning—donotparkthemachineonslopes;engagethe
parkingbrake,lowerthecuttingdecks,stoptheengineand
removetheignitionkeybeforeleavingthemachine
5.Warning—readtheOperator'sManualbeforetowingthe
machine.
125-8753
1.ReadtheOperator'sManualformoremaintenanceinformation.
10

Setup
LooseParts
Usethechartbelowtoverifythatallpartshavebeenshipped.
ProcedureDescriptionQty.Use
1Nopartsrequired–Adjustthetirepressure.
2Nopartsrequired–Adjustthestepheight.
3Nopartsrequired–Adjustthecontrolarmposition.
4Cuttingunits5Installthecuttingunits
5Finishingkit1Mountthenishingkits(Finishingkits
aresoldseparately)
6Nopartsrequired–Adjusttheturfcompensationspring.
Hoodlatchassembly1
7Washer1InstalltheCEHoodLatch
8Cuttingunitkickstand1InstalltheCuttingUnitKickstand.
MediaandAdditionalParts
DescriptionQty.Use
Operator'sManual1ReadtheOperator'sManualbeforeoperatingthemachine.
EngineOperator'sManual1Engineinformation
PartsCatalog1Usetoreferencepartnumbers
DeclarationofConformity1Declarationofconformity
OperatorTrainingMaterial1Reviewbeforeoperatingthemachine
Note:Determinetheleftandrightsidesofthemachine
fromthenormaloperatingposition.
1
AdjustingtheTirePressure
NoPartsRequired
Procedure
Thetiresareover-inatedforshipping.Therefore,release
someoftheairtoreducethepressure.Correctairpressurein
thefrontandreartiresis83to103kPa(12to15psi).
Important:Maintainevenpressureinalltirestoensure
uniformcontactwiththeturf.
11

2
AdjustingtheStepHeight
NoPartsRequired
Procedure
Theheightofthestepscanbeadjustedfortheoperators
comfort.
1.Removethe2boltsandnutssecuringthestepbrackets
tothetractionunitframe(Figure2)
Figure2
1.Step2.Stepbrackets
2.Raiseorlowerthesteptothedesiredheightand
re-securethebracketstotheframewiththe2bolts
andnuts.
3.Repeattheprocedureontheotherstep.
3
AdjustingtheControlArm
Position
NoPartsRequired
Procedure
Thecontrolarmpositioncanbeadjustedfortheoperators
comfort.
1.Loosenthe2boltssecuringthecontrolarmtothe
retainingbracket(Figure3).
Figure3
1.Controlarm3.Bolts(2)
2.Retainingbrackets
2.Rotatethecontrolarmtothedesiredpositionand
tightenthe2bolts.
4
InstallingtheCuttingUnits
Partsneededforthisprocedure:
5Cuttingunits
Procedure
CAUTION
Ifyoudonotdisconnectthepowertothecutting
units,someonecouldaccidentallystartthecutting
unit,causingseriousinjurytohandsandfeet.
Alwaysseparatethecuttingunitpowerdisconnect
connectorsbeforeworkingonthecuttingunits
(Figure26).
1.Disconnectthecuttingunitpowerdisconnect
connector;refertoCuttingUnitPowerDisconnectin
theProductOverviewsection.
2.Removethecuttingunitsfromthecartons.Assemble
andadjustasdescribedinthecuttingunitOperator's
Manual.
3.Makesurethecounterweight(Figure4)isinstalledto
theproperendofthecuttingunitasdescribedinthe
counterweightkitInstallationInstructions.
12

1
G027133
Figure4
1.Counterweight
4.Allthecuttingunitsareshippedwiththeturf
compensationspringmountedtotherightsideofthe
cuttingunit.Theturfcompensationspringmustbe
mountedtothesamesideofthecuttingunitasthe
reeldrivemotor.Repositiontheturfcompensation
asfollows:
A.Removethe2carriageboltsandnutssecuringthe
rodbrackettothecuttingunittabs(Figure5).
Figure5
1.Turfcompensationspring3.Springtube
2.Rodbracket
B.Removetheangenutsecuringthespringtube
bolttothecarrierframetab(Figure5)Remove
theassembly.
C.Mountthespringtubebolttotheoppositetabon
thecarrierframeandsecurewiththeangenut.
Theboltheadistobepositionedtotheouterside
ofthetabasshowninFigure6.
Figure6
1.Oppositecarrierframetab2.Rodbracket
D.Mounttherodbrackettothecuttingunittabs
withthecarriageboltsandnuts(Figure6).
Note:Wheninstallingorremovingthecutting
units,makesurethehairpincotterisinstalled
inthespringrodholenexttotherodbracket.
Otherwise,thehairpincottermustbeinstalledin
theholeintheendoftherod.
5.Loweralltheliftarmscompletely.
6.Removethesnapperpinandthecapfromtheliftarm
pivotyoke(Figure7).
Figure7
1.Snapperpin2.Cap
7.Forthefrontcuttingunits,slideacuttingunitunder
theliftarmwhileinsertingthecarrierframeshaftup
intotheliftarmpivotyoke(Figure8).
13

Figure8
1.Liftarm3.Liftarmpivotyoke
2.Carrierframeshaft
8.Usethefollowingprocedureontherearcuttingunits
whentheheightofcutisabove3/4inch.
A.Removethelynchpinandwashersecuringthelift
armpivotshafttotheliftarmandslidethelift
armpivotshaftoutoftheliftarm(Figure9).
Figure9
1.Liftarmpivotshaftlynchpinandwasher
B.Inserttheliftarmyokeontothecarrierframe
shaft(Figure8).
C.Inserttheliftarmshaftintotheliftarmand
secureitwiththewasherandlynchpin(Figure9).
9.Insertthecapoverthecarrierframeshaftandliftarm
yoke.
10.Securethecapandthecarrierframeshafttothelift
armyokewiththesnapperpin.Usetheslotifasteering
cuttingunitisdesiredorusetheholeifthecuttingunit
istobelockedinposition(Figure7).
11.Securetheliftarmchaintothechainbracketwiththe
snapperpin(Figure10).Usethenumberofchainlinks
describedinthecuttingunitOperator'sManual.
Figure10
1.Liftarmchain2.Chainbracket
12.Coatthesplineshaftofthereelmotorwithclean
grease.
13.OilthereelmotorO-ringandinstallitontothemotor
ange.
14.Installthemotorbyrotatingitclockwisesothatthe
motorangesclearthebolts(Figure11).Rotatethe
motorcounterclockwiseuntiltheangesencirclethe
boltsthentightenthebolts.
Important:Makesurethereelmotorhoseisnot
twisted,kinkedorintheriskofbeingpinched.
12
g027140
Figure11
1.Reeldrivemotor2.Mountingbolt(2)
14

5
MountingtheFinishingKits
Partsneededforthisprocedure:
1Finishingkit
Procedure
Important:Toensurethehoseroutingisappropriate
andthehosesarenottwisted,mountthemotorstothe
cuttingunitsbeforemountingthenishingkits.
1.Onthefrontleftcorneroftheframe(#4cuttingunit
location),removetheextraangeheadnutonthebolt
securingthebulkheadbrackettothemachine(Figure
12).
2.Loosenthenutsonthenishingkithosetting,insert
thehoseintotheslotonthebulkheadbracketand
tightenthenuts.
Note:Whentighteningthenuts,useabackupwrench
topreventthehosefromtwistingorkinking.
3.Inserttheconnectorplateontothebulkheadmounting
boltswiththeconnectorspositionedasshownin
Figure12.
4.Securetheconnectorplatetooneofthemounting
boltswiththeangenutpreviouslyremoved.
5.Locatethewireharnessonthemachineandplug
thewireconnectorsintothewireconnectorsofthe
nishingkit.
1
2
3
g027210
Figure12
#4cuttingunitlocation,leftfront
1.Extraangeheadnut3.Bulkheadbracket
2.Connectorplate
6.Repeattheprocedureontheremaining(4)bulkhead
locationsasshowninFigure13thruFigure16.
Important:Theconnectorplatesarepositioned
differentlyattheremaininglocationssothehose
canberoutedthroughthebulkheadbracketandto
thecuttingunitwithoutgettingtwistedorkinked.
1
2
3
g027129
Figure13
#1cuttingunitlocation,centerfront
(Asviewedfromunderthemachine)
1.Connectorplate3.Bulkheadbracket
2.Extraangeheadnut
g02721 1
1
3
2
Figure14
#5cuttingunitlocation,rightfront
1.Bulkheadbracket3.Extraangeheadnut
2.Connectorplate
15

g027127
1
2
3
Figure15
#3cuttingunitlocation,rightrear
1.Extraangeheadnut3.Connectorplate
2.Bulkheadbracket
g027209
2
1
3
Figure16
#2cuttingunitlocation,leftrear
1.Bulkheadbracket3.Connectorplate
2.Extraangeheadnut
6
AdjustingtheTurf
CompensationSpring
NoPartsRequired
Procedure
Theturfcompensationspring(Figure17)transfersweight
fromthefronttotherearroller.(Thishelpstoreduceawave
patternintheturf,alsoknownasmarcellingorbobbing.)
Important:Makespringadjustmentswiththecutting
unitmountedtothetractionunit,pointingstraight
aheadandloweredtotheshopoor.
1.Makesurethehairpincotterisinstalledintherearhole
inthespringrod(Figure17).
Figure17
1.Turfcompensationspring3.Springrod
2.Hairpincotter4.Hexnuts
2.Tightenthehexnutsonthefrontendofthespringrod
untilthecompressedlengthofthespringis12.7cm(5
inches)for5inchcuttingunitsor15.9cm(6.25inches)
for7inchcuttingunits(Figure17).
Note:Whenoperatingonroughterraindecreasethe
springlengthby13mm(1/2inch).Groundfollowing
willbeslightlydecreased.
16

7
InstallingtheCEHoodLatch
Partsneededforthisprocedure:
1Hoodlatchassembly
1Washer
Procedure
1.Unlatchandraisethehood.
2.Removetherubbergrommetfromtheholeintheleft
sideofthehood(Figure18).
g027072
Figure18
1.Rubbergrommet
3.Removethenutfromthehoodlatchassembly(Figure
19).
Figure19
1.Hoodlatch3.Rubberwasher
2.Nut4.Metalwasher
4.Outsidethehood,insertthehookendofthelatch
throughtheholeinthehood.Makesuretherubber
sealingwasherremainstotheoutersideofthehood.
5.Insidethehood,insertthemetalwasherontothelatch
andsecurewiththenut.Makesurethelatchengages
theframecatchwhenitislocked.Usetheenclosed
hoodlatchkeytooperatethehoodlatch.
8
UsingtheCuttingUnit
Kickstand
Partsneededforthisprocedure:
1Cuttingunitkickstand
Procedure
Wheneverthecuttingunithastobetippedtoexposethe
bedknife/reel,propuptherearofthecuttingunitwiththe
kickstandtomakesurethenutsonthebackendofthe
bedbaradjustingscrewsarenotrestingontheworksurface
(Figure20).
Figure20
1.Cuttingunitkickstand
Securethekickstandtothechainbracketwiththesnapper
pin(Figure21).
17

Figure21
1.Chainbracket3.Cuttingunitkickstand
2.Snapperpin
ProductOverview
Controls
SeatAdjustingKnobs
Theseatadjustinglever(Figure22)allowsyoutoadjustthe
seatforeandaft.Theweightadjustingknobadjuststheseat
fortheoperator'sweight.Theweightgaugeindicateswhen
theseatisadjustedtotheweightoftheoperator.Theheight
adjustingknobadjuststheseatfortheoperator'sheight.
Figure22
1.Weightgauge3.Heightadjustingknob
2.Weightadjustingknob4.Adjustinglever(foreand
aft)
TractionPedal
Thetractionpedal(Figure23)controlstheforwardand
reverseoperation.Pressthetopofthepedaltomoveforward
andthebottomtomoverearward.Groundspeeddependson
howfaryoupressthepedal.Fornoload,maximumground
speed,fullypressthepedalwhilethethrottleisintheFast
position.
Tostop,reducefootpressureonthetractionpedalandallow
ittoreturntothecenterposition.
MowSpeedLimiter
Whenthemowspeedlimiter(Figure23)isippedupitwill
controlthemowspeedandallowthecuttingunitstobe
engaged.Eachspaceradjuststhemowingspeedby0.8km/h
(0.5mph).Themorespacersyouhave,onthetopofthebolt
thesloweryouwillgo.Fortransport,ipbackthemowspeed
limiterandyouwillhavemaximumtransportspeed.
Note:Whenmowinginthe“Economy”mode,themowing
groundspeedisslightlyreduced.Remove1spacertoachieve
thesamemowingspeedaswhenmowinginthenormalmode.
18

BrakePedal
Pressthebrakepedal(Figure23)tostopthemachine.
ParkingBrake
Toengagetheparkingbrake,(Figure23)pushdownonthe
brakepedalandpressthetopforwardtolatch.Toreleasethe
parkingbrake,pressthebrakepedaluntiltheparkingbrake
latchretracts.
Figure23
1.Tractionpedal4.Brakepedal
2.Mowspeedlimiter5.Parkingbrake
3.Spacers6.Tiltsteeringpedal
TiltSteeringPedal
Totiltthesteeringwheeltowardsyou,pressthefootpedal
(Figure23)down,andpullthesteeringtowertowardyouto
themostcomfortablepositionandthenreleasethepedal.
EngineSpeedSwitch
Theenginespeedswitch(Figure24)hastwomodesto
changetheenginespeed.Bymomentarilytappingtheswitch,
theenginespeedcanbeincreasedordecreasedin100rpm
increments.Byholdingtheswitchdowntheenginewill
automaticallymovetoHighorLowidle,dependingonwhich
endoftheswitchisdepressed.
1
2
3
4
5
6G021208
Figure24
1.Lowermow/raisecontrol
lever
4.Enable/disableswitch
2.Keyswitch5.Enginespeedswitch
3.InfoCenter6.Headlightswitch
KeySwitch
Thekeyswitch(Figure24)hasthreepositions:Off,
On/Preheat,andStart.
LowerMow/RaiseControlLever
Thislever(Figure24)raisesandlowersthecuttingunitsand
alsostartsandstopsthecutterheadswhenthecutterheads
areenabledinthemowmode.
HeadlightSwitch
Pivottheswitchdownwardtoturnontheheadlights(Figure
24).
Enable/DisableSwitch
Usetheenable/disableswitch(Figure24)inconjunctionwith
thelowermow/raisecontrollevertooperatethecutterheads.
Thecutterheadscannotbeloweredwhenthemow/transport
leverisinthetransportposition.
PowerPoint
Thepowerpointisa12voltpowersupplyforelectronic
devices(Figure25).
19

Figure25
1.Powerpoint
CuttingUnitPowerDisconnect
Beforeinstalling,removing,orworkingonthecutting
units,disconnectthecuttingunitsfromthepowersupply
byseparatingthecuttingunitpowerdisconnectconnector
(Figure26),locatedundertheseat.Plugtheconnectorback
inbeforeoperatingthemachine.
1
g027134
Figure26
1.Cuttingunitpowerdisconnectconnector
CAUTION
Ifyoudonotdisconnectthepowertothecutting
units,someonecouldaccidentallystartthecutting
unit,causingseriousinjurytohandsandfeet.
Alwaysseparatethecuttingunitpowerdisconnect
connectorsbeforeworkingonthecuttingunits.
20
Other manuals for 3674
1
This manual suits for next models
1
Table of contents
Other Toro Lawn Mower manuals

Toro
Toro ProLine 30135 User manual

Toro
Toro Recycler 20017 User manual

Toro
Toro 74822 User manual

Toro
Toro Wheel Horse XL380H 71252 User manual

Toro
Toro 4038 User manual

Toro
Toro 30327 User manual

Toro
Toro Reelmaster 7000-D User manual

Toro
Toro 75746 User manual

Toro
Toro Reelmaster 450-D User manual

Toro
Toro 4021 User manual

Toro
Toro 20380 User manual

Toro
Toro 44907 User manual

Toro
Toro Reelmaster 3555 Series User manual

Toro
Toro Super Recycler User manual

Toro
Toro 74437 User manual

Toro
Toro 22168 User manual

Toro
Toro Recycler 21766 User manual

Toro
Toro 3422 User manual

Toro
Toro 02611 HoverPro 550 User manual

Toro
Toro TimeCutter ZS 3200S User manual