Toro 51480A User manual

FormNo.3424-776RevB
14inElectricTrimmer
ModelNo.51480A—SerialNo.319000001andUp
Operator'sManual
Ifyouhavequestionsorproblems,calltollfree1-888-367-6631
(US),1-888-430-1687(Canada),or1-800-450-9350(Mexico)before
returningthisproduct.
YoumaycontactT orodirectlyatwww.Toro.comforproduct
andaccessoryinformation,helpndingadealer,thecomplete
warrantydetails,ortoregisteryourproduct.
WARNING
CALIFORNIA
Proposition65Warning
Thepowercordonthisproductcontains
lead,achemicalknowntotheState
ofCaliforniatocausebirthdefects
orotherreproductiveharm.Wash
handsafterhandling.
Useofthisproductmaycauseexposure
tochemicalsknowntotheStateof
Californiatocausecancer,birthdefects,
orotherreproductiveharm.
GeneralSafetyRules
WARNING:Whenusingelectricgardeningappliances,basic
safetyprecautionsshouldalwaysbefollowedtoreducetheriskof
re,electricshock,andpersonalinjury,includingthefollowing:
Readallinstructions.
Theterm“powertool”inallofthewarningsreferstoyour
mains-operated(corded)powertoolorbattery-operated(cordless)
powertool.
1.Workareasafety
A.Keepworkareacleanandwelllit.Clutteredordark
areasinviteaccidents.
B.Donotoperatepowertoolsinexplosive
atmospheres,suchasinthepresenceofammable
liquids,gases,ordust.Powertoolscreatesparks,
whichmayignitethedustorfumes.
C.Keepchildrenandbystandersawaywhileoperating
apowertool.Distractionscancauseyoutolose
control.
2.Electricalsafety
A.Powertoolplugsmustmatchtheoutlet.Never
modifythepluginanyway.Donotuseany
adapterplugswithearthed(grounded)powertools.
Unmodiedplugsandmatchingoutletswillreducerisk
ofelectricshock.
B.Avoidbodycontactwithearthedorgrounded
surfaces.Thereisanincreasedriskofelectricshockif
yourbodyisearthedorgrounded.
C.Donotabusethecord.Neverusethecordfor
carrying,pulling,orunpluggingthepowertool.
Keepcordawayfromheat,oil,sharpedges,or
movingparts.Damagedorentangledcordsincrease
theriskofelectricshock.
D.Donotexposepowertoolstorainorwetconditions.
Waterenteringapowertoolwillincreasetheriskof
electricshock.
E.Ifoperatingapowertoolinadamplocationis
unavoidable,useasupplyprotectedbyaresidual
currentdevice(RCD)inAUSoragroundfault
interrupt(GFI)intheUSA.
UseofanRCDorGFIreducestheriskofelectricshock.
F.Whenoperatingapowertooloutdoors,usean
extensioncordsuitableforoutdooruse.Useofa
cordsuitableforoutdoorusereducestheriskofelectric
shock.
G.Disconnecttheplugfromthepowersourcewhen
theapplianceisnotinuse.
3.Personalsafety
A.Stayalert;watchwhatyouaredoing,anduse
commonsensewhenoperatingapowertool.Do
notuseapowertoolwhileyouaretiredorunder
theinuenceofdrugs,alcohol,ormedication.A
momentofinattentionwhileoperatingpowertoolsmay
resultinseriouspersonalinjury.
B.Usepersonalprotectiveequipment.Alwayswear
eyeprotection.Protectiveequipmentsuchasdust
mask,non-skidsafetyshoes,hardhat,orhearing
protectionusedforappropriateconditionswillreduce
personalinjuries.
C.Preventunintentionalstarting.Ensuretheswitch
isintheoff-positionbeforeconnectingtopower
sourceand/orbatterypack,pickinguporcarrying
thetool.Carryingpowertoolswithyourngeronthe
switchorenergizingpowertoolsthathavetheswitch
oninvitesaccidents.
D.Donotoverreach.Keepproperfootingandbalance
atalltimes.Thisenablesbettercontrolofthepower
toolinunexpectedsituations.
E.Dressproperly.Donotwearlooseclothingor
jewelry.Keepyourhair,clothingandglovesaway
©2019—TheToro®Company
8111LyndaleAvenueSouth
Bloomington,MN55420
Registeratwww.T oro.com.OriginalInstructions(EN)
PrintedinChina
AllRightsReserved*3424-776*B

frommovingparts.Looseclothes,jewelry,orlonghair
canbecaughtinmovingparts.
F.Keephandsandfeetawayfromthecuttingarea.
G.Thedeviceshouldnotbeusedbypersons
(includingchildren)withreducedphysical,sensory
ormentalabilities,orlackofexperienceor
knowledge,unlesssuchpersonsaresupervision
ortrainingtooperatetheappliancebyaperson
responsiblefortheirsafety.Childrenshouldbe
supervisedtonotusethedeviceasatoy.
4.Powertooluseandcare
A.Donotforcethepowertool.Usethecorrectpower
toolforyourapplication.Thecorrectpowertoolwill
dothejobbetterandsaferattherateforwhichitwas
designed.
B.Donotusethepowertooliftheswitchdoesnotturn
itonandoff.Anypowertoolthatcannotbecontrolled
withtheswitchisdangerousandmustberepaired.
C.Disconnecttheplugfromthepowersourceand/or
thebatterypackfromthepowertoolbeforemaking
anyadjustments,changingaccessories,orstoring
powertools.Suchpreventivesafetymeasuresreduce
theriskofstartingthepowertoolaccidentally.
D.Removethebatterypackfromthepowertoolbefore
makinganyadjustments,changingaccessories,or
storingpowertools.Suchpreventivesafetymeasures
reducetheriskofstartingthepowertoolaccidentally.
E.Storeidlepowertoolsoutofthereachofchildren,
anddonotallowpersonsunfamiliarwiththepower
toolortheseinstructionstooperatethepowertool.
Powertoolsaredangerousinthehandsofuntrained
users.
F.Storeidleappliancesindoors.Whennotinuse,
appliancesshouldbestoredindoorsinadryandhigh
orlocked-upplace,outofthereachofchildren.
G.Maintainpowertools.Checkformisalignmentor
bindingofmovingparts,breakageofparts,and
anyotherconditionthatmayaffecttheoperation
ofthepowertool.Ifdamaged,havethepowertool
repairedbeforeuse.Manyaccidentsarecausedby
poorlymaintainedpowertools.
H.Keepcuttingtoolssharpandclean.Properly
maintainedcuttingtoolswithsharpcuttingedgesare
lesslikelytobindandareeasiertocontrol.
I.Usethepowertoolinaccordancewiththese
instructionsandinthemannerintendedforthe
particulartypeofpowertool,takingintoaccountthe
workingconditionsandtheworktobeperformed.
Useofthepowertoolforoperationsdifferentfromthose
intendedcouldresultinahazardoussituation.
J.Keepguardsinplaceandinworkingorder.
5.Service
A.Haveyourpowertoolservicedbyaqualiedrepair
personusingonlyidenticalreplacementparts.
Thiswillensurethatthesafetyofthepowertoolis
maintained.
B.Ifthecordisdamaged,itmustbereplacedbythe
manufacturer,itsauthorizedserviceagentora
similarlyqualiedinordertoavoidhazard.
6.ExtensionCord
Ensurethatyourextensioncordisingoodcondition.When
usinganextensioncord,useoneheavyenoughtocarry
thecurrentyourproductwilldraw.Anundersizedextension
cordwillcauseadropinlinevoltage,resultinginlossof
powerandoverheating.Thefollowingtableliststhecorrect
cordsizedependingonthelengthofthecord.Ifyouarein
doubt,usethenextheaviergauge.Thesmallerthegauge
number,theheavierthegauge.
ExtensionCordLengthMinimumWireGauge
(A.W.G.)
7.6m(25feet)16
15.0m(50feet)16
30.5m(100feet)16
45.7m(150feet)14
Note:Donotuseanextensioncordover45.7m(150
feet)long.
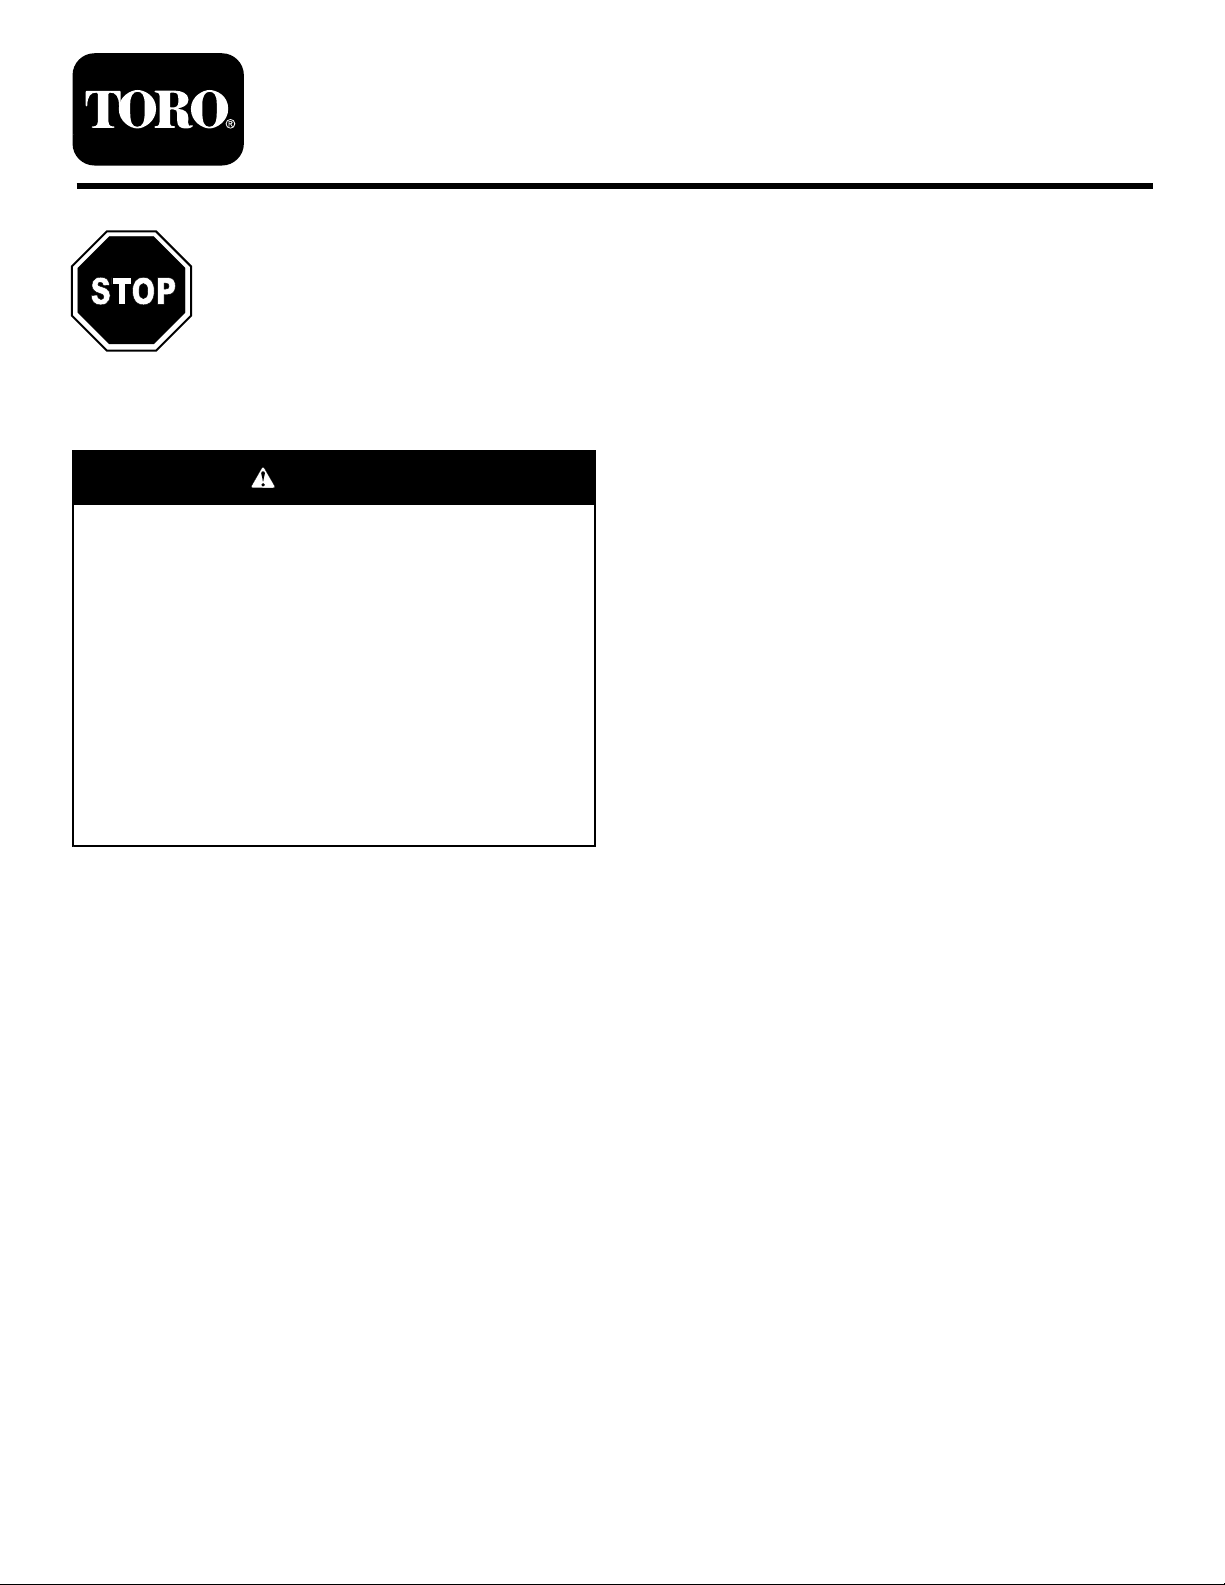
Toreducetheriskofdisconnectionoftheextensioncord
duringuse,connecttheextensioncordtothetrimmeras
illustratedinOperation(page6).
Theapplianceisnottobeusedbypersons(includingchildren)
withreducedphysical,sensoryormetalcapabilities,orlack
ofexperienceandknowledge,unlesstheyhavebeengiven
supervisionorinstruction.Childrenshouldbesupervisedto
ensurethattheydonotplaywiththeappliance.
SAVETHESEINSTRUCTIONS
Electricalspecications:120V~60Hz5A
2

SafetyandInstructionalDecals
Safetydecalsandinstructionsareeasilyvisibletotheoperatorandarelocatednearanyareaofpotentialdanger.
Replaceanydecalthatisdamagedormissing.
SymbolNameExplanation
ACAlternatingcurrentTypeofcurrent
AAmperesCurrent
HzHertzFrequency(cycles
persecond)
rpmRevolutionsper
minute
Speedofstring
VVoltsVoltage
decal131-0374b
131-0374
decal125-8324c
125-8324
1.Warning—readtheOperator’sManual;donotoperatein
wetconditions;donotuseifthecordisdamaged;wear
eyeprotection.
decal131-0361b
131-0361
decal138-6683
138-6683
3

Setup
LooseParts
Usethechartbelowtoverifythatallpartshavebeenshipped.
ProcedureDescriptionQty.Use
Auxiliaryhandle1
Latch1
1Brace1
Installtheauxiliaryhandle.
Guard1
2Phillipsscrew1Installtheguard.
3Edgeguard1Installtheedgeguard.
4Nopartsrequired–Adjustthetrimmerheightandthebase
position.
1
InstallingtheAuxiliary
Handle
Partsneededforthisprocedure:
1Auxiliaryhandle
1Latch
1Brace
1.Positiontheauxiliaryhandleontheshaftofthetrimmerwith
thesmoothsurfacefacingyou(Figure1).
g017277
Figure1
1.Auxiliaryhandle3.Brace
2.Latch
2.Slidethebraceintotheauxiliaryhandlesothatthebrace
restsinthegroovealongtheshaft(Figure1).
3.Slidethelatchfromtheleftthroughthehandleandbrace,
andtightenthelatchscrewwithaPhillipsscrewdriver
(Figure1).
4

2
InstallingtheGuard
Partsneededforthisprocedure:
1Guard
1Phillipsscrew
Procedure
1.SlidetheguardontothetrimmerbaseasshowninFigure2.
g015656
Figure2
1.Phillipsscrew2.Guard
2.SecuretheguardusingthePhillipsscrew.
3
InstallingtheEdgeGuard
Partsneededforthisprocedure:
1Edgeguard
Procedure
Inserttheendsoftheedgeguardintotheholesinthetrimmer
housingasshowninFigure3.
g017621
Figure3
1.Edgeguard
5

4
AdjustingtheTrimmer
HeightandBasePosition
NoPartsRequired
Procedure
•T oadjusttheauxiliaryhandleheight,releasetheauxiliary
handlelatch,slidetheauxiliaryhandleupordowntothe
desiredheight,thensecuretheauxiliaryhandleinplaceby
closingtheauxiliarylatch(Figure4).
g015655
Figure4
1.Auxiliaryhandle3.Height-adjustmentlatch
2.Auxiliary-handlelatch
•T oadjustthetrimmerheight,opentheheightadjustment
latch,thenslidetheshaftupordowntodesiredheight,
securingitinplacewiththelatch(Figure4).
•T oadjustthepositionofthebase,pressdownontherotator
buttonlocatedatthebaseoftheshaft,thenmovethebase
tofacethedesireddirection(Figure5).
g015683
Figure5
1.Rotatorbutton
Operation
ConnectingtoaPower
Source
WARNING
Ifyoudonotfullyseattheextensioncordontheinlet
plug,thelooseplugcouldleadtooverheatingand
causeare,possiblyburningyouorothers.
Ensurethatyoufullyseatthecordonthepluganduse
thecordlockfeaturetosecurethecord.
NOTICE!Donotuseadamagedcord.
g015693
Figure6
1.Inletplug3.Cordlock
2.Extensioncord
6

StartingtheTrimmer
Tostartthetrimmer,slidethelockswitchbacktotheONposition,
thensqueezethetrigger(Figure7).
g015658
Figure7
1.Lockswitch2.Trigger
StoppingtheTrimmer
Tostopthetrimmer,releasethetrigger.
AdvancingtheLine
Note:Thetrimmerisequippedwithanauto-feedhead.
1.Withthetrimmerrunning,releasetheswitchtrigger.
2.Wait2seconds,thenpresstheswitchtrigger.
Note:Thelineextendsapproximately6mm(1/4inch)
witheachstopandstartoftheswitchtrimmeruntiltheline
reachesthelengthofthegrassdeectorblade.
3.Resumetrimming.
AdvancingtheLine
Manually
Disconnectthestringtrimmerfromthepowersupply,thenpush
theredbuttonatthebaseofthespoolretainerwhilepullingonthe
trimmerlinetomanuallyadvancetheline.
Trimming
g021135
Figure8
7

Edging
Toconvertthetrimmertoanedger,presstherotatorbuttonand
rotatetheheadasshowninFigure9.
g015660
Figure9
1.Rotatorbutton2.Edgerguide
OperatingTips
•Keepthetrimmertiltedtowardtheareabeingcut;thisisthe
bestcuttingarea.
•Thestringtrimmercutswhenpassingtheunitfromleftto
right.Thisavoidsthrowingdebrisatyou.
•Usethetipofthestringtodothecutting;donotforcethe
stringheadintouncutgrass.
•Usingthetrimmeralongwireandpicketfences,stoneand
brickwalls,curbs,andwoodcancausethelinetorapidly
wearandevenbreak.
•Avoidtreesandshrubs.Treebark,woodmoldings,siding,
andfencepostscaneasilybedamagedbythestrings.
g023661
Figure10
1.Directionofrotation3.Stringpath
2.Idealcuttingrange
Maintenance
Aftereachuseofthetrimmer,completethefollowing:
1.Wipethetrimmercleanwithadampcloth.Donothosethe
trimmerdownorsubmergeitinwater.
2.Wipeorscrapecleananydebrisfromthecutting-headarea.
3.Checkandtightenallfasteners.Ifanypartisdamagedor
lost,repairorreplaceit.
4.Brushdebrisawayfromtheairintakeventsonthemotor
housingtopreventthemotorfromoverheating.
ReplacingtheSpool
Note:Useonly1.65mm(0.065in)diametermonolament
string.Forbestperformance,useonlyTororeplacementstring
(PartNo.88512).
Important:Usingalargerdiameterstringmaycausethe
motortooverheatandfail.
1.Pushinthetabsonthesideofthespoolretainer(Figure11).
g023662
Figure11
1.Spoolretainer3.Slots
2.Spool4.Tabs
2.Pullthespoolretaineruptoremoveit.
3.Removethespool.
4.Installthenewspool,makingsurethatthestringsare
capturedintheretainingslotsonthenewspool.
Note:Makesurethattheendsofthestringsextend
approximately152mm(6inches).
5.Installthenewspoolsothatthestringendsalignwith
theeyeletsinthestringhead,andthreadthestringends
throughtheeyelets.
8

6.Pullthestringsextendingfromthestringheadsothatthe
stringsreleasefromtheslotsinthespool.
7.Installthespoolretainerbypressingthetabsintotheslots
andpushingdownonthespooluntilthespoolretainerclicks
intoplace.
ReplacingtheString
Important:Useonly1.65mm(0.065inch)diameter
monolamentstring.Donotuseanyothergaugeortypeof
string,asthiscoulddamagethetrimmer.
1.Removethespool;refertoReplacingtheSpool(page8).
2.Removeanystringremainingonthespool.
3.Insertthestringintotheanchorholeintheupperpartof
thespool(Figure12).
g021146
Figure12
1.Slotinupperspoolange3.Slotinlowerspoolange
2.Hole
Note:Windthestringontothespoolinthedirection
shownbythearrowsonthespool.
Note:Thespoolcanacceptupto4.6m(15ft)ofstring.
4.Placethestringendsintheslotsontheupperspoolange,
leavingabout152mm(6inches)beyondtheslot.
Note:Donotoverllthespool.Afterwindingthestring,
thereshouldbeatleast6mm(1/4inch)betweeneachofthe
woundstringsandtheoutsideedgeofthespool.
5.Replacethespoolandthespoolretainer;refertoReplacing
theSpool(page8).
9

Service
Torohasdesignedthisproducttogiveyouyearsoftrouble-free
use.Shoulditneedservice,bringtheproducttoyourAuthorized
ServiceDealer.
Double-insulatedAppliance
Inadouble-insulatedappliance,2systemsofinsulationare
providedinsteadofgrounding.Nogroundingmeansisprovided
onadouble-insulatedappliance,norshouldameansfor
groundingbeaddedtotheappliance.Servicingadouble-insulated
appliancerequiresextremecareandknowledgeofthesystem,
andshouldbedoneonlybythequaliedservicepersonnel
atyourAuthorizedServiceDealer.Replacementpartsfora
double-insulatedappliancemustbeidenticaltothepartsthatthey
replace.Adouble-insulatedapplianceismarkedwiththewords
“DoubleInsulation”or“DoubleInsulated.”Thesymbol(square
withinasquare)mayalsobemarkedontheappliance.
Storage
Storethetrimmerandtheextensioncordindoorsinacool,dry
locationandoutofthereachofchildrenandanimals.
Important:Donotrestthetrimmerontheguard,oritmay
warpandinterferewiththecuttingline.
Note:Devicesforretainingextensioncordsarecommercially
available.
10

CaliforniaProposition65WarningInformation
Whatisthiswarning?
Youmayseeaproductforsalethathasawarninglabellikethefollowing:
WARNING:CancerandReproductiveHarm—www.p65Warnings.ca.gov.
WhatisProp65?
Prop65appliestoanycompanyoperatinginCalifornia,sellingproductsinCalifornia,ormanufacturingproductsthatmaybesoldinorbroughtinto
California.ItmandatesthattheGovernorofCaliforniamaintainandpublishalistofchemicalsknowntocausecancer,birthdefects,and/orother
reproductiveharm.Thelist,whichisupdatedannually,includeshundredsofchemicalsfoundinmanyeverydayitems.ThepurposeofProp65isto
informthepublicaboutexposuretothesechemicals.
Prop65doesnotbanthesaleofproductscontainingthesechemicalsbutinsteadrequireswarningsonanyproduct,productpackaging,orliteraturewith
theproduct.Moreover,aProp65warningdoesnotmeanthataproductisinviolationofanyproductsafetystandardsorrequirements.Infact,the
CaliforniagovernmenthasclariedthataProp65warning“isnotthesameasaregulatorydecisionthataproductis‘safe’or‘unsafe.’”Manyofthese
chemicalshavebeenusedineverydayproductsforyearswithoutdocumentedharm.Formoreinformation,gotohttps://oag.ca.gov/prop65/faqs-view-all.
AProp65warningmeansthatacompanyhaseither(1)evaluatedtheexposureandhasconcludedthatitexceedsthe“nosignicantrisklevel”;or(2)
haschosentoprovideawarningbasedonitsunderstandingaboutthepresenceofalistedchemicalwithoutattemptingtoevaluatetheexposure.
Doesthislawapplyeverywhere?
Prop65warningsarerequiredunderCalifornialawonly.ThesewarningsareseenthroughoutCaliforniainawiderangeofsettings,includingbutnot
limitedtorestaurants,grocerystores,hotels,schools,andhospitals,andonawidevarietyofproducts.Additionally,someonlineandmailorder
retailersprovideProp65warningsontheirwebsitesorincatalogs.
HowdotheCaliforniawarningscomparetofederallimits?
Prop65standardsareoftenmorestringentthanfederalandinternationalstandards.TherearevarioussubstancesthatrequireaProp65warning
atlevelsthatarefarlowerthanfederalactionlimits.Forexample,theProp65standardforwarningsforleadis0.5μg/day,whichiswellbelow
thefederalandinternationalstandards.
Whydon’tallsimilarproductscarrythewarning?
•ProductssoldinCaliforniarequireProp65labellingwhilesimilarproductssoldelsewheredonot.
•AcompanyinvolvedinaProp65lawsuitreachingasettlementmayberequiredtouseProp65warningsforitsproducts,butothercompanies
makingsimilarproductsmayhavenosuchrequirement.
•TheenforcementofProp65isinconsistent.
•CompaniesmayelectnottoprovidewarningsbecausetheyconcludethattheyarenotrequiredtodosounderProp65;alackofwarningsfora
productdoesnotmeanthattheproductisfreeoflistedchemicalsatsimilarlevels.
WhydoesToroincludethiswarning?
Torohaschosentoprovideconsumerswithasmuchinformationaspossiblesothattheycanmakeinformeddecisionsabouttheproductstheybuyand
use.T oroprovideswarningsincertaincasesbasedonitsknowledgeofthepresenceofoneormorelistedchemicalswithoutevaluatingthelevelof
exposure,asnotallthelistedchemicalsprovideexposurelimitrequirements.WhiletheexposurefromToroproductsmaybenegligibleorwellwithinthe
“nosignicantrisk”range,outofanabundanceofcaution,T orohaselectedtoprovidetheProp65warnings.Moreover,ifTorodoesnotprovidethese
warnings,itcouldbesuedbytheStateofCaliforniaorbyprivatepartiesseekingtoenforceProp65andsubjecttosubstantialpenalties.
RevA

Other manuals for 51480A
3
This manual suits for next models
1
Table of contents
Other Toro Trimmer manuals
Popular Trimmer manuals by other brands

Tanaka
Tanaka TBC-230 series Illustrated parts manual

Grizzly Tools
Grizzly Tools CH 2000 Li Translation of the original instructions for use

Dolmar
Dolmar ET-120 C instruction manual

Flymo
Flymo Power Trim 500 XT Original instructions

AL-KO
AL-KO BC 1200 E manual

Grizzly Tools
Grizzly Tools EHS710-69 R Translation of the original instructions for use