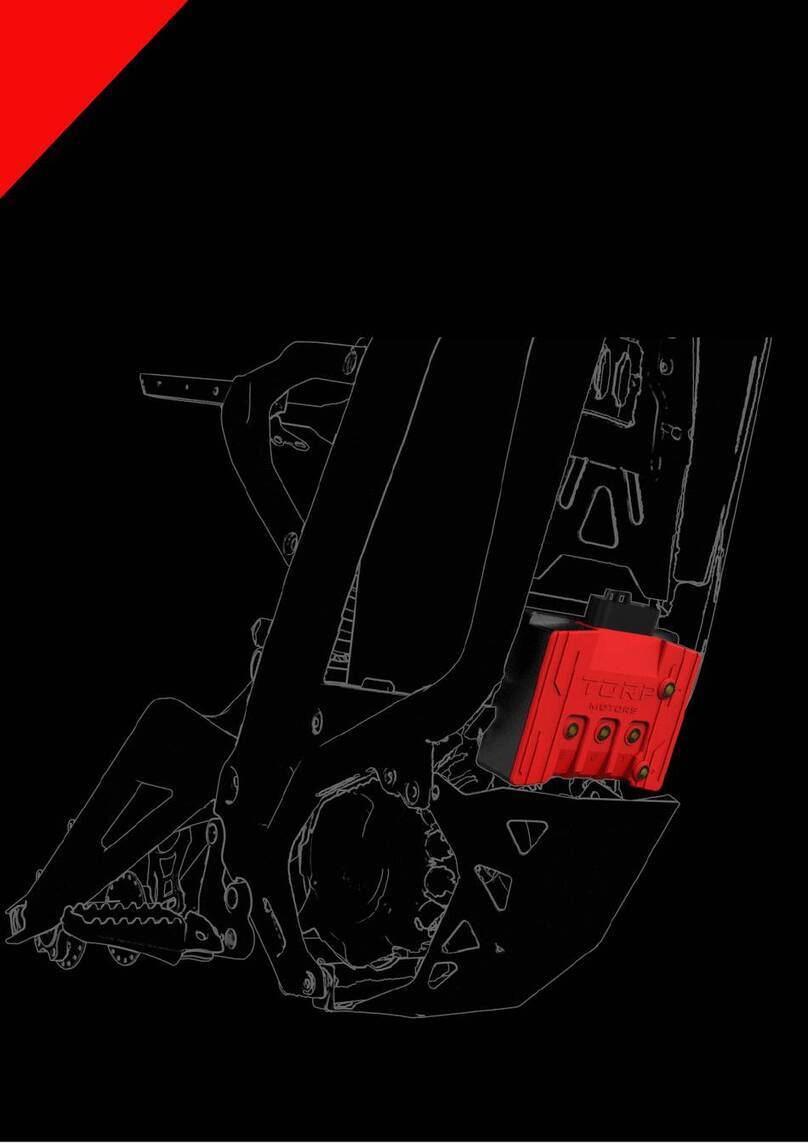
TORP TC500 User manual

TORP CONTROLLER.
User Manual

IMPORTANT.
Please read and carefully follow the instructions in this manual. The TC500 controller must always
be used with a stock SurRon/Segway fuse! Not using the fuse with the TC500 controller is
dangerous and can cause serious damage!
Use only tools and screws that came with the controller. Using the tools and screws that were not
included in the parcel, not following these instructions, or not using the fuse, can cause serious
damages to you and your bike.
INTRODUCTION.
TC500 controller has been developed exclusively for SurRon Light Bee and Segway X260 e-bikes,
and is not compatible with any other electric motor. TC500 is not compatible with Segway X160.
TC500 controller is also not compatible with motor model number P/N: 11100-YQ2A-0100. Please
check your motor model number before installing the TC500 controller. In general, all
SurRon/Segway X260 motors, manufactured after 2018 are compatible with the TC500 controller.
TC500 controller is compatible with both versions of the stock display (L1 E & the off-road version).
Both speed and the distance are displayed on it. For the additional options, like battery monitoring
and settings, you will have to use your smartphone or buy a Torp Display, that is sold separately.
This is a plug&play controller that needs no previous knowledge of electronics and programming for
installation and setup. Everything needed for successful installation is included in the box.
WWW.TORPMOTORS.COM
1

THE BOX CONSIST OF:
-TC500 controller
-Wire-harness
-5 phase screws with washers
-2 screws for fastening the controller
to the bike`s frame
-2 screws for installation of the plastic
shield
-2 hex keys
-Shield
-Short instructions
All the settings and diagnostics are managed through an
intuitive and easy-to use smartphone app for Android and
IOS. The users can use their smart-phone as a display
during the rides and to set up all the controller`s features
through the app.
WWW.TORPMOTORS.COM
2

WWW.TORPMOTORS.COM
3
INSTALLATION.
Before starting with the installation, drain the bike`s capacitors.
Switch off the fuse
Switch on the bike and wait for the capacitors to drain.
1.
2.
1. 2.
Now you can start removing the stock SurRon controller and the battery from the frame, and lower
the skid-plate that covers the wiring.
FOR THE INSTALLATION
you will need:
-2 M5 screws (smaller screws)
-A smaller hex key
STEP 1:
Place the controller in a way that the holes on its back align
with the upper holes on the bottom front of the frame.
STEP 2:
Insert each screw in one hole and fasten them by using a
smaller hex key.
1.
2.

WWW.TORPMOTORS.COM
4
STEP 3:
There is a cable on the left of the controller.
Stick it behind the controller.
STEP 4:
There are 5 screws with washers already on the
controller. Remove them from the controller and
start connecting the controller to the phase
motor wires.
DON`T MESS THIS ONE UP!
STEP 5:
Connect the power and phase motor wires as shown on
the picture using the screws with washers that you have
removed from the controller in the previous step:
Power Wires:
-The red battery wire to the positive (+) electrode
-The black battery wire to the negative (-) electrode
Phase Motor Wires:
-The Blue motor wire to the letter B
-The Green motor wire to the letter G
-The Yellow motor wire to the letter Y
STEP 6:
Use a larger hex key to gently fasten the
screws with washers. Max Torque that should
be used is 3.5 Nm!
3.
5.
6.

WWW.TORPMOTORS.COM
5
STEP 7:
Put the bike`s skid-plate back to its original
position by screwing back the top screws on
each side.
STEP 8:
Use the wire harness that came with the
controller to connect the controller to the
bike. Connect the largest connector to the
controller and the three smaller connectors to
the bike`s wiring, in the same way the stock
controller has been connected.
There is also a 4th connector with a cap on it.
This connector will be used with the
dedicated display, once it is made available.
STEP 9:
Take the plastic shield that came with the
controller and mount it by placing its lower
part into the skid plate.
7.
8.
9.

WWW.TORPMOTORS.COM
6
STEP 10:
Use the longer M6 screws
and a larger hex key to
fasten the shield to the frame.
STEP 11:
Put the battery back to the frame.
STEP 12:
Connect the battery to the battery power
connector and to the 6-pin connector.
10.
11.
12.

WWW.TORPMOTORS.COM
7
STEP 13:
Turn the fuse back on. Always use the
Controller with the stock SurRon/Segway
fuse!
CONNECT THE CONTROLLER
TO THE APP
for further setup.
HOW TO CONNECT?
To connect the TC500 controller with the
Torp Controller App, first go to the Google
Play Store (Android) or AppStore (IOS) and
download the App to your smartphone.
-Allow the App to access the phone's
location, photos and media and accept the
Terms & Conditions.
-Put the key into the ignition and turn on
your bike.
-The App will automatically detect your
controller.
-Choose your controller from the list. The
Bluetooth ID can be found on the label on
the side of the controller.
-Now you are connected and can start
setting up your controller.
We suggest you always ride with the app set to the 1s screen. This is how the Torp Controller
App will be able to recognize potential errors which will help our support team with detecting
and solving any problems that might occur with the controller.
13.
IMPORTANT: After the installation make sure to calibrate the throttle and Hall sensors! Check the
“Setting up the throttle” and “Calibration of hall sensors” sections of the manual and follow the
instructions.

1
WWW.TORPMOTORS.COM
8
1st Screen: GAUGE
The TC500 controller is compatible with the stock SurRon display, where
you will be able to track your speed and distance. However, we
recommend using your smartphone as the display during the rides.
The first screen serves as a gauge, showing all your riding information in
real time. Here are also displayed all the potential errors and warnings.
THE APP OVERVIEW.
2
3
4
5
6
7
8
1-Motor Temperature: Monitor the Motor
Temperature in real-time.
2-Battery Temperature: Monitor the battery
temperature in real-time.
3-Controller Temperature: Monitor the
battery temperature in real-time.
4-Power Gauge: Displays the power.
5-Warnings & Errors: All Warnings and
Errors are displayed here. More details on
their meaning can be found in a table below.
6-Battery Info: State of charge (SOC),
battery voltage, and battery current.
7-Motor Info: Motor RPMs, Motor Power and
Motor Current.
8-Predict your Trip: Check the distance you
have passed, the amount of regenerated
energy, and the consumption of the battery.
You can plan your trip based on this
information.

THE LIST OF WARNINGS AND ERRORS
WWW.TORPMOTORS.COM
9
-KICKSTAND: Your kickstand is lowered.
Lift it to start riding.
-CRASH SENSOR: Crash sensor activates
in case of a fall. Turn the bike off and
turn it back on after a few seconds to
continue riding.
LIMIT:
-TEMP CONTROLLER: The temperature of
the controller has reached the top limit
value. The power will be gradually
reduced.
-TEMP MOTOR: The temperature of the
motor is rising. To prevent overheating,
the power will be gradually reduced. The
motor temperature limit is set in the
“Motor Temp Cuttoff” settings on the
"Settings" screen.
-MOTOR TEMP SENSOR: Motor
temperature sensor is not connected.
Power is limited.
-LOW VOLTAGE: The battery is almost
drained or there is a voltage sag due to
the acceleration. The power will be
gradually reduced.
-LOW REGEN: The battery is nearly full.
The regen will be reduced.
-BATTERY TEMP: Battery temperature
has reached limit values so the power
will be reduced.
-BMS TEMP: Discharge mosfets in BMS
have overheated. Power will be gradually
reduced.
CUTOFF:
-CUTOFF LOW VOLTAGE: The battery is
completely drained and the bike will not
start. You can set the cutoff value in
Voltage Min setting in the App (3rd
Screen) . Charge the battery to continue
riding.
-OVERVOLTAGE: Battery voltage is
above 90V.
-UNDERVOLTAGE: Battery voltage
dropped under the values set in the
controller`s settings. Charge the
battery.
-OVERCURRENT: Motor Current is
above permitted limit.
-CONTROLLER OVERTEMP: Controller
has overheated. Wait for it to cool
down to continue riding.
-MOTOR OVERTEMP: Motor has
overheated. Wait for it to cool down to
continue riding.
-PHASE FET: MOSFET error:
Controller`s phase is in short-circuit.
Contact the manufacturer.
-HALL SENSOR: Motor Hall Sensor
connector is not connected, or there is
a problem with the Hall Sensor itself.
Check the wiring.
-THROTTLE PROBLEM: The problem
with a throttle wiring was detected,
that has been solved in the meantime.
Turn your bike off and on again to
continue riding.
-THROTTLE #1-5: Various problems
with the throttle wiring.The most
common cause for these errors lie in
one of the wires not being properly
connected or if the wire is broken. Turn
off the bike, check the wiring and turn
the bike on again.

WWW.TORPMOTORS.COM
10
-CUTOFF THROTTLE: The throttle has
been activated while the bike is being
turned on.
-1st solution: Release the throttle
when turning on the bike;
-2nd solution: Re-calibrate the throttle
(see the "Setting up the Throttle"
section of this document) ;
-3rd solution: Check the wiring.
-CUTOFF BATTERY TEMP: Battery has
overheated. The bike will stop until it
cools down.
-HALL PROBLEM: The Hall sensor has
disconnected during the ride. Check
the wiring.
-HALL DISCONNECTED: The Hall
sensor has disconnected during the
ride. Check the wiring.
-CUTOFF BMS TEMP: The BMS mosfet
temperature has reached the limit. The
bike will stop until it cools down.

WWW.TORPMOTORS.COM
11
2nd Screen: PEAKS
Check all the minimal and maximal values that occurred during your ride.

1
2
3
4
5
6
WWW.TORPMOTORS.COM
12
3rd Screen: BATTERY INFO
You will be able to see all the functions of this screen only with the stock
SurRon battery and stock BMS. It also works with the bypassed battery,
but with limited display of data (battery current, cycles and SOH will not be
displayed correctly).
Use this screen to determine the health of your stock SurRon battery. The
screen shows you the state of health of each of the battery cells and can
serve as a useful tool to check the health of the battery or to determine
the cause of battery malfunctions.
1 - Battery Cell Voltage: Check the voltage of
each battery cell. The more the columns are
aligned, the healthier the battery.
2- Battery Overview: Check the SOC, battery
voltage, battery current, battery
temperature, charging MOSFET temperature,
and discharging MOSFET temperature in
real-time.
3-Min & Max Battery Cell Voltage: Minimal
and maximal battery cell voltage. Lesser the
difference, healthier the battery.
4-Battery Info: Check the current stats of
battery cells, charge cycles, battery
estimated mileage, including errors,
warnings, battery cell temperature,...
5-Battery Error History: An overview of all-
time battery errors.
6-Battery Charging History: Check the
charging history information of your battery.

4th Screen: CONTROLLER SETTINGS
Before your first ride you should tune your controller according to your
riding preferences and the battery you are using.
The app allows the user to enter certain values that can potentially harm
the battery, motor or other parts. We suggest you to use the settings that
have been preset in the app by default.
13
1-Sport & Eco Mode: Choose the desired
mode by pressing the mode button on the
handle bar of your bike.
After that, set the parameters in a tab
according to the chosen mode (Sport/Eco).
2-Estimated Power: Power estimate sets
itself automatically, according to the chosen
settings. It is calculated by taking into
account the battery current, motor current
and voltage (voltage is set according to the
battery type).
3-Motor Current: Motor Current affects the
torque of the motor. It is most noticeable at a
lower speed.
4-Battery Current: Battery Current affects the
maximum power. It also affects torque, which
is most noticeable at medium and higher
speeds.
5-Speed: Set the maximum speed limit. In
case you choose ∞your speed is not limited.
1
2
3
4
5
6
7
8
9
10
11
12
WWW.TORPMOTORS.COM
Note that the TC500 controller is not an original SurRon/Segway part, therefore
you are using it strictly at your own risk. The damages that are caused by using the
controller are solely your responsibility.

6-Regen Type:
The Controller supports the regen from the original SurRon
brake signal and the regen from the throttle release.
Choose the regen type by scrolling the menu and press OK.
After that, use the slider below to choose how much
current should be regenerated. Set the amount of the
regenerated current according to your preferences. In case the battery is fully
charged, the LOW REGEN warning will appear on the 1st screen.
7-Battery Type: TC500 controller is compatible with:
-stock Surron Light Bee/Segway X260 battery,
-bypassed stock Battery,
-custom 60V battery, and
-72V custom battery.
Select the battery you use and the Controller will set the minimal and maximal
voltage to the optimal values.
The selected Battery Type affects the limits that can be set within the App.
8-Min & Max Voltage: Minimal and maximal voltages are set automatically,
according to the battery type you choose from the menu above. You can also
customize the voltage values for each Battery Type, but we recommend you use the
controller in the limits of preset values. Customize the settings carefully, while
setting the “Min Voltage” too low can cause the battery to over-discharge.
10-Kickstand and Crash sensor: The TC500 controller is compatible with stock
SurRon Kickstand and Crash sensors. You can simply turn them on and off through
the App. In case the Kickstand is ON and the kickstand is lowered, the motor will not
run and you will see a KICKSTAND warning on the first screen on your App.
The same, in case the Crash Sensor is ON, and you fall, the motor will turn off and
you will be presented with the CRASH SENSOR warning on the first screen of your
App. In this case, turn off the bike, wait for a few seconds and turn it on again.
WWW.TORPMOTORS.COM
14
9-Motor Temperature Cutoff: Set the max temperature
at which you would like for the controller to limit the
power. The controller will gradually limit the power
before reaching the max motor temperature. The
temperature at which the controller starts limiting the
power is indicated at the bottom of the screen.
Setting the motor temperature to the red values can
cause the motor to overheat and fail.

WWW.TORPMOTORS.COM
15
11-Kill Switch: Set whether or not you would like to use a kill-
switch as a safety feature. You can choose between three
different options:
-Brake Lever: When you press the stock SurRon brake with the
sensor, the throttle input will be disabled.
-Mode & Brake: When you press the stock SurRon brake with
the sensor, the throttle input will be disabled. Eco mode is
disabled and the mode button is acting as a kill switch.
-Mode: Eco mode is disabled and the mode button is acting as a kill switch.
This option only works with the stock wiring. To activate the Mode Button as a Kill-
Switch, set the Mode button on the Handle Bar to SPORT and select the MODE
BUTTON as a Kill Switch option in the menu in the App. In this case the ECO mode in
the app will disappear and adjustments of the values will be possible only in the
SPORT mode screen.
12-Calibrate Throttle: We recommend calibrating the
throttle when you install the controller for the 1st time or
in case you have switched the stock SurRon throttle for
another brand. Follow the instructions in the Throttle
Calibration window and in the "Setting up the Throttle"
section of this document.

16
1-General Information: Check the App and
Firmware version and update them in case there
is a newer version available. The App can be
updated through the Play Store or App Store
(depending whether you are using Android or
IOS).
You can also see the identification parameters of
your controller, like Bluetooth name, Hardware
name and Serial number.
2-Speed and Temperature Units: You can choose
between Metric and US Standard units. The
chosen units will be applied to other sections of
the App.
3-Sprocket Ratio: Change the sprocket tooth
count or ratio. This function comes in handy in
case you are using sprockets that are not the
same size as the stock Surron/Segway sprockets.
This option will affect the displayed speed, both
on the stock LCD and in the App.
4-Wheel Diameter: Choose the values that
correspond to your wheel. Wheel diameter will
affect the displayed speed.
1
2
3
4
5
6
7
8
9
10
11
12
13
14
WWW.TORPMOTORS.COM
5th Screen: APP SETTINGS
Use this screen to identify your controller and to adjust the general
settings. This screen is also useful in case of controller malfunctions,
since it allows you to share errors and ride logs with Torp support
team.

17
5-Bluetooth Pass: In case you want additional protection for your controller, enter a
Bluetooth password, which can be found on the controller`s label. Bluetooth pass
will be required every time you will connect to the App with a new device.
6-Bluetooth Reconnect: The App is set to try to reconnect to the controller every 10
seconds. Turn this option off, in case you want to prevent the App from continuously
trying to reconnect.
7-Scan Bluetooth: Use it for connecting to your device.
8-Error: The list of all controller errors since the last time it was disconnected from
the battery. This list is useful in determining the causes for controller
malfunctioning.
9-Update Firmware: Check whether a new Firmware is available. In case it is, press
the button to update.
10-Calibrate Hall: It is recommended to calibrate HALL sensor after the first
installation and every time after you do the factory reset. For calibration you will
need your Bluetooth pass that can be found on the controller`s label and on the box.
Please check the instructions on how to calibrate Hall Sensors at the end of this
manual.
11-Log: You can check your ride on the map or send your ride-log file with all the
stats to the chosen email address.
12-Measure Time: Measure the acceleration of your e-bike.
13-Diagnostics: An overview of all technical characteristics of the Controller that
can help with determining the cause of potential errors.
14-Reset to Factory Defaults: Reset your controller to the factory settings. By
pressing this button you will lose all the settings you have made previously. After
you reset your controller to the Factory Defaults, you will need to re-calibrate the
throttle and HALL Sensors.
WWW.TORPMOTORS.COM

SETTING UP THE THROTTLE
Before using the Controller for the first time or in case
you have swapped the stock SurRon Throttle for
another brand, you should calibrate the throttle. You
should also re-calibrate the throttle every time you are
resetting the controller to the factory features.
Scroll to the bottom of the 4th Screen (Controller
Settings) and click on the Calibrate Throttle. Then
follow the instructions on the screen.
18
SETTING UP THE CONTROLLER ACCORDING TO THE BATTERY TYPE
Before using the Controller, you should fine-tune its settings according to the
Battery you are using. The TC500 Controller supports*:
-SurRon Stock 60V Battery
-SurRon Stock Bypassed 60V Battery
-Custom 60V Battery
-Custom 72V Battery
The app will adjust the parameters to optimal values based on your Battery Type.
You can adjust Motor and Battery Current according to how much torque you prefer.
You can also customize the voltage values for each Battery Type, but we recommend
you use the controller in the limits of preset values.
*A Torp Controller can be also used with other batteries, but you should keep in mind that in this case the
voltage of the fully charged battery should not be above 84V, and minimal battery voltage should not be less
than 36V.
WWW.TORPMOTORS.COM
CALIBRATION OF HALL SENSORS
We recommend you to calibrate HALL sensors after the
first installation of the TC500 controller and every time
after you reset the controller to the Factory settings.
In order to calibrate HALL sensors, you will have to enter
your Bluetooth password, which can be found on the
label on the box and on the Controller.
After entering the password, you will be presented with
the short instructions.
ADDITIONAL SETTINGS.

19
WWW.TORPMOTORS.COM
You must lift the rear wheel, which will start spinning for 20 seconds. During this time,
the “Detected” column will fill with data, which means that the calibration was
successful. In case there is more than 10 degree difference between NOW and
Detected columns, you should repeat the calibration. Press "save" and exit the
Calibrate Hall screen.
After the calibration you should check the direction in which the motor is spinning. Do
that by gently turning the throttle and observe if the rear wheel is turning forward. In
case the wheel is spinning in reverse, you should check if the phase wires are
connected correctly (see the STEP 5 of the "Installation" section of this document).
For additional support contact us at:
Send us a detailed description of the error, with photos and videos and our team will
get back to you with the solution.
Other manuals for TC500
1
Table of contents
Other TORP Controllers manuals

