manuals.online logo
Brands
  1. Home
  2. •
  3. Brands
  4. •
  5. Torpedo7
  6. •
  7. Tent
  8. •
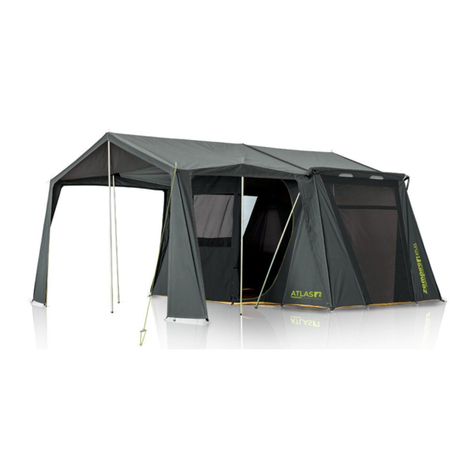
  9. Torpedo7 Air 7000 Series User manual

Torpedo7 Air 7000 Series User manual

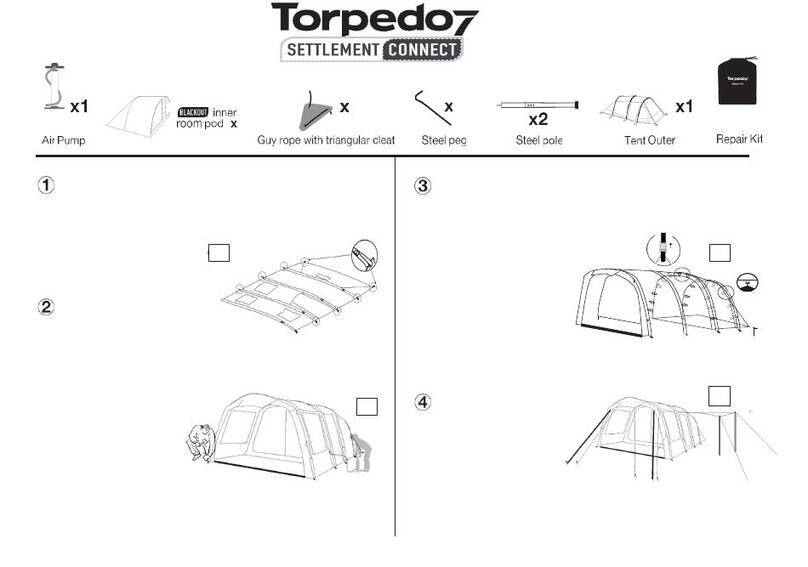
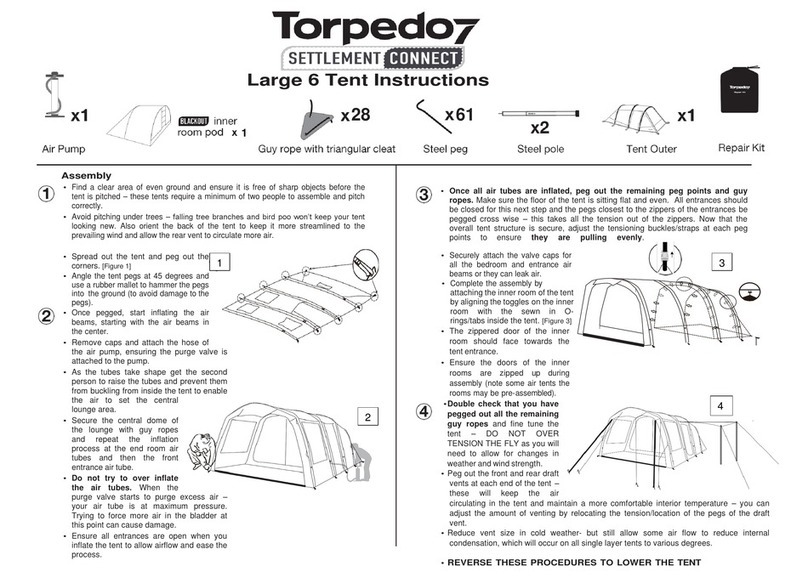
Assembly
•Find a clear area of even ground and ensure it is free of sharp objects before the
tent is pitched – these tents require a minimum of two people to assemble and pitch
correctly. Avoid pitching under trees – falling tree branches and bird poo won’t keep
your tent looking new. Also orient the back of the tent to keep it more streamlined to
the prevailing wind and allow the rear vent
to circulate more air.
•Spread out the tent and peg out the corners.
Angle the tent pegs at 45 degrees and use
a rubber mallet to hammer the pegs into
the ground (to avoid damage to the pegs).
with the air beam in the central lounge – the
valve feeding air to both air tubes which is
located to the right side of the vestibule.
Remove caps and attach the hose of the air
pump, ensuring the purge valve is attached
to the pump. As the tubes take shape get
the second person to raise the tubes and
prevent them from buckling from inside
the tent to enable the air to set the central
lounge area. Secure
the central dome of the
lounge and repeat the
each of the end room air
tubes and then the front
vestibule air tube. Once
7psi then peg out the guy
ropes.
DO NOT TRY TO OVER INFLATE THE AIR TUBES – when the purge valve starts
to purge excess air – your air tube is at maximum pressure (7psi). Secure the
valve caps securely in a clockwise direction – DO NOT OVER TIGHTEN. Ensure
tent which makes it easier to pump.
•
during this step and the pegs closest to the zippers of the entrances are pegged
cross wise – this takes all the tension out of the zippers. Now that the overall tent
structure is secure, adjust the tensioning buckles/straps at each peg point to ensure
they are pulling evenly. Securely
attach the valve caps for all the
bedroom and vestibule air beams
or they can leak air.
•Complete the assembly by
attaching both of the inner rooms
of the tent by aligning the toggles
on the inner room with the sewn
in O-rings/tabs inside the tent.
The zippered door of the inner
room should face towards the
tent vestibule. Ensure the doors
of the inner rooms are zipped up
during assembly (note some air tents the rooms may be pre assembled)
•
tent – DO NOT OVER TENSION THE FLY as you will need to allow for changes in
weather and wind strength. Peg out the front and rear draft vents at each end of the
tent – these will keep the air circulating in the tent and maintain a more comfortable
interior temperature – you can adjust the amount of venting by relocating the
tension/location of the pegs of the draft vent. Reduce vent size in cold weather- but
Air Series 700 Tent Instructions
Peg points
The connecting hoses inside the tent have valves built in. To inate the tent,
the valves must be turned to an open position and then closed once inated.
To deate the tent, the valves need to be opened again and left open.
REVERSE THESE PROCEDURES TO LOWER THE TENT
2
30
68
General Maintenance and Handy Pointers
•Practise pitching your tent to become familiar with the pitching process and make
sure you follow instructions. Air inside the tubes of the Air Series tents naturally
expands and contracts with air temperature so for extended camping you will need
to top up to maintain a 7psi pressure. The tent pressure will rise and fall during the
WILL expand. Avoid setting up Air Series tent in strong winds and disassemble your
tent in high winds as any damage caused will not be covered by our standard 12
month Warranty.
•When you are ready to move from your campsite – unscrew the valve caps and the
then unscrew the valves counter clock wise a few gentle turns – let the air release
gradually from the air tubes – don’t release to suddenly as it is likely to give your
neighbours a fright as there is a fair bit of pressure
•Air tubes may still have residual air – this can be massaged out towards the valve
direction while the tent is being folded. Always dry the tent out before you pack
away to avoid mould if stored wet. The inner room can be left inside the tent on
•DO NOT pull our pegs with the peg webbing it will weaken the peg straps or break
them – use another peg and its hook end to lever out other pegs or a proper peg
extractor.
•When you return home, dry the tent out and repack – add some silica gel sachets
and store in a dry area.
WARNING – do not open the air tube zips - these are only to be opened when
the inner air bladder needs replacing. For details on tube replacement please
refer to www.torpedo7.com and search for tent model assembly/disassembly
details
Packing Instructions
•
away. (A damp tent can develop mildew very quickly.)
•Pack the poles and pegs into their separate bags.
•
rectangle. Then fold each side into the middle and continue folding until you have a
•
•Secure the rolled up tent with the supplied ties.
•Place in carry bag.
Care Instructions for Your Tent
·
KEEP ALL HEAT AND FLAME SOURCES AWAY FROM TENT, ***NEVER*** use
•The pre-tied guy ropes must be used at all times to help stabilize and help prevent
any damage to your tent (your tent is not covered under warranty from wind and/or
storm damage).
•Your tent must be stored away DRY and CLEAN; it also must be kept in a dry area
off the ground to help prevent any moisture build-up and/or mildew developing.
•
•DO NOT use cleaning agents, bleaches or sharp instruments to clean your tent;
accidentally damage the tent which would NOT be covered under the warranty.
•When dismantling the tent, take the extra time to wipe down the poles along with
your pegs. This will help keep them all free of dirt and debris and help extend their
usage.
•If not regularly used, erect the tent periodically, this will help in the detection of any
mould or mildew that may have been previously undetected (if accidentally put away
damp, or has had moisture build-up whilst stored), or any damage that may have
been unsighted when last used.
•If the tent has been used near the sea, hose down the entire tent to remove salt
spray residue (particularly zip slides and any metal parts) and dry thoroughly before
storing. Zip sliders can be sprayed with a silicone spray to prevent corrosion (avoid
oil-based sprays as they will stain the fabric).
Warranty
Torpedo7’s Warranty Policy covers our products for 12 months from
the purchase date. Warranty claims cover any fault, defect or failure
occurring as a result of the manufacturing process. Damage or faults
occurring as a result of misuse, accident, or wear and tear are not
covered by our warranty policy. If the product is out of warranty, then
we can still have the product repaired, however, the cost of the repair
will be charged to the customer.
Please Note:
The warranty for Torpedo7 tents does not cover wind damage. This is
standard practice for all tents sold within New Zealand and Australia.
Other Torpedo7 Tent manuals

Torpedo7 Large 6 User manual

Torpedo7

Torpedo7 Large 6 User manual

Torpedo7 Estate User manual

Torpedo7

Torpedo7 Estate User manual

Torpedo7 Vista User manual

Torpedo7

Torpedo7 Vista User manual

Torpedo7 Large 6 Tent User manual

Torpedo7

Torpedo7 Large 6 Tent User manual

Torpedo7 Horizon User manual

Torpedo7

Torpedo7 Horizon User manual

Torpedo7 Discovery 12 User manual

Torpedo7

Torpedo7 Discovery 12 User manual

Popular Tent manuals by other brands

Flash Furniture GZ1010PKG-BL-GG Assembly instructions

Flash Furniture

Flash Furniture GZ1010PKG-BL-GG Assembly instructions

The Louvre Lounge ShadeTec instruction manual

The Louvre Lounge

The Louvre Lounge ShadeTec instruction manual

Sukkah Depot CLASSIC instructions

Sukkah Depot

Sukkah Depot CLASSIC instructions

Coleman KEYSTONE 9270-121C installation instructions

Coleman

Coleman KEYSTONE 9270-121C installation instructions

Gumax 1000 Mounting instructions

Gumax

Gumax 1000 Mounting instructions

Lemeks CP6076 installation manual

Lemeks

Lemeks CP6076 installation manual

Obelink COLUMBIA EASY AIR quick start guide

Obelink

Obelink COLUMBIA EASY AIR quick start guide

Latitude Pioneer user guide

Latitude

Latitude Pioneer user guide

Dancover PARTY TENT SEMI PRO CombiTent 8m Series manual

Dancover

Dancover PARTY TENT SEMI PRO CombiTent 8m Series manual

Carefree SPIRITFX owner's manual

Carefree

Carefree SPIRITFX owner's manual

Ozark Trail WMT-9920N owner's manual

Ozark Trail

Ozark Trail WMT-9920N owner's manual

GigaTent GT004 owner's manual

GigaTent

GigaTent GT004 owner's manual

Savotta HAWU Setting Up and Care Guide

Savotta

Savotta HAWU Setting Up and Care Guide

Napier SPORTZ TRUCK TENT 57 Series instructions

Napier

Napier SPORTZ TRUCK TENT 57 Series instructions

Wehncke Makalu 15826 instructions

Wehncke

Wehncke Makalu 15826 instructions

Coleman Montana Setup instructions

Coleman

Coleman Montana Setup instructions

Boutique Camping WEEKENDER LUNA instruction manual

Boutique Camping

Boutique Camping WEEKENDER LUNA instruction manual

toolport PT-L1-Q1 Assembly instructions

toolport

toolport PT-L1-Q1 Assembly instructions

manuals.online logo
manuals.online logoBrands
  • About & Mission
  • Contact us
  • Privacy Policy
  • Terms and Conditions

Copyright 2025 Manuals.Online. All Rights Reserved.