01/05/2020 13/56
E_MH_Mounting_instructions_Skylux_Climalux
uNearly all silicone products affect
the polymethyl methacrylate or poly-
carbonate sheets. Purchase silicone
types that are safe for polymethyl
methacrylate or polycarbonate pro-
ducts (guarantee certificate).
uThe fumes from this putty may
never evaporate in the slots of the
sheet. The ventilation openings as well
as the sides of the end profiles may
not be closed off. The silicone should
always be allowed to release fumes
freely.
uSome seals contain softening agents
(as used in certain types of rubber,
PVC, polyurethane, etc.) that may
cause small cracks. Use only approved
seals..
uDo not use black or dark-coloured
seals to prevent heat accumulation.
uA lead slab may be placed on the
seals but may not rest against the
sheets.
uSome paints, varnishes and wood
protectors affect the polymethyl
methacrylate or polycarbonate sheets.
Never use lubricants to put the seals
into the profiles.
uNever spray insecticide directly on
to the sheets. Synthetic sheets can be
damaged by these products.
2. SILICONE, SEALS AND
WOOD PROTECTORS
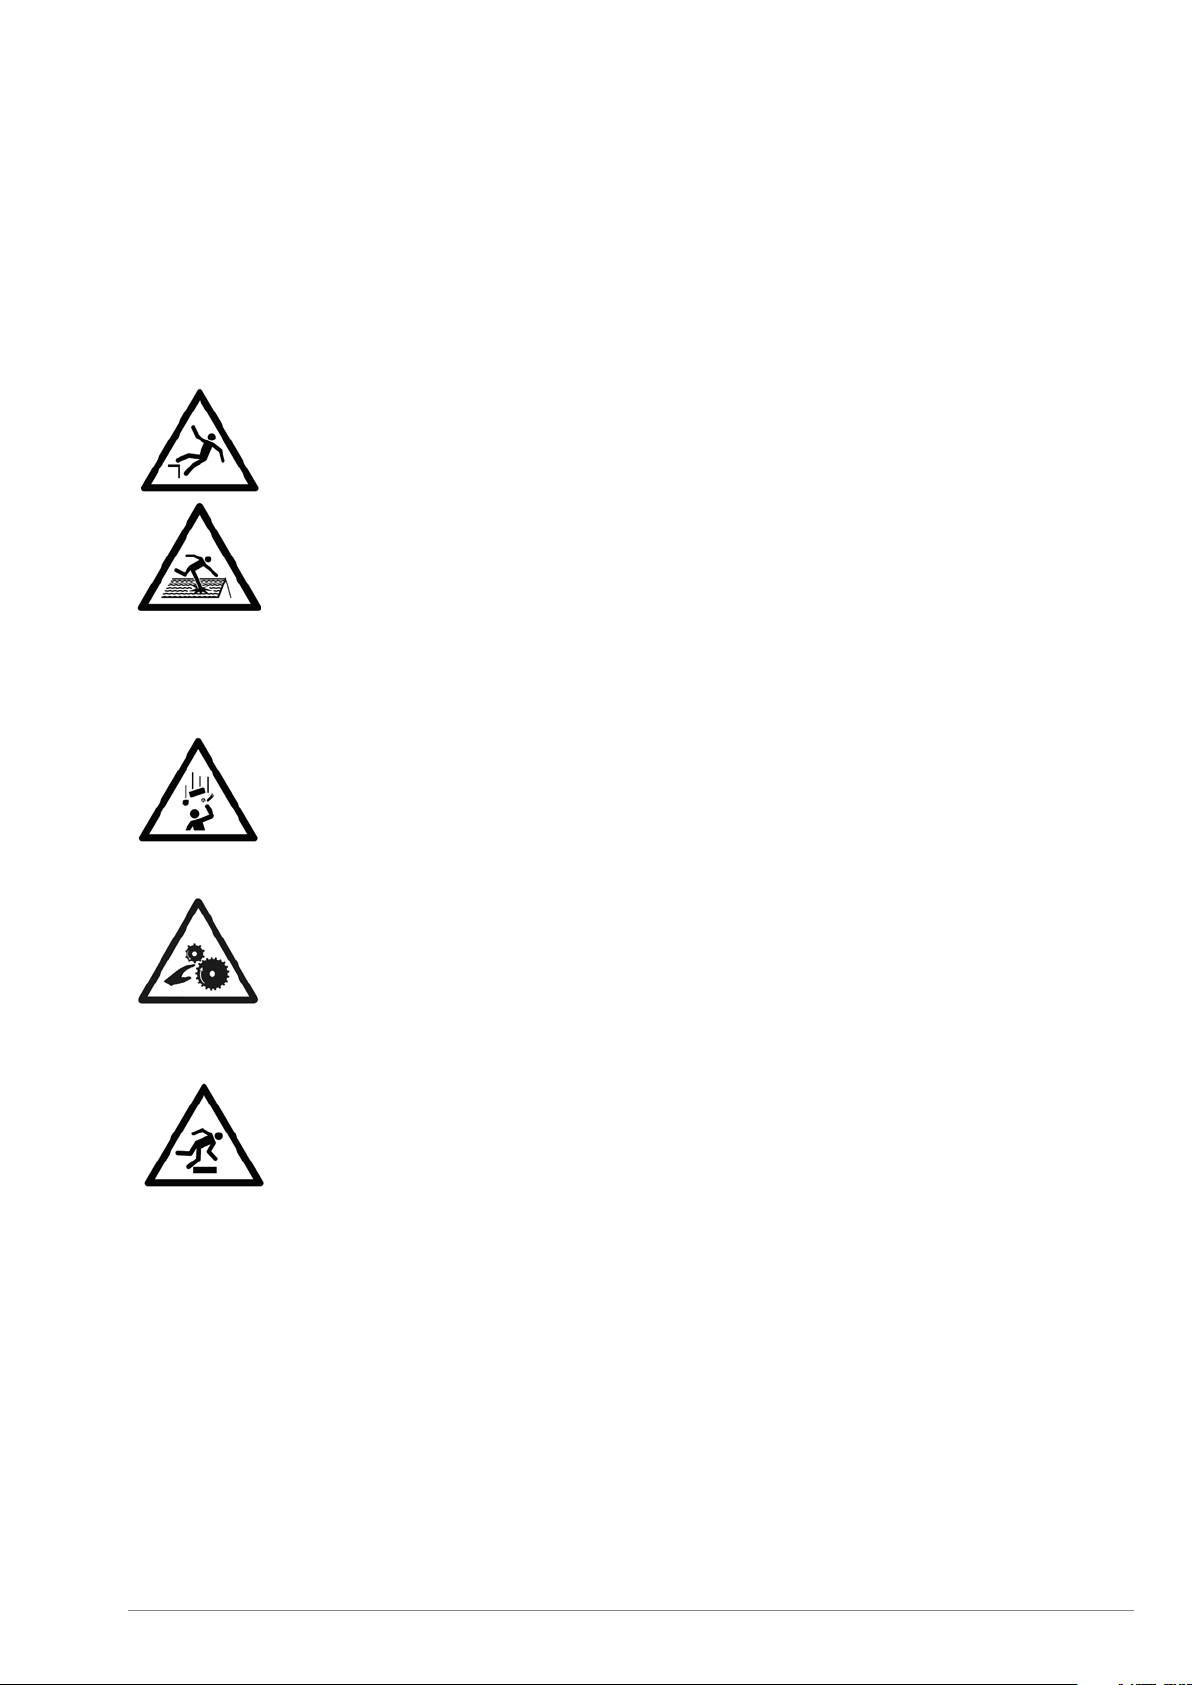
uObserve the safety instructions
that apply to work on roofs.
Polycarbonate sheets: Very
IMPORTANT! The side which is
protected against UV radiation
must always be installed facing
the exterior or the sky. The “sun
side” is indicated on the protec-
tion film.
uThe plastic tape or the provisional
aluminium tape will only ensure the
sheets are free from dust while being
shipped. These should be removed!
Adjusted aluminium tape or end pro-
files must be used.
uThe load-bearing structure must
be strong and stable (see the regulati-
ons that apply to the timber and
metal construction industry). Cross
supports may be required depending
on the type of sheet used. Only speci-
fic maximum lengths may be used
without a cross support for each
type of sheet taking into account
the loads of 500 N/m2 or 750 N/
m2, respectively (see the technical
plastic sheets information sheet).
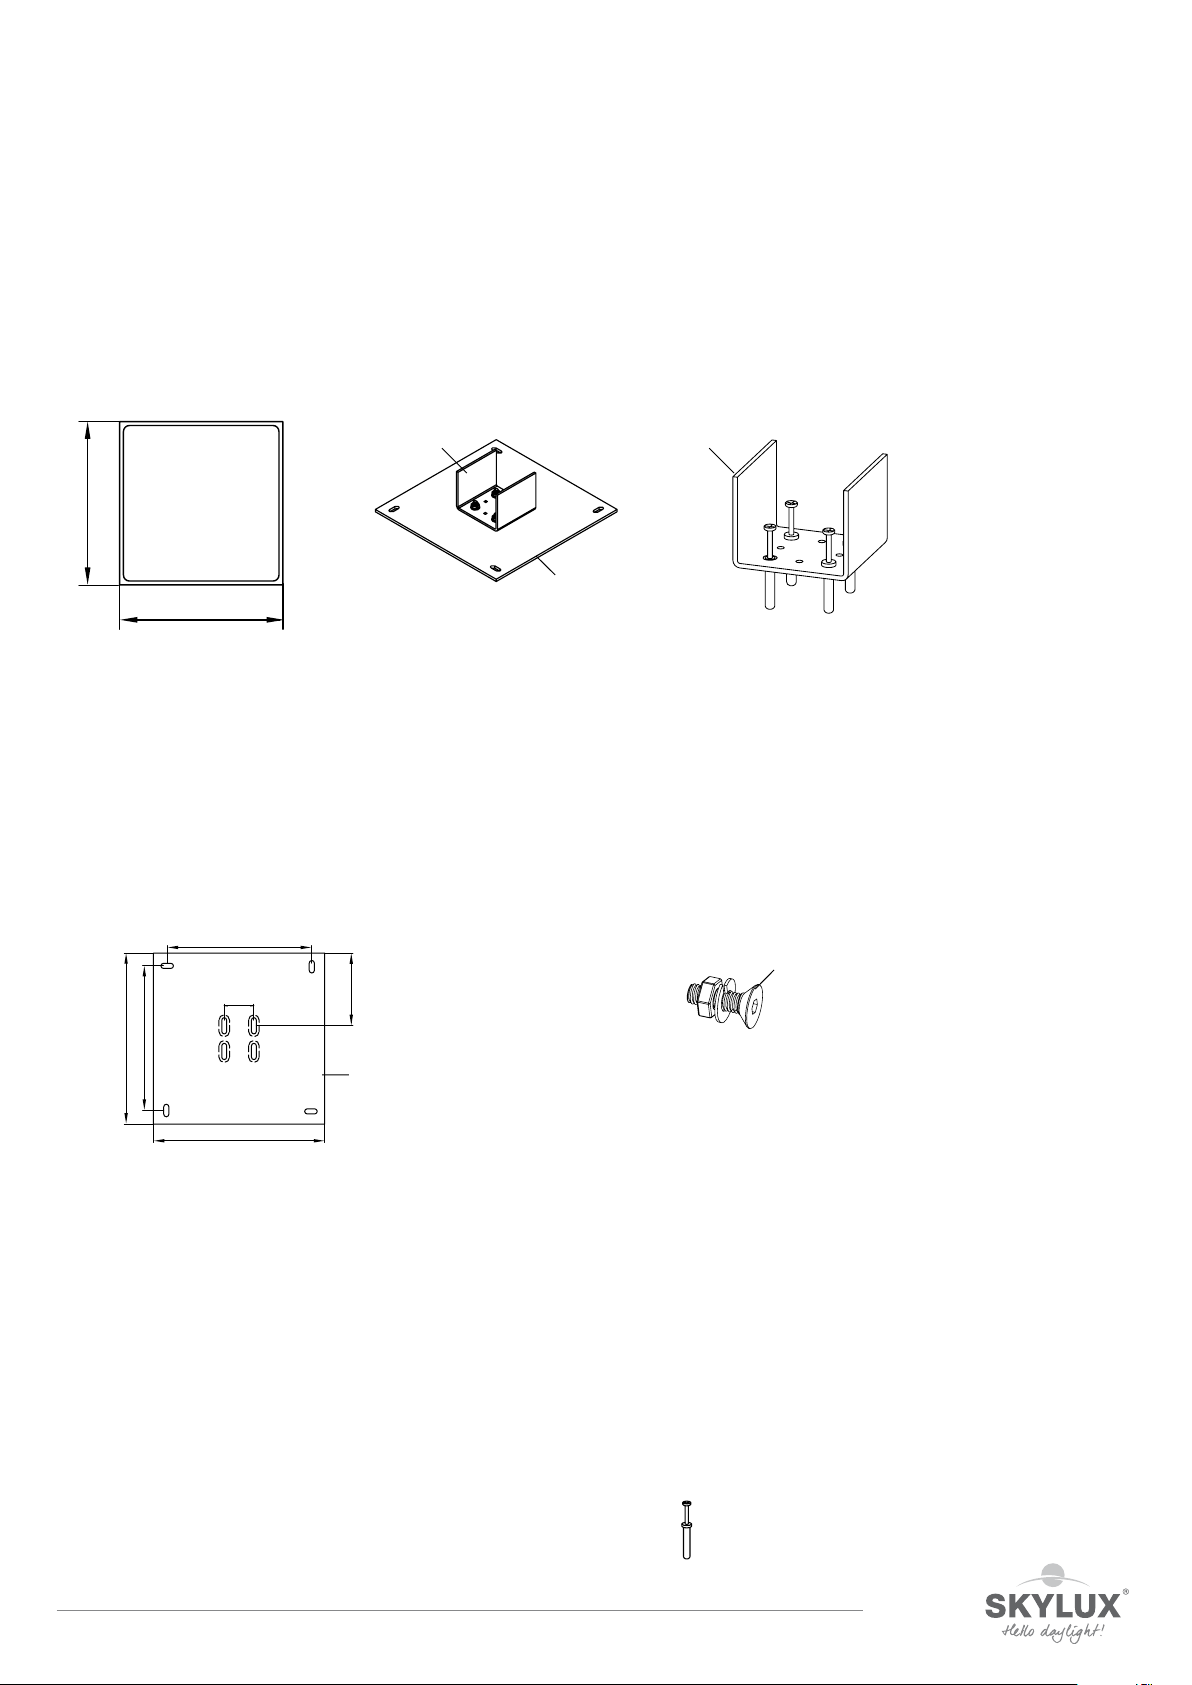
uPergotop/Pergotop-soft sandwich
panels are only adapted in combina-
tion with Skylux screwable clips.
uHeat accumulation: the top side
of the load-bearing structure that is
turned towards the sheets must be
WHITE reflective.
4. INSTALLATION
Synthetic sheets can expand or shrink
when there are temperature fluctuati-
ons. The following tips should be
taken into account:
uEnsure there is 5 mm clearance
lengthwise for each sheet meter and
ensure there is 10 mm clearance
(5 mm on each side) widthwise, for
example, a 3000 mm sheet must
have a clearance lengthwise of 1.5 cm.
uNever block the sheet lengthwise
or widthwise. Always ensure sufficient
clearance.
uNever stick the sheet using silicone
(even when it does not damage syn-
thetic materials). It would prevent the
expansion and shrinkage of the sheets.
uThe sheet is blocked at the bottom
end to prevent it from sliding. The
clearance must, therefore, be provided
at the top.
1. CLEARANCE
5 mm 5 mm
uApply white dispersion paint (dilu-
ted in water or paint without solvents)
or use preferably aluminium tape.
Attention: Let the paint dry after
painting the load-bearing structure!
Continue with the installation of the
sheets after the paint has dried. The
synthetic sheets may NEVER be
installed directly on to timber struc-
tures.
uDo not place roof tiles directly on
the sheets! Leave a space of at least
10 mm between the sheets and the
roof covering.
uUse a special weather stripping (seal
C6) for sealing the opening between
the plate and the gutter beam. Do not
seal using sealant or fill with PU foam.
uWe formally recommend not adding
a ceiling under the acrylic sheets
(PMMA). Any used sun blinds or
other finish under the sheets should
be at least 120 mm from the roofing
sheet. These may not have insulation
properties and should have a reflecting
colour. The polycarbonate sheets
(PC) do not require any specific pre-
cautions.
uWIDTH DISTRIBUTION OF THE
SHEETS:
RECOMMENDED
:
standard
sheet width with an adapter for the 2
outer sheets. This is especially impor-
tant for the S5P heat-stop sheet.
NOT RECOMMENDED:
in
equal sections with sized sheet widths.
Take the standard sheet width into
account. We formally advise against
sizing multiple-layer sheets.
uFollow the installation instructions
provided by the glass manufacturer
when including the installation of
glass!
5. GLASS
uClean the sheets annually using
lukewarm rainwater. Dissolve a little
household soap (neutral) in the water
if required (no detergent!!). Never use
solvents or abrasive products.
uDo not rub dry (may cause
scratches).
uSimply rinse.
3. MAINTENANCE
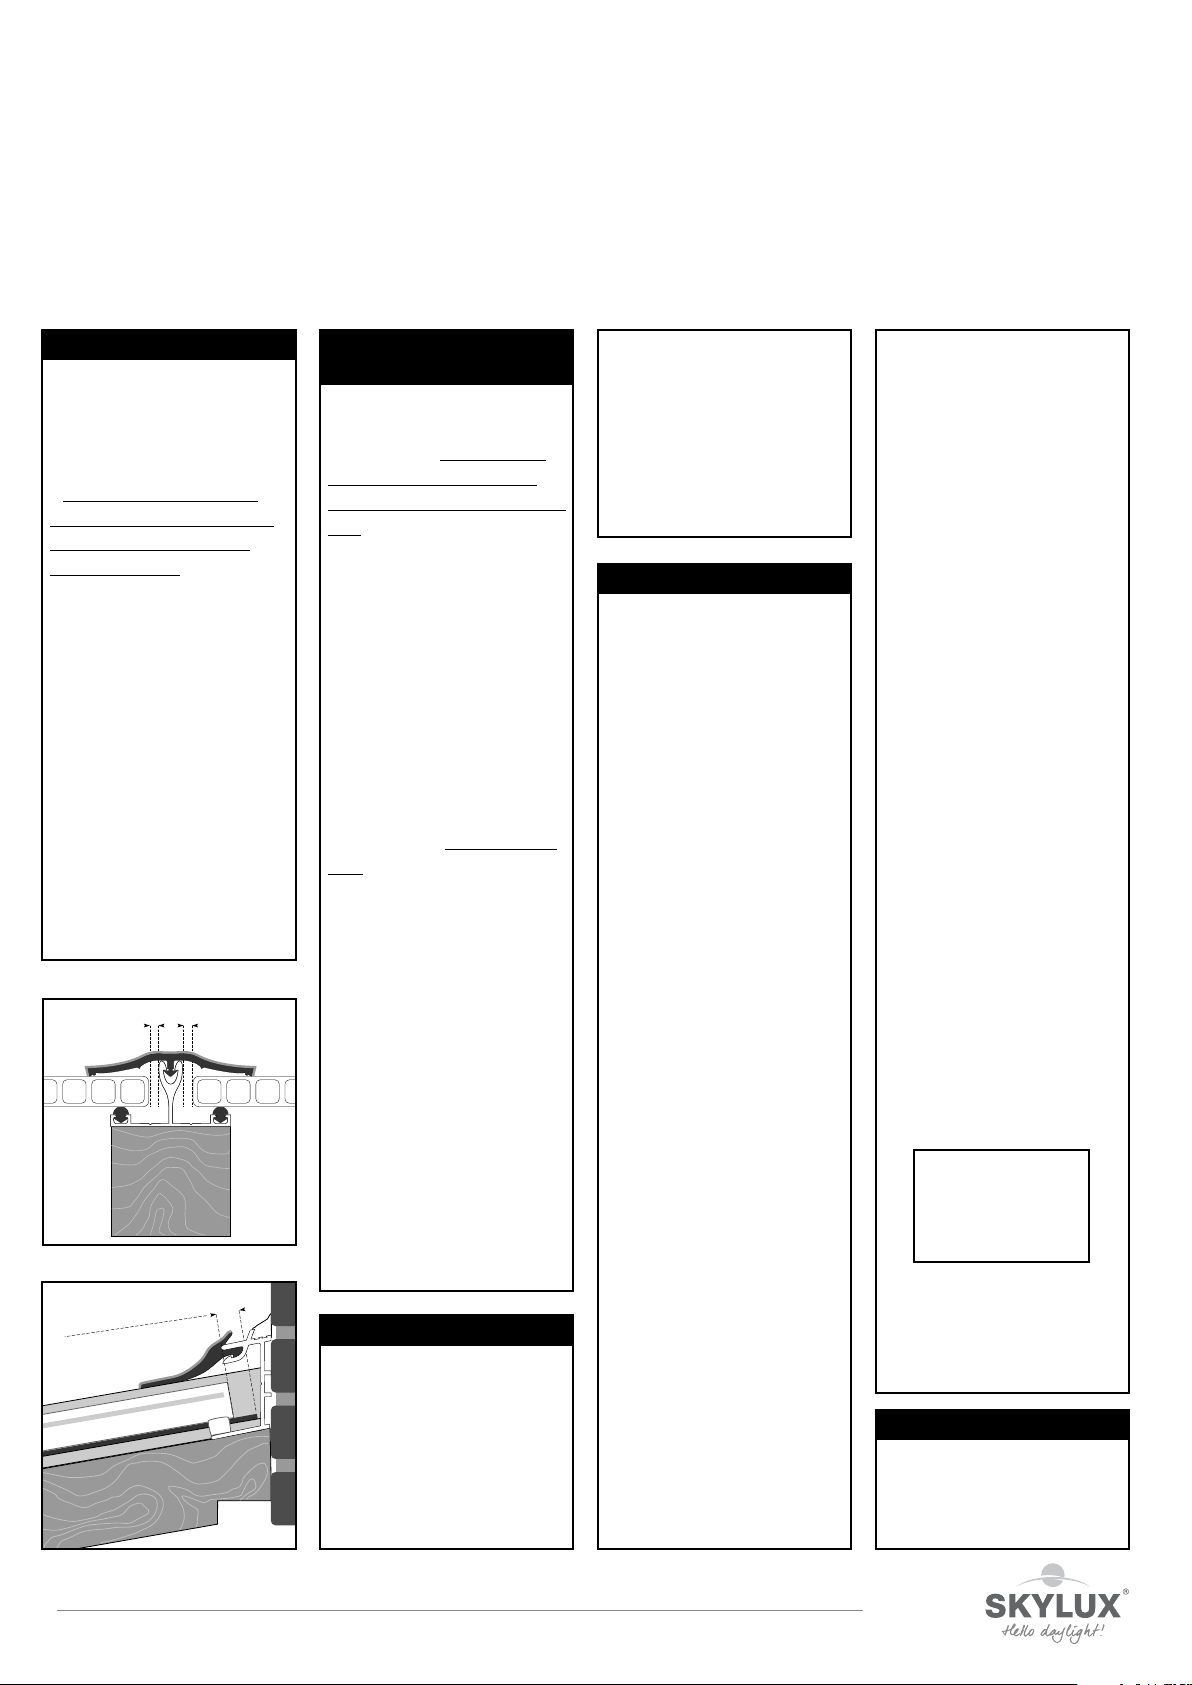
space for expansion
uClean the surfaces/profiles min.
1 a year with cold water and a mild
soap. Rinse well with plenty of
water.
Never use solvents or abrasives!
A good cleaning is necessary to
avoid the profiles from growing dull
and dirty by the UV light!
The closed off sides
are one of the fac-
tors that
determine the
sheet strength!
General tips and maintenance instructons
The qualitative and technological level of the multiple layer plastic sheet is high. We provide a few important tips for problem-free
installation. Please pay special attention to the following: Space for expansion/silicone and wooden protection/seals.