manuals.online logo
Brands
  1. Home
  2. •
  3. Brands
  4. •
  5. Toshiba
  6. •
  7. All In One Printer
  8. •
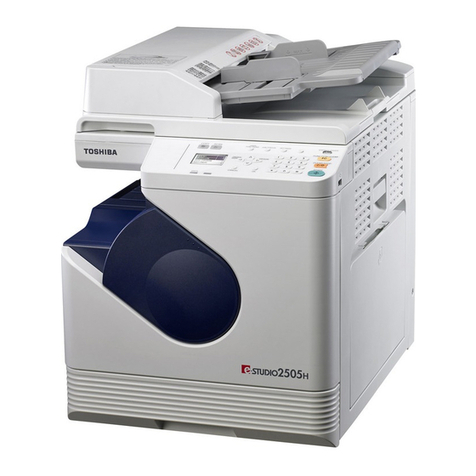
  9. Toshiba e-studio 2822AM User manual

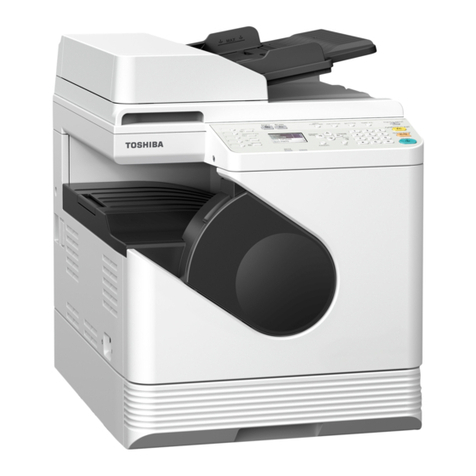
Toshiba e-studio 2822AM User manual

Before UseBasic Operations
Troubleshooting
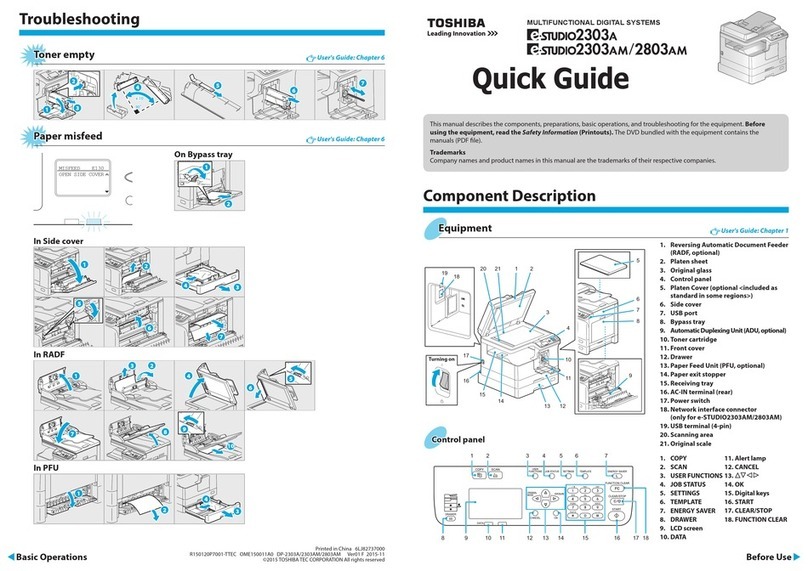
Original glass
Platen sheet
Original scale
Scanning area
Receiving tray
Drawer
Network interface
connector
USB terminal
(4-pin)
AC-IN terminal
(rear)
Bypass tray
USB port
Side cover
Paper exit stopper
Reversing Automatic Document Feeder
Front cover
Toner cartridge
OPEN SIDE COVER
MISFEED E130
Printed in China 6LL24607000
R180420U7200-TTEC OME18000800 DP-2822AM Ver00 F Issued in May 2019
© 2019 Toshiba Tec Corporation All rights reserved
Bypass tray
Toner empty
Paper misfeed
3
2
2
1
456
1
2
User's Guide: Chapter 7
This manual describes the components, preparations, basic operations, and troubleshooting for the equipment. Before
using the equipment, read the Safety Information (Printouts). The DVD bundled with the equipment contains the
manuals (PDF le).
Trademarks
Company names and product names in this manual are the trademarks of their respective companies.
MULTIFUNCTIONAL DIGITAL SYSTEMS
Quick Guide
Turning off
Press the power switch to“ ”
(off).
Control panel
Power switch
Equipment User's Guide: Chapter 1
LCD screen
[FUNCTION CLEAR]
Alert lamp [CLEAR/STOP]
[START]
Main screen (Copy)
[ENERGY SAVER]
[USER FUNCTIONS]
[SETTINGS]
[OK][CANCEL]
DATA
Digital keys
[JOB STATUS][SCAN]
[COPY] [TEMPLATE]
READY
100%
AUTO EXPOSURE
TEXT/PHOTO
1A4
Message
Paper size
Reproduction ratio
Exposure
Original mode
Copy quantity
Scroll icon
Behind transfer unit
Side cover
12
3
4
5
6
7
1
2
3
45
6
7
8
9
10
RADF
Turning on
Press the power switch to“ ” (on).
Component Description
Printer
and
scanner
functions
are
available.
TroubleshootingComponent Description
Basic OperationsBefore Use
1. Select [Print] from the application's [File] menu. Scan to USB Memory
1. Place the original(s).
2. Press [SCAN].
3. Connect the USB storage device to the equipment and
wait a few seconds.
4. Press or to select “USB”, and then press [OK].
5. Press to make the scan settings as required.
6. Press [START] to scan your documents.
TWAIN Scan
1. Place the original(s).
2. Launch a TWAIN-compliant application.
3. Select the device from the application’s [File] menu.
4. Select the menu to scan from the application’s [File]
menu.
5. Make the scan settings, and then click [Scan].
3. Enter the number of copies
with the digital keys
1
, and
then press [START]
2
to copy.
To stop copying
Press [CLEAR/STOP]
Shortcut keys
Press : “ORIGINAL MODE”
Press : Europe and the Americas“EXPOSURE”,
Except Europe and the Americas “ID
CARD”
2
1
2. Select your printer
1
, and
then click [Preferences]
2
.
3. Make print option settings, and then click [OK].
4. Click [Print] ([OK]).
Copier User's Guide: Chapter 2
2
1
Printer User's Guide: Chapter 3 Scanner User's Guide: Chapter 5
Bypass tray
Drawer
Loading paper User's Guide: Chapter 1
1
2
5 5
6
3
4
4
7
1
2
34
To reset settings and LCD screen after copying
Press [FUNCTION CLEAR]
2. Press [COPY] and make the
copy settings.
READY
100%
AUTO EXPOSURE
TEXT/PHOTO
1A4
RADF
1. Place the original(s). Original glass
Note when placing
originals on RADF
When placing long
originals (A3, B4, A4-R, LD,
LG, COMP, or 8K), open the
original holder so that the
size of the original can be
detected correctly.
To print on an A3 (LD) page
Load paper in the bypass tray, and follow the pop-up
instructions to set the paper size and paper type.
To set paper size of Drawer
When you load paper in the drawer, a pop-up window appears.
Follow the instructions and set the paper size. (When the “POP
UP” function is set to “ENABLE”.)
Use the installer in the DVD to install the driver.
Installing the driver requires the administrator authority. Note when installing from installer
• Close all running applications.
• If the installer does not automatically start, double-
click “Setup.exe” in the DVD.
Driver installation Software Installation Guide: Chapter 2
Using installer
1. Close all running applications.
2. Make sure that the equipment is turned on.
3. Insert the DVD into the computer.
4. Double-click “Setup.exe”.
5. Follow the on-screen instructions.
Connecting computer
Before installing the drivers, connect the equipment
and the computer with a USB cable or Network interface
cable.
Registering a template
1. Press [COPY] or [SCAN].
2. Make settings for the functions to register as a
template.
3. Press [TEMPLATE].
4. Press or to select “REGISTRATION”, and then press
.
5. Press or to select a template, and then press [OK].
Templates User's Guide: Chapter 2, 5
Recalling a template
1. Press [COPY] or [SCAN].
2. Press [TEMPLATE].
3. Press or to select “RECALL”, and then press .
4. Press or to select the template, and then press
[OK].
Other manuals for e-studio 2822AM

1

Other Toshiba All In One Printer manuals

Toshiba e-studio4520C Programming manual

Toshiba

Toshiba e-studio4520C Programming manual

Toshiba E-STUDIO 655 User manual

Toshiba

Toshiba E-STUDIO 655 User manual

Toshiba e-studio 167 User manual

Toshiba

Toshiba e-studio 167 User manual

Toshiba e-studio 160 User manual

Toshiba

Toshiba e-studio 160 User manual

Toshiba e-studio202L User manual

Toshiba

Toshiba e-studio202L User manual

Toshiba E-Studio167 User manual

Toshiba

Toshiba E-Studio167 User manual

Toshiba e-STUDIO203 How to use

Toshiba

Toshiba e-STUDIO203 How to use

Toshiba e-studio351c How to use

Toshiba

Toshiba e-studio351c How to use

Toshiba e-studio162 User manual

Toshiba

Toshiba e-studio162 User manual

Toshiba e-STUDIO2500c User manual

Toshiba

Toshiba e-STUDIO2500c User manual

Toshiba e-studio 2006 User manual

Toshiba

Toshiba e-studio 2006 User manual

Toshiba e-studio222cs User manual

Toshiba

Toshiba e-studio222cs User manual

Toshiba GA-1200 User manual

Toshiba

Toshiba GA-1200 User manual

Toshiba e-STUDIO206L User manual

Toshiba

Toshiba e-STUDIO206L User manual

Toshiba E-studio 281c Configuration guide

Toshiba

Toshiba E-studio 281c Configuration guide

Toshiba CX410 Series User manual

Toshiba

Toshiba CX410 Series User manual

Toshiba E-STUDIO6506AC User manual

Toshiba

Toshiba E-STUDIO6506AC User manual

Toshiba E-STUDIO3005AC Firmware update

Toshiba

Toshiba E-STUDIO3005AC Firmware update

Toshiba e-studio 2555c User manual

Toshiba

Toshiba e-studio 2555c User manual

Toshiba e-STUDIO2020C How to use

Toshiba

Toshiba e-STUDIO2020C How to use

Toshiba e-studio202L User manual

Toshiba

Toshiba e-studio202L User manual

Toshiba E-STUDIO 5518A User manual

Toshiba

Toshiba E-STUDIO 5518A User manual

Toshiba e-STUDIO 206L User manual

Toshiba

Toshiba e-STUDIO 206L User manual

Toshiba GA-1190 User manual

Toshiba

Toshiba GA-1190 User manual

Popular All In One Printer manuals by other brands

Xerox B1022 user guide

Xerox

Xerox B1022 user guide

Xerox WorkCentre 3655 user guide

Xerox

Xerox WorkCentre 3655 user guide

Kyocera ECOSYS FS-C2526MFP Quick installation guide

Kyocera

Kyocera ECOSYS FS-C2526MFP Quick installation guide

Epson STYLUS CX2900 Series user guide

Epson

Epson STYLUS CX2900 Series user guide

Canon imageRUNNER ADVANCE C7580i II Advance Maintenance guide

Canon

Canon imageRUNNER ADVANCE C7580i II Advance Maintenance guide

Canon PIXMA MG3120 Specifications

Canon

Canon PIXMA MG3120 Specifications

Konica Minolta Drypro 832 Service manual

Konica Minolta

Konica Minolta Drypro 832 Service manual

Printronix L5000 Series Maintenance manual

Printronix

Printronix L5000 Series Maintenance manual

Ecosys P7035cdn Operation guide

Ecosys

Ecosys P7035cdn Operation guide

Canon imageRUNNER 1435P+ Getting started

Canon

Canon imageRUNNER 1435P+ Getting started

Xerox Phaser 6128 MFP quick guide

Xerox

Xerox Phaser 6128 MFP quick guide

Brother Business Smart Plus Series Problem Solving

Brother

Brother Business Smart Plus Series Problem Solving

Epson Expression Home XP-200 Important safety instructions

Epson

Epson Expression Home XP-200 Important safety instructions

Canon IMAGERUNNER 2010F datasheet

Canon

Canon IMAGERUNNER 2010F datasheet

Savin 3651 operating instructions

Savin

Savin 3651 operating instructions

Canon 3920B009 Specifications

Canon

Canon 3920B009 Specifications

Sharp AR-M236 Service manual

Sharp

Sharp AR-M236 Service manual

Canon imageRUNNER ADVANCE DX C477iZ Getting started

Canon

Canon imageRUNNER ADVANCE DX C477iZ Getting started

manuals.online logo
manuals.online logoBrands
  • About & Mission
  • Contact us
  • Privacy Policy
  • Terms and Conditions

Copyright 2025 Manuals.Online. All Rights Reserved.